Ready to send your first email campaign? This guide walks you through the entire process — from choosing your audience to scheduling delivery. Make sure you have already set up your contact fields, contact lists, and added contacts before starting.
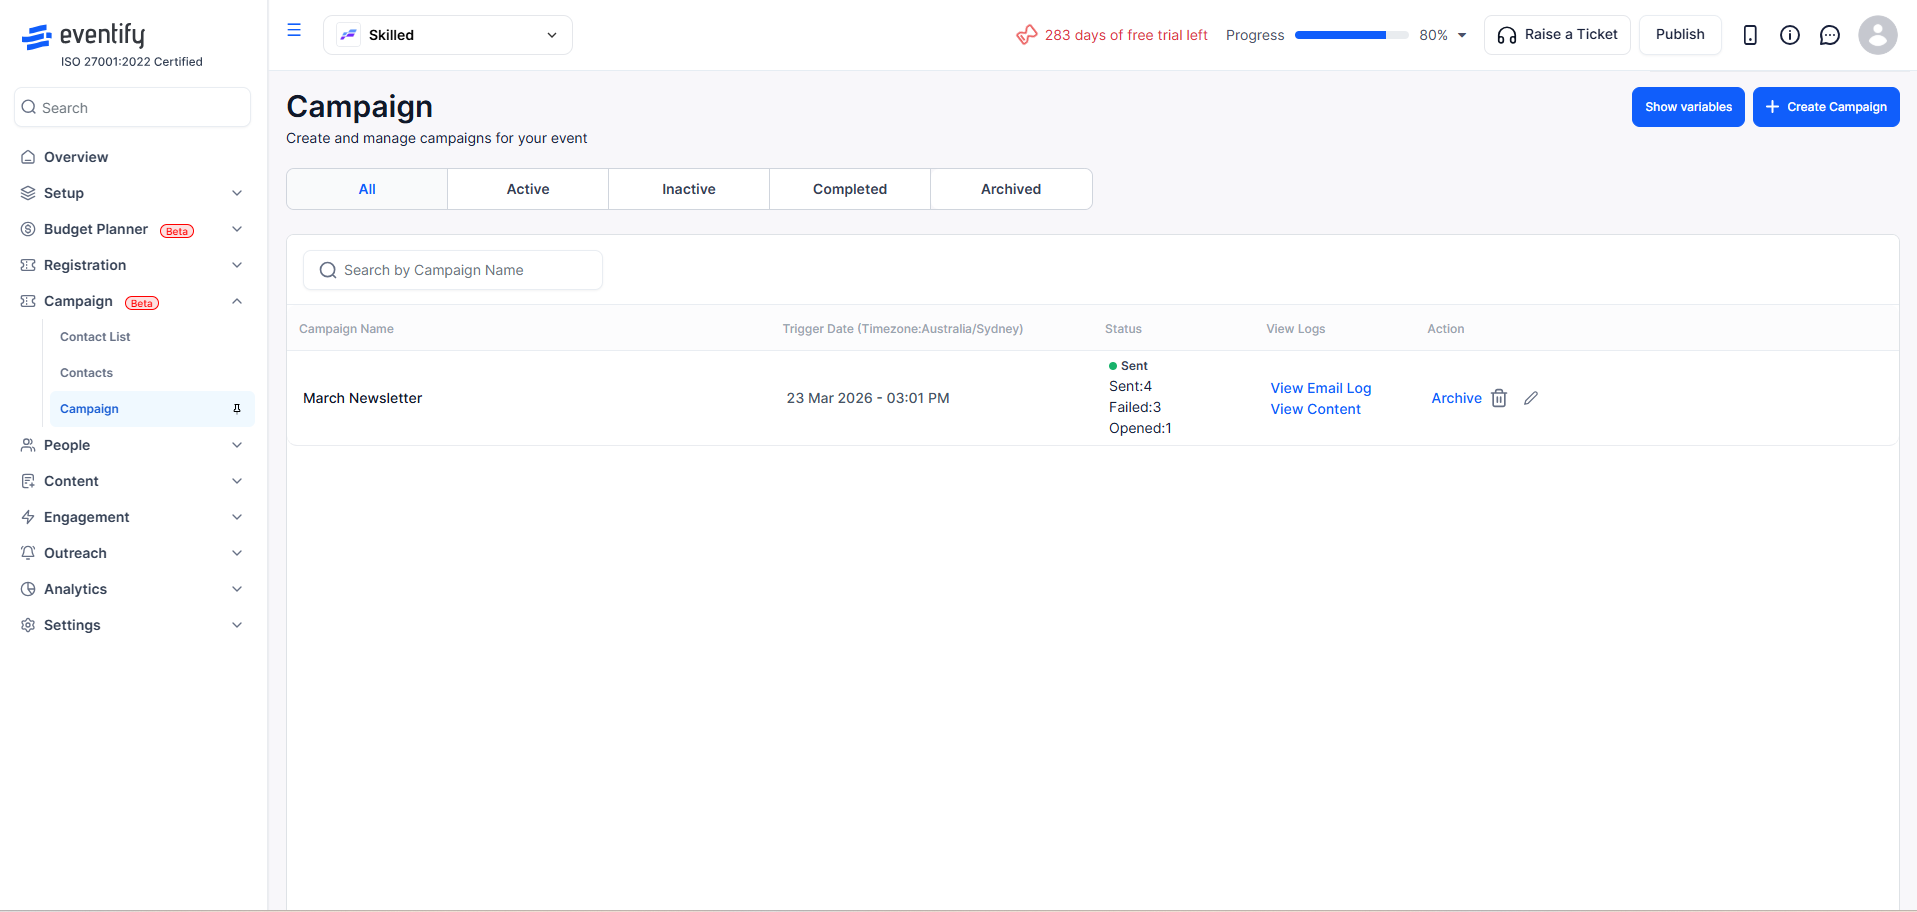
From the Eventify Admin Panel, click on Campaign in the left sidebar.

Make sure you are on the Campaign tab (Email Campaign section).

Click the Create Campaign button to start creating a new email campaign.
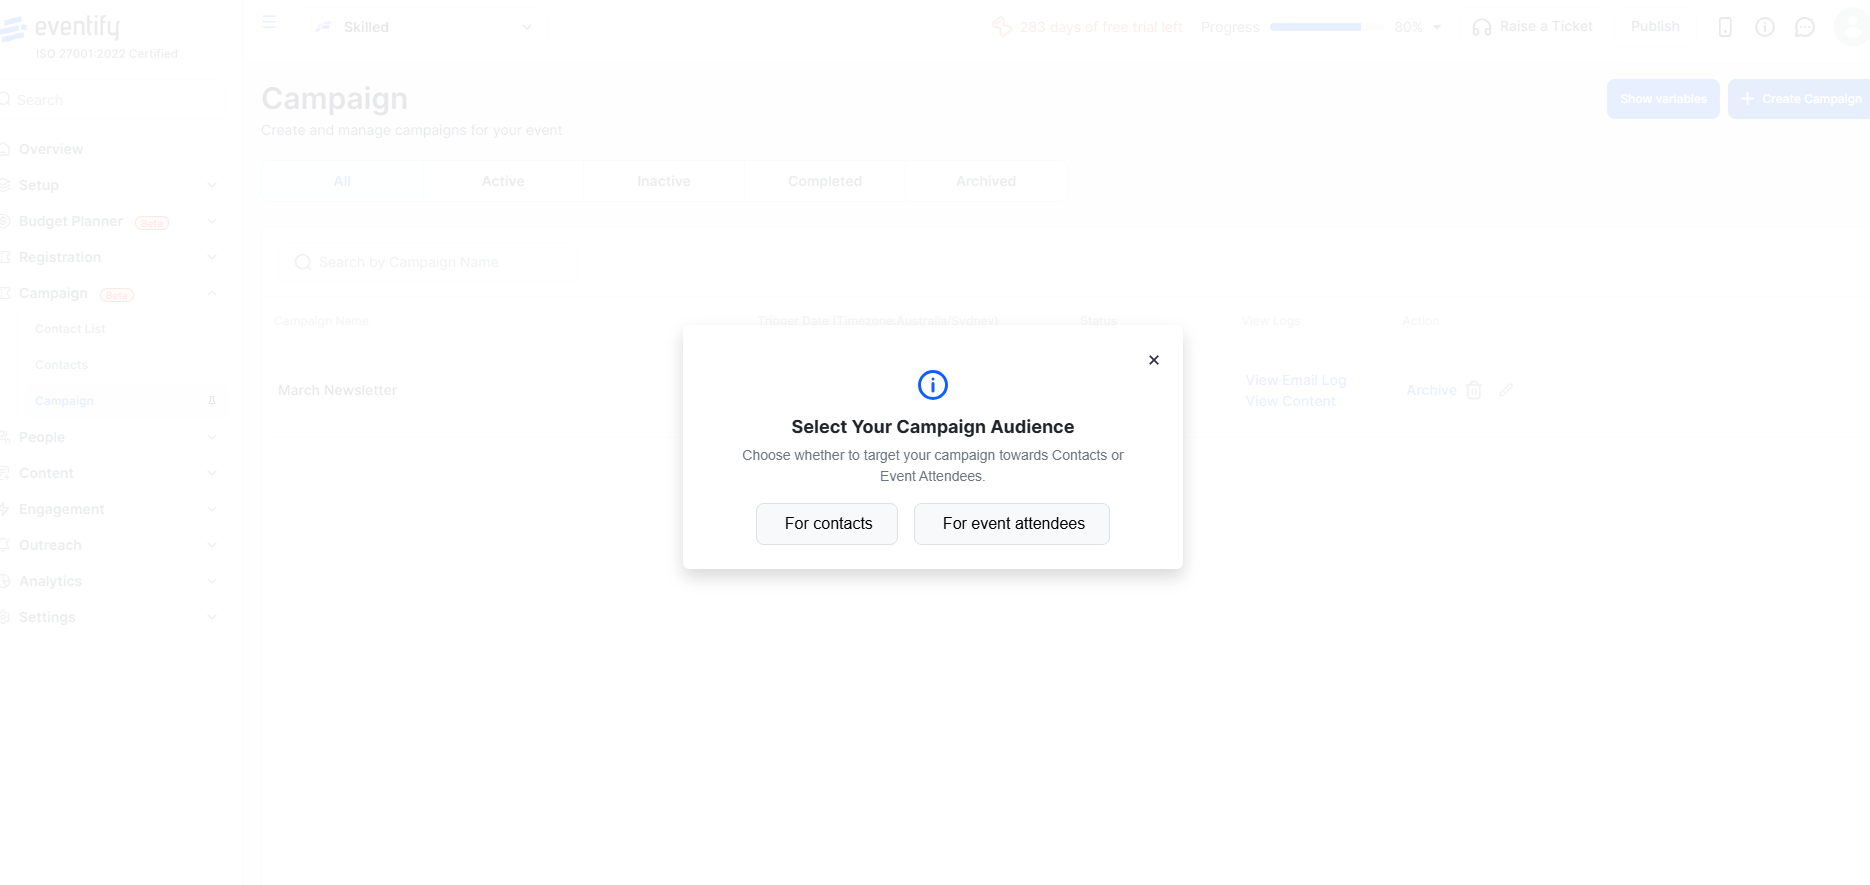
You will be asked to choose who this campaign is for:
Click the appropriate option. The remaining steps are the same for both audience types.
Give your campaign a descriptive name (e.g., "March Newsletter", "Event Reminder", "Thank You Email"). This is for your reference only — recipients will not see this.

Type the email subject line that recipients will see in their inbox. Keep it concise and compelling.

The From Name is what recipients see as the sender. By default this is your event/organization name, but you can change it (e.g., to a person's name for a more personal touch).
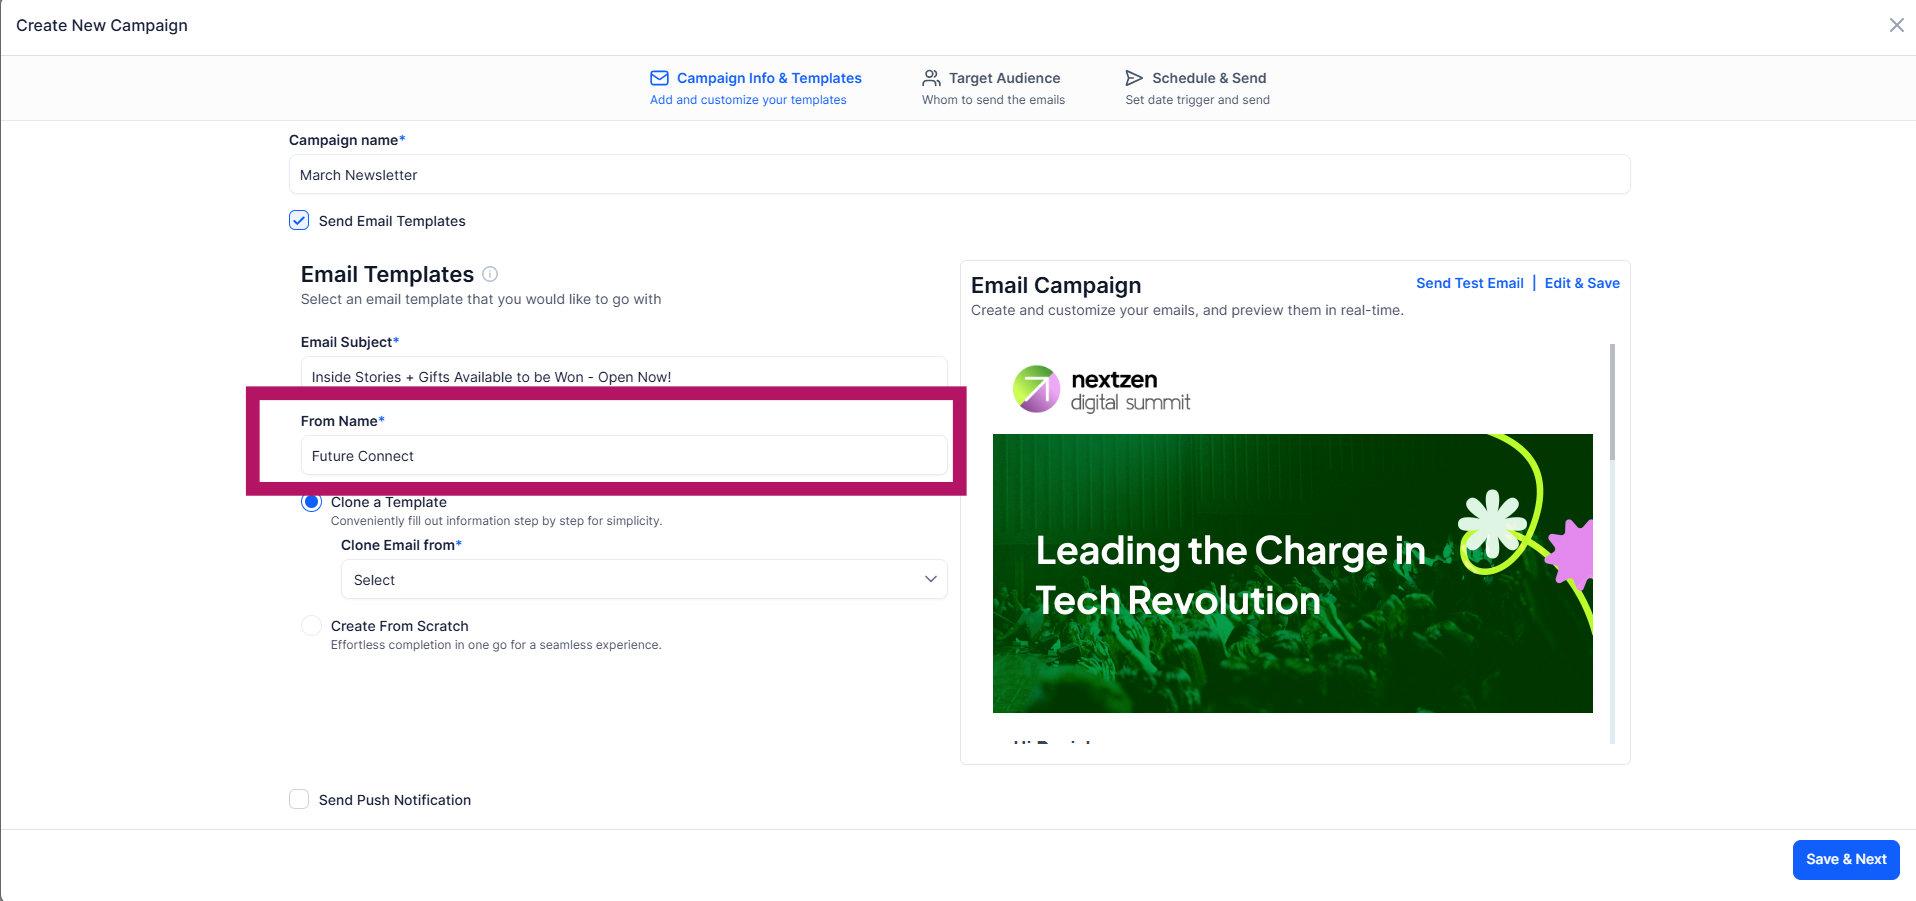
You have two options for your email content:
For detailed instructions on using the template builder, see the article "How To Use the Email Template Builder?"

Use the visual editor to create your email. Add text, images, buttons, and personalization variables. Remember to save your template when done.

Save your email template, then click Save & Next to proceed to recipient selection.

Choose which Contact List/Group you want to send this campaign to. These are the lists you created in the Contact Lists section.

Click the Add Contacts button to open the contact selection modal. Here you can manually add contacts.
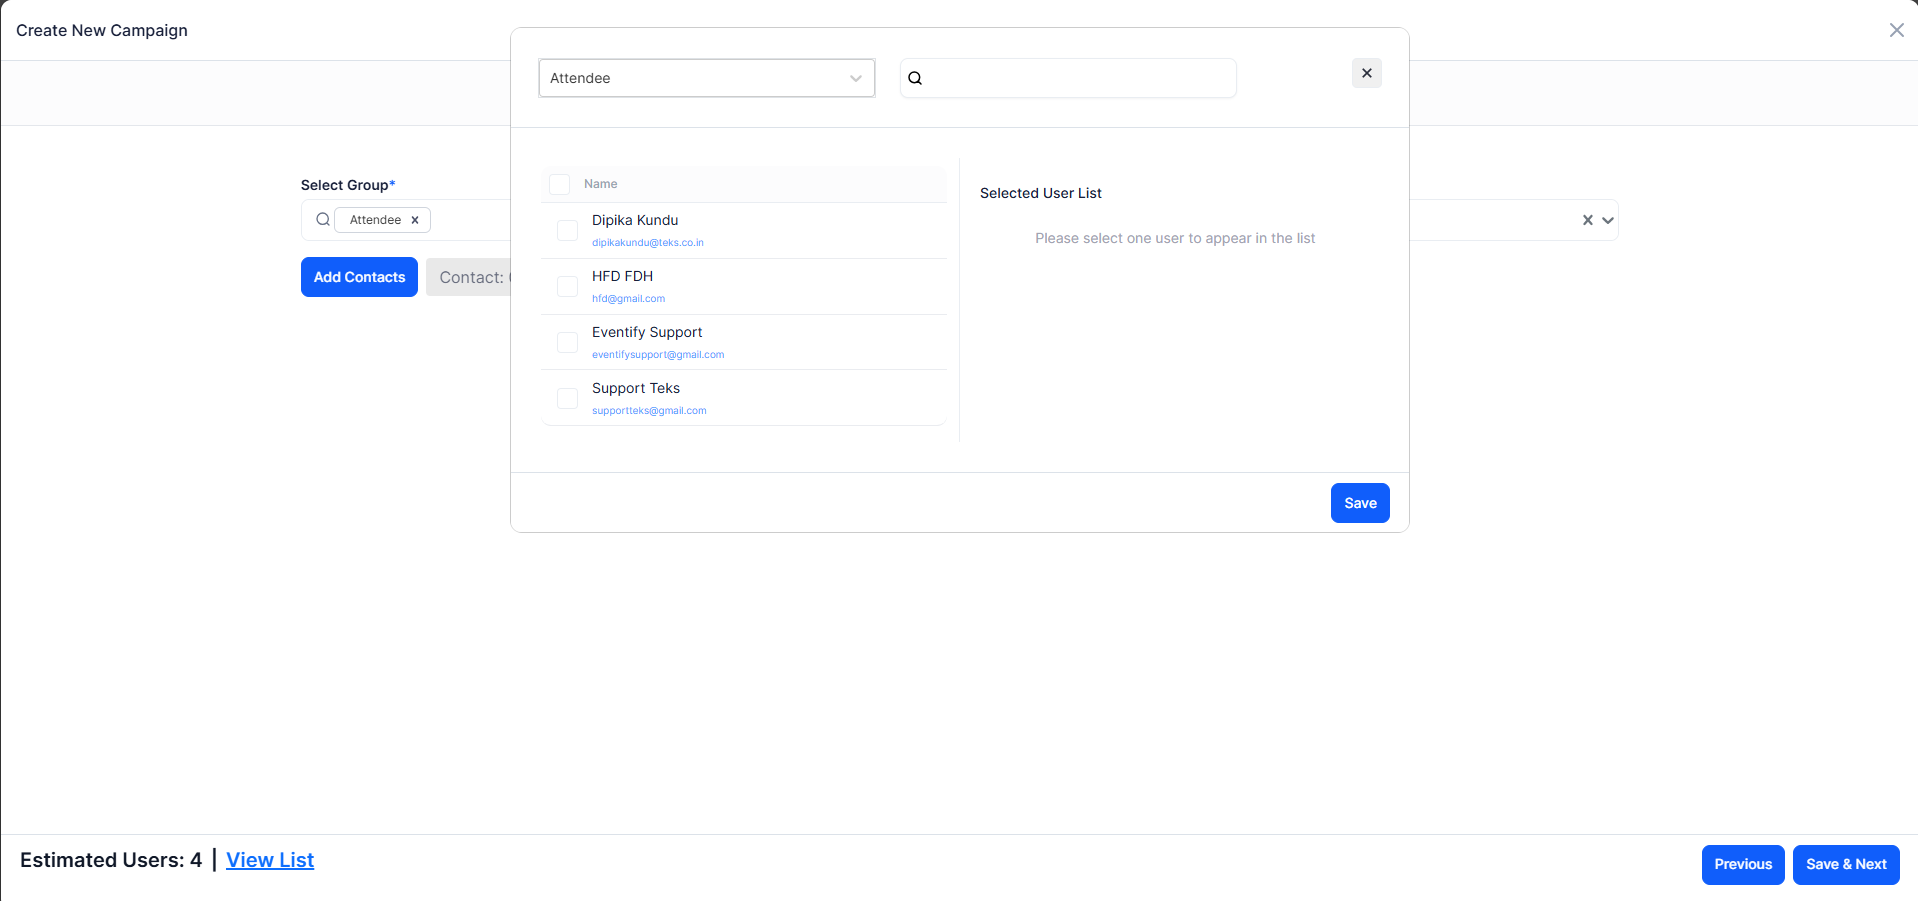
After selecting your recipients, click Save.

Click View List to see the estimated list of users who will receive this campaign. Review it to make sure the right contacts are included.

Click Save & Next to move to the scheduling step.

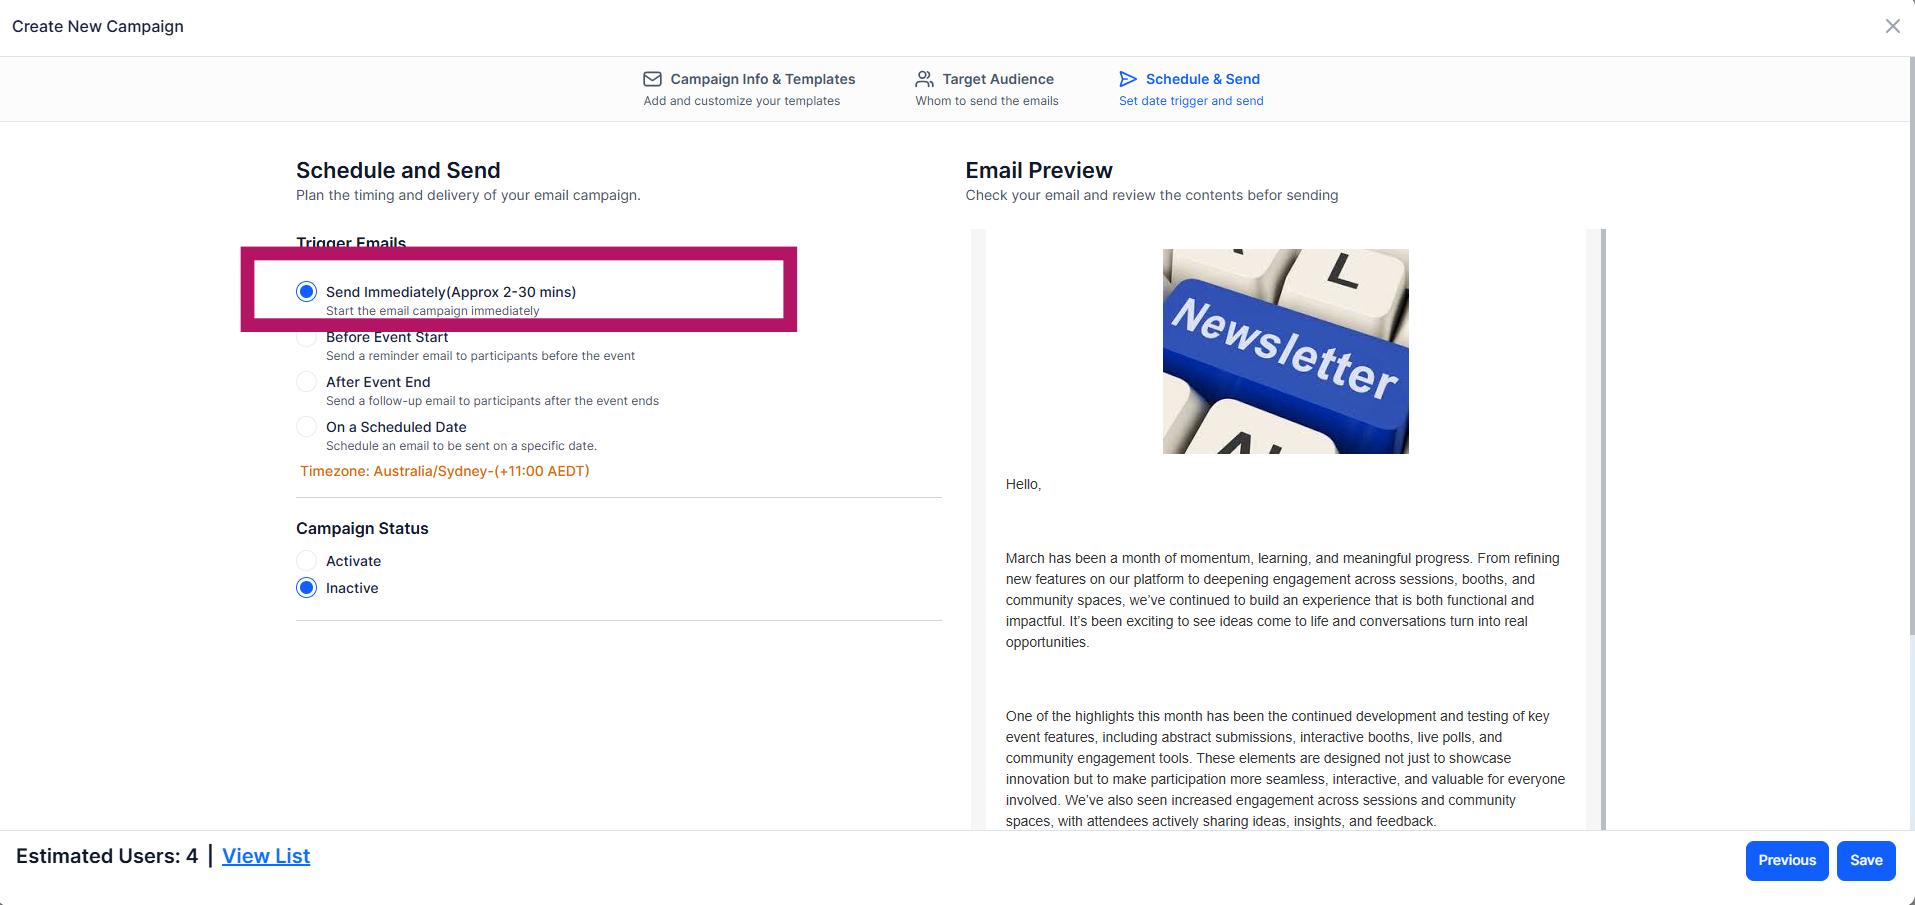
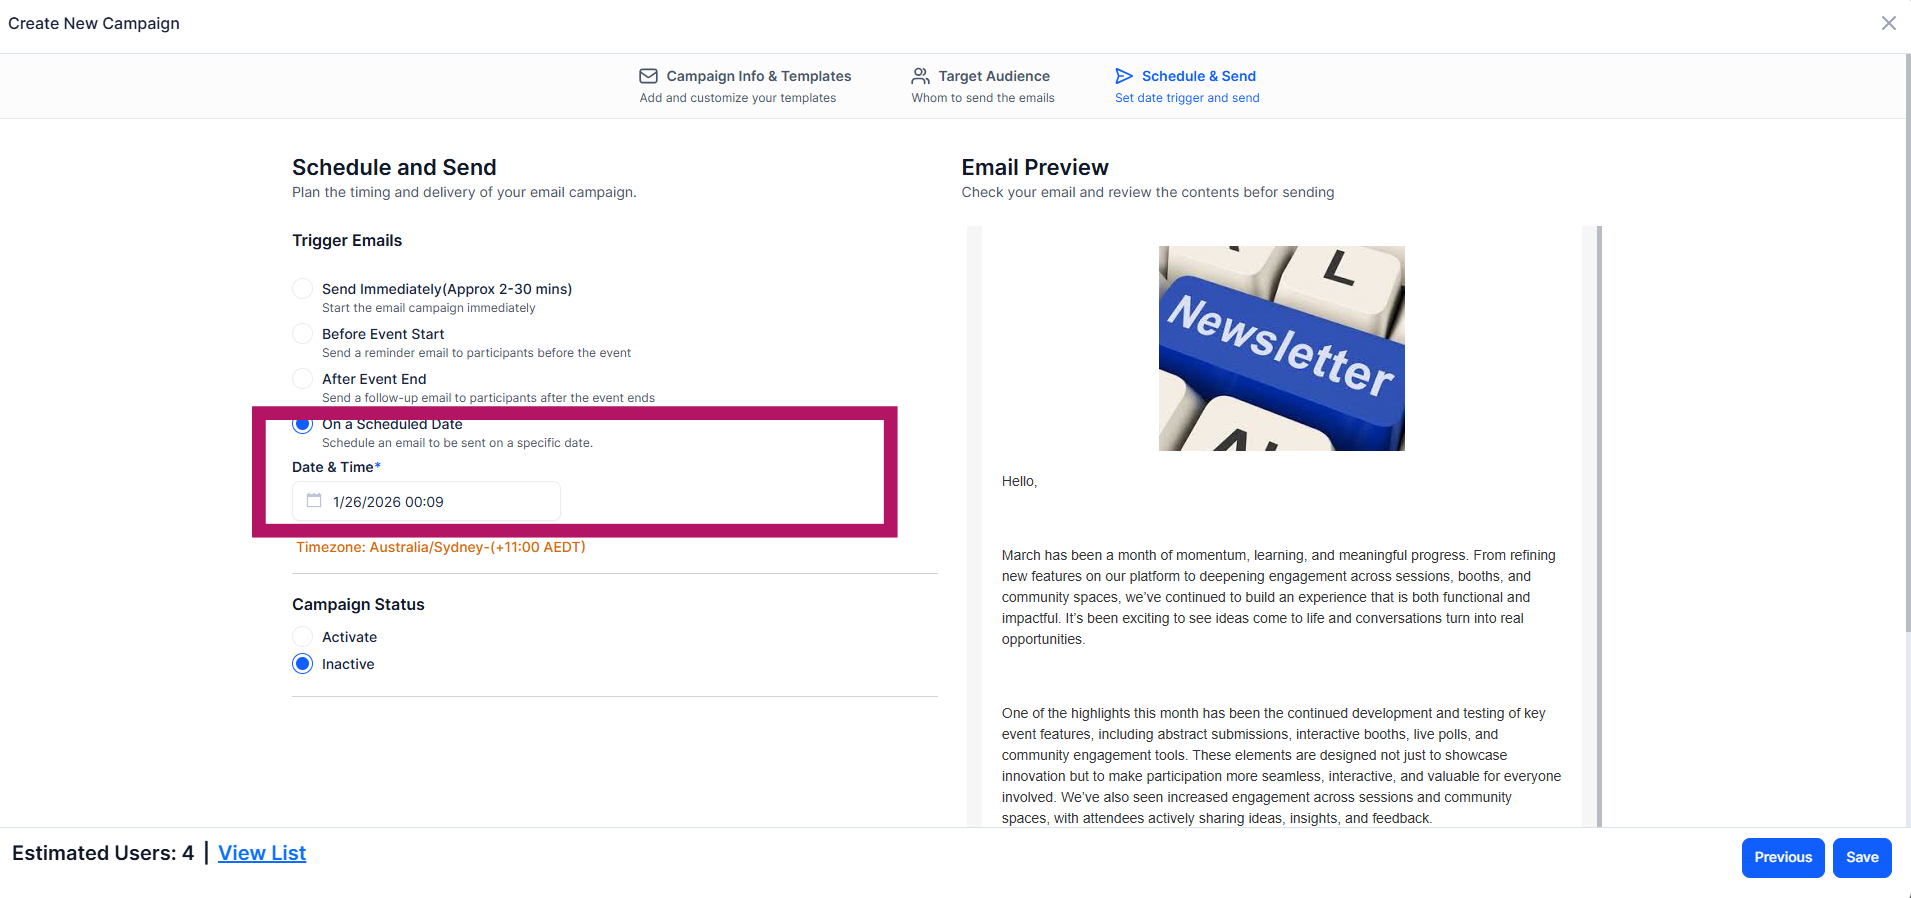
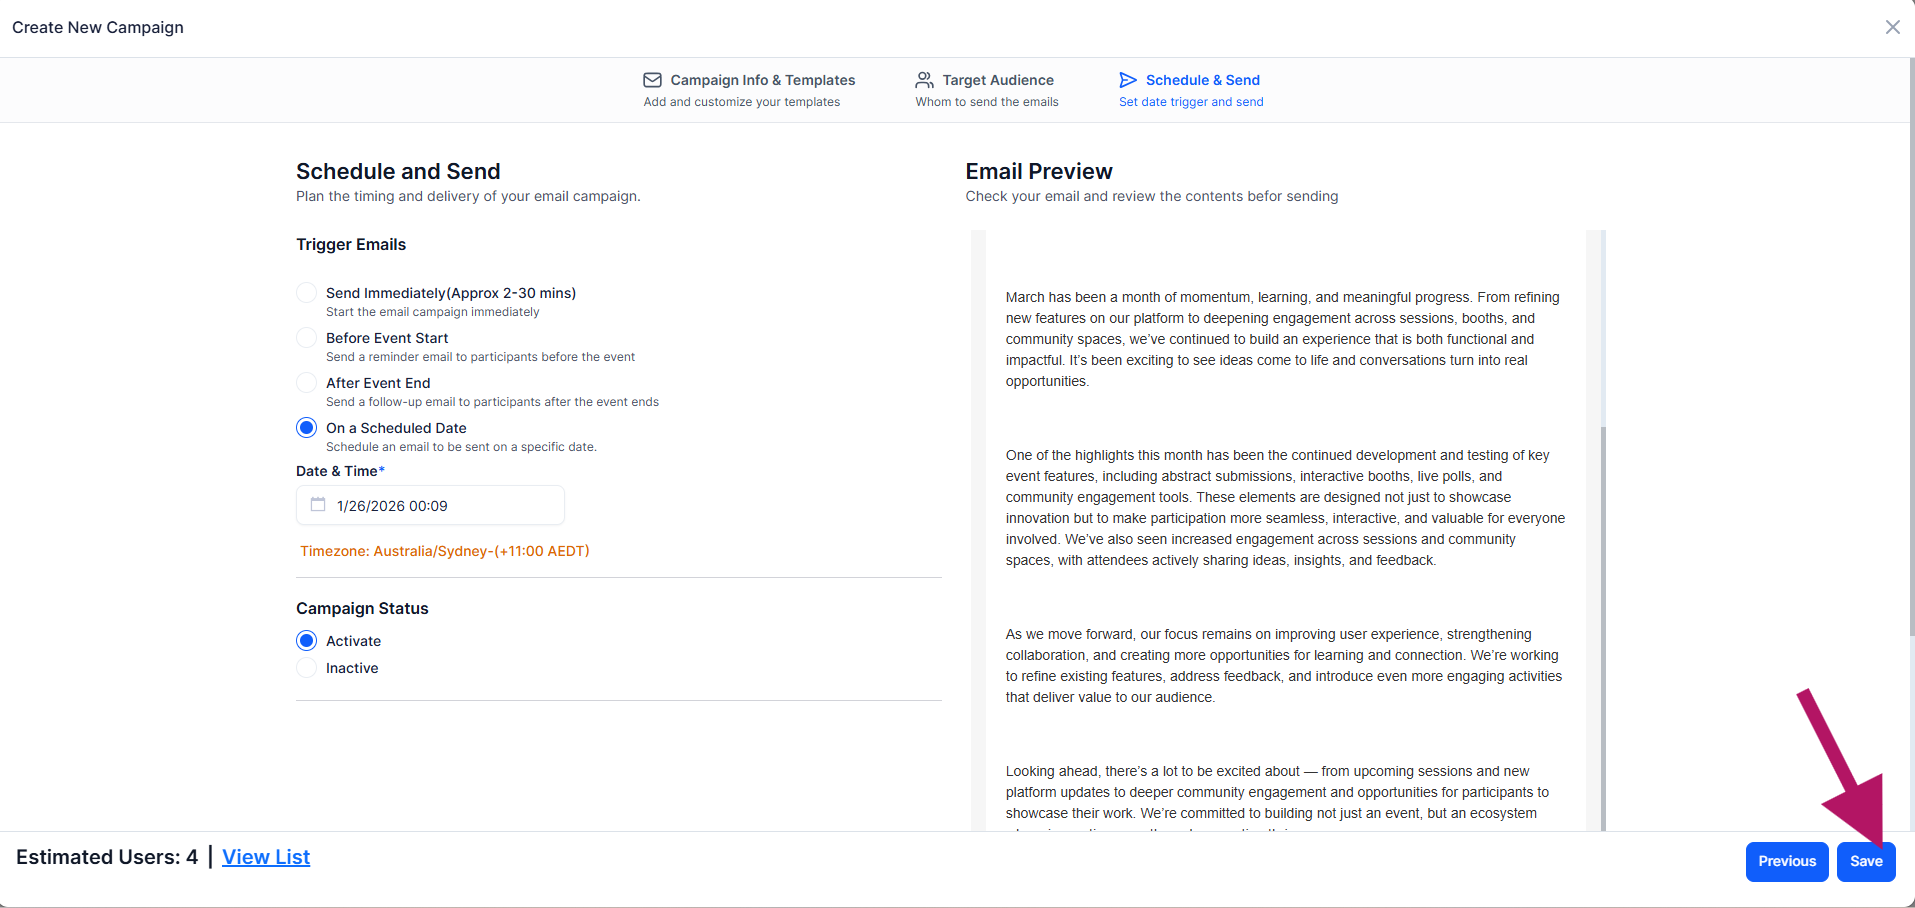
You have four scheduling options:
Choose Send Now to deliver your email within 2 to 30 minutes. Select the delivery window from the dropdown.
Choose Before Event to send a reminder email ahead of your event. Select:
The system will show the tentative send date based on your event date and the days-before setting.

Choose After Event to send a follow-up email after your event. Select:
The system will show the tentative send date based on your event end date.

Choose Specific Date to set an exact date and time for delivery. Use the date picker and time selector to set your preferred schedule.
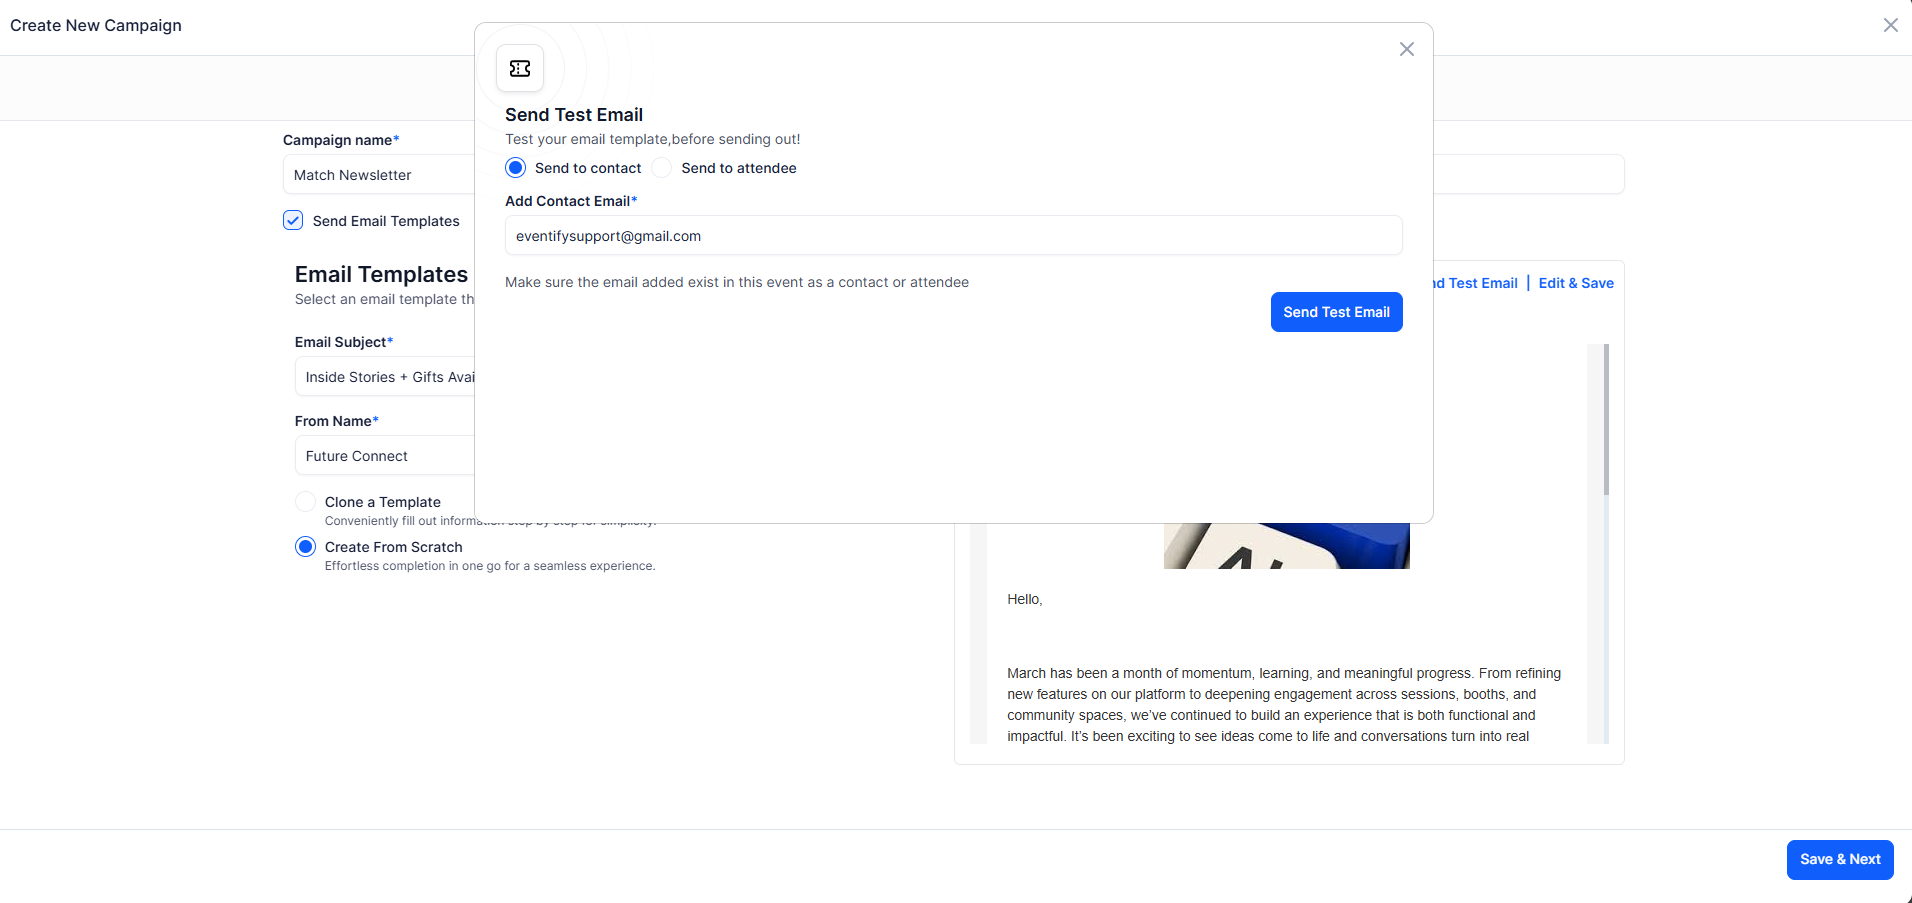
Before activating your campaign, it is highly recommended to send a test email to yourself or a colleague. This lets you verify how the email looks in an actual inbox, check that variables are working, and catch any formatting issues. You can do this from the campaign actions menu.
Toggle the campaign status to Active. If you set it to Inactive, the campaign will be saved as a draft and will not send until you activate it later.
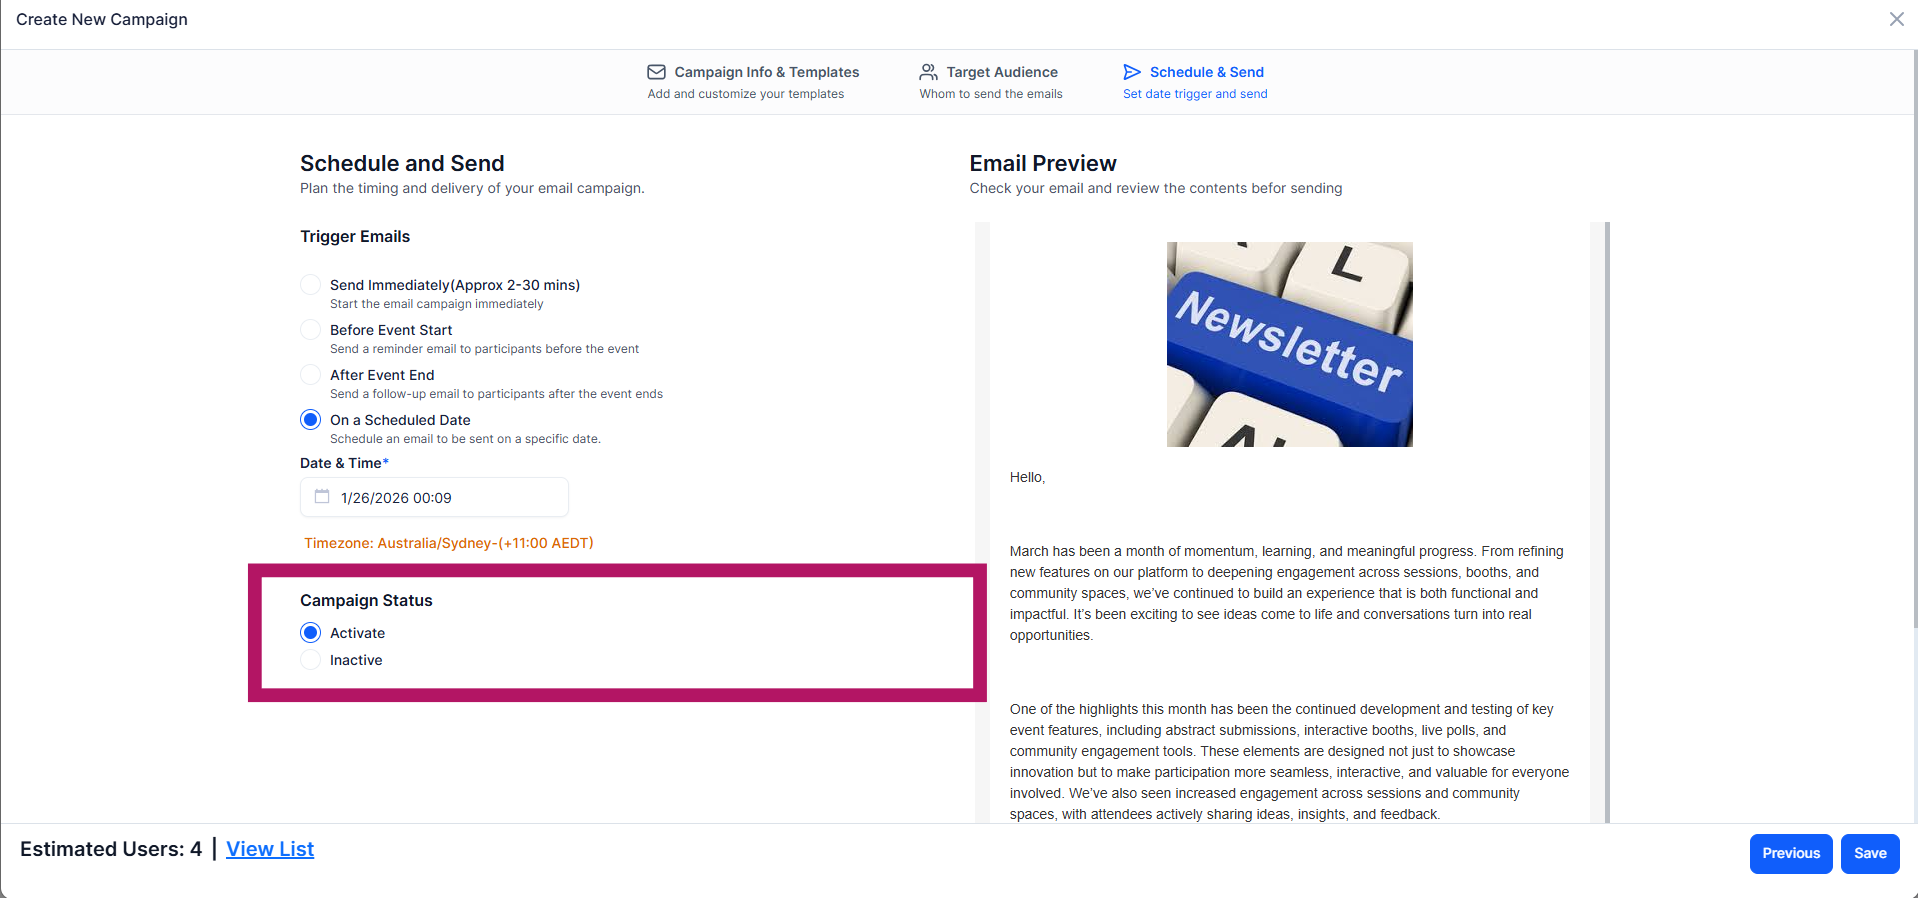
Click the Save button to finalize and create your campaign. If set to Active with an immediate schedule, emails will begin sending shortly. If scheduled for a future date, the campaign will send automatically at the scheduled time.
Once your campaign is saved and active, here's what to expect:
