How To Add A Custom Domain For The Event Landing Page?
Published on
December 3, 2024
Last updated on
June 17, 2026
Eventify auto creates the event landing page with the option to add a custom seocode url. However if you want to add a custom domain(Available with selected plans only. Refer to the pricing page for details)for the landing page, follow the below steps:
💡 Recommendation: Use Cloudflare as Your DNS Provider (Free)
Eventify does not host nameservers. You are free to use any DNS provider — however, we strongly recommend using Cloudflare, available for free at cloudflare.com. Cloudflare offers faster DNS propagation, improved security, and support for CNAME Flattening — making it the best choice for connecting your domain to Eventify.
⚠️ Important: CNAME Flattening — Not All DNS Providers Support It
A standard CNAME record can only be added on a subdomain (e.g., events.yourdomain.com), not on a root/apex domain (e.g., yourdomain.com). CNAME Flattening is a special feature offered by select DNS providers that allows pointing a root domain directly to a CNAME target like sites.eventify.io.
✅ Supports CNAME Flattening: Cloudflare (recommended), NS1, DNS Made Easy
❌ Does NOT support CNAME Flattening: GoDaddy — GoDaddy does not support CNAME Flattening. If you are using GoDaddy, you must point a subdomain (e.g., events.yourdomain.com) to Eventify, or transfer your DNS management to Cloudflare (free) to use a root domain.
Step 1: Create a DNS CNAME Entry
Access Your Domain's DNS Settings: - Log in to your domain registrar or DNS hosting provider (e.g., GoDaddy, Namecheap, Cloudflare). -Navigate to the DNS Management or Domain Settings section.
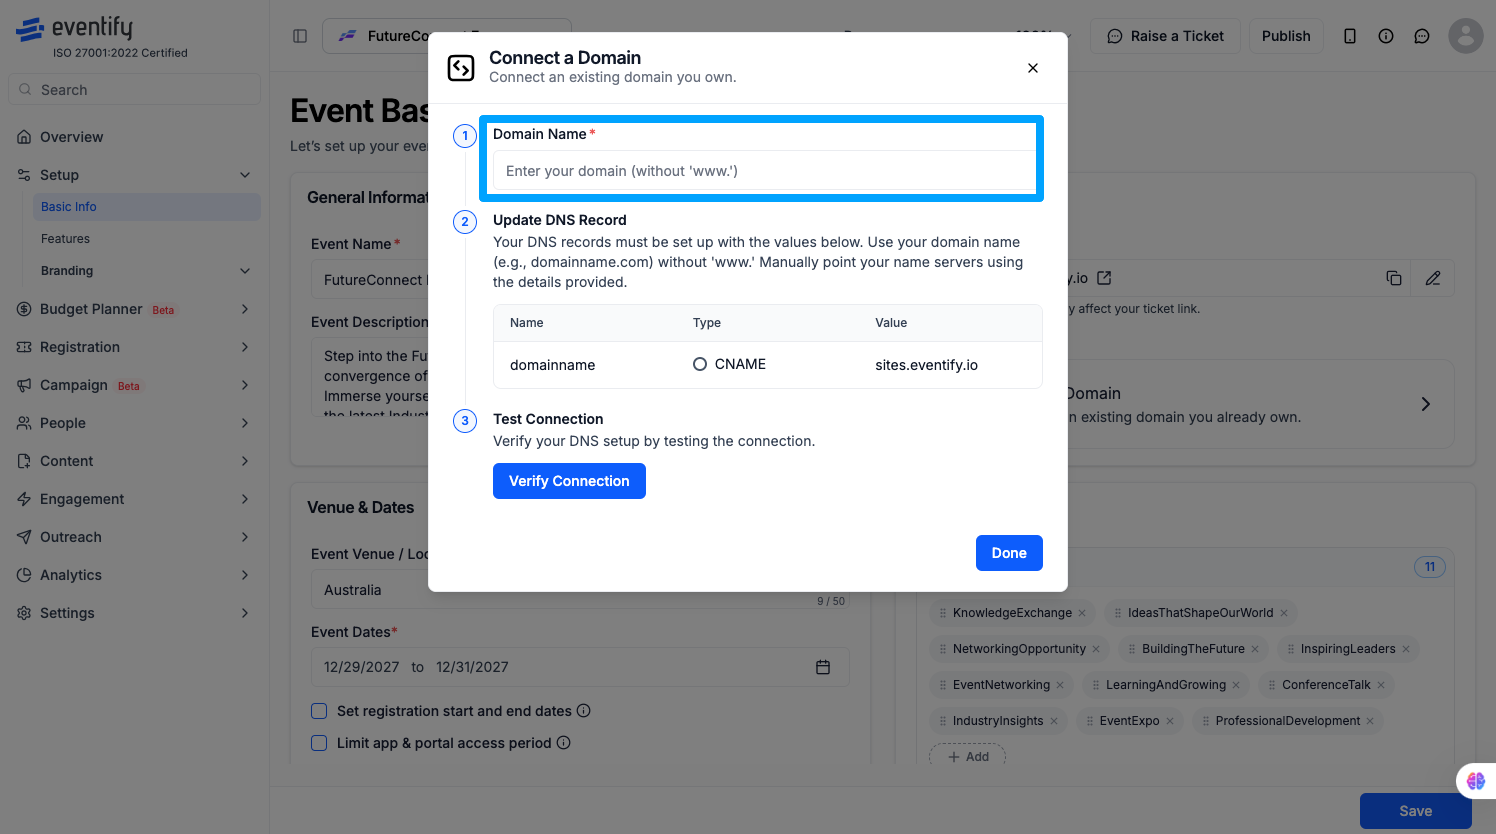
Create a CNAME Record - Look for an option to add a new DNS record. - Select CNAME as the record type. - In the Name or Host field, enter the subdomain you want to use. For example:- If you want to use yourevent.yourdomain.com, enter yourevent. - In the Value or Points to field, enter sites.eventify.io - Save the DNS record.
Verify the DNS Propagation: - DNS changes can take a few minutes to several hours to propagate globally.- You can use tools like [WhatsMyDNS.net](https://www.whatsmydns.net/) to check if the CNAME record has propagated successfully.
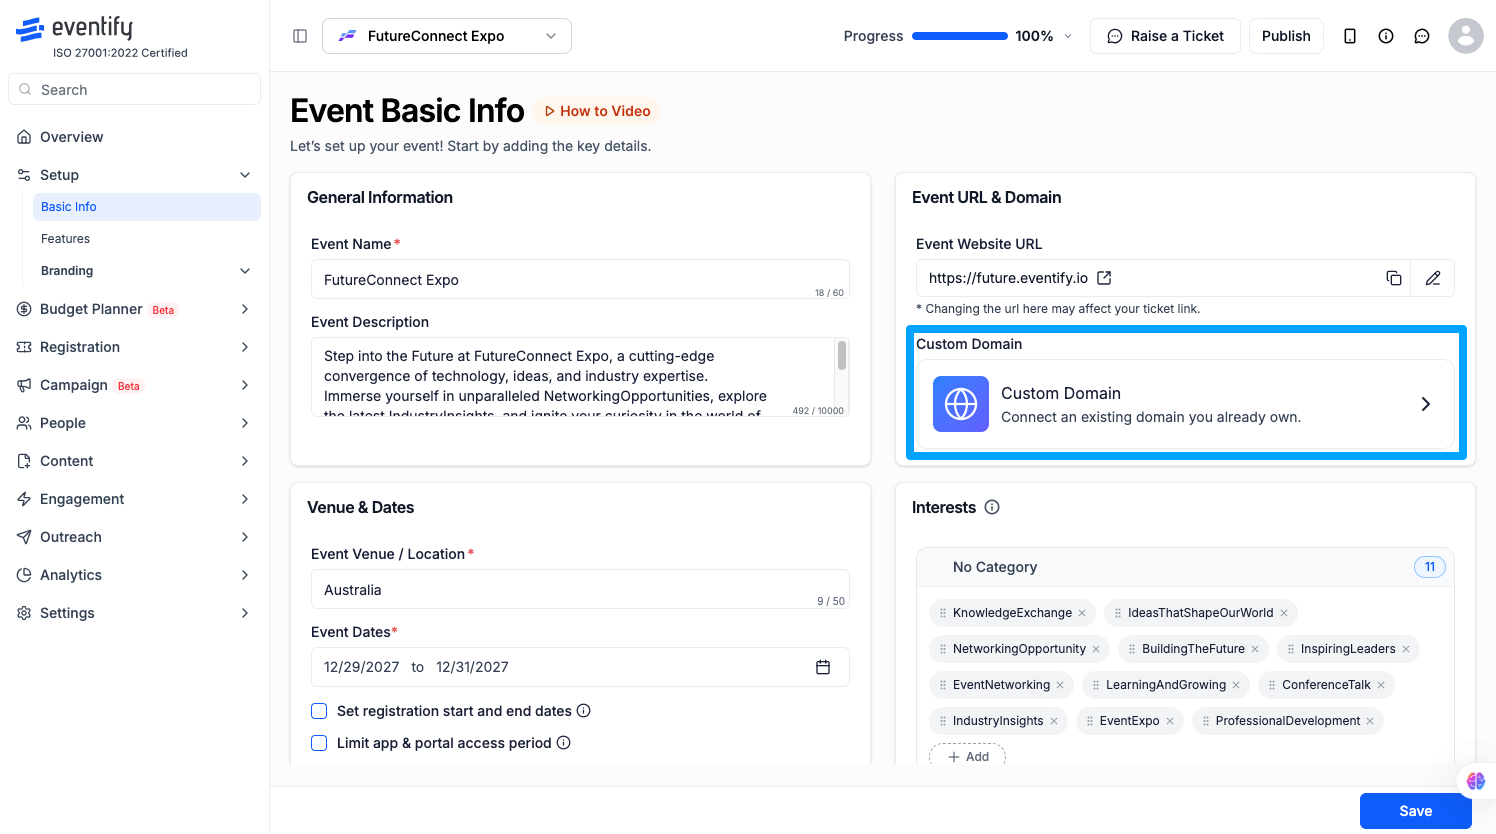
Step 2: Add your domain in the Eventify Admin Panel
Go to Setup > Basic Details > Event URL & Domain> Custom Domain.
3. Set the Domain. For example:- yourdomain.com and save the changes.
This subdomain will act as the base URL for your event.
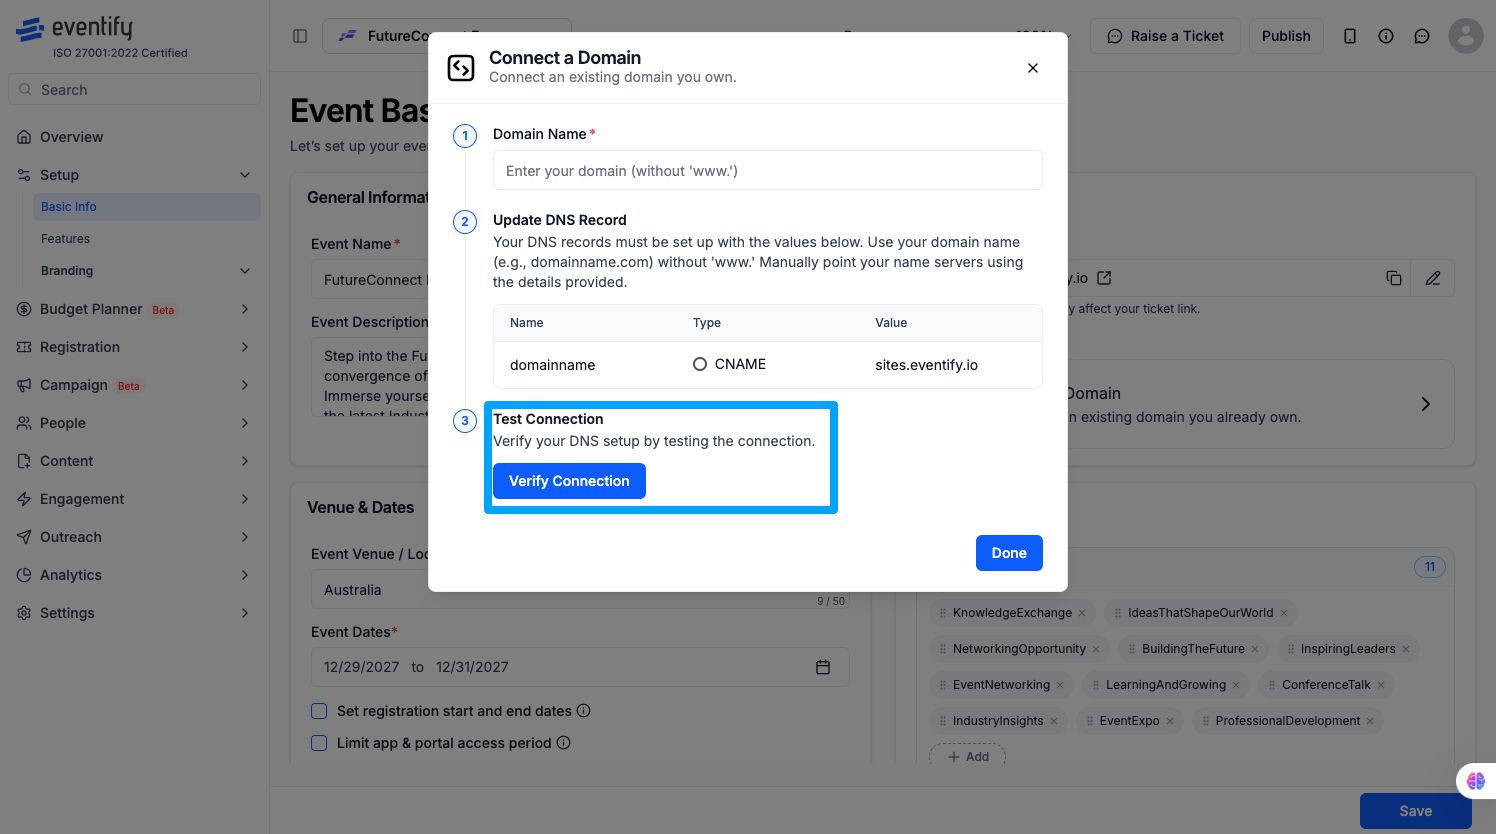
Step 3: Verify Connection
Once the DNS CNAME entry is set up, Verify the connection - Firstly the nameserver will be updated. It should take less than a minute to complete the process. - SSL connection will be secured. This process can take upto 5 minutes to be completed - Lastly, the domain and SSL connection will be confirmed.