Learn how to easily add and sell exhibitor booths using the interactive floor map feature in your Eventify dashboard.

Interactive Guide
Or check the step-by-step guide
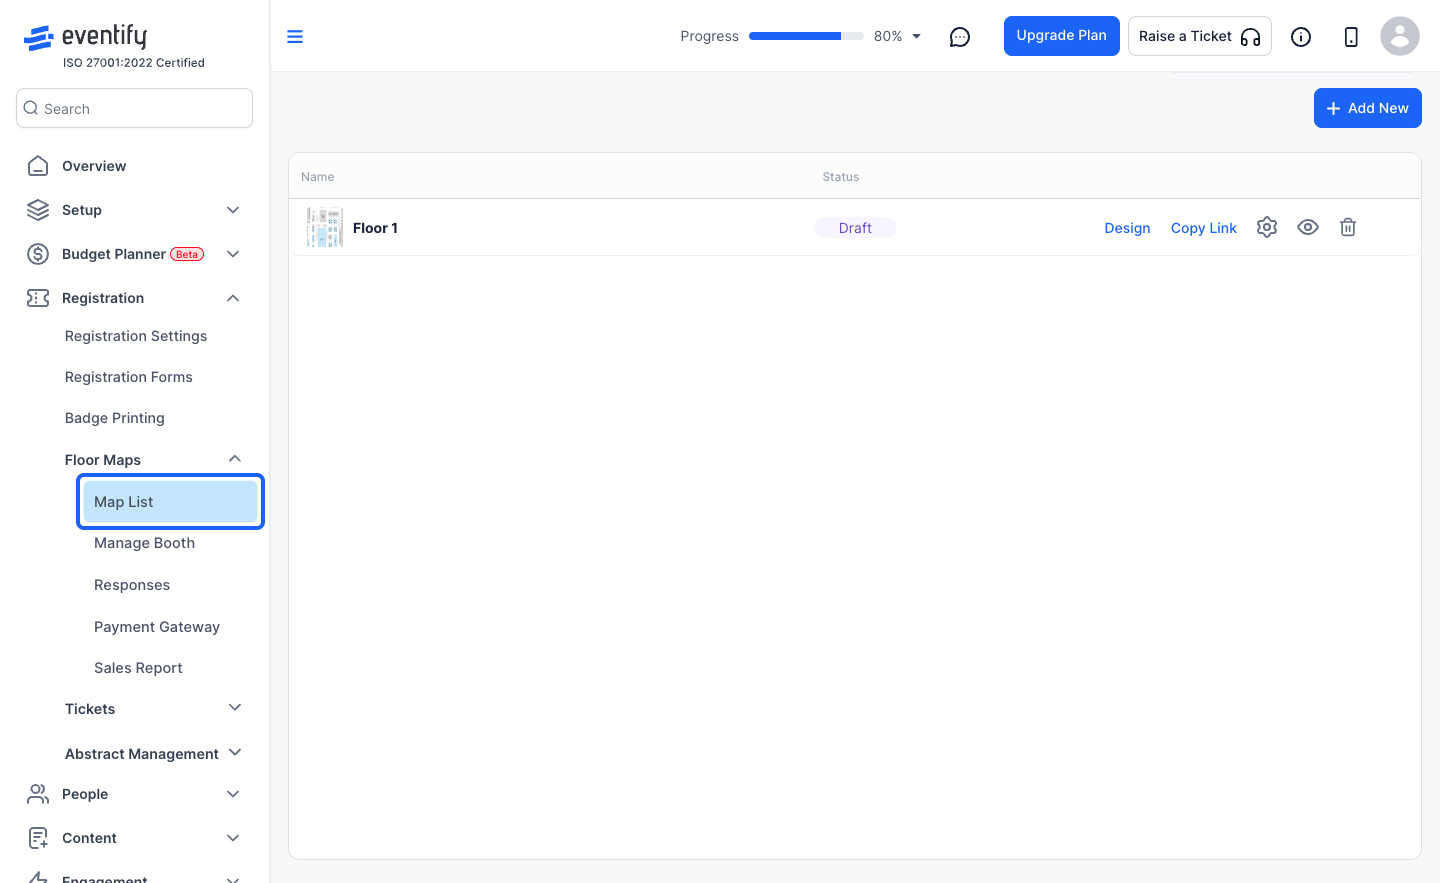
1: Login to the Admin Panel and click on Registration > Floor Maps > Map List
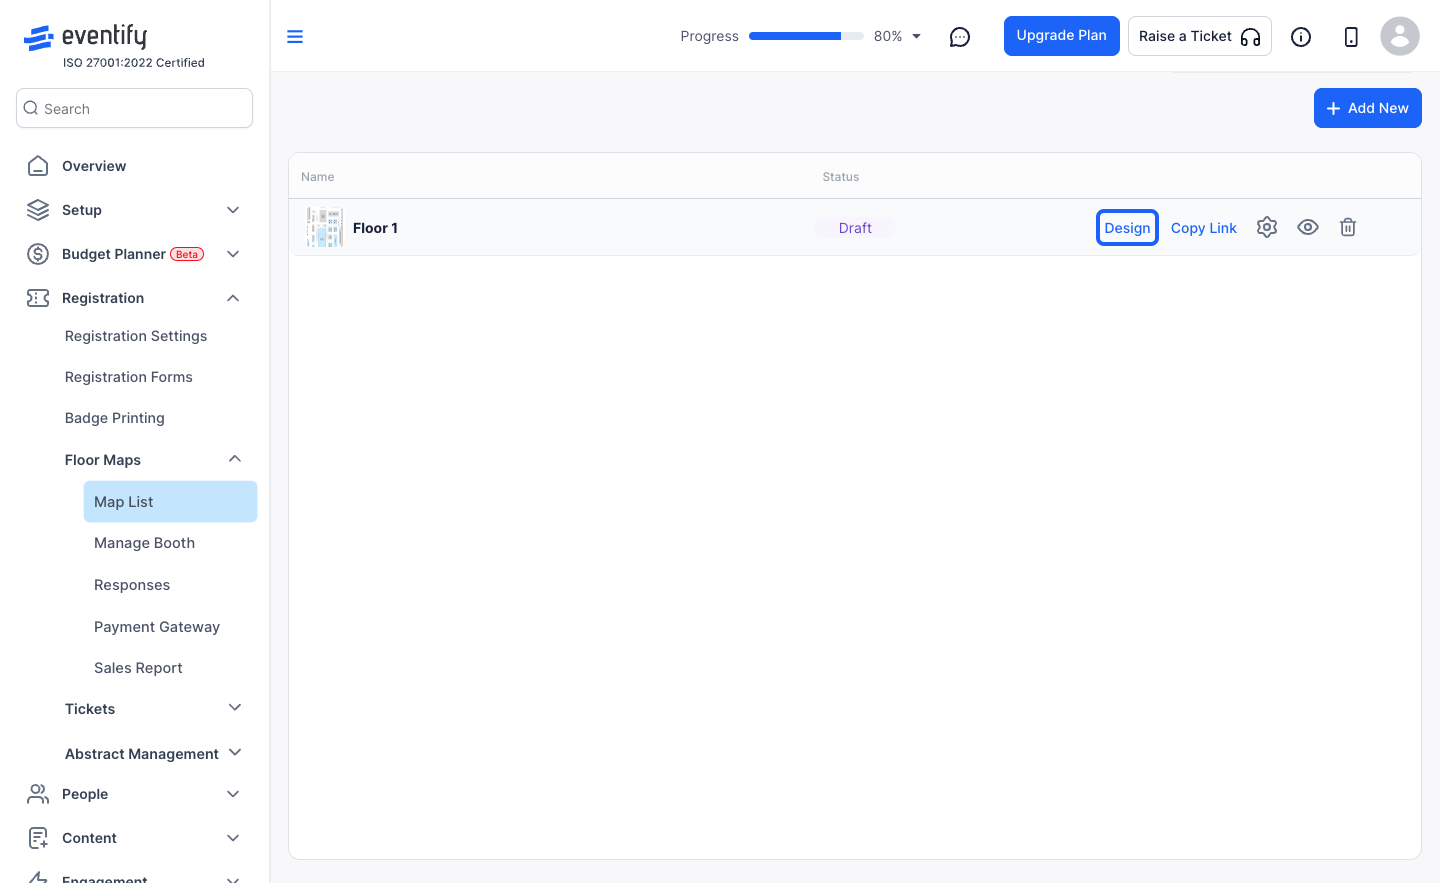
2: Click on "Design" to design the booths on the map
3: Click the “edit” button to update the map name if needed
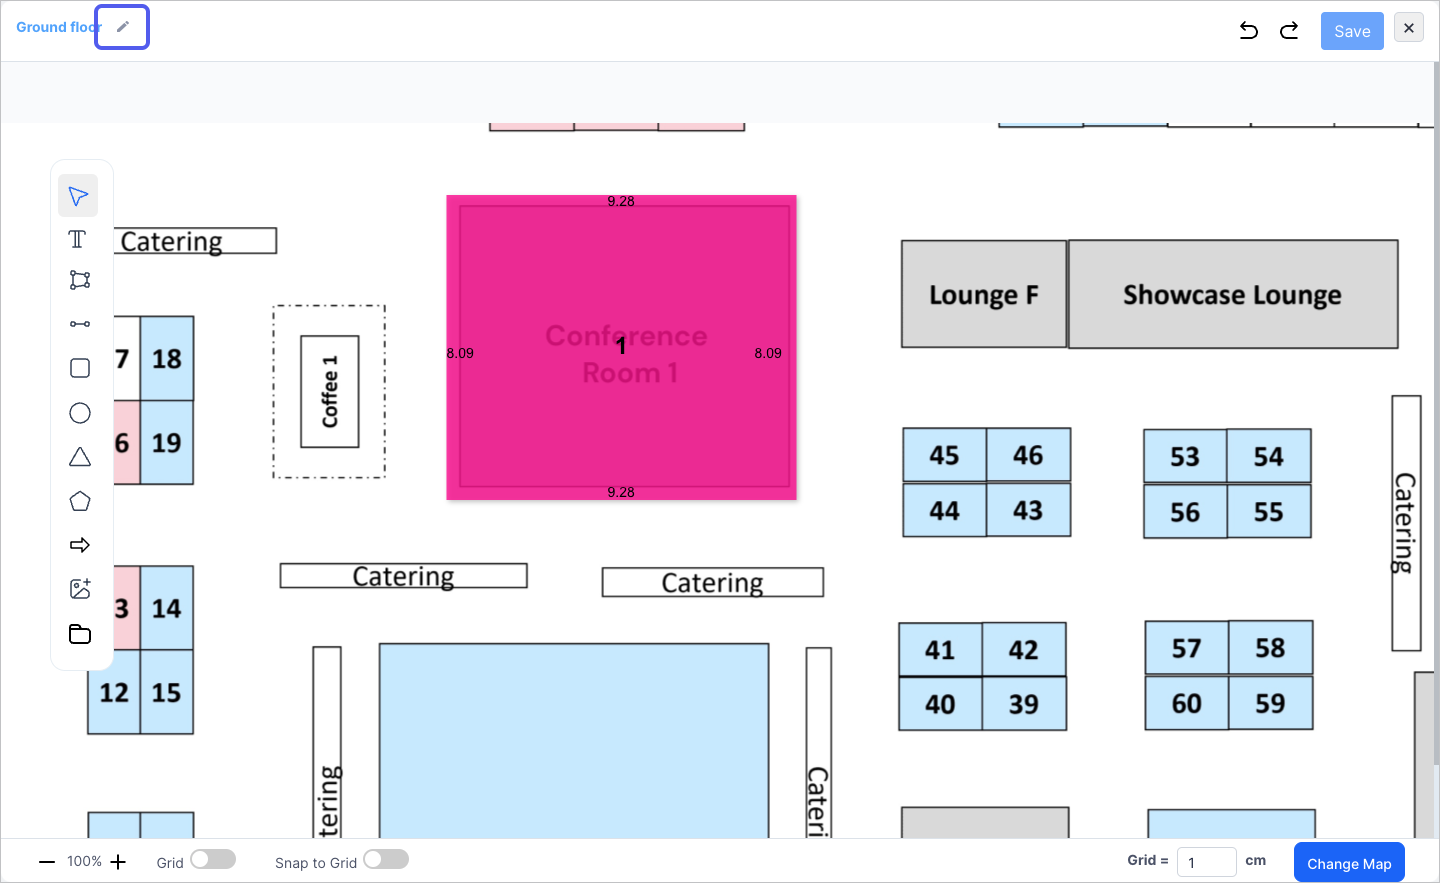
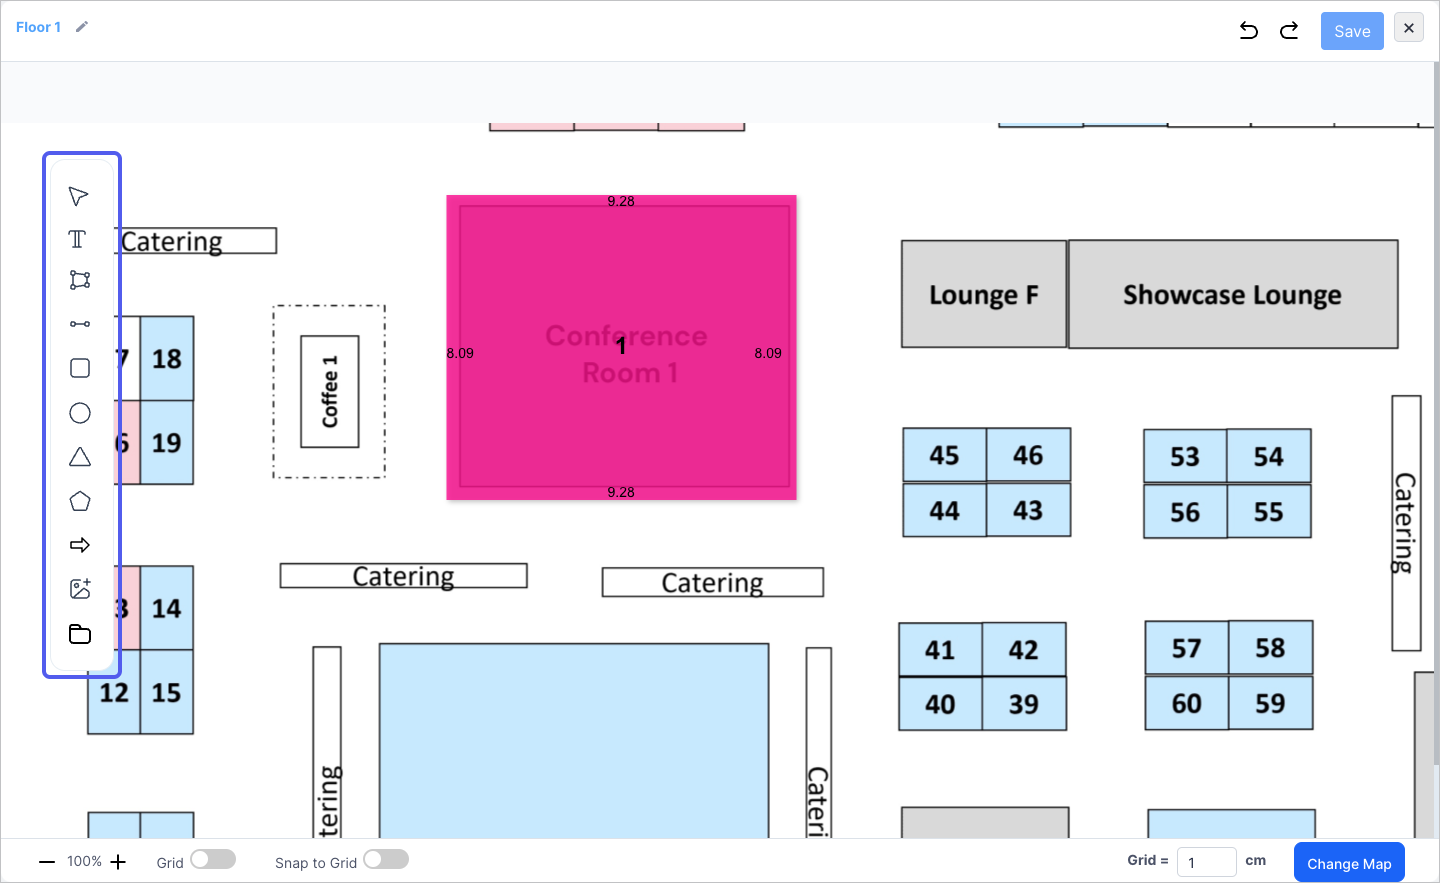
4: Select your desired tool from the toolbox
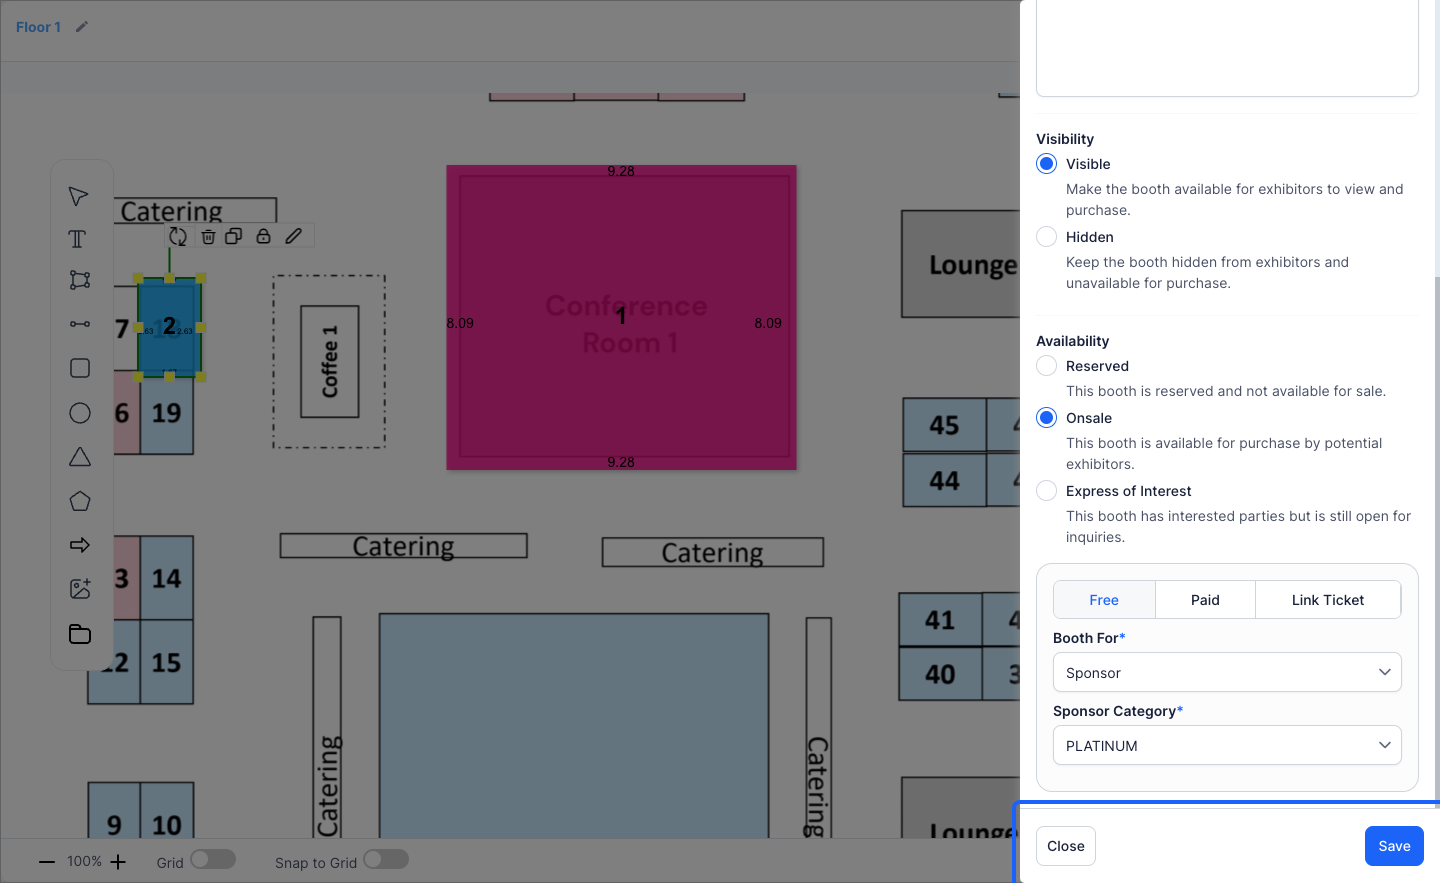
5: After drawing the booth area, add the booth properties
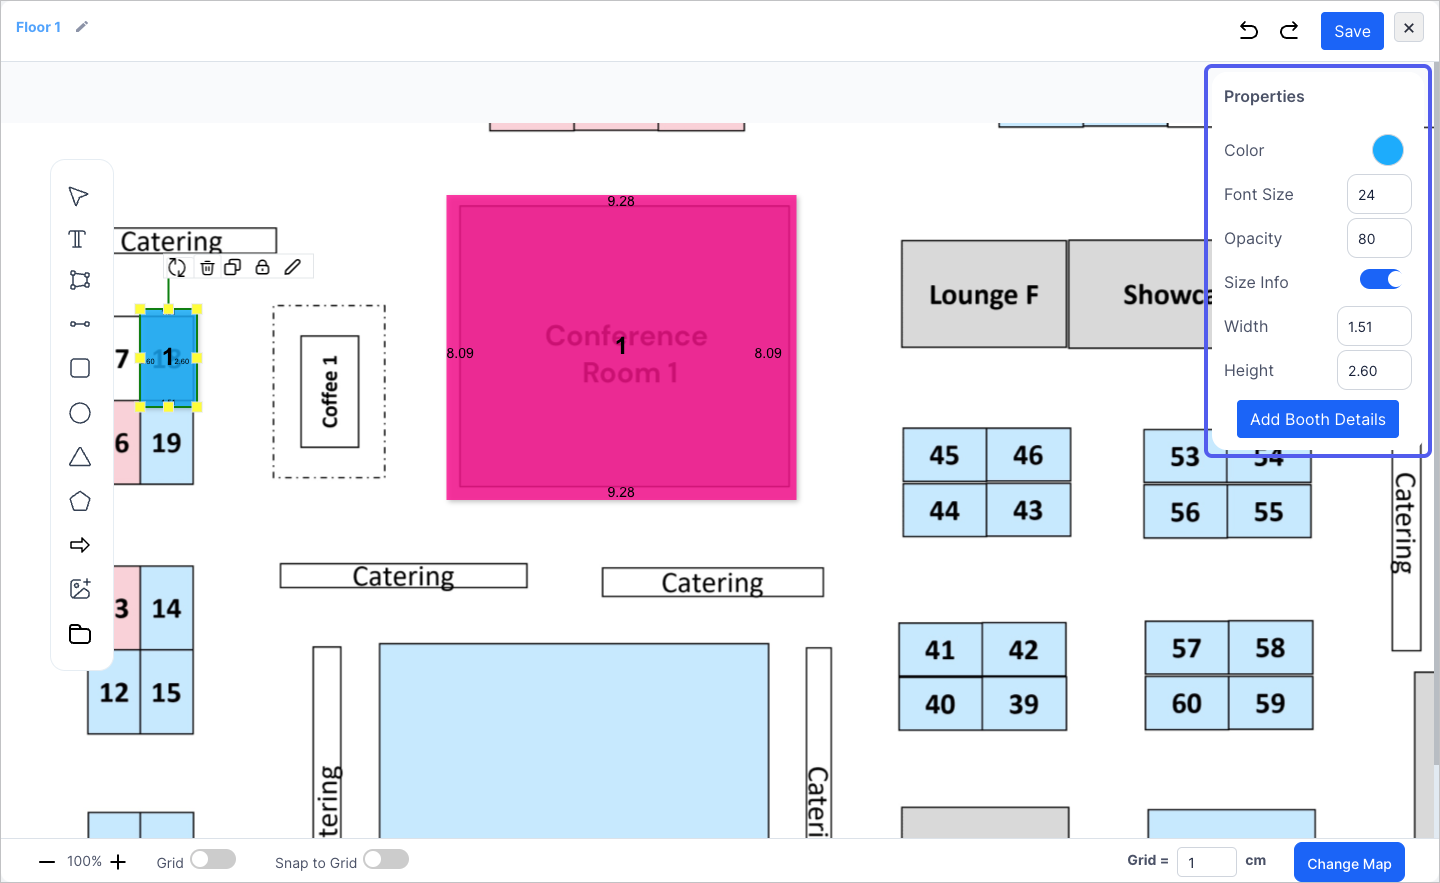
6: Click the “Add Booth Details” button to add more details

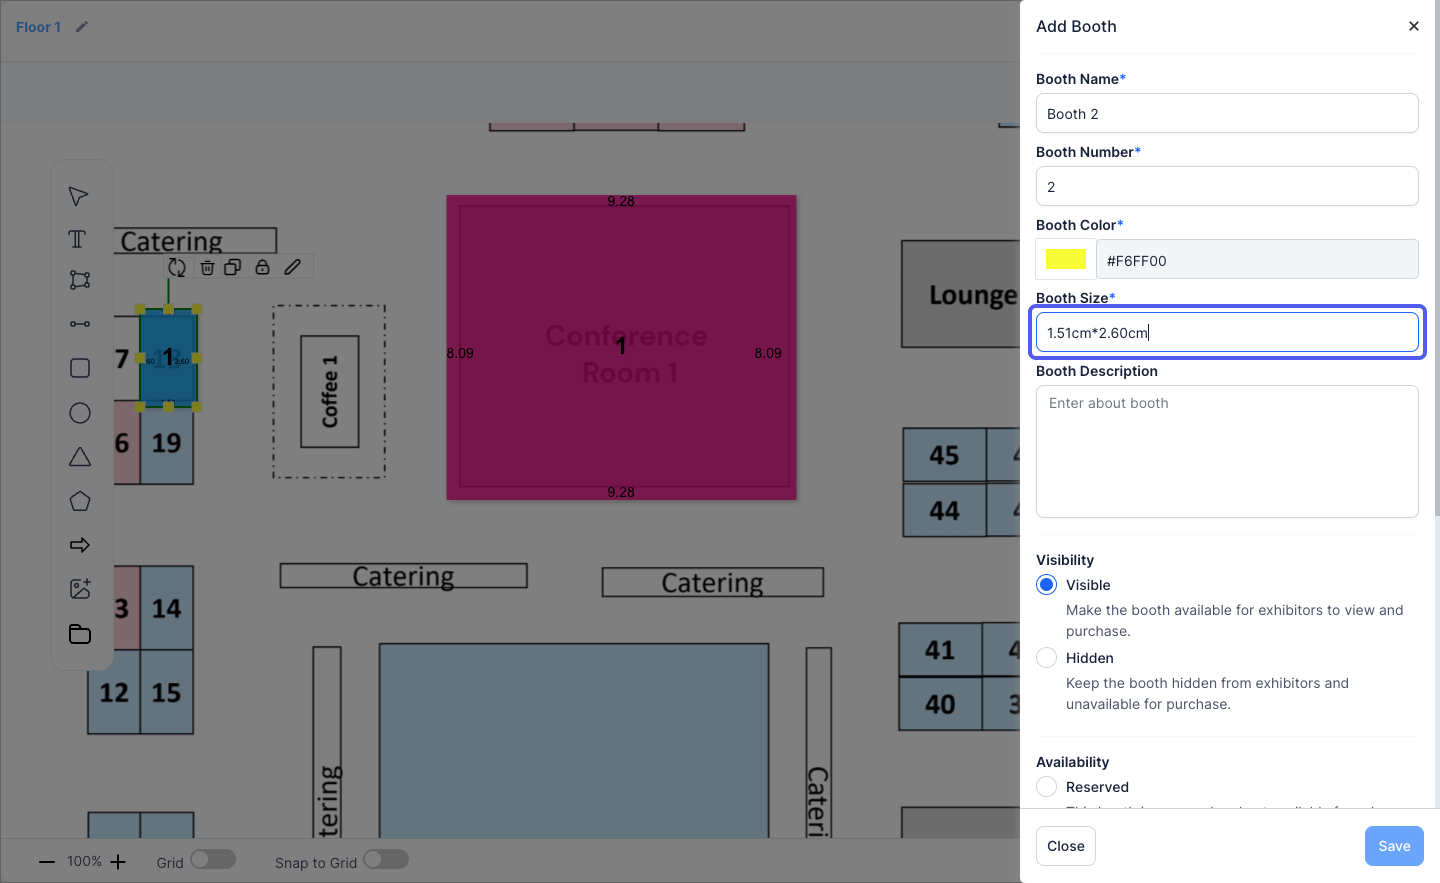
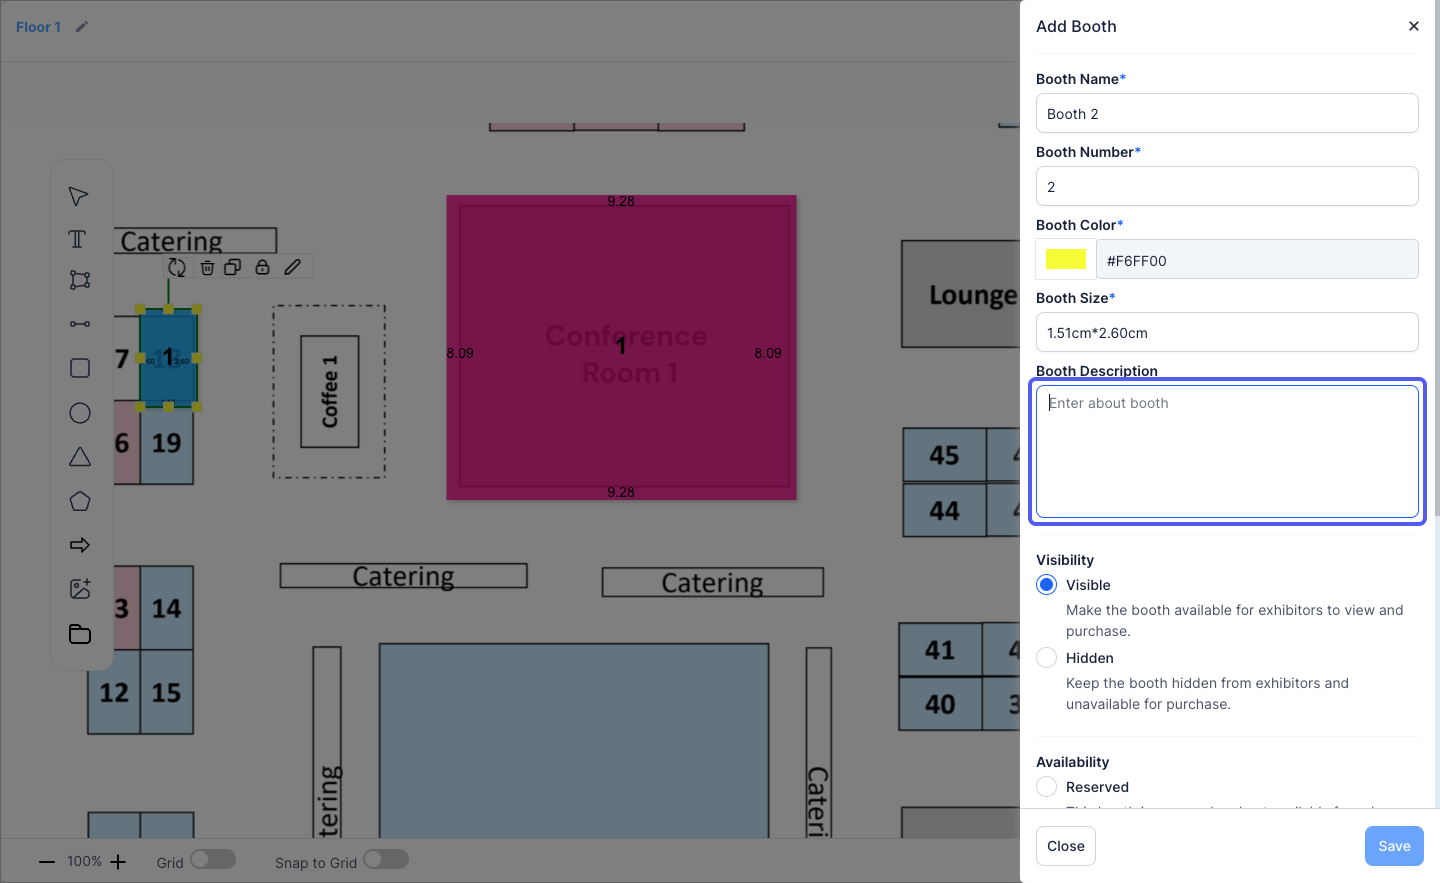
7: Here you can add the booth details
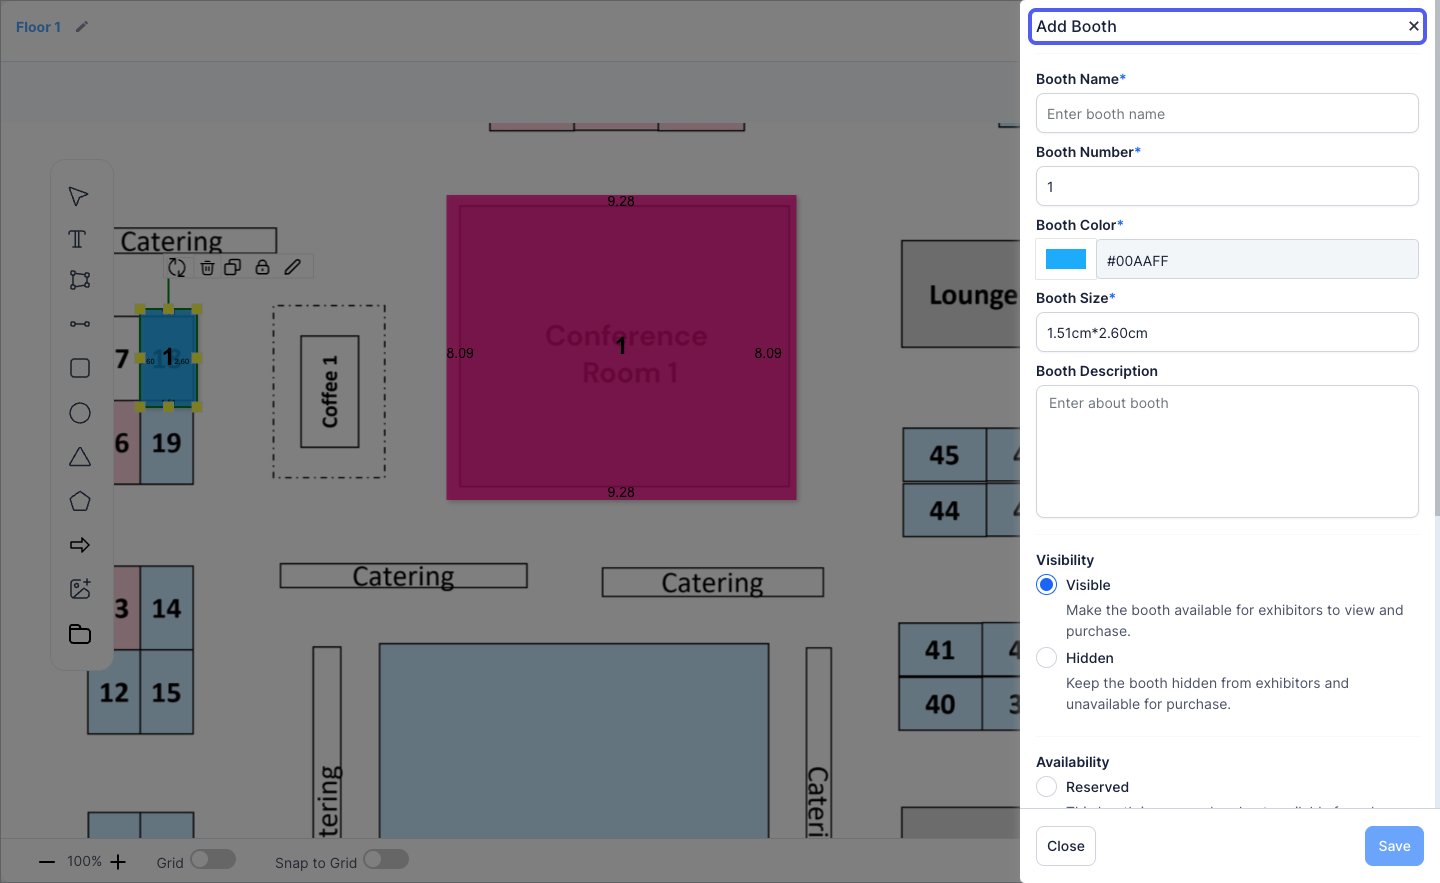
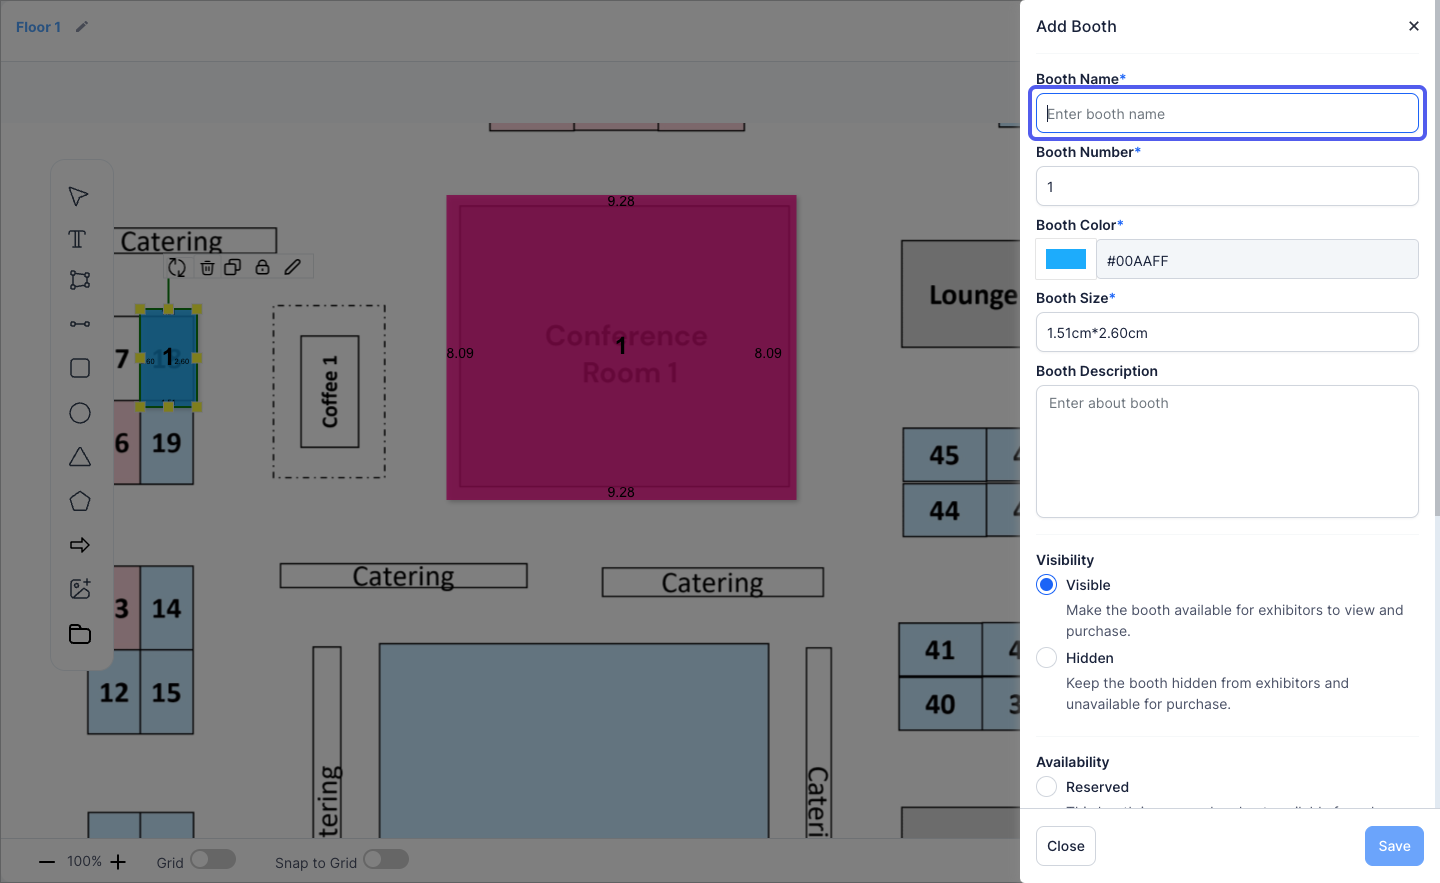
8: Define the booth name
9: Add the booth number

10: Assign a colour to the booth

11: Define the booth area(size)
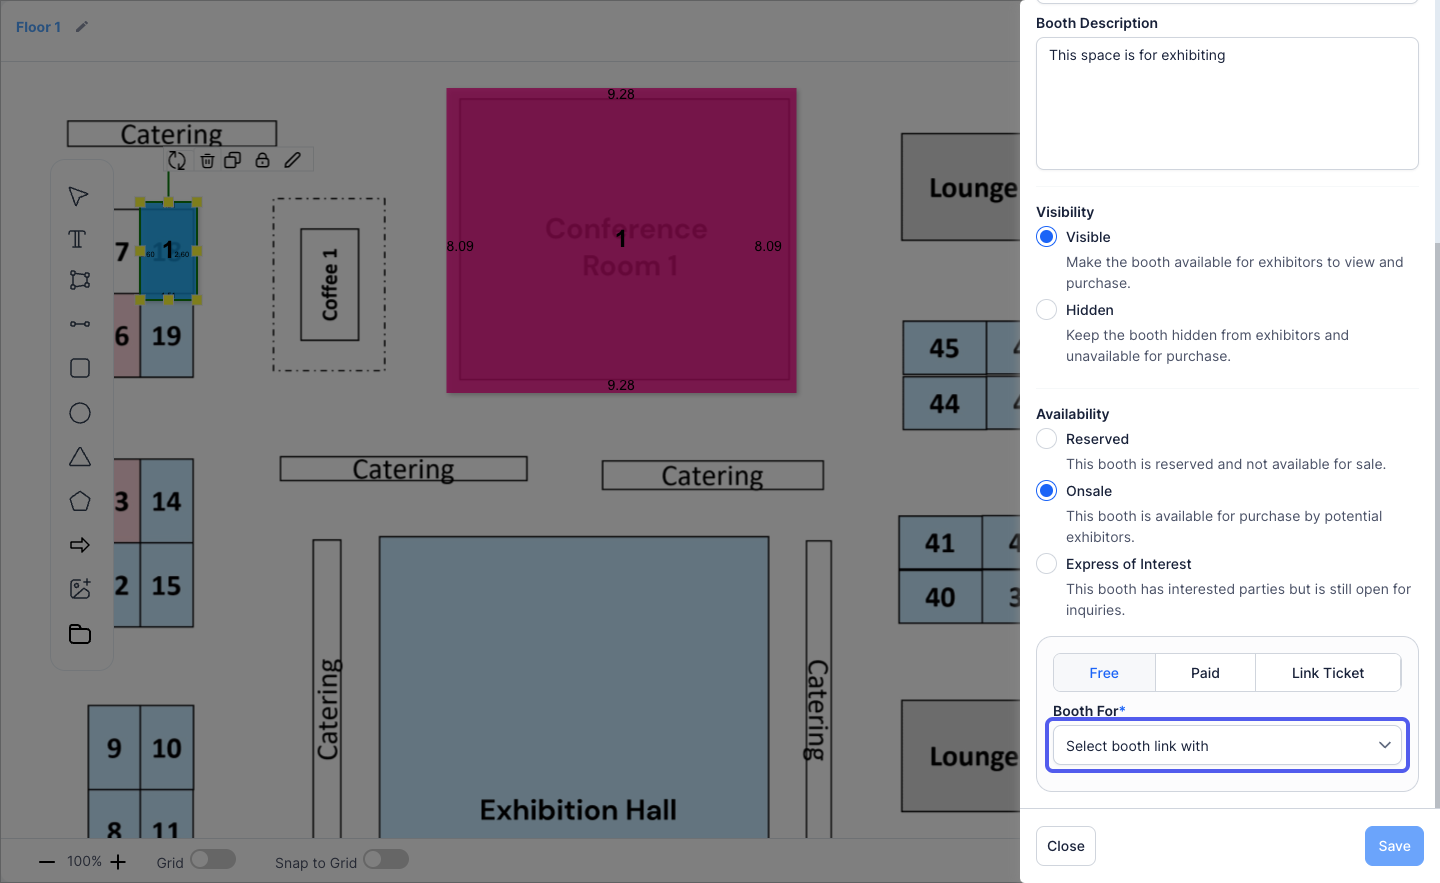
12: Enter the booth description
13: Mark the booth as "Visible" or "Hidden" on the map
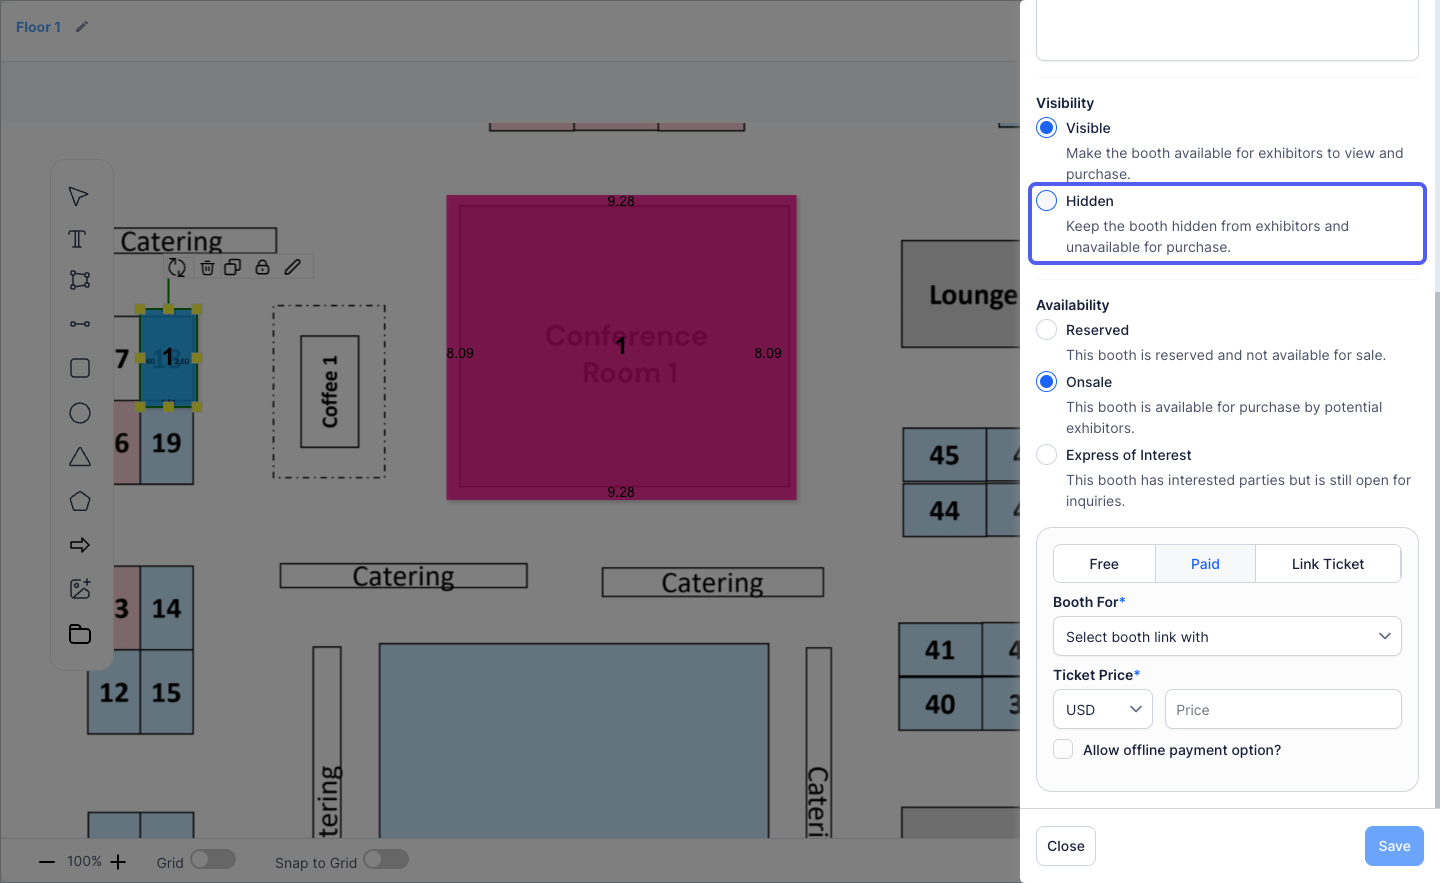
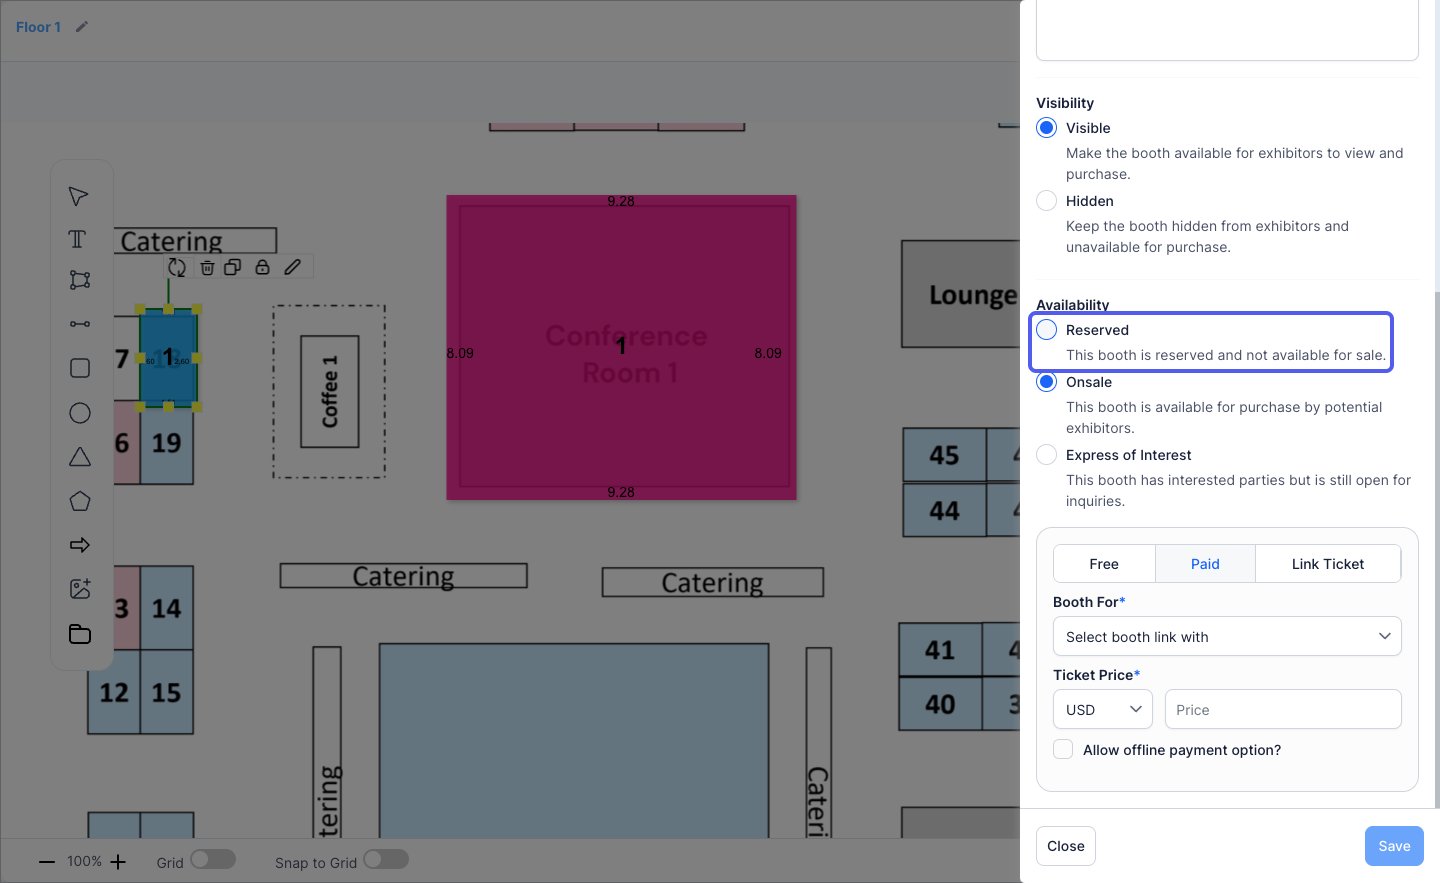
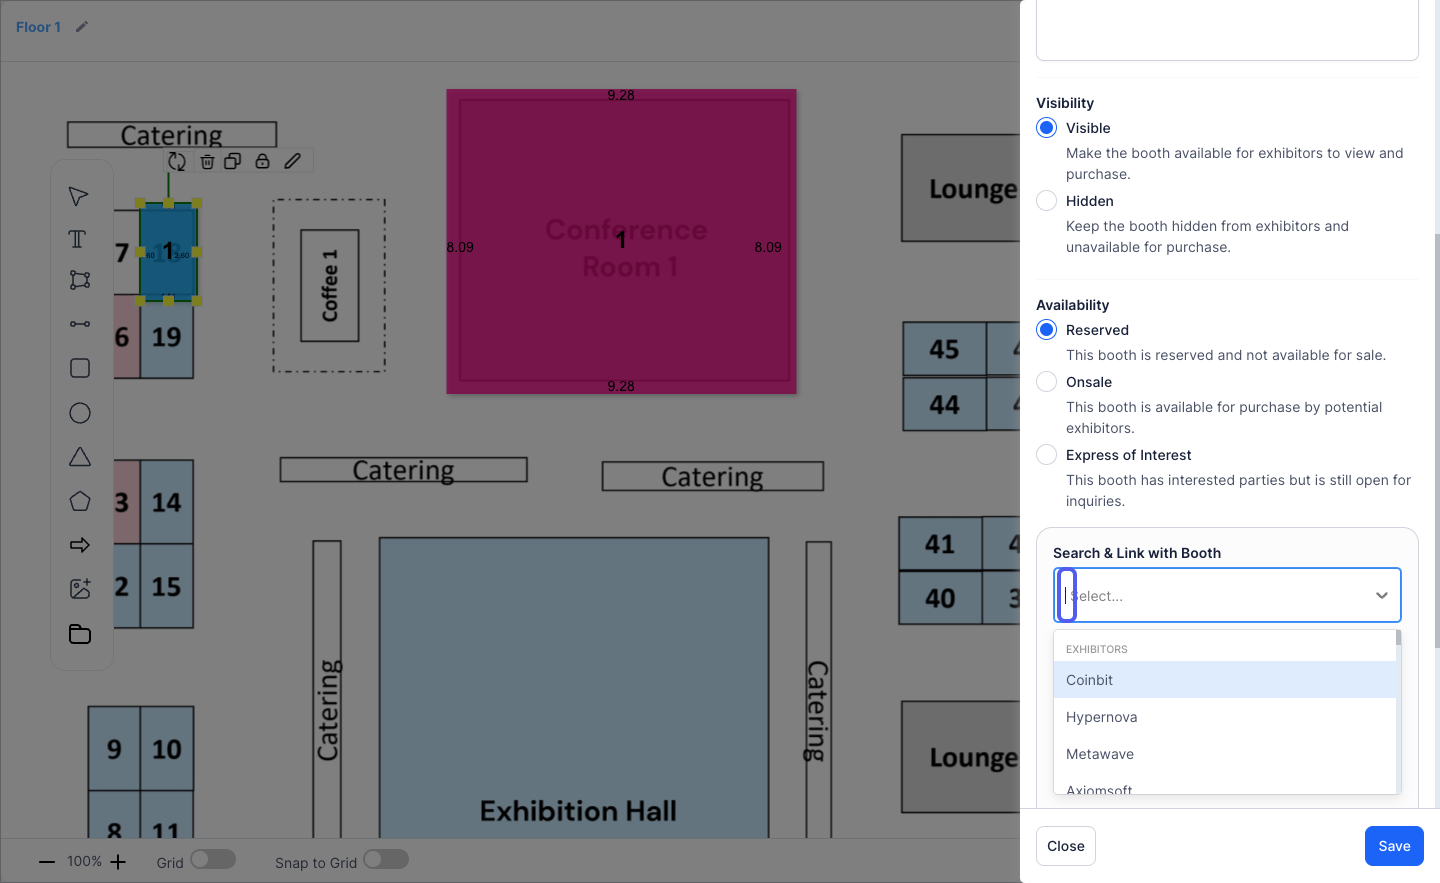
14: Select "Reserved" if you want to pre=reserve the booth for someone in the event
15: Reserved booths can be linked to Exhibitors, Speakers, Sponsors or Sessions
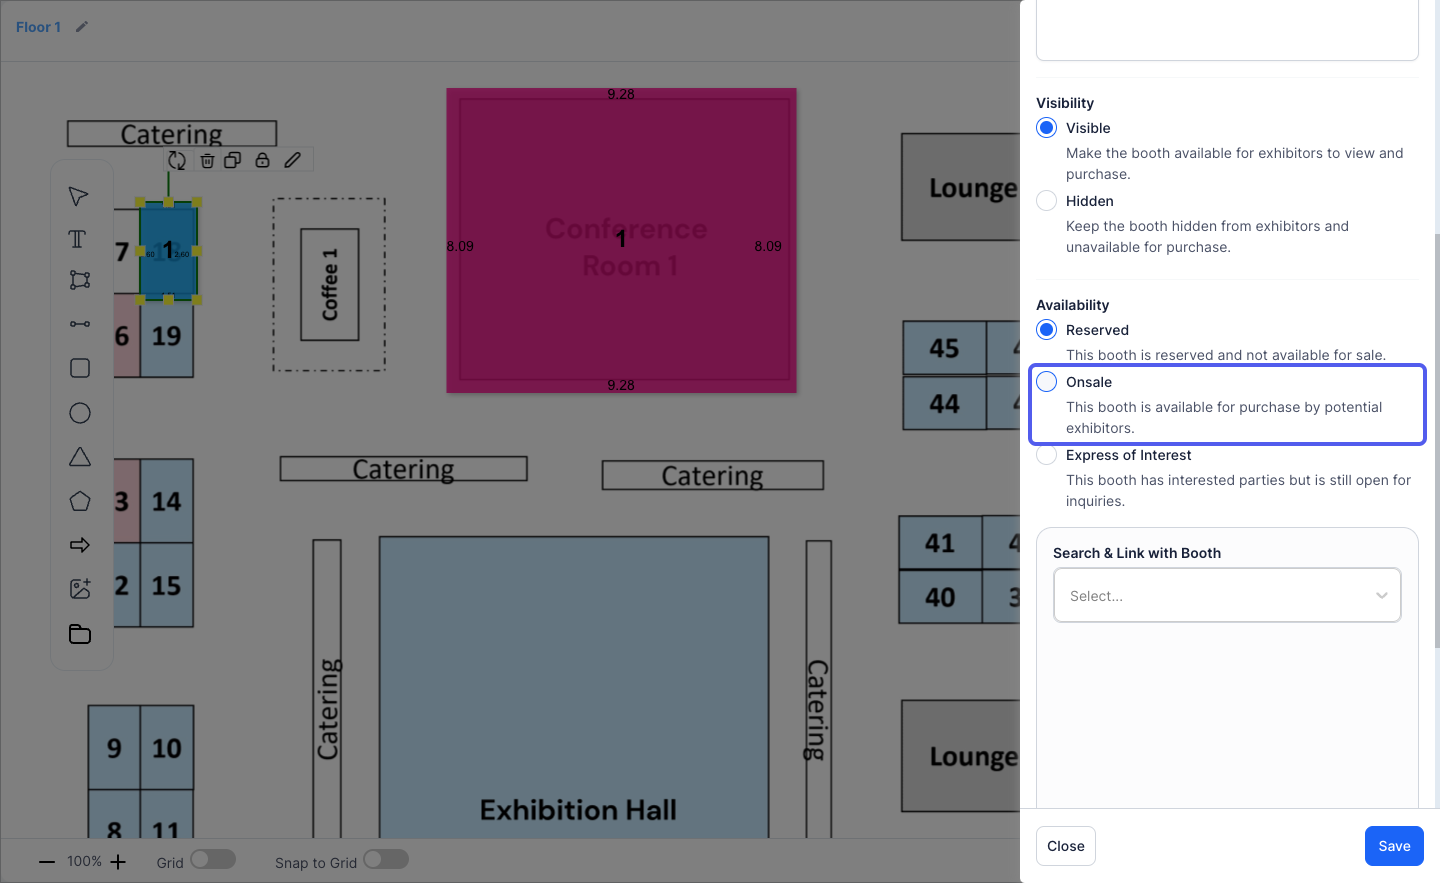
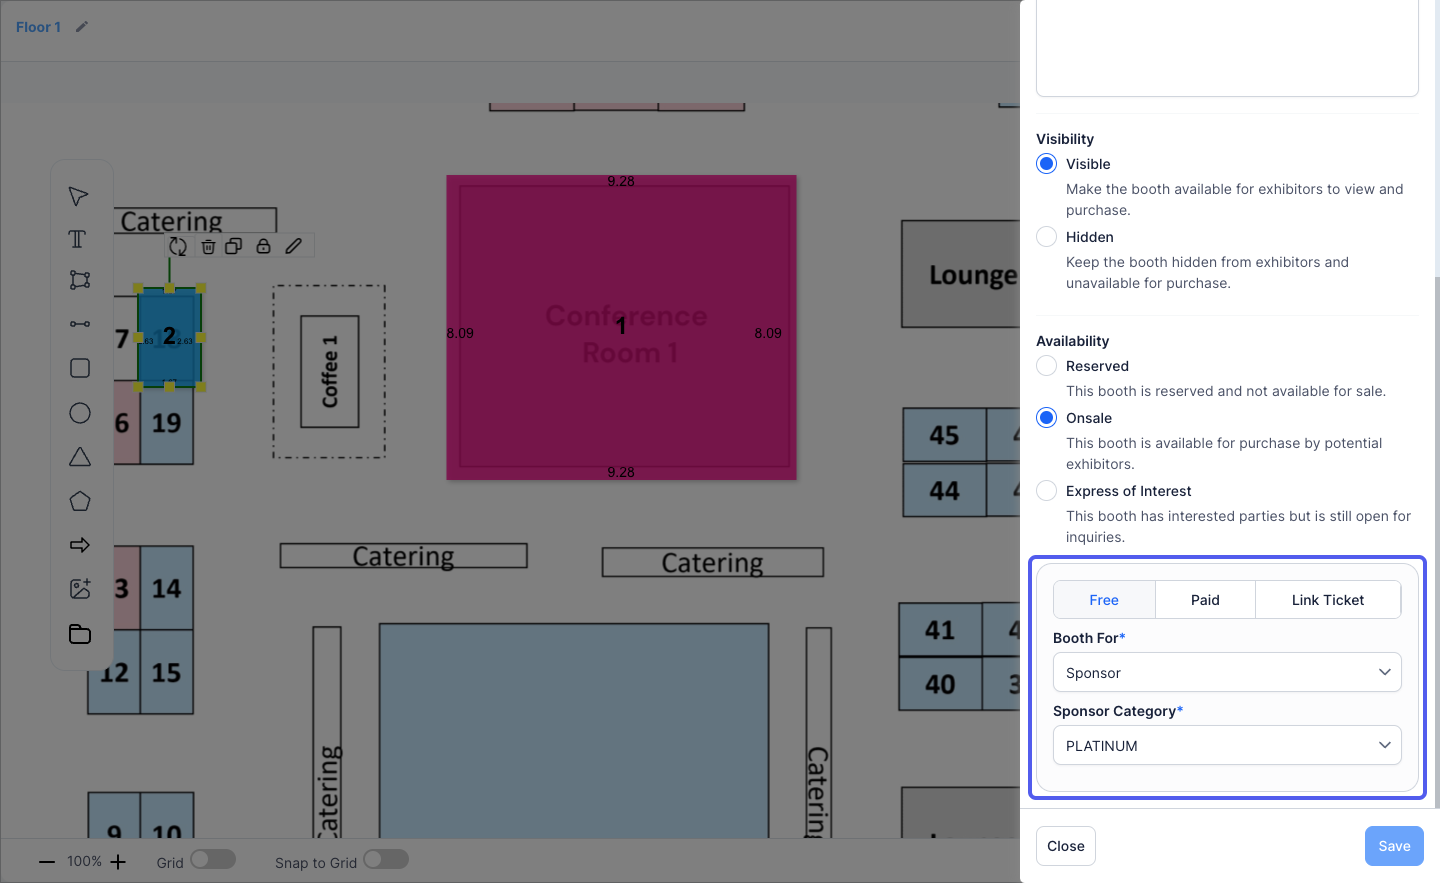
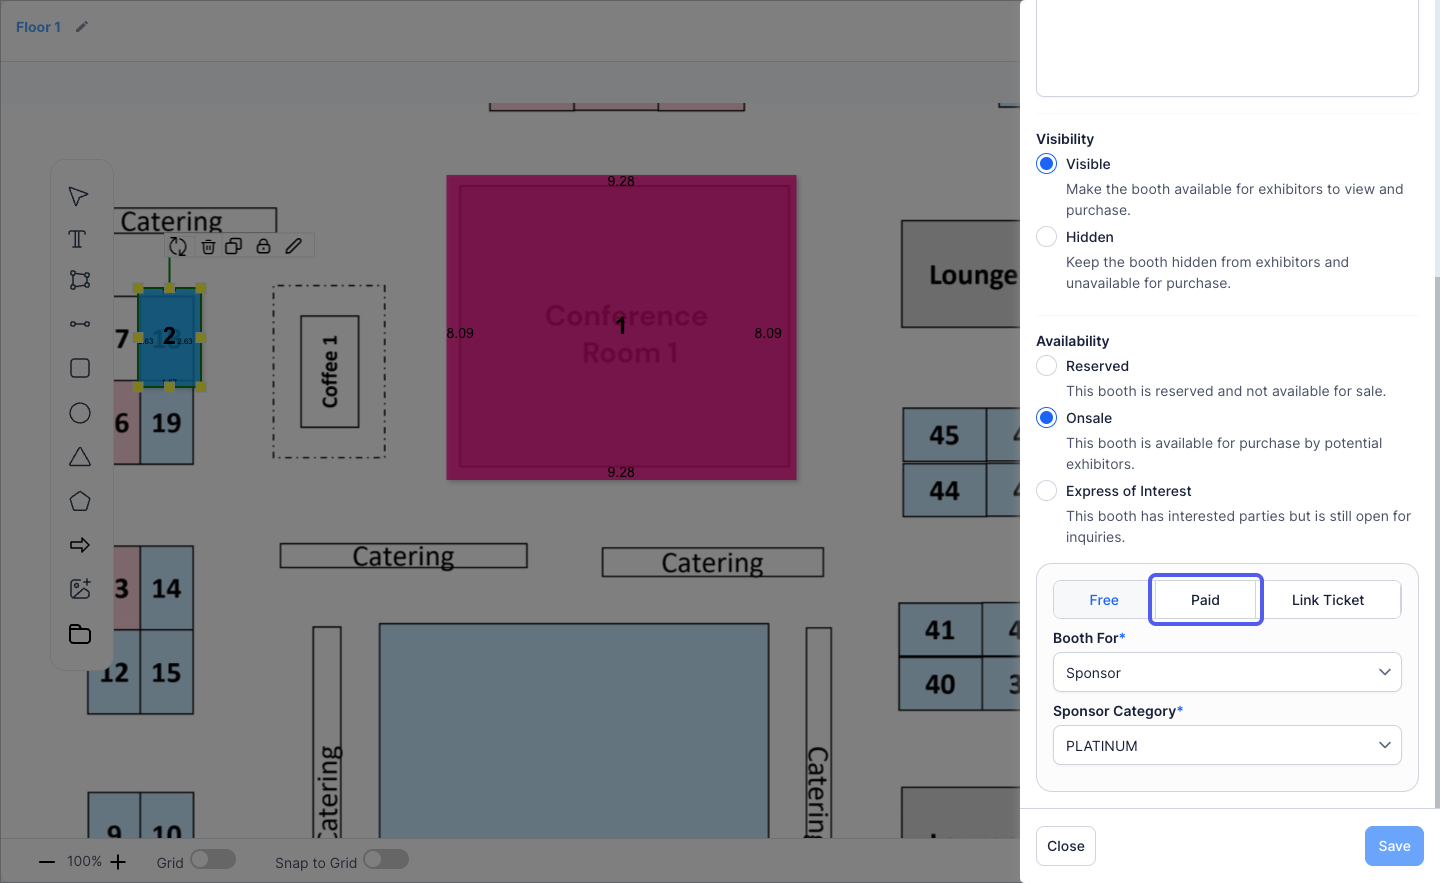
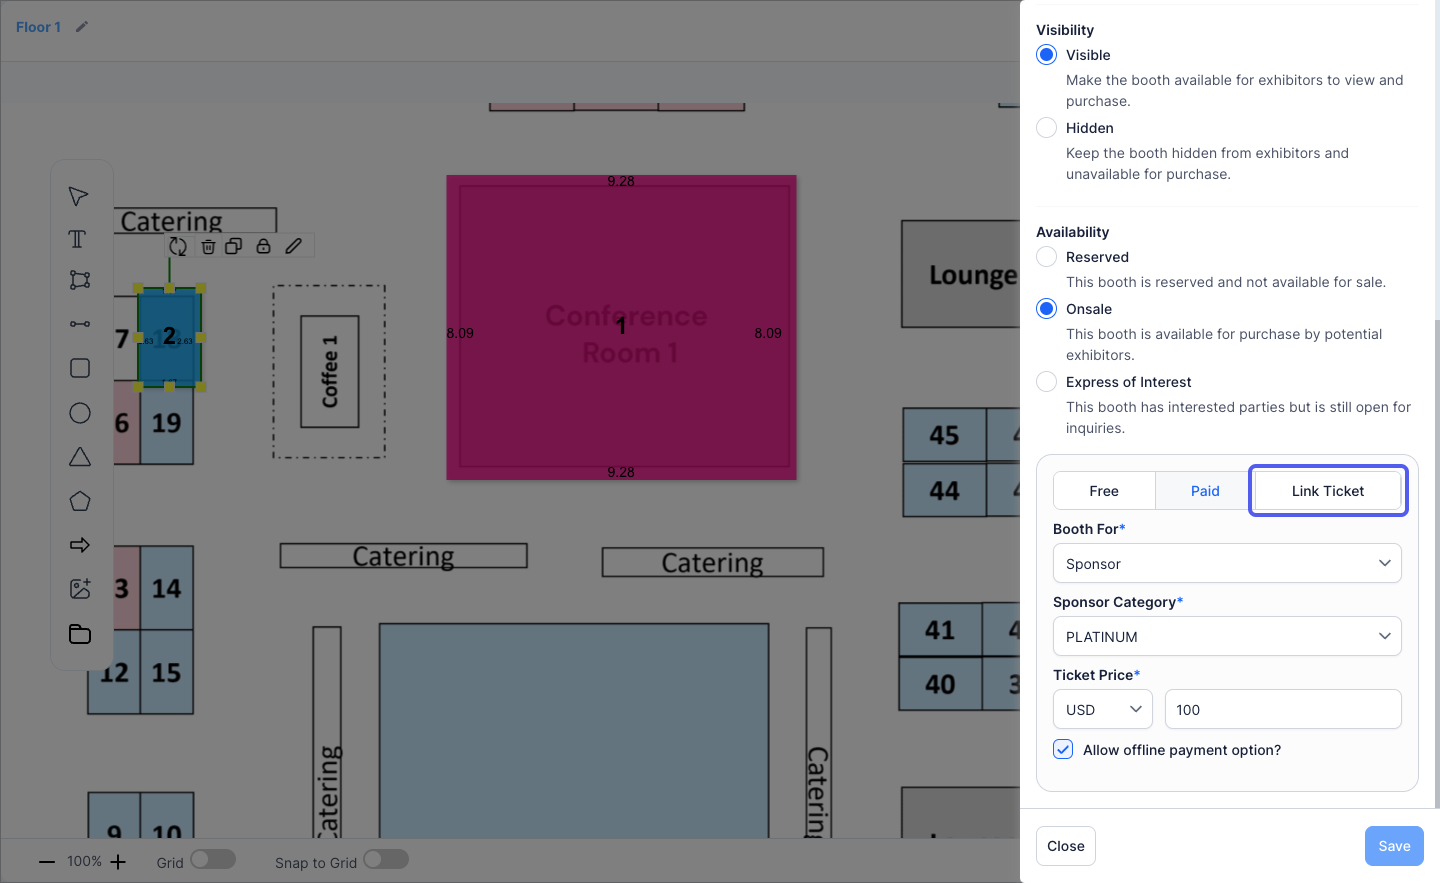
16: Mark it as "Onsale" to make it available for sale
17: An "Onsale" booth can be Free, Paid or Linked to a ticket
💡 Note on HOLD Status: If a booth is already on hold, the Buy button will not be shown to other attendees. A booth can only be purchased or booked by one person at a time. When a booth is marked as HOLD, it means the booth is currently under negotiation, or a party is actively considering purchasing it.
18: A Free booth can be linked to a sponsor or exhibitor
19: Paid booths can be sold by assigning a price to the booth
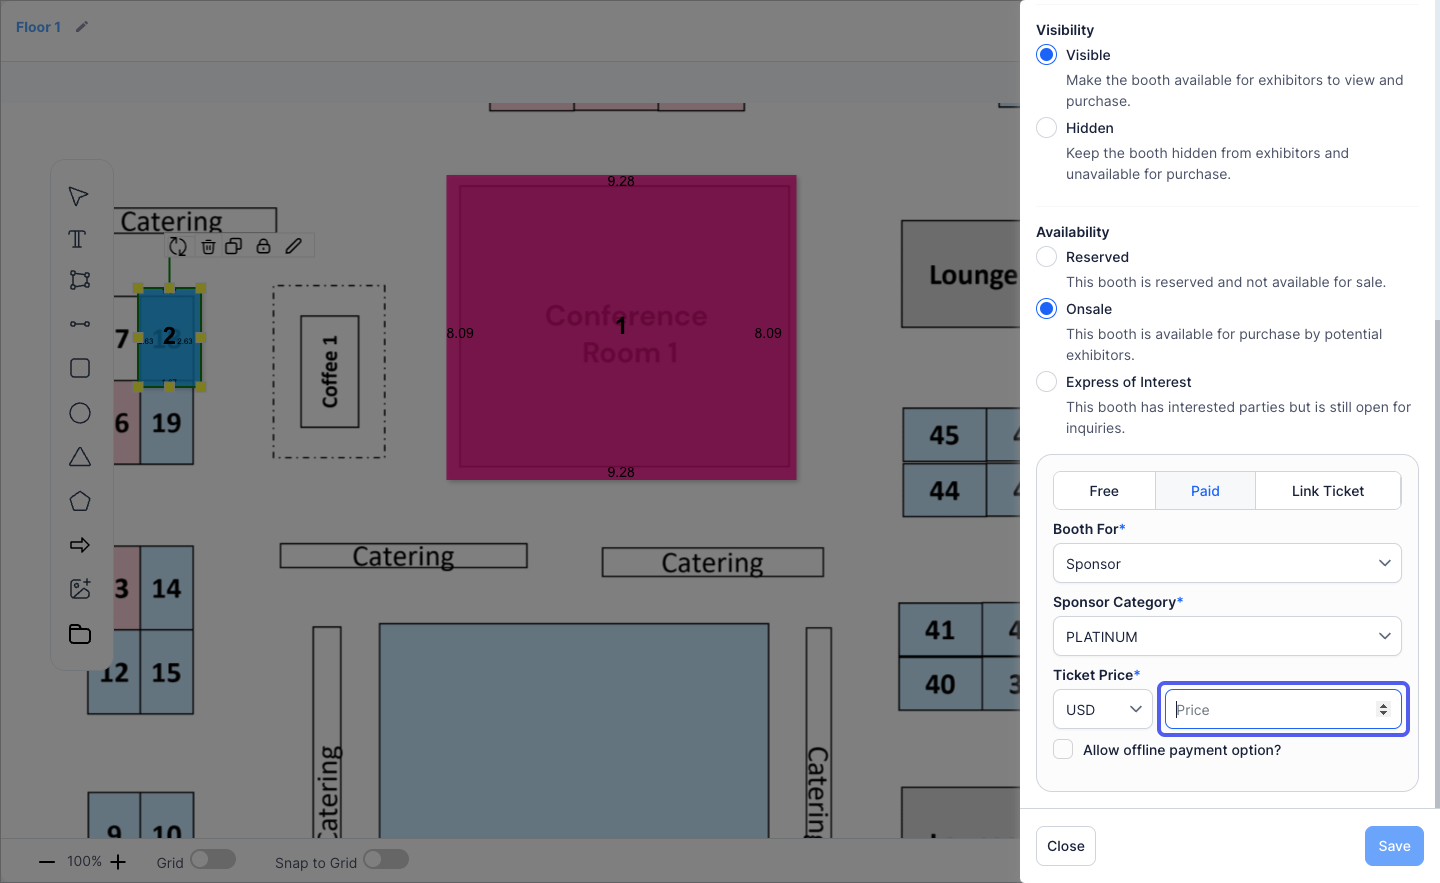
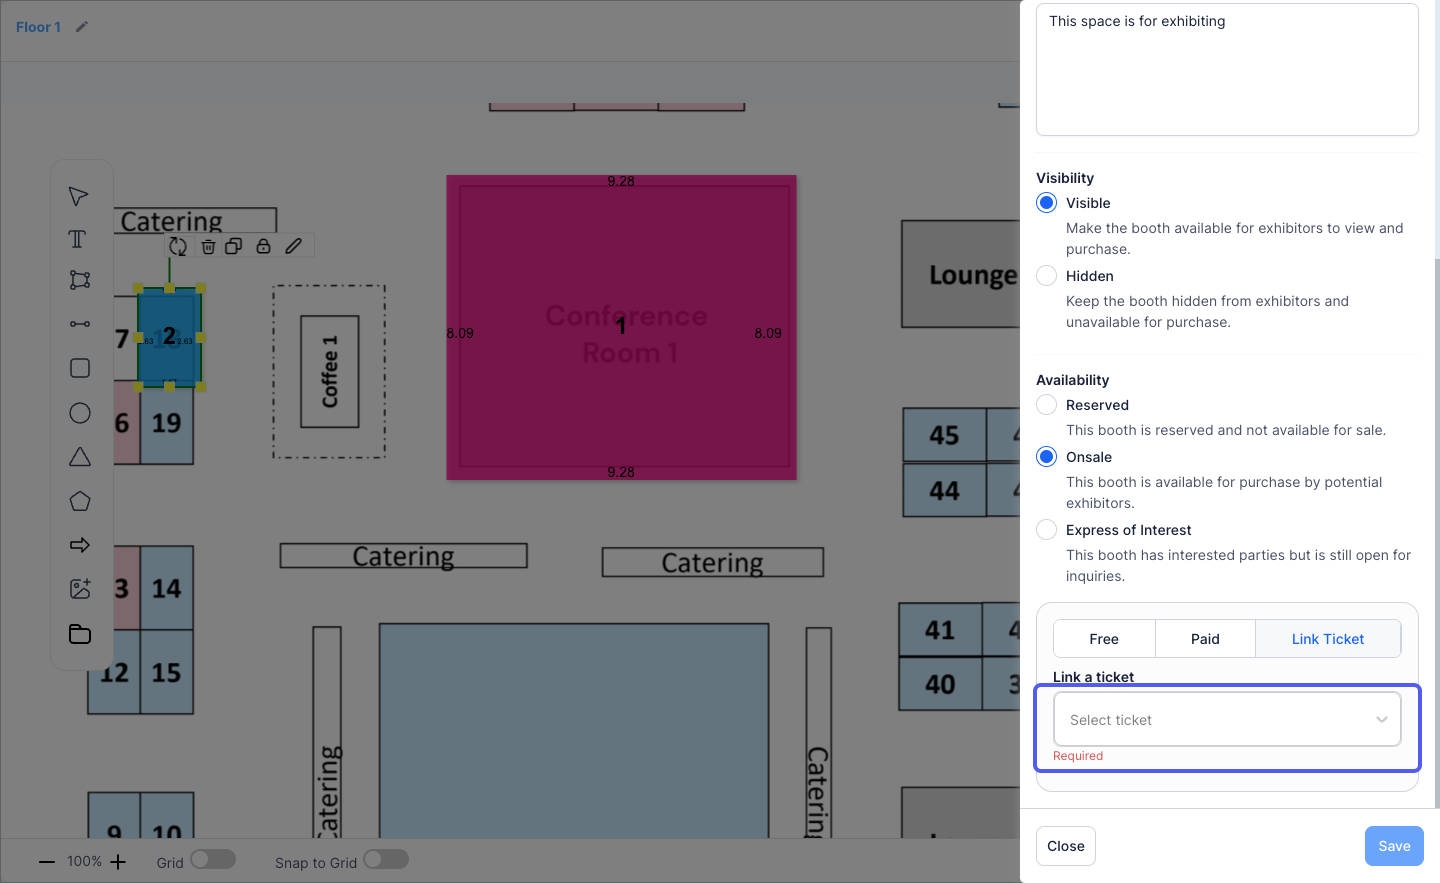
20: Select the selling currency
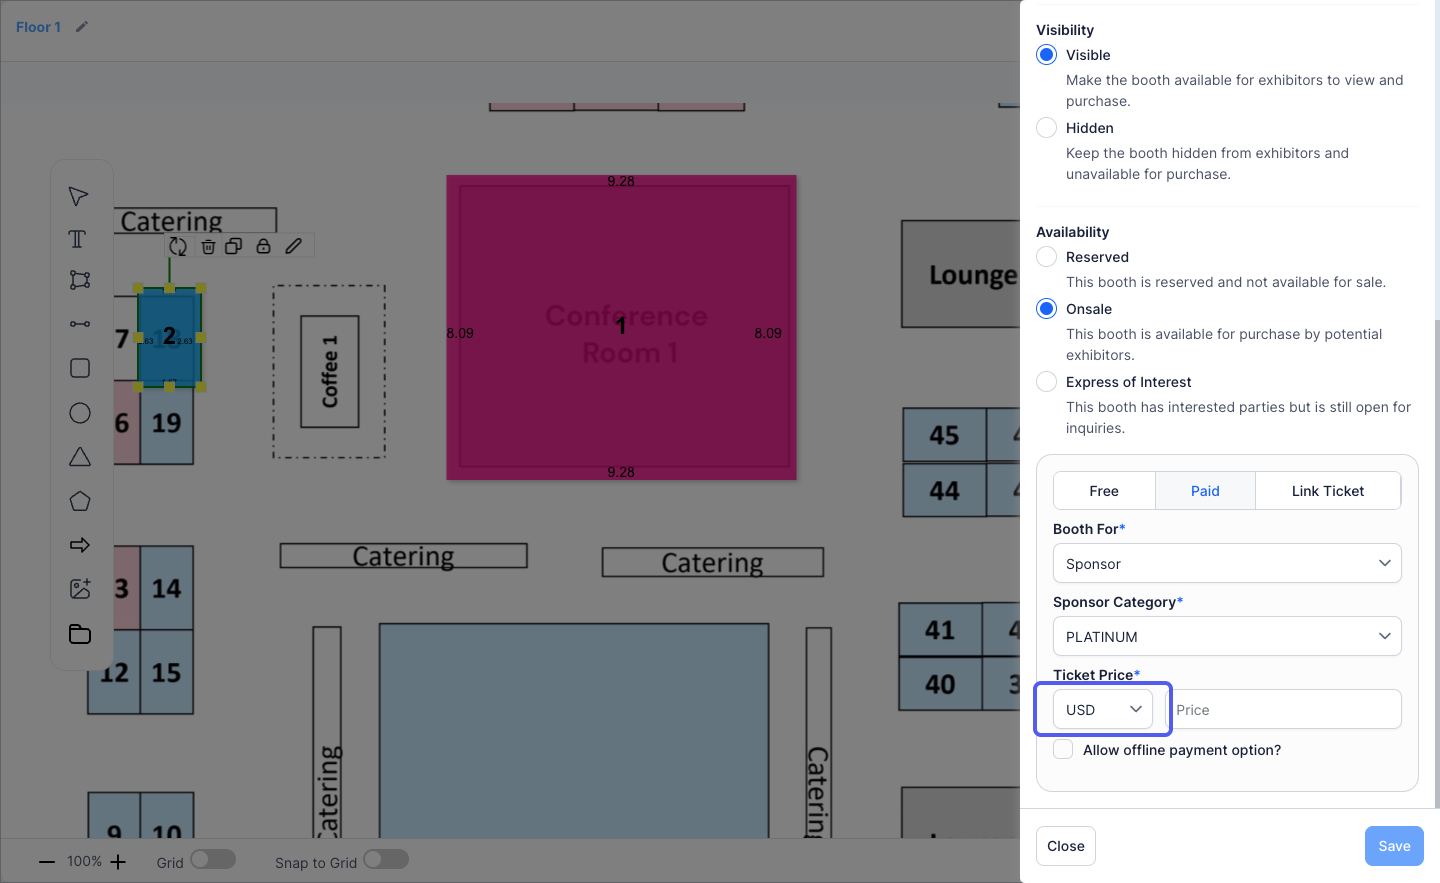
21: Set the selling price
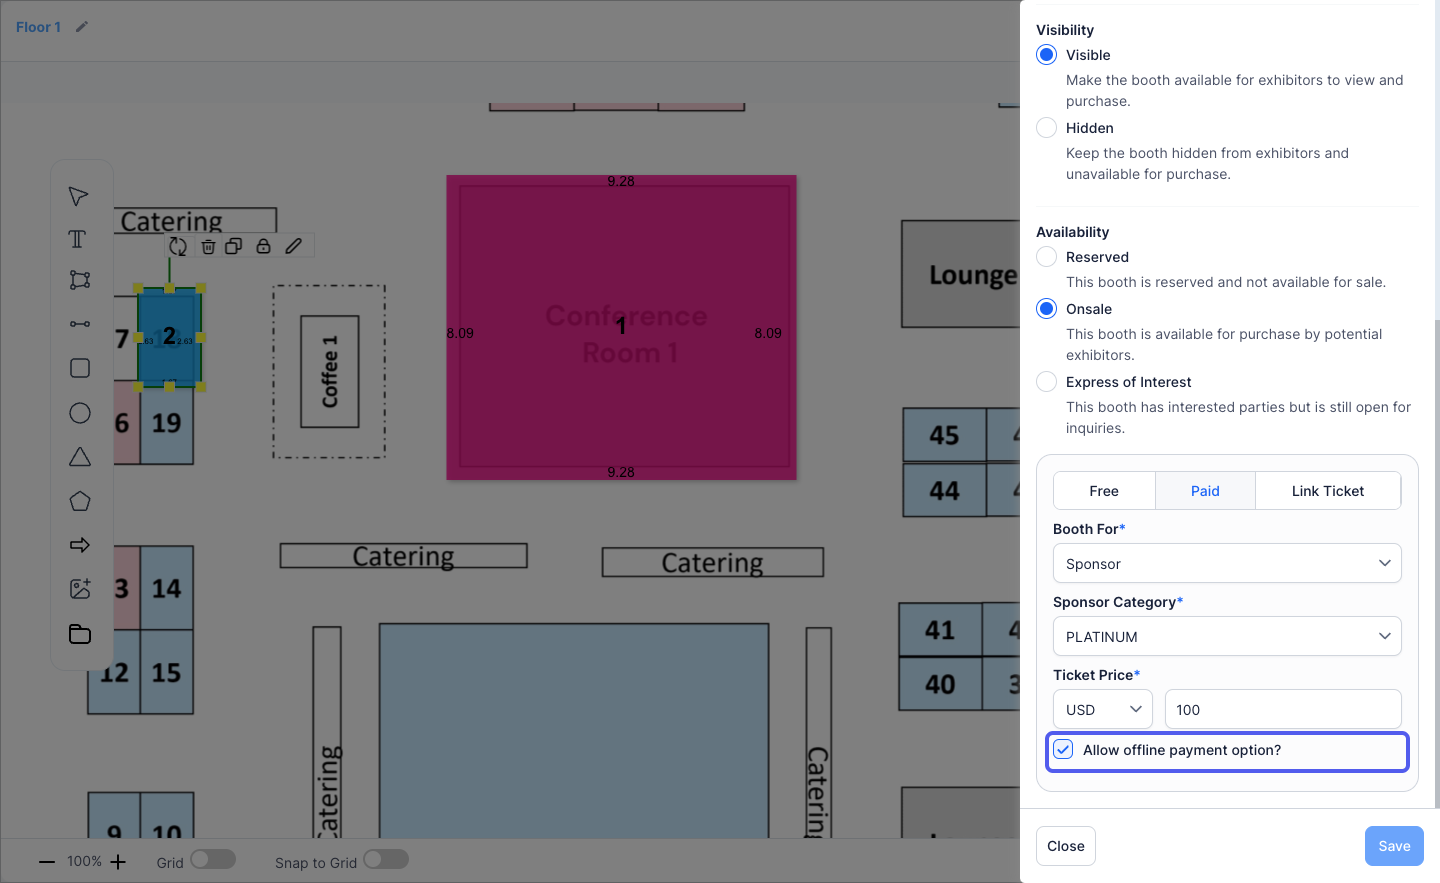
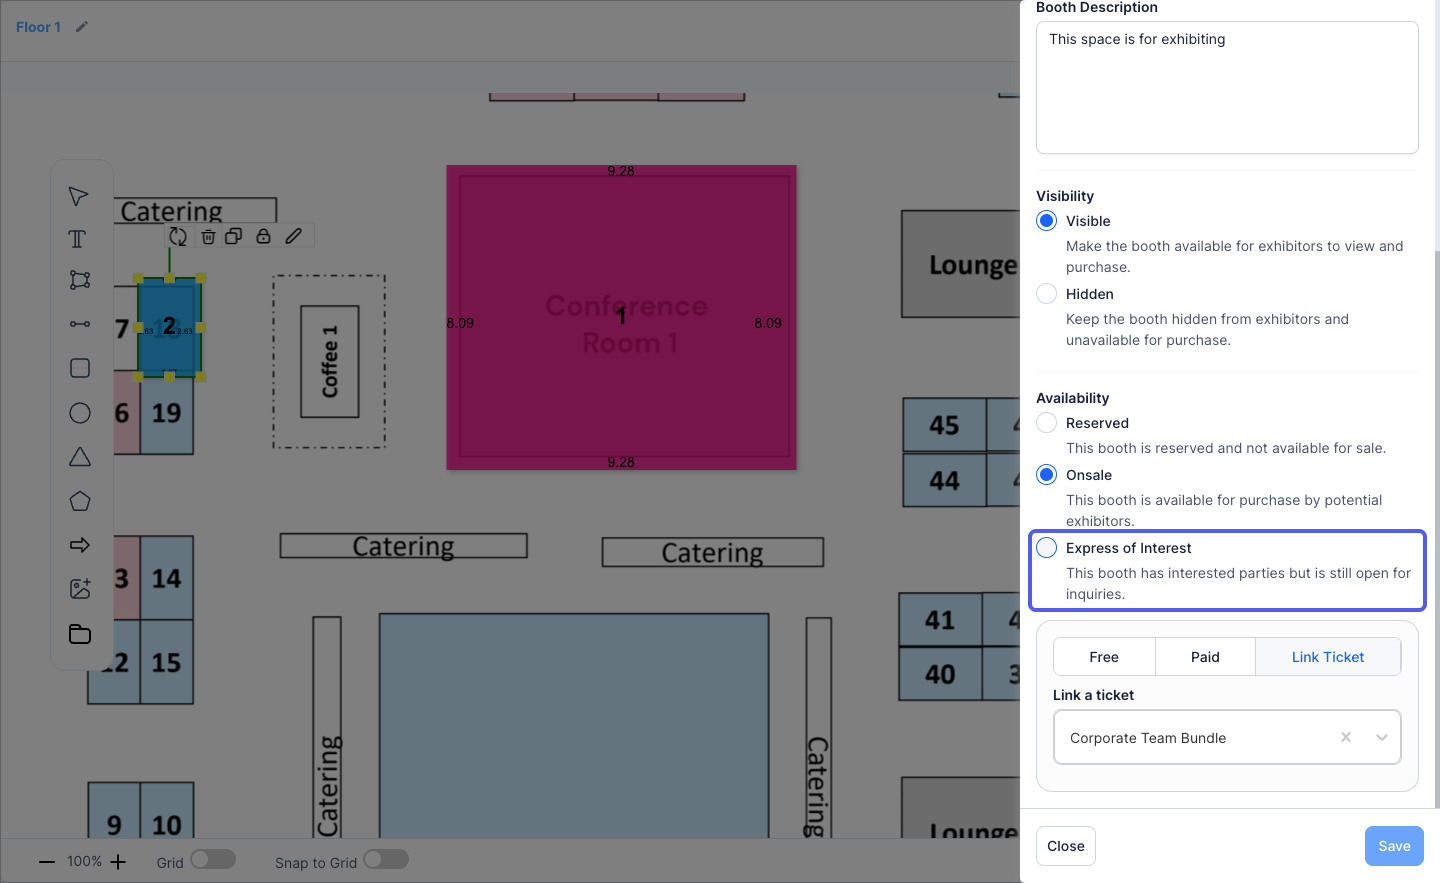
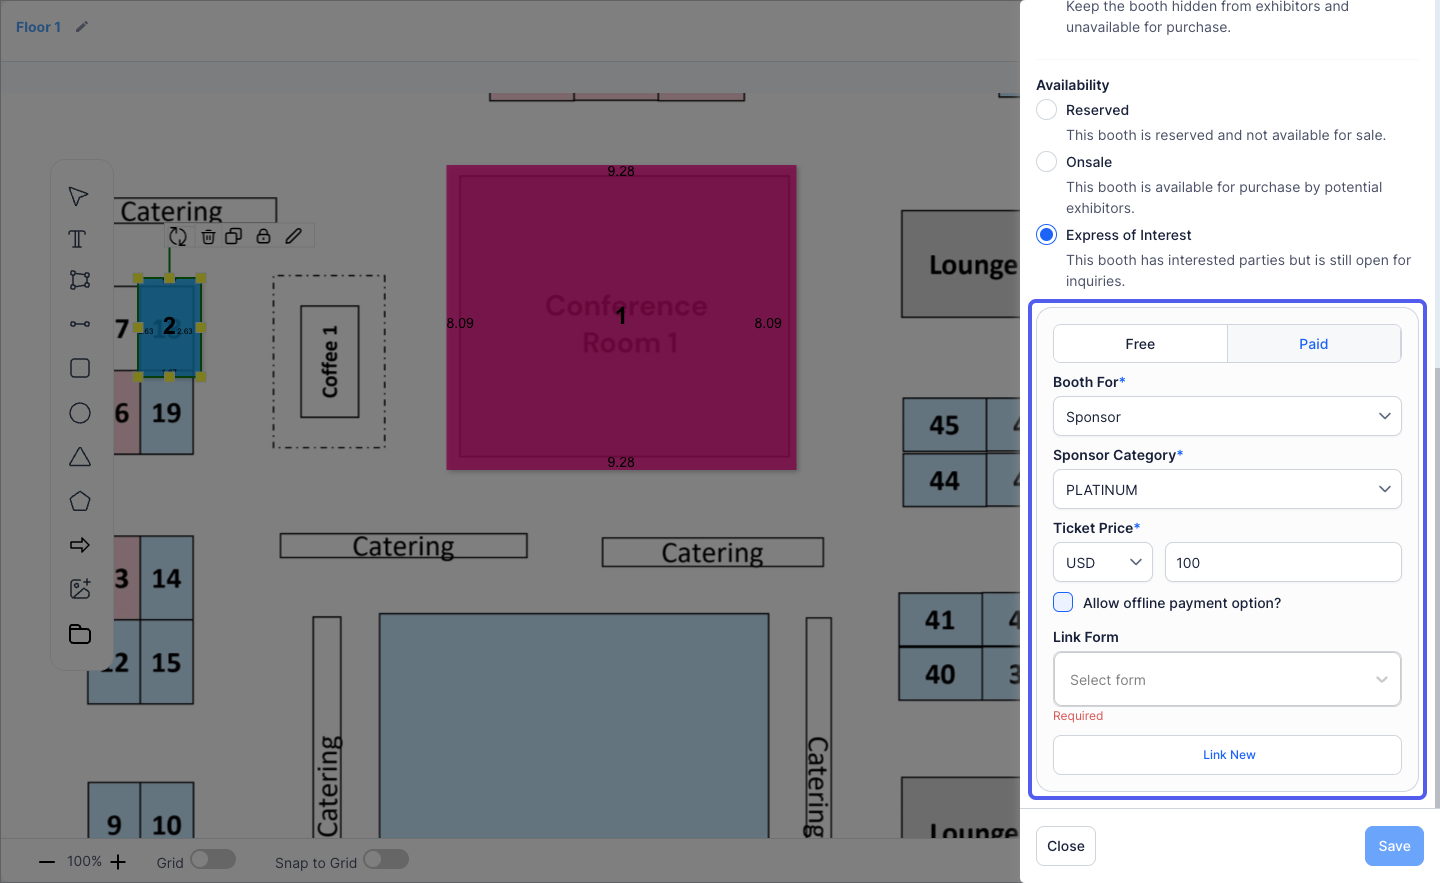
22: You can allow offline payments as well
23: Click "Link Ticket"
24: Click "Link a Ticket" if you want to sell the booth via a pre-created ticket
25: Click "Express of Interest" to make a booth available for potential buyer's inquiries
26: Express of Interest can be Free or Paid
27: You can Link the Booth form for collecting interest
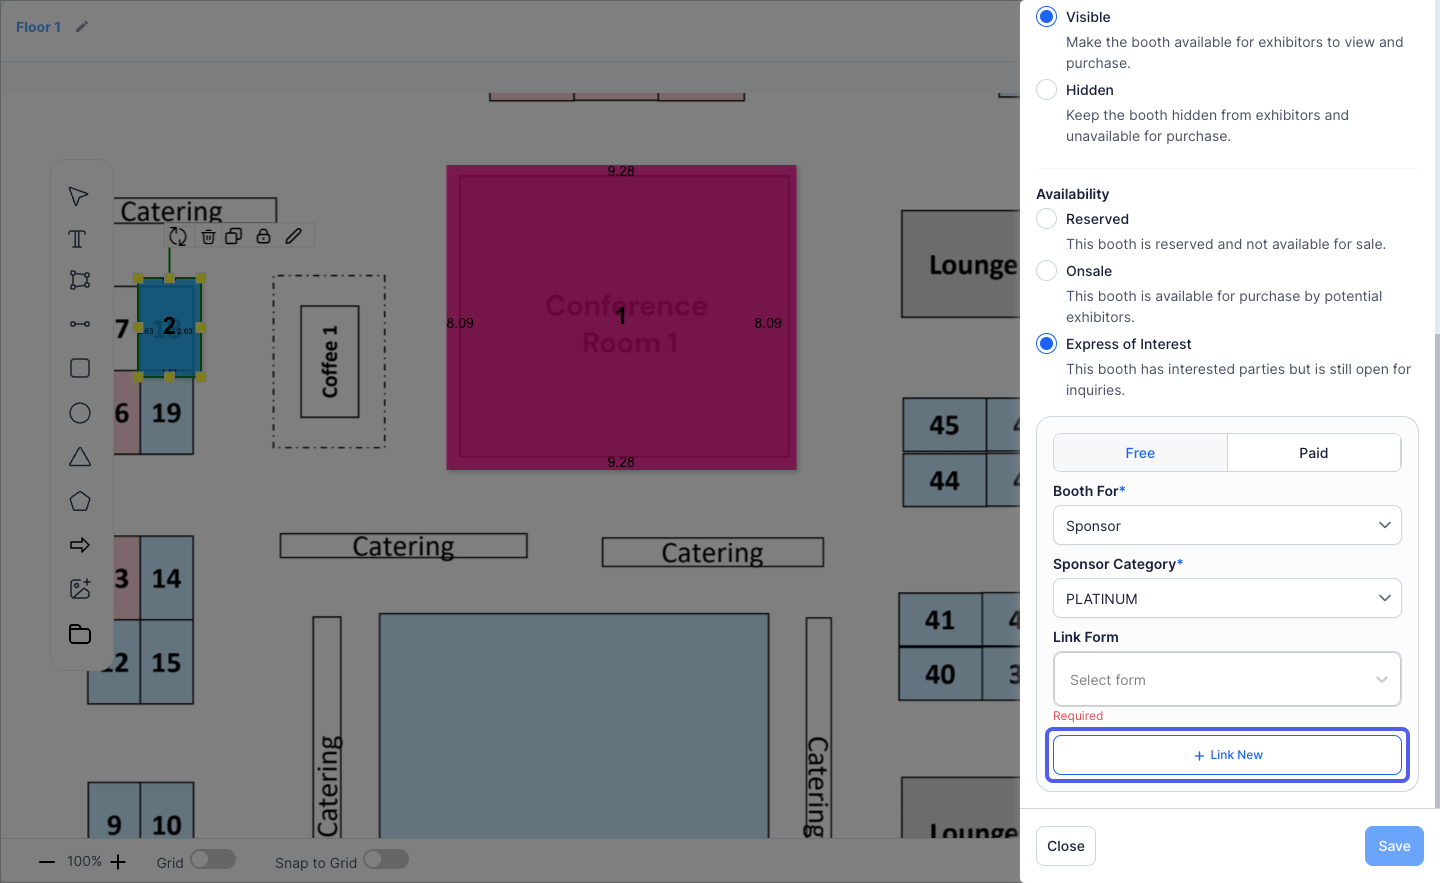
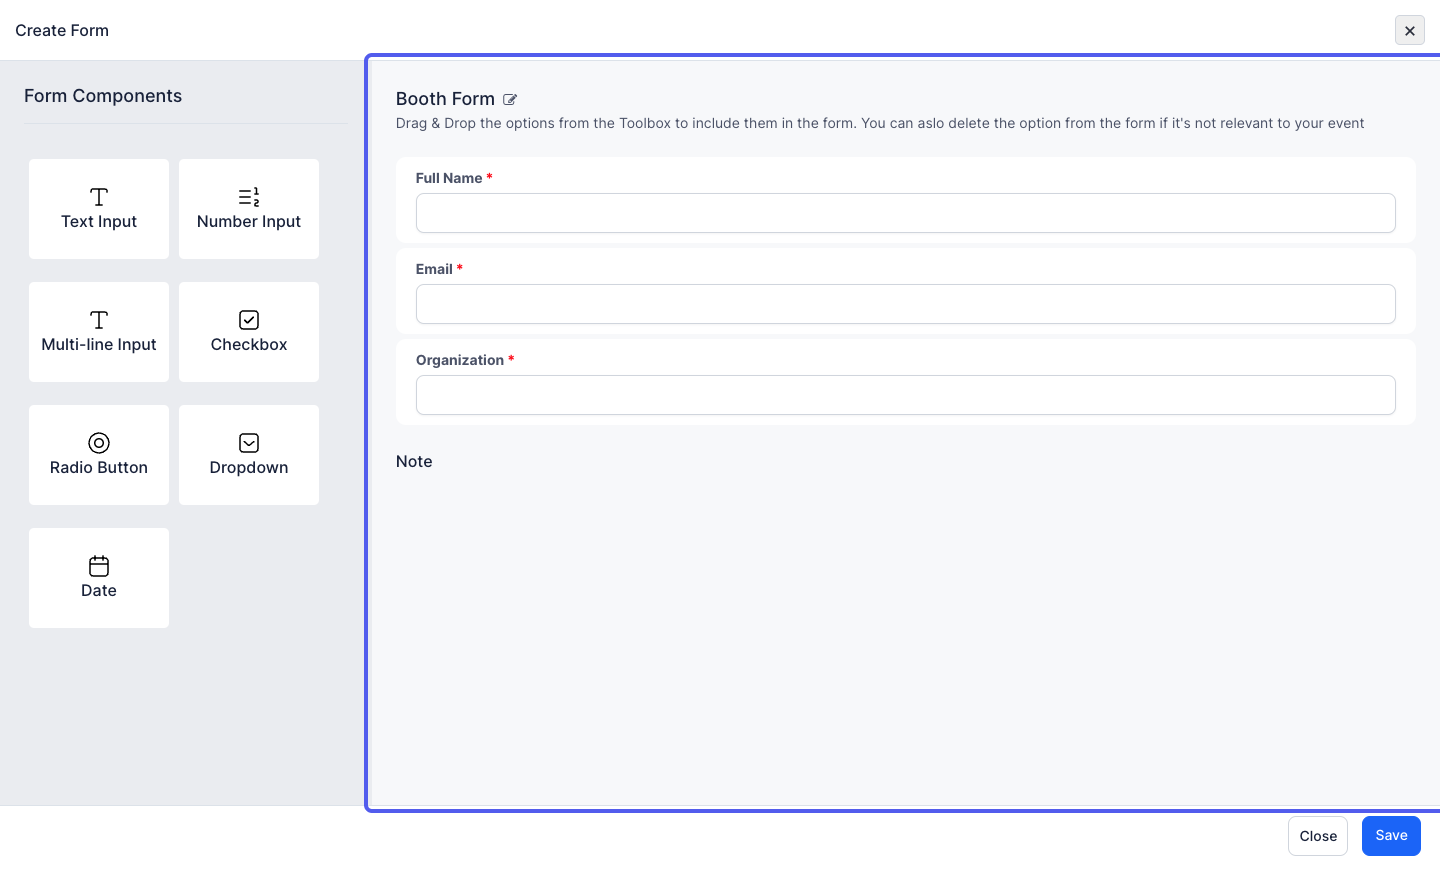
28: You can create a custom booth form
29: Click on Save to add the booth