
Checkout forms gather essential attendee data during ticket purchases and registration. Making key fields mandatory ensures you always collect the information you need. Here's how to set it up:
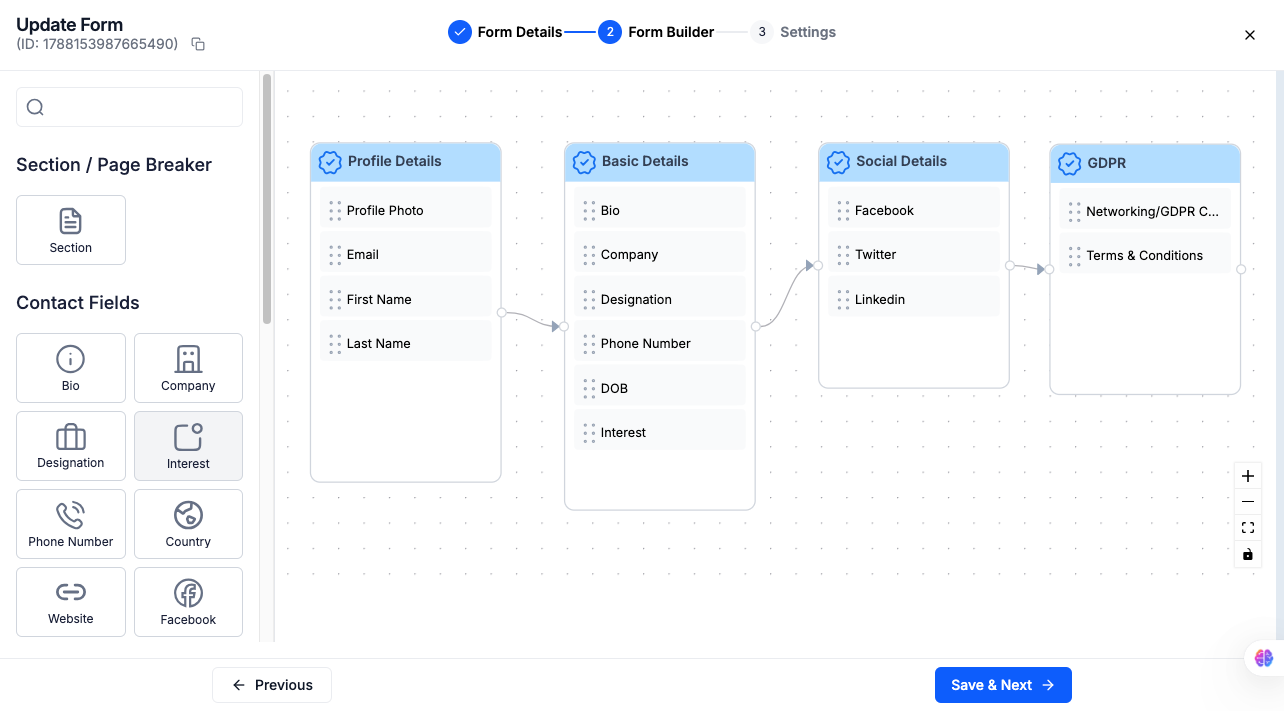
Go to Registration > Registration Forms, select the checkout or custom form you want to modify, and click Edit.
.png)
Hover over the field you want to make mandatory and click on it to open Field Settings.
In Field Settings, check Mark it mandatory. This requires attendees to fill in the field before they can submit the form.
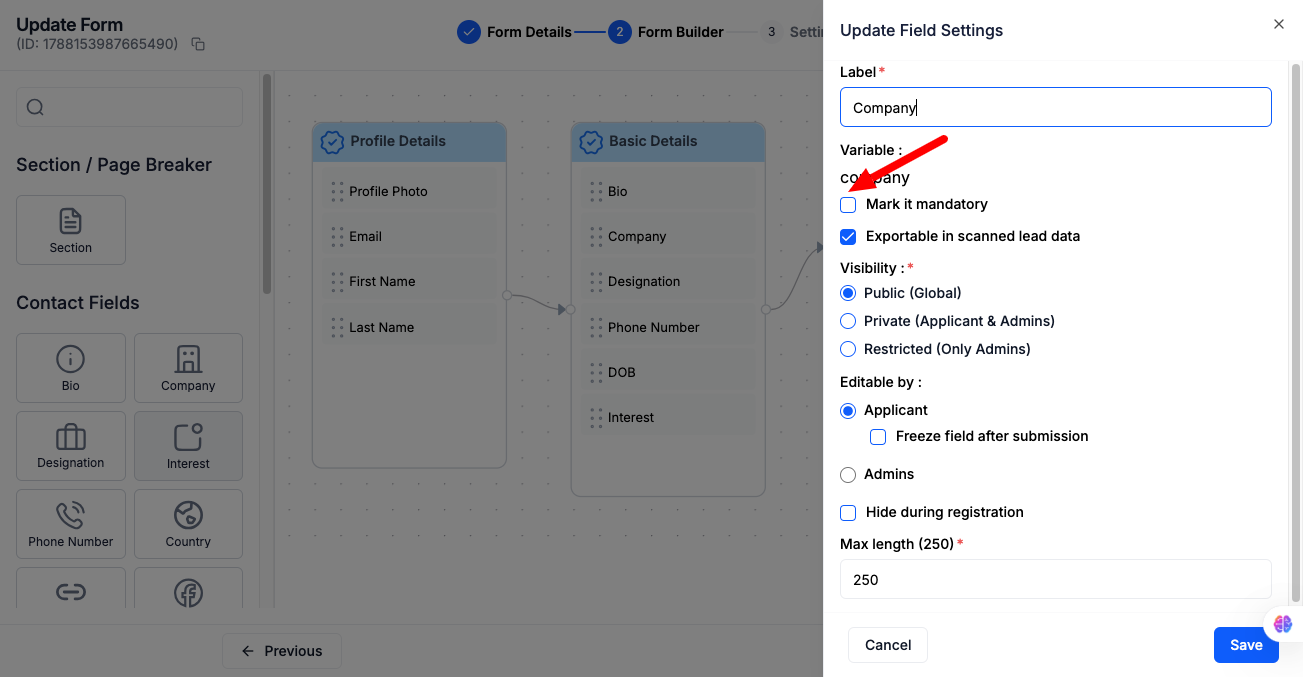
Click Save on the field settings, then click Save again on the form to apply the changes.
.png)
Q: Can I make a field mandatory only for certain attendees?
No. Mark it mandatory applies to everyone filling out that form. If you need different requirements for different attendee types, use a separate form or user group instead.
Q: Will marking a field mandatory affect attendees who already registered?
No. It only applies to new submissions made after the change. Existing registrations aren't retroactively affected.
Q: Can I make a hidden field mandatory?
If a field is hidden during registration, attendees won't see it to fill it in, so marking it mandatory at the same time can block form submission entirely. Make sure a mandatory field stays visible to attendees.
Q: What happens if an attendee tries to submit without filling a mandatory field?
The form will prompt them to complete the field before allowing submission.
Q: Can I set a maximum character limit along with making a field mandatory?
Yes. Max length and Mark it mandatory are independent settings in Field Settings — you can use both on the same field.
