Running an event is rarely a one-person job. Whether you have a co-organizer, a team member handling sessions, or someone managing check-ins on the ground, Eventify makes it easy to bring multiple admins on board. Here are two ways to do it.
This is the most straightforward way to add a new admin to your account.
Log in to the Eventify Admin Panel and click on your profile icon, usually found in the top corner of the screen.
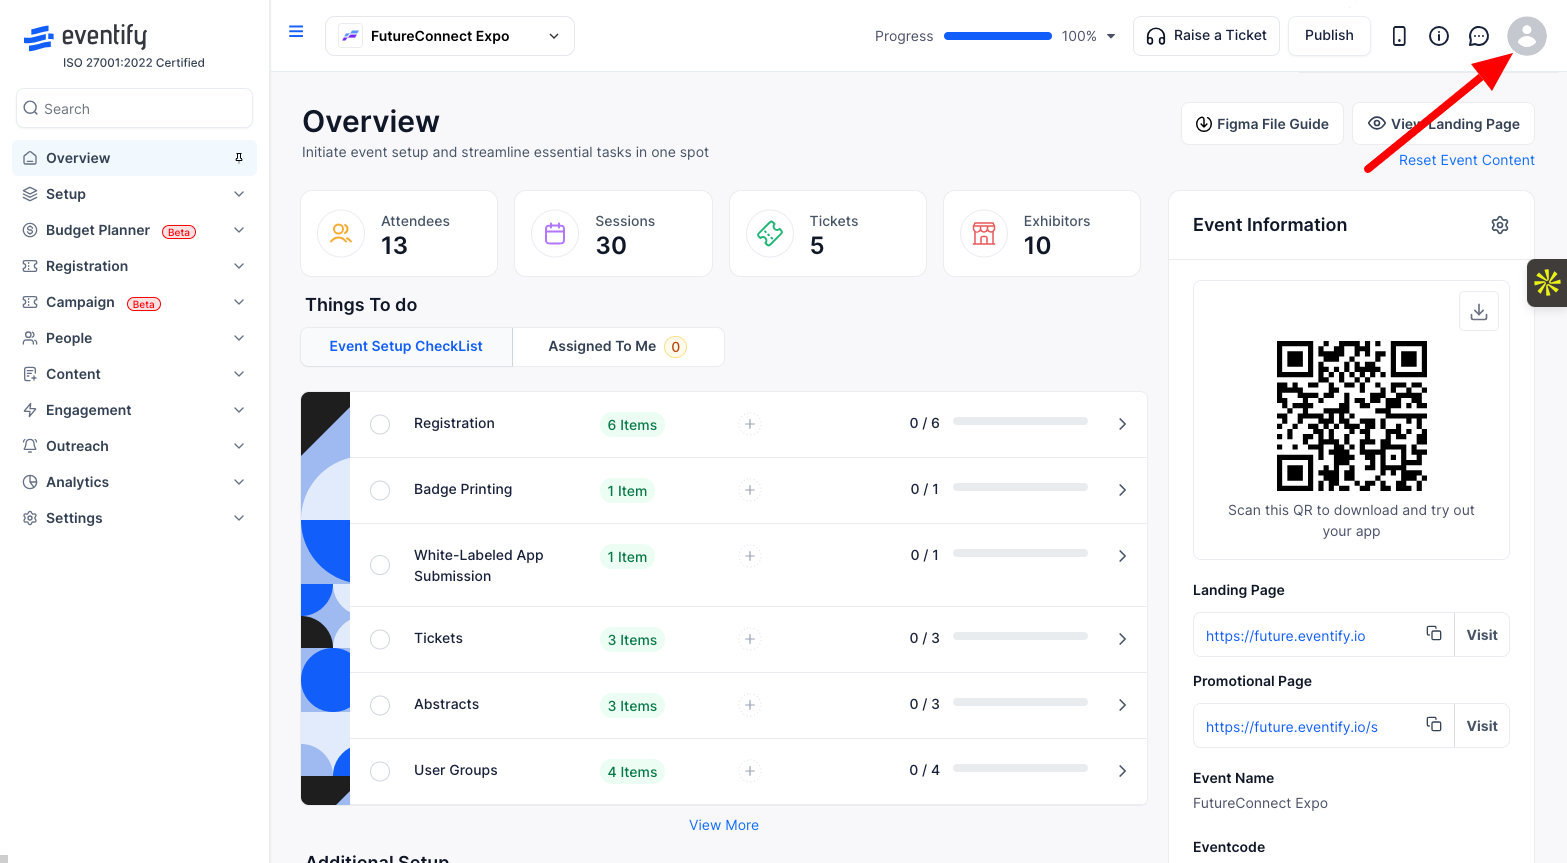
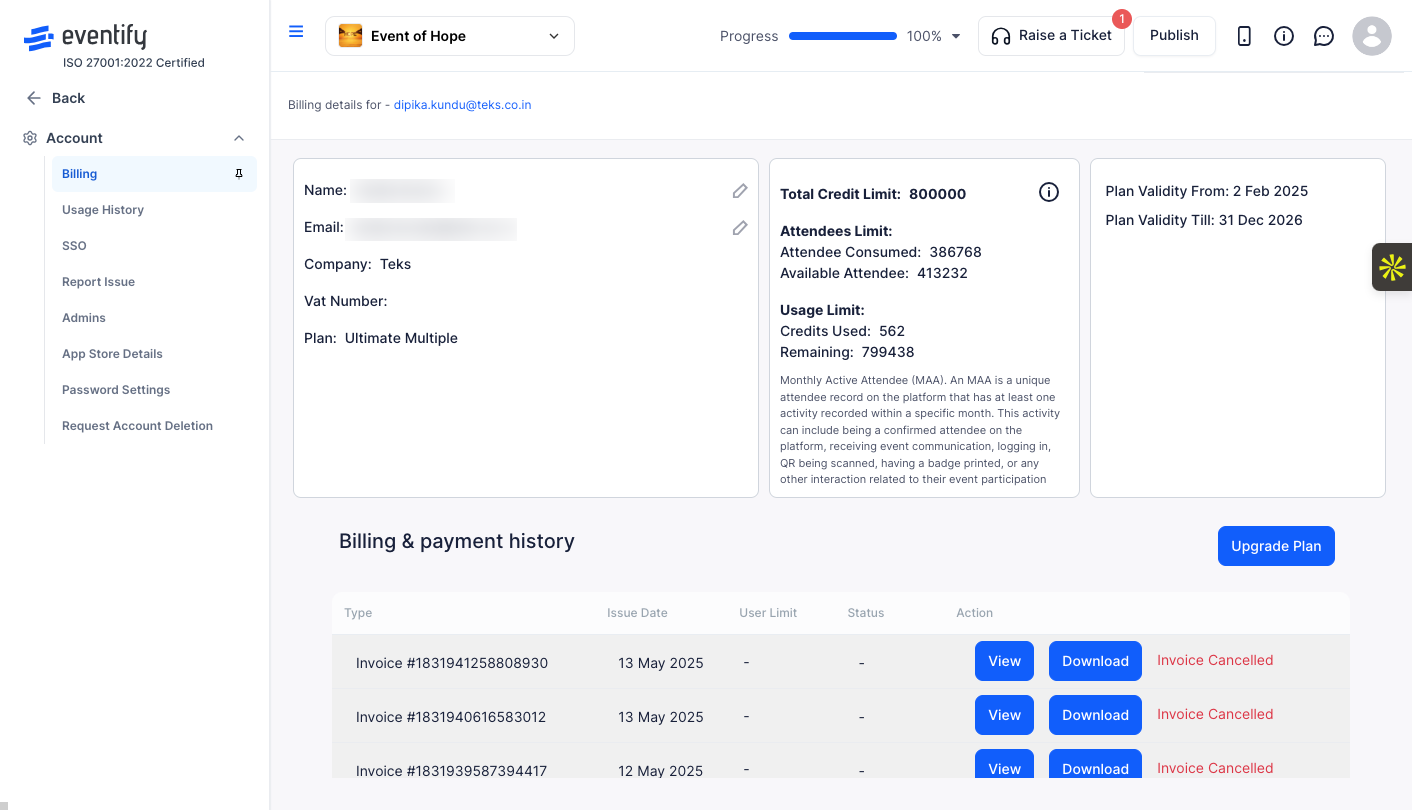
From your profile, navigate to Account Settings. This is where you manage everything related to your account, including who has admin access.
You'll see a sidebar on the left. Look for the "Admins" option and click on it. This will show you a list of all current admins on your account.
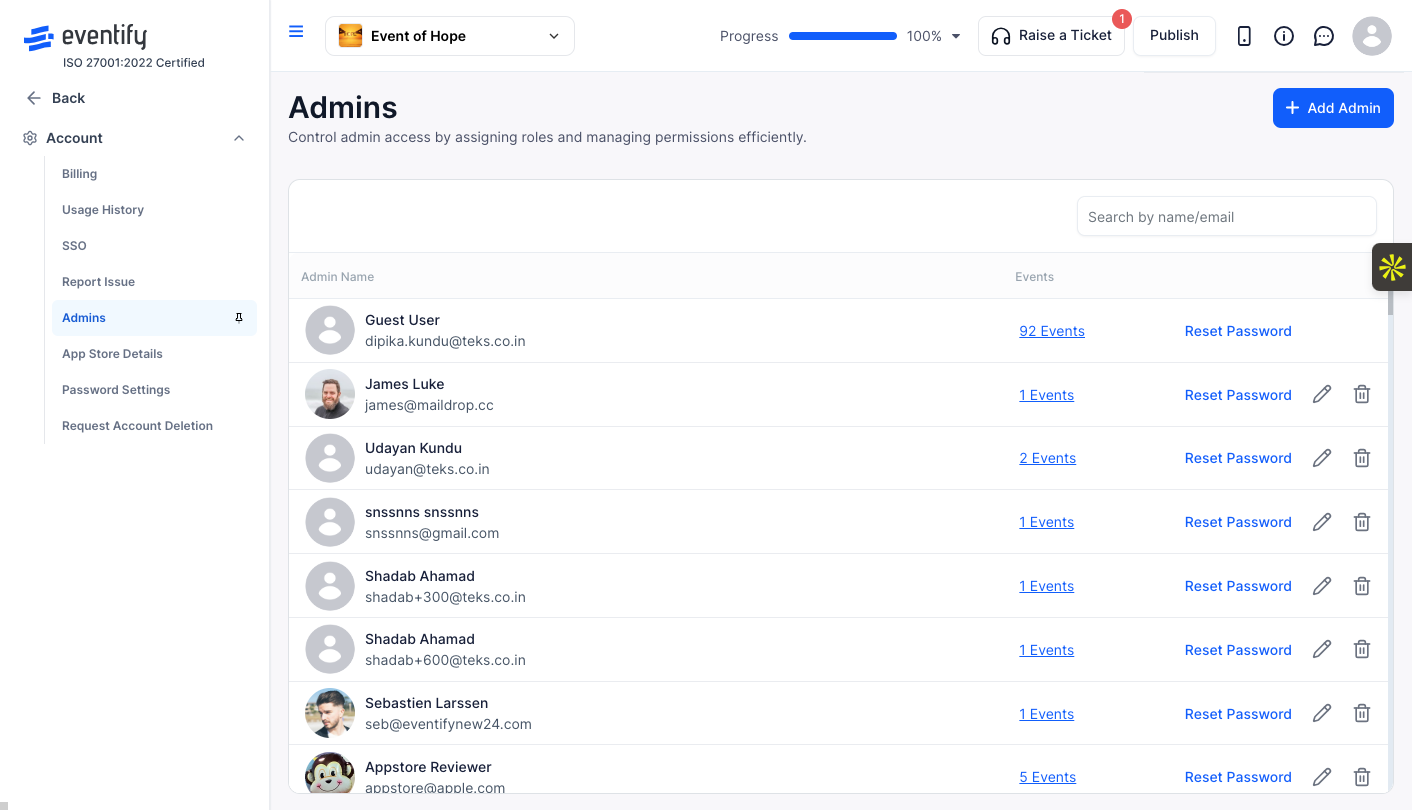
Hit the "Add Admin" button to start adding a new administrator.
.png)
Enter the new admin's first name, last name, and email address. Take a moment to double-check the email — that's how they'll receive their login credentials.
Choose the specific event you'd like to give this admin access to. You can assign them to one or multiple events depending on your needs.
Create a password for their admin account. Make sure it's something secure, and share it with them directly or use the email option in the next step.
Tick the option to send an email with login credentials to the new admin. This saves you the hassle of manually sharing the details.
Hit the final "Add Admin" button to save everything. The new admin will now appear in your admins list, and they're good to go.
If you prefer working directly inside the event panel, you can also add an admin through the attendee management section. This method is handy when you want to add someone as an attendee and give them admin access at the same time.
Step 1: In the Admin Panel, go to People > Manage Attendees.
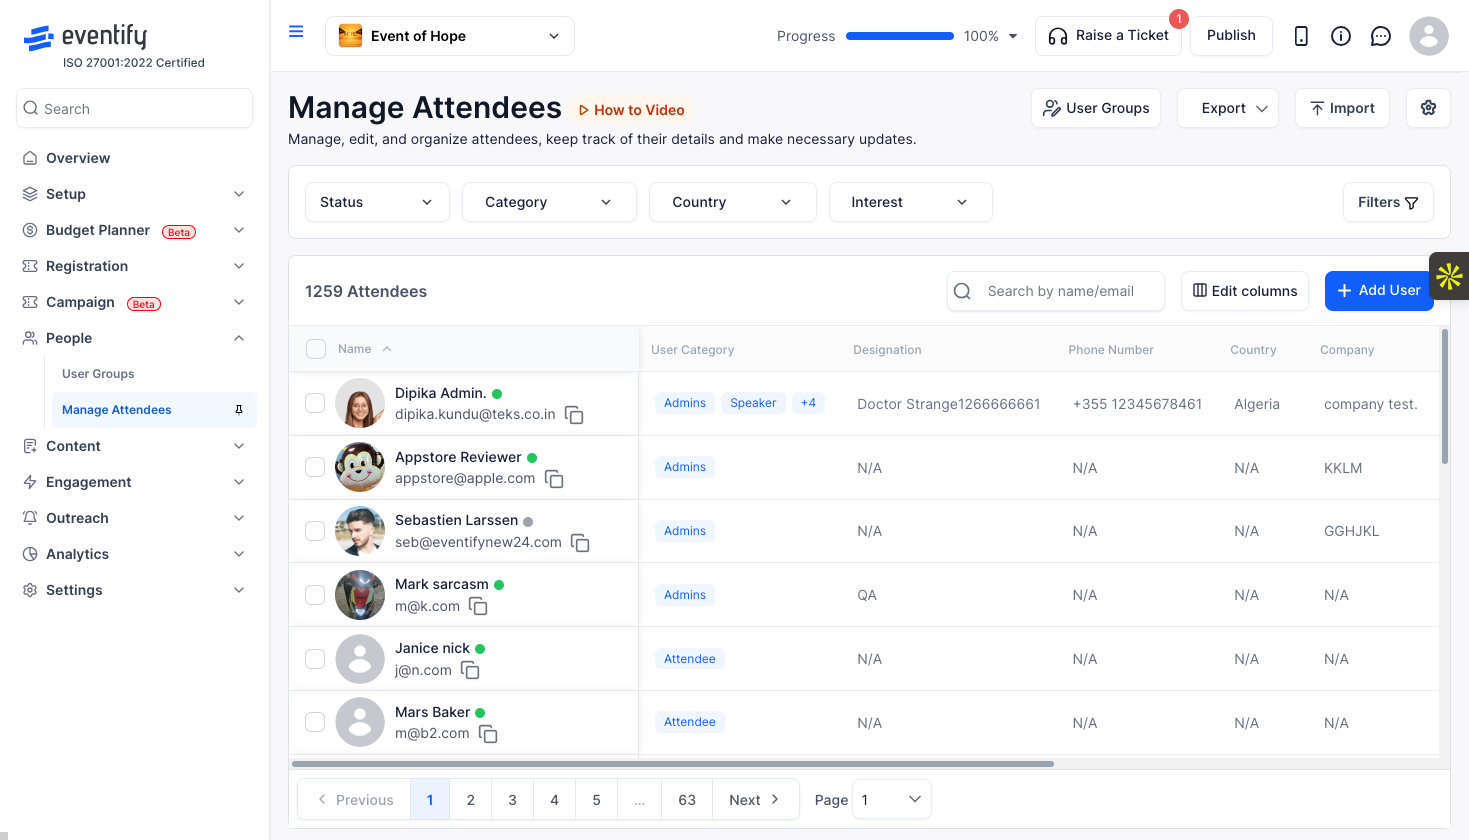
Step 2: Click on Add New to create a new user profile.
Step 3: Fill in the person's details — their first name, last name, and email address.
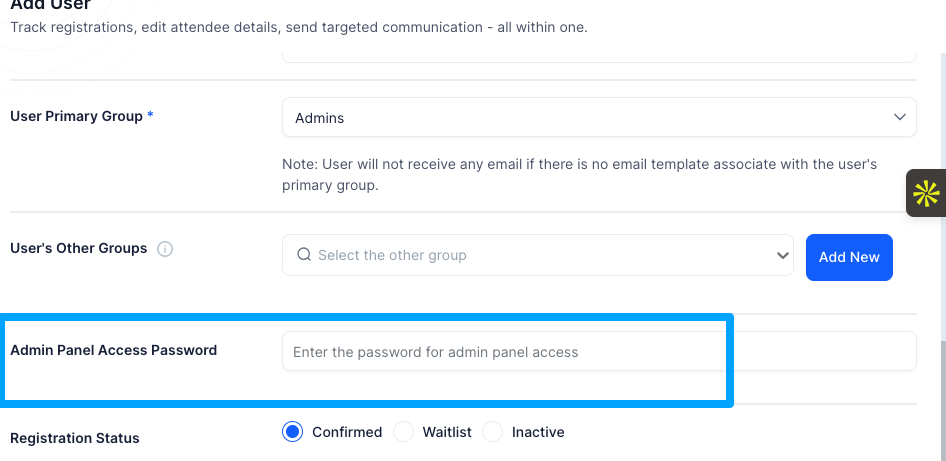
Step 4: Under the Primary User Group field, select the Admin user group. This is what grants them admin-level access to the event.
.png)
Step 5: Optionally, you can also set an Admin Panel Access Password for them right from this screen.
Q: Can I add an admin to just one event, or does it apply to all my events?
When adding an admin through Account Settings, you can choose which specific event or events they have access to. They won't automatically get access to everything on your account — you're in control of that.
Q: What can an admin do once they're added?
Admins can manage the event just like you can — editing sessions, managing attendees, sending notifications, and more. Their level of access depends on the user group and any permissions you've set up.
Q: What's the difference between the two methods of adding an admin?
The Account Settings method is best for adding a dedicated co-admin to your account. The People > Manage Attendees method is useful when you want to add someone who is also an event attendee and give them admin-level access at the same time, particularly because it lets you assign them to a specific user group and set their panel access password in one go.
Q: Can I remove an admin later if needed?
Yes, you can go back to the Admins section in Account Settings and remove any admin who no longer needs access. It's a good idea to clean up your admin list after an event wraps up.
Q: What happens after I add the admin — do they get notified automatically?
If you check the option to send an email with credentials during setup, they'll get an email right away with everything they need to log in. If you skip that option, you'll need to share the login details with them manually.
Q: Can an admin add other admins?
That depends on the permissions assigned to their account. By default, full admin access allows management of the event, but account-level actions like adding more admins may be restricted to the primary account owner.
