
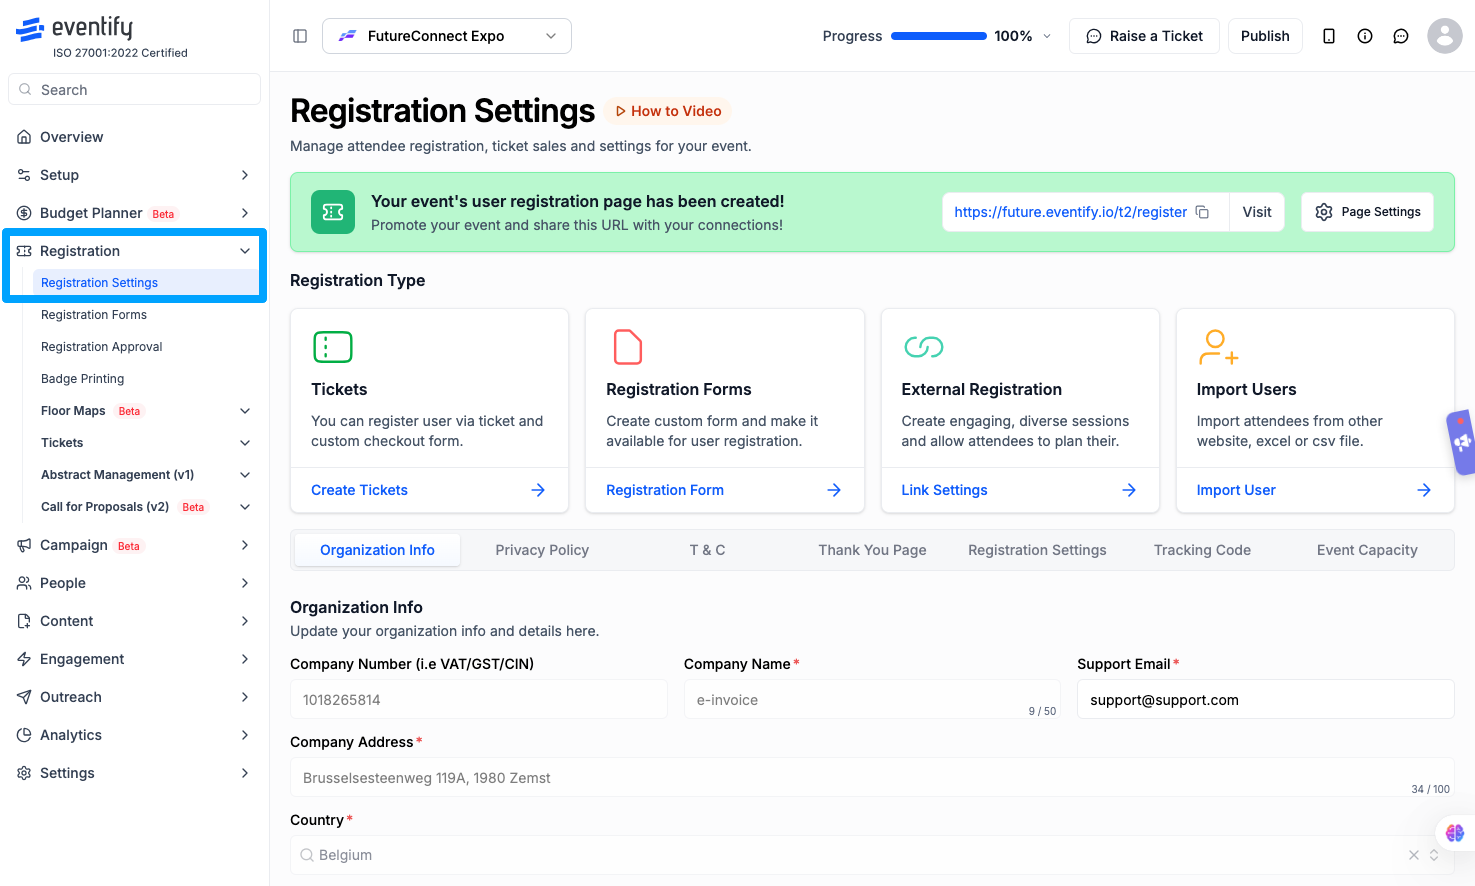
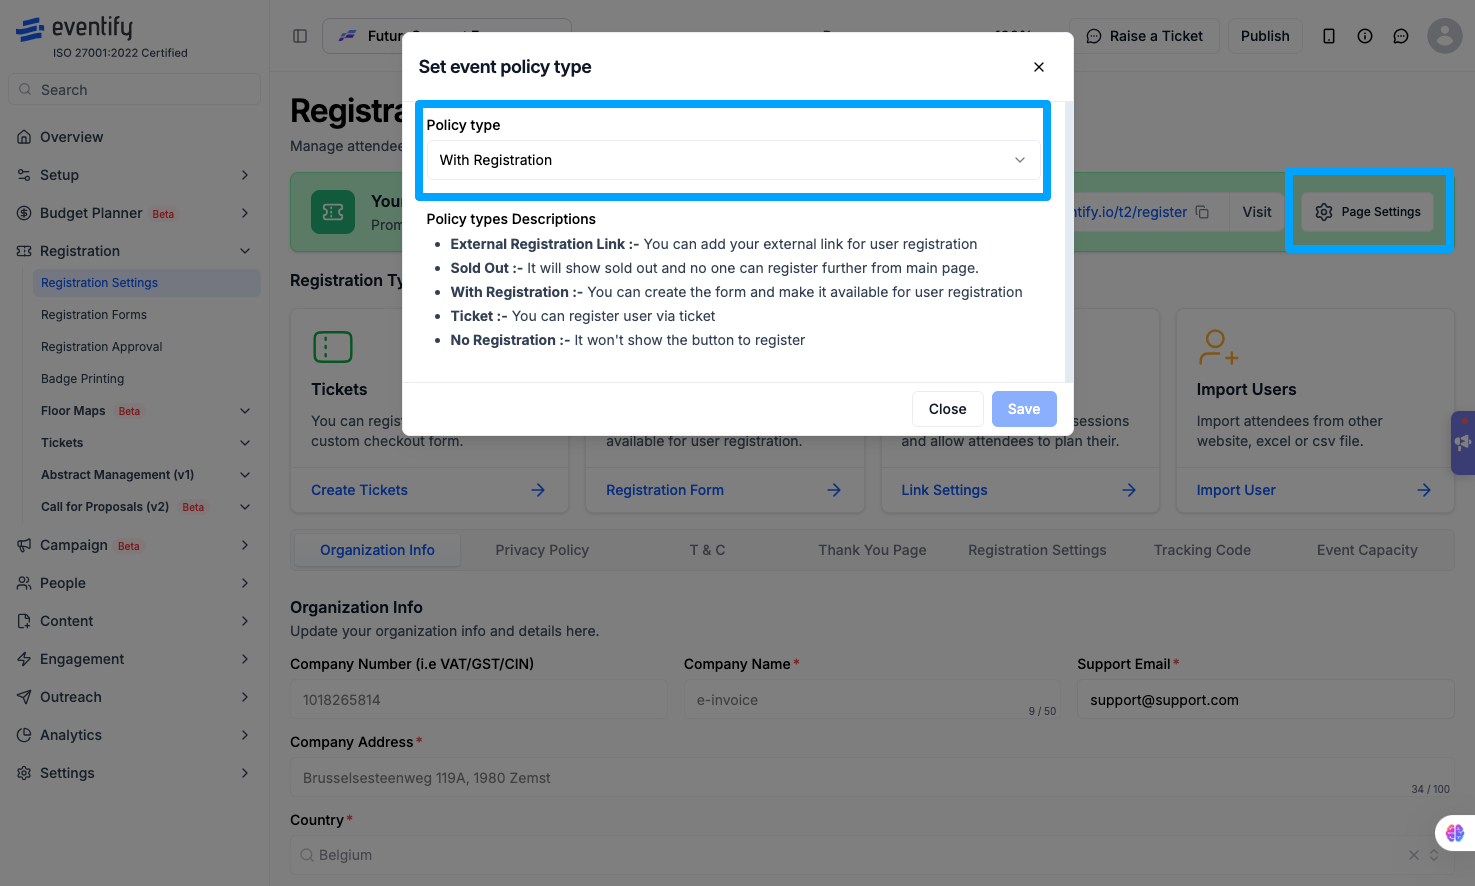
To create a registration link for an event in Eventify, set the policy type to With Registration and copy the link shown at the top of the Registration Settings page.
Eventify lets you share a public registration link so anyone can sign up for your event without an invite. Here's how to set it up.
.png)
Q: Do I need to change any settings before sharing the link?
Yes — make sure your registration policy is set to "With Registration" (not "External Registration Link") so the public link is generated.
Q: Where can I find my public registration link?
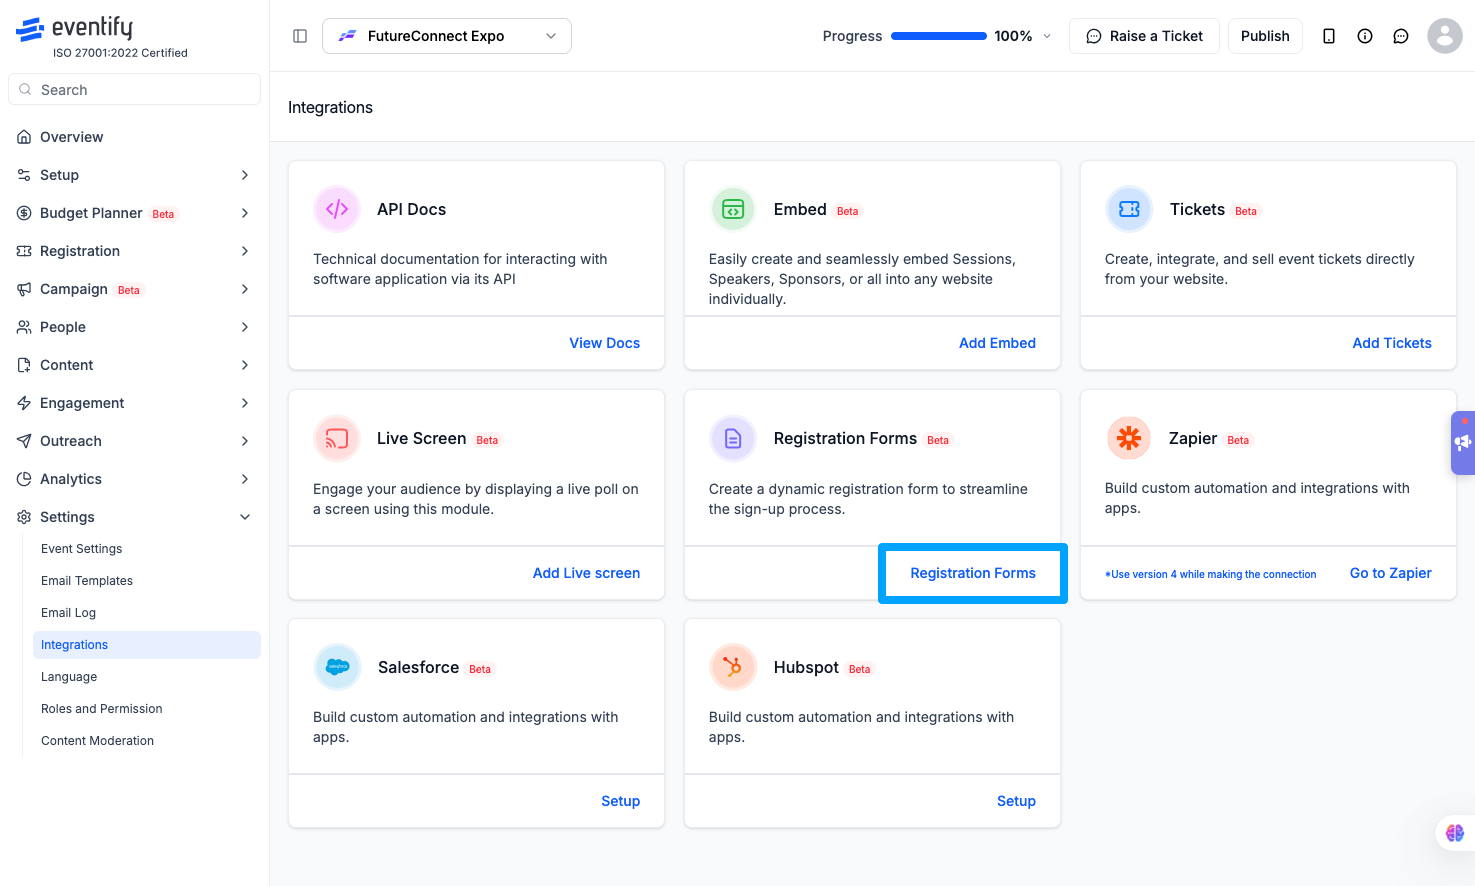
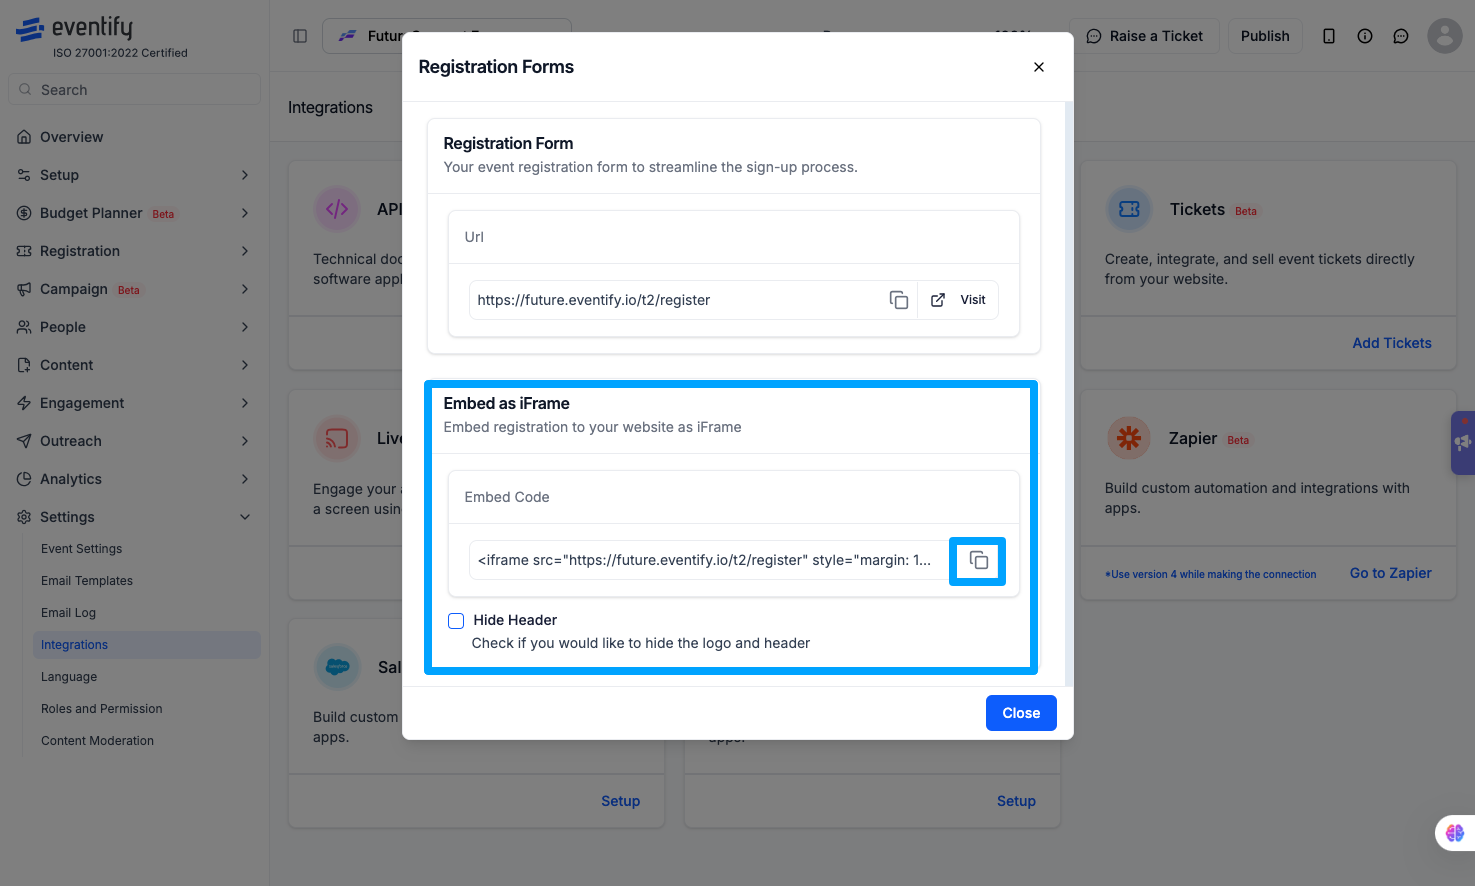
On your event landing page, or under Settings > Integrations > Registration Forms in the Admin Panel.
Q: Can I embed the registration form on my own website instead of just sharing a link?
Yes, use the iFrame embed option to integrate the form directly into your site.
Q: Will the link show up automatically, or do I need to generate it?
It's generated automatically once your registration policy is set to "With Registration" and you save your changes — it also appears on your event landing page.
Q: How do I create a registration link for an event?
Go to Registration > Registration Settings > Page Settings, set the policy type to With Registration and click Save. Your registration link then appears at the top of the Registration Settings page with a copy icon.
Q: Can I create a separate registration link for each campaign or partner?
Yes. Go to Registration > Tickets > Personalized Links, click New Link and choose the Registration link type. Each link shows its own views, redemptions and conversion rate.
Q: Can I turn my registration link into a QR code?
Yes. Copy your registration link and paste it into any QR code generator. Scan the code with your phone before printing to check it opens the registration page.
