
User Groups allow you to organize attendees into different categories such as Admins, Speakers, Sponsors, Exhibitors, Volunteers, VIPs, and General Attendees. They help control registration forms, email communications, app permissions, and feature access for different attendee categories. Every attendee must belong to at least one user group, making User Groups an essential part of attendee management in Eventify.
To access User Groups, navigate to People → User Groups. This page displays all default and custom groups associated with the event, including the number of users assigned to each group, the linked registration form, whether the group name is visible within the app, and the available actions for editing or deleting the group.
ℹ️ Default system groups cannot be deleted, while custom-created groups can be deleted when no longer needed.

To create a new user group, click Add New, enter a group name, and decide whether the group should be used for internal purposes. When Use this group for internal purposes is selected, the group name will not be visible to attendees within the event app, although organizers can still use the group for attendee management and permissions. Click Save to create the group.

To edit an existing user group, navigate to People → User Groups and click the Edit icon beside the desired group. The editor contains three sections: General, Email Templates, and Roles & Permissions.

The General tab allows you to update the group name, assign a registration form to the group, and change whether the group is used internally. Assigning different registration forms allows different attendee categories to complete different registration experiences.

The Email Templates tab allows you to customize the emails associated with a specific user group. You can modify the default templates assigned to onboarding, ticket assignment, waitlist notifications, registration confirmation, registration approval, login emails, and other supported email types. If needed, click Create New Template to build a new email template by selecting an email trigger, entering a subject line, adding the email content, and choosing whether to clone an existing template or create one from scratch.

Here, you can define the email trigger, subject line, content, and choose whether to clone an existing template or create one entirely from scratch.

The Roles & Permissions tab controls which features members of the selected group can access within the event app. Depending on your event configuration, you can grant or restrict access to modules such as Schedules, Speakers, Sponsors, Exhibitors, Messages, Maps, Live Streaming, Polls, Live Q&A, News, and other available event features. This allows organizers to create different app experiences for different attendee categories.

Every attendee must belong to at least one user group. Users may be assigned automatically through registration forms, ticket types, or attendee imports, but organizers can also manually update group assignments whenever necessary from the Manage Attendees page.

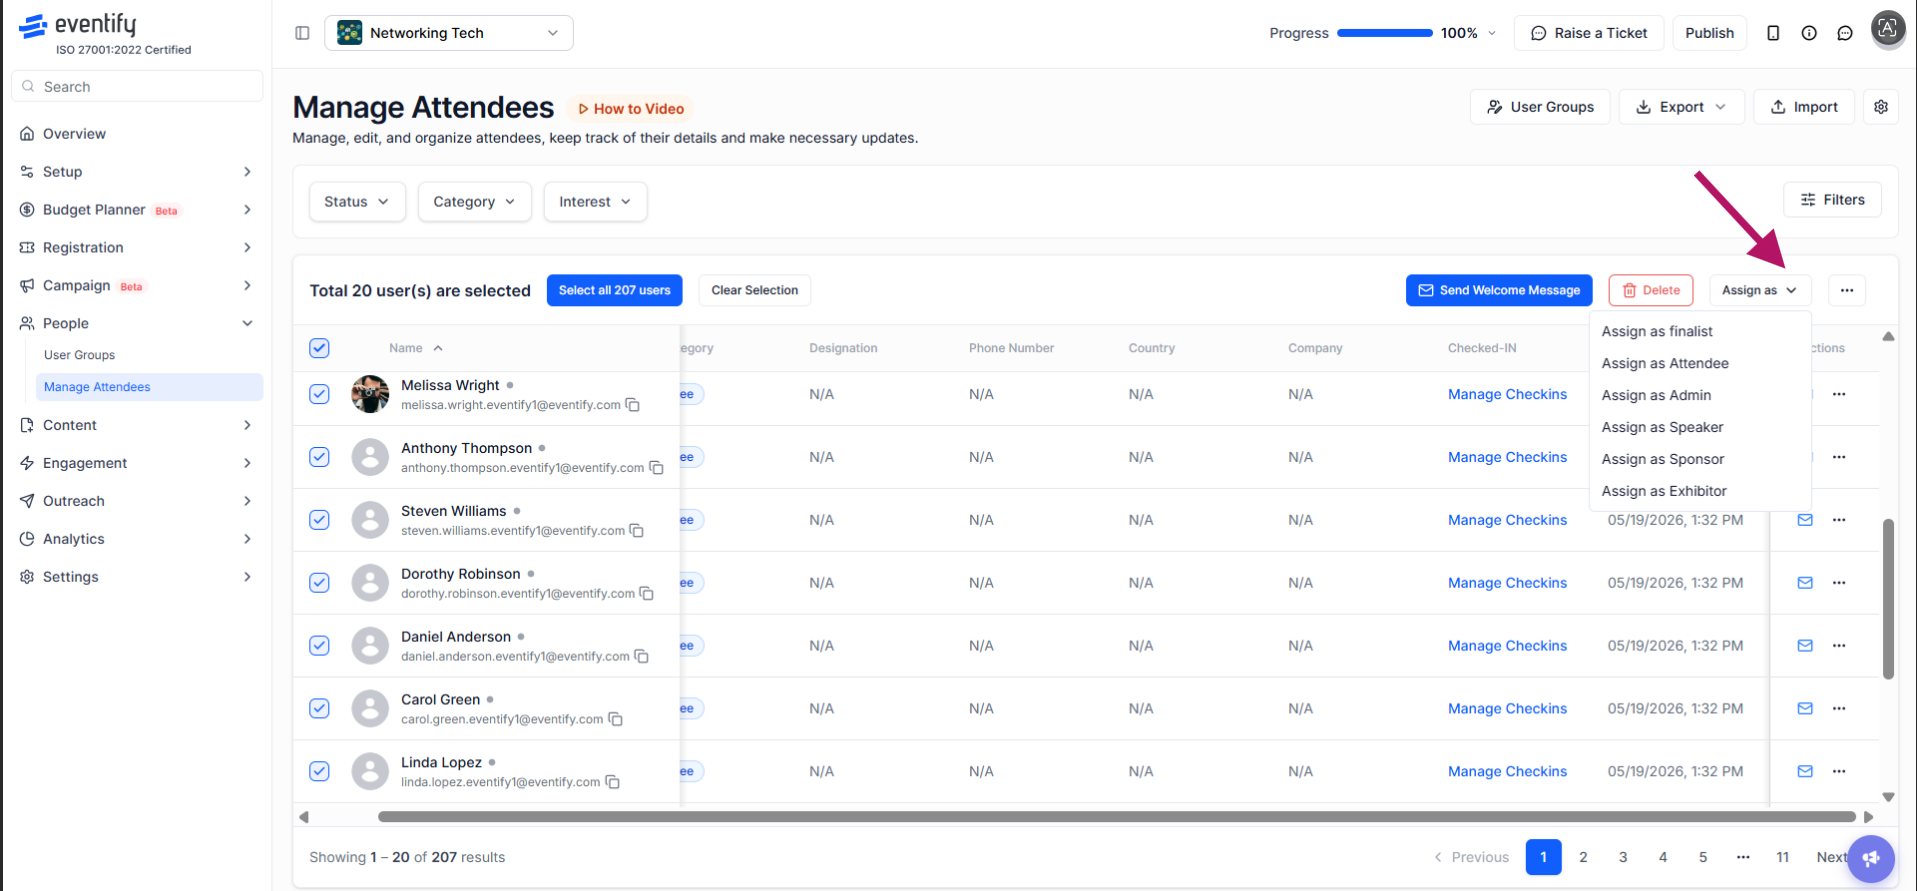
To assign multiple attendees to a user group simultaneously, navigate to People → Manage Attendees, select the attendees using the checkboxes beside their names, click Assign As, and choose the appropriate user group. The selected attendees will immediately be assigned to the chosen group.
To modify an attendee's information, navigate to People → Manage Attendees and click the three-dot (Actions) menu beside the attendee. Select Edit to open the attendee's profile, where you can update their details, group assignments, permissions, and other event-related information. You can also select Delete from the same menu to permanently remove the attendee from the event.

Once the page opens, locate the User Primary Group and User’s Other Groups section. From here, you can assign one primary group and multiple secondary groups to the attendee.

While editing an attendee, click Manage Users / Groups to open the group management window. From here, you can search for a specific group. Use the Filters option to narrow the attendee list before assigning users to a group. You can filter attendees by Status, Category, Interest, Entry Source, Company, Designation, Phone Number, Facebook, and other available fields. After selecting the required criteria, click Show to display the matching attendees or Reset to clear all applied filters.

No. Default system groups cannot be deleted. Only custom groups can be deleted.
In People > Manage Attendees, select the attendees with the checkboxes, click Assign As and choose the user group.
