Bulk assigning users to sessions allows you to efficiently add multiple users—such as speakers or attendees. Follow the steps below to bulk assign users to sessions:

Interactive Guide
Or check the step-by-step guide
.
1: Access the Eventify Admin Panel and navigate to Content > Schedules
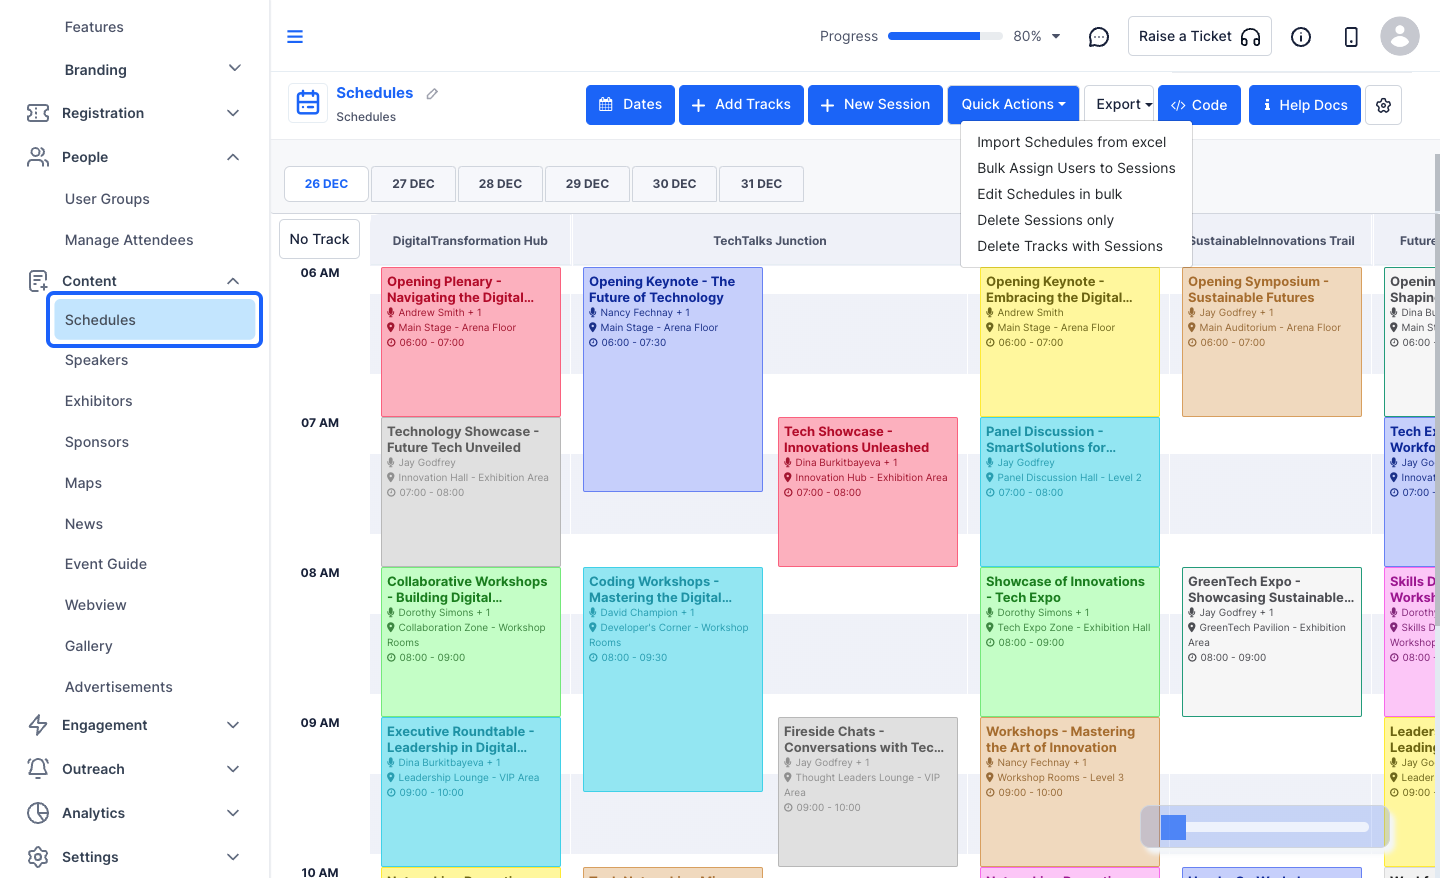
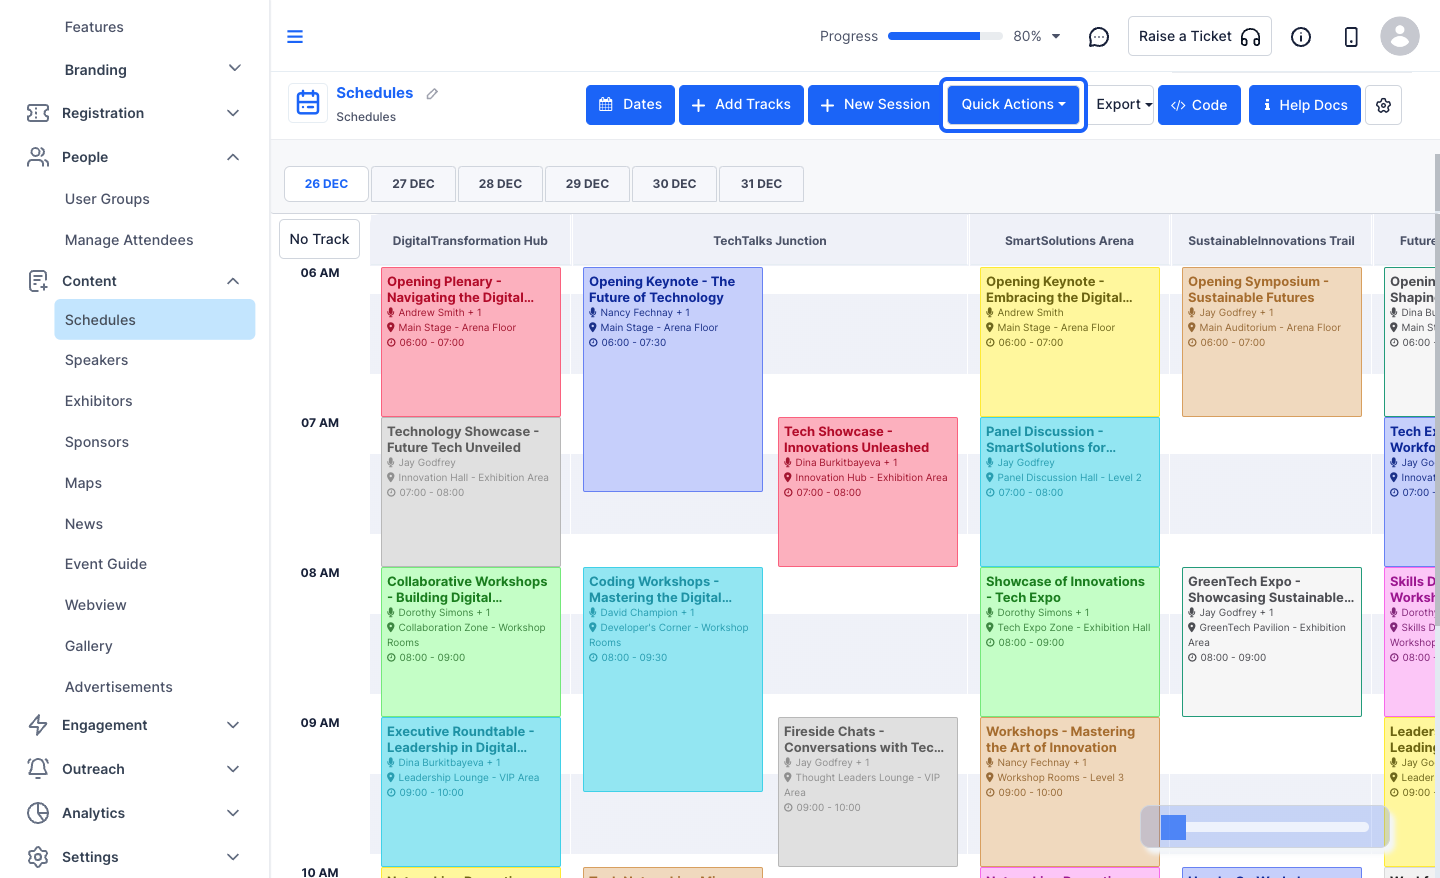
2: To bulk assign users to sessions, click on Quick Actions
3: Then click on "Bulk Assign Users to Sessions"

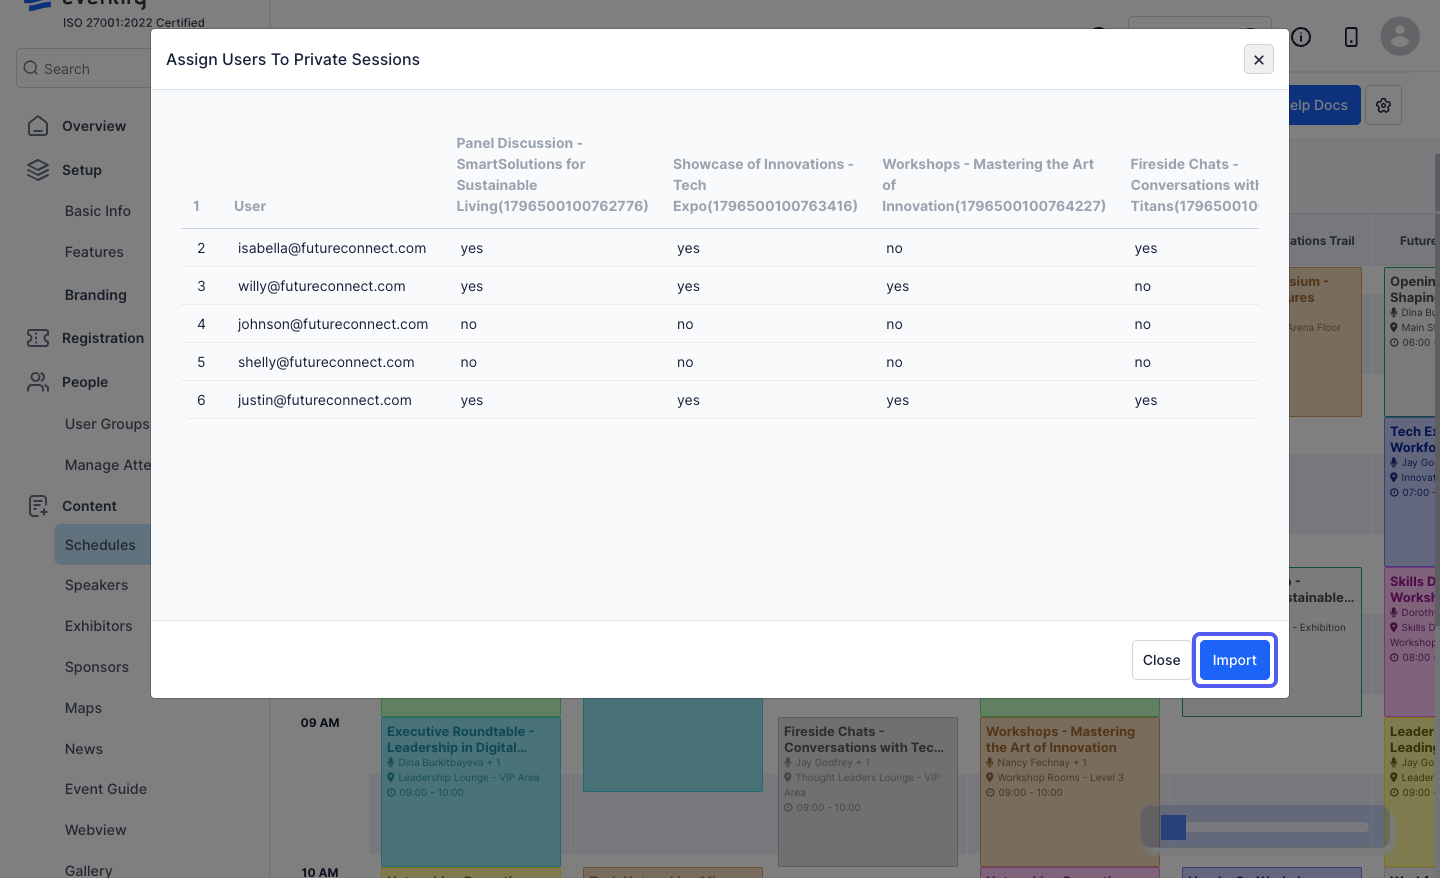
4: Before importing the file, make sure the data in it is formatted correctly. You need to download the sample file either in csv or xls format to compare your data
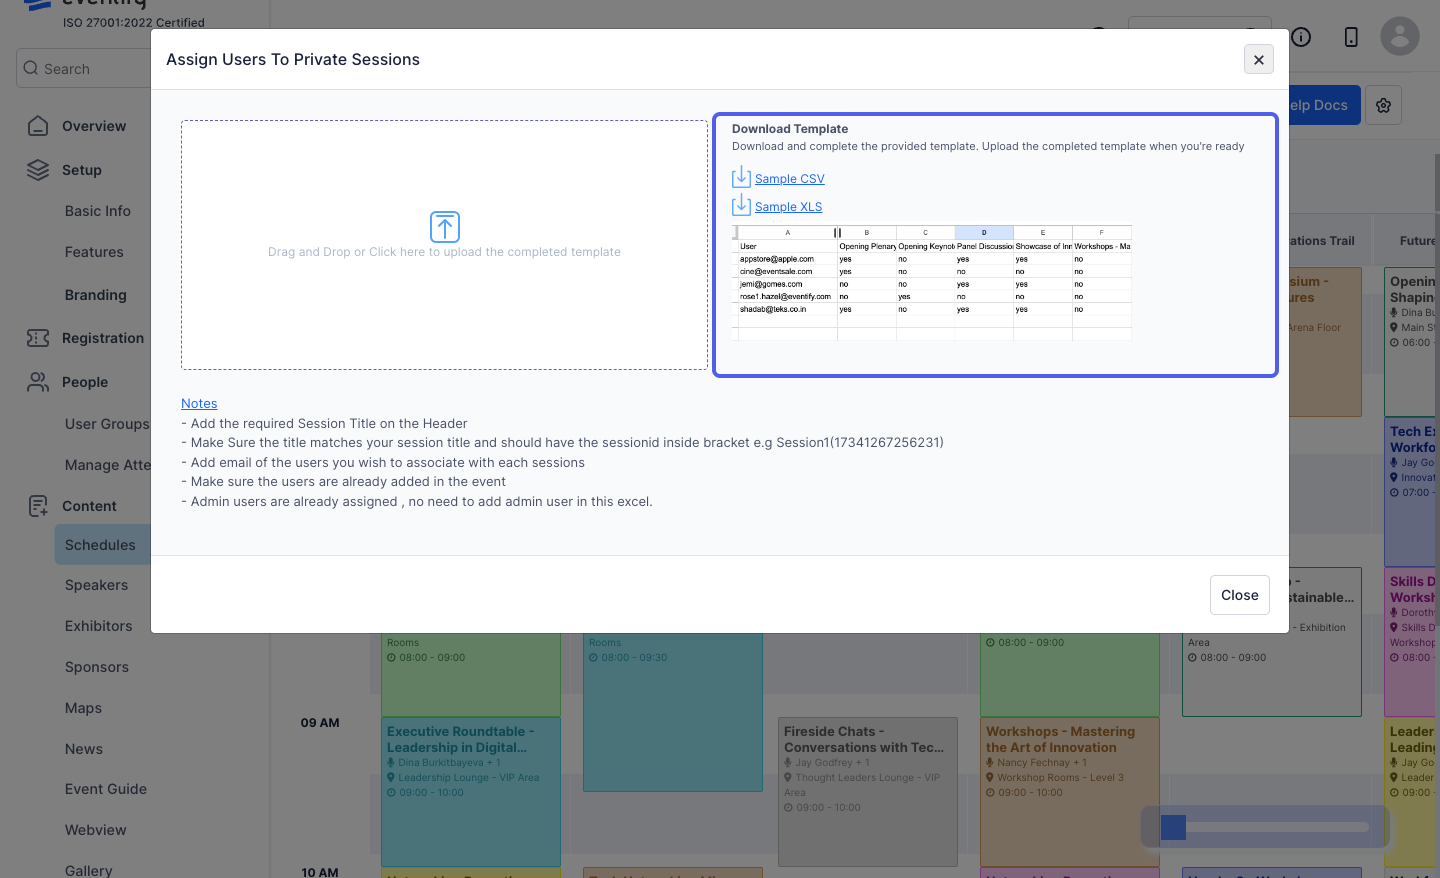
5: Make sure to take care of the instructions related to the data

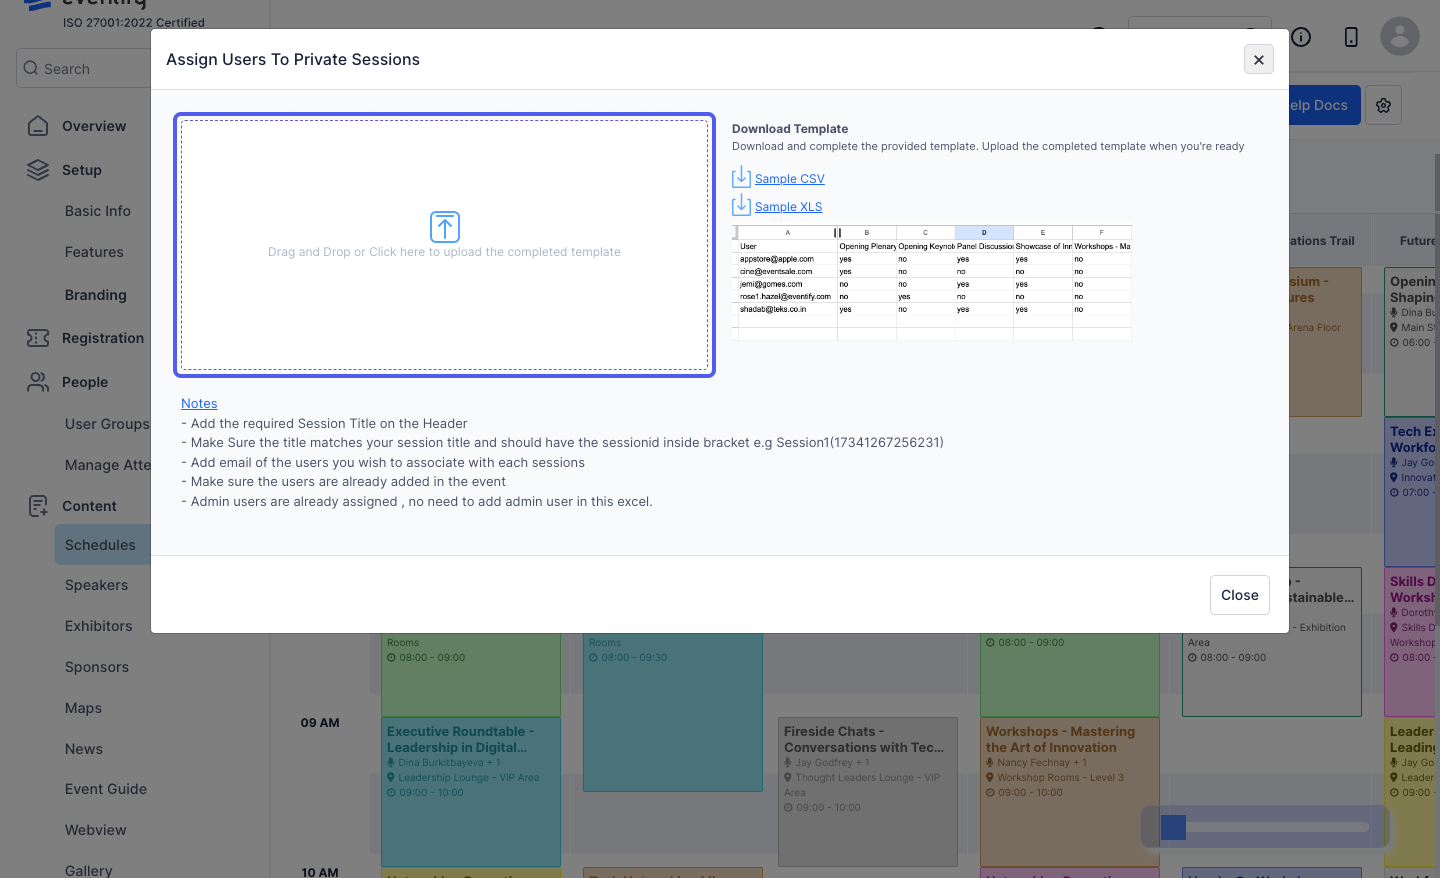
6: Once the file is ready, “Drag and Drop" or Browse to upload the file
7: You can see the file preview and will receive errors in case your file has data that does not match the required format
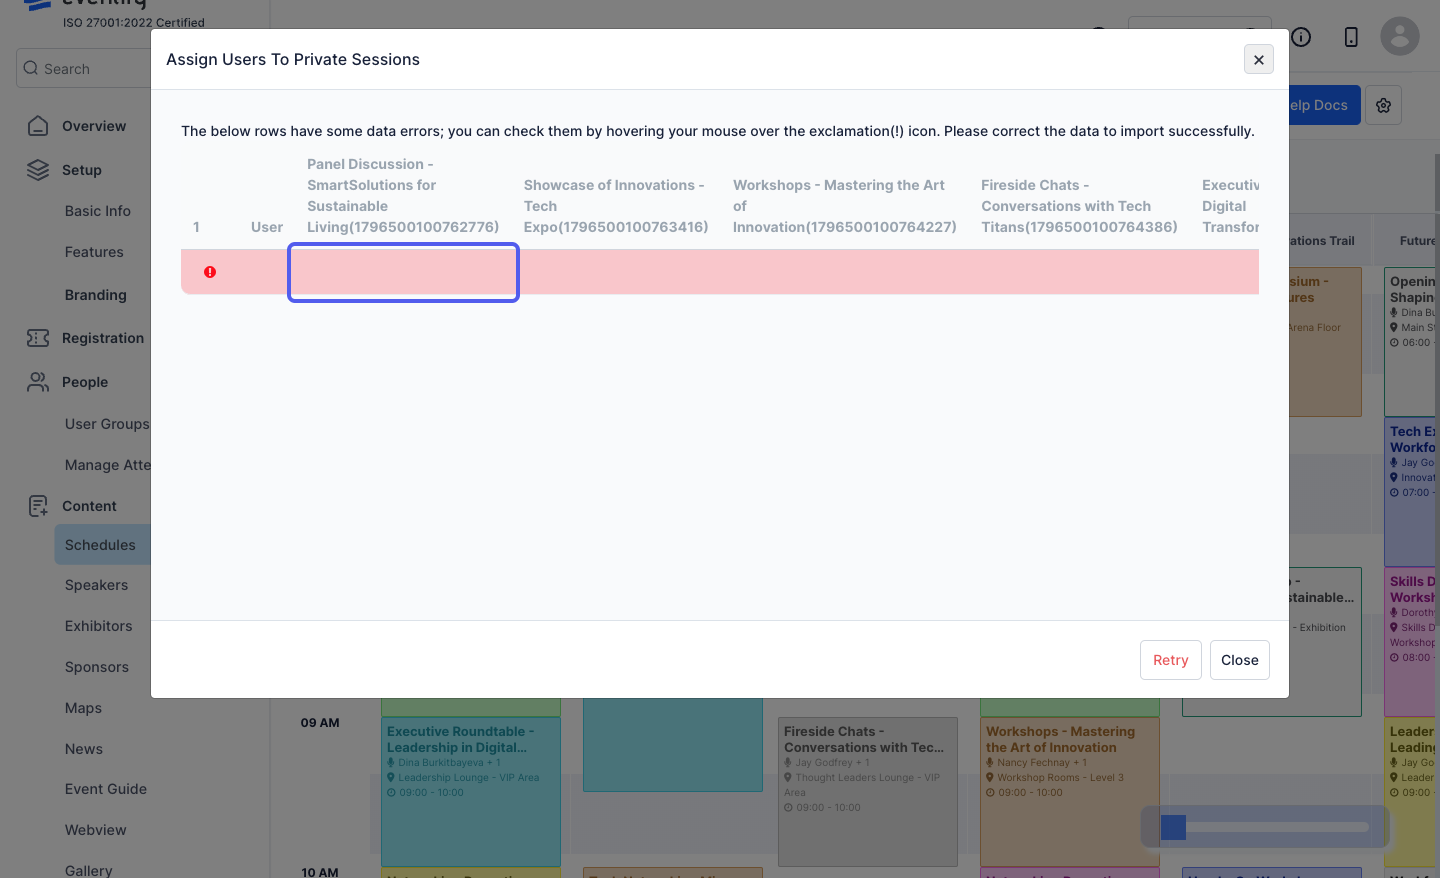
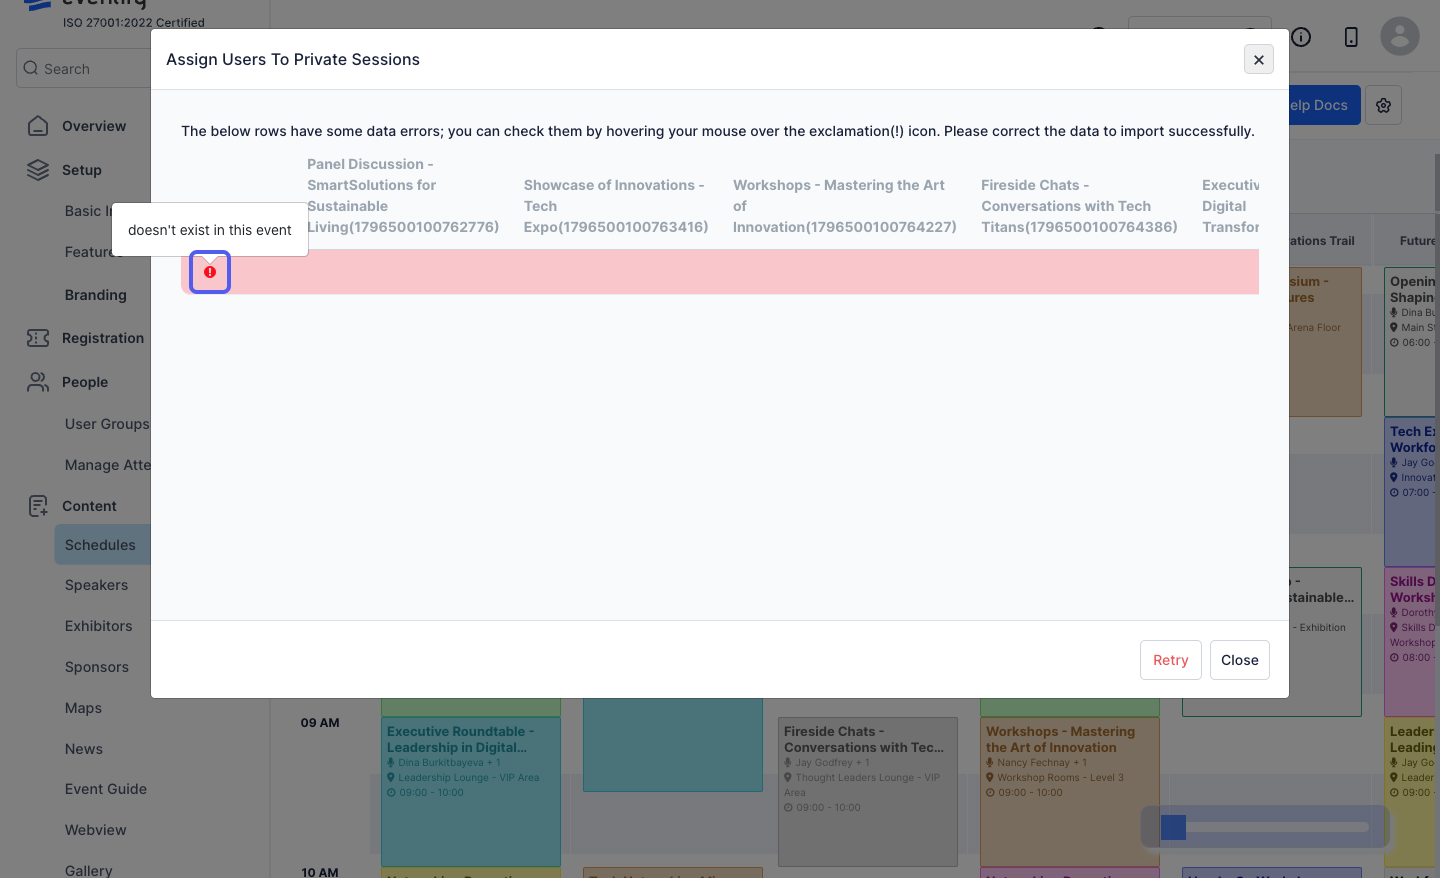
8: By clicking on the info icon on the marked rows, you can check the exact error that is present in the data
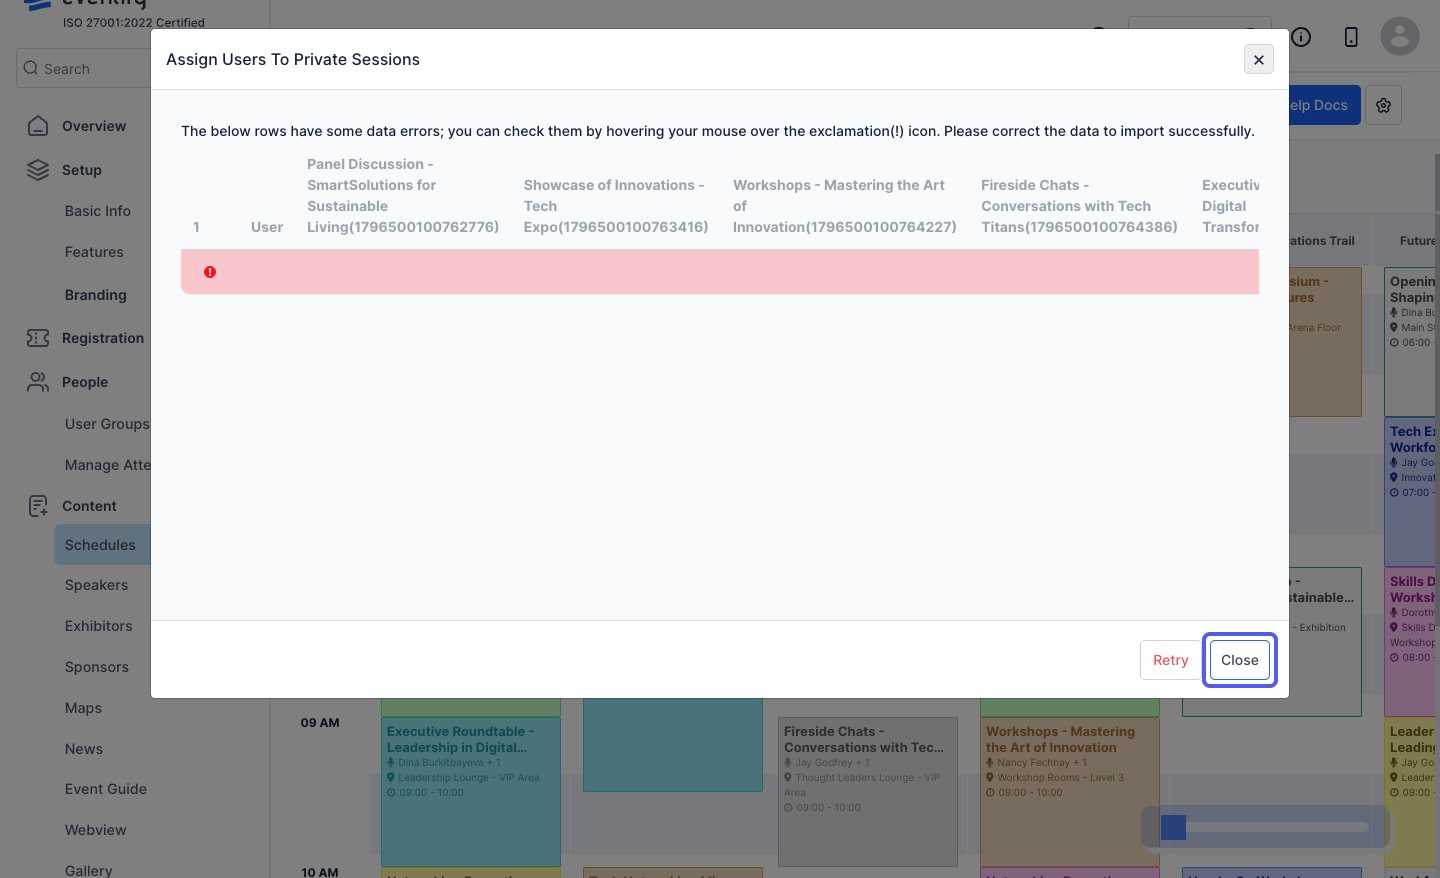
9: Click the “Close” button to exit import and correct the file
10: When your file is error free, you will get the option to Import it
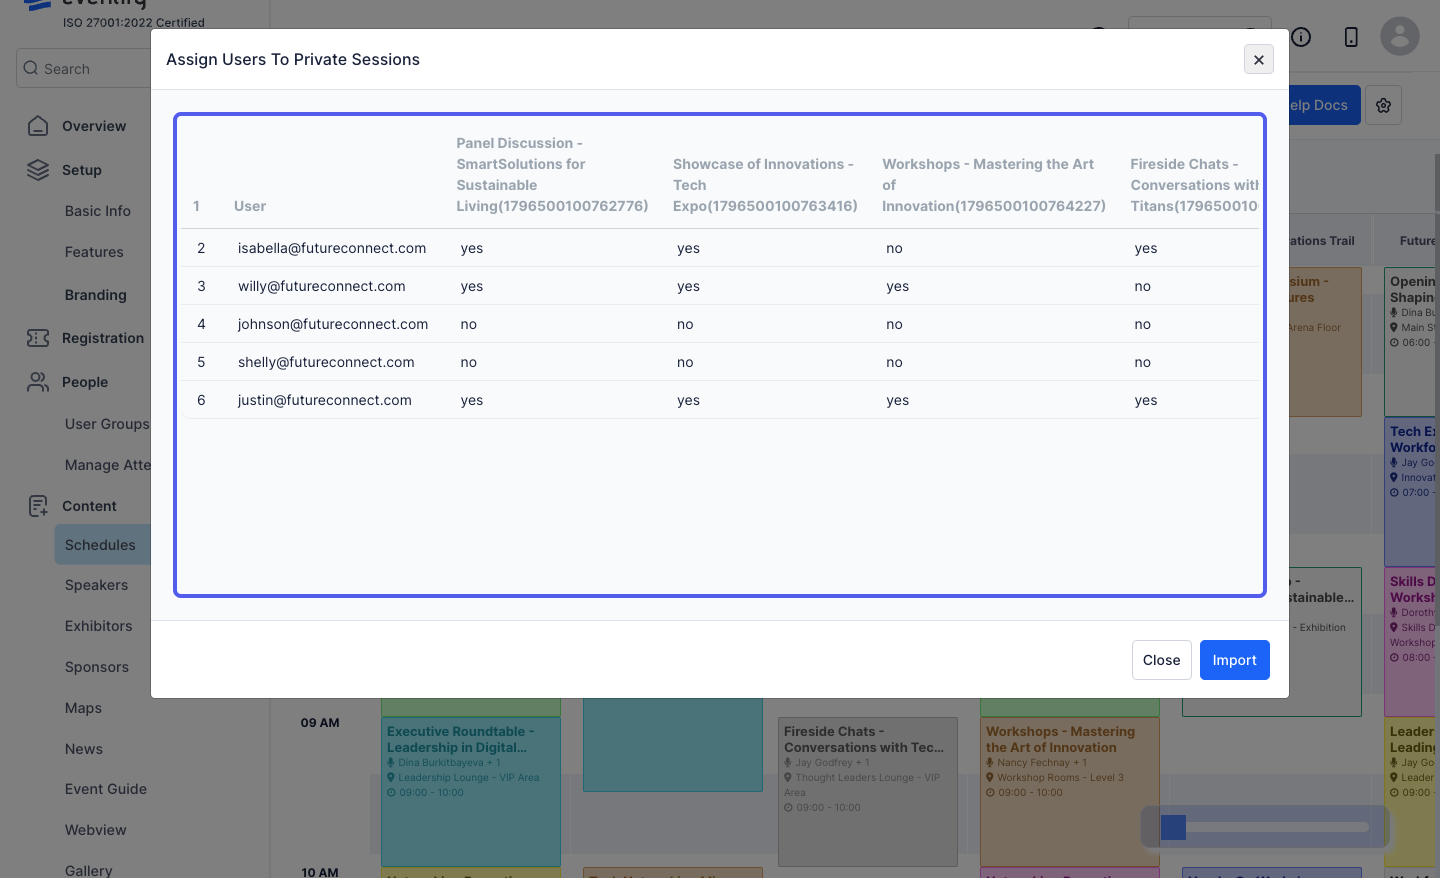
11: Click on the “Import” button to begin importing
12: You will find the users are added to the relevant sessions in the schedule calendar

