
Eventify allows organizers to create custom surveys to collect feedback from attendees before, during, or after an event. Using the Survey Builder, you can design surveys with different question types, assign them to specific attendee groups, publish them to the event app, and monitor responses from a centralized dashboard.
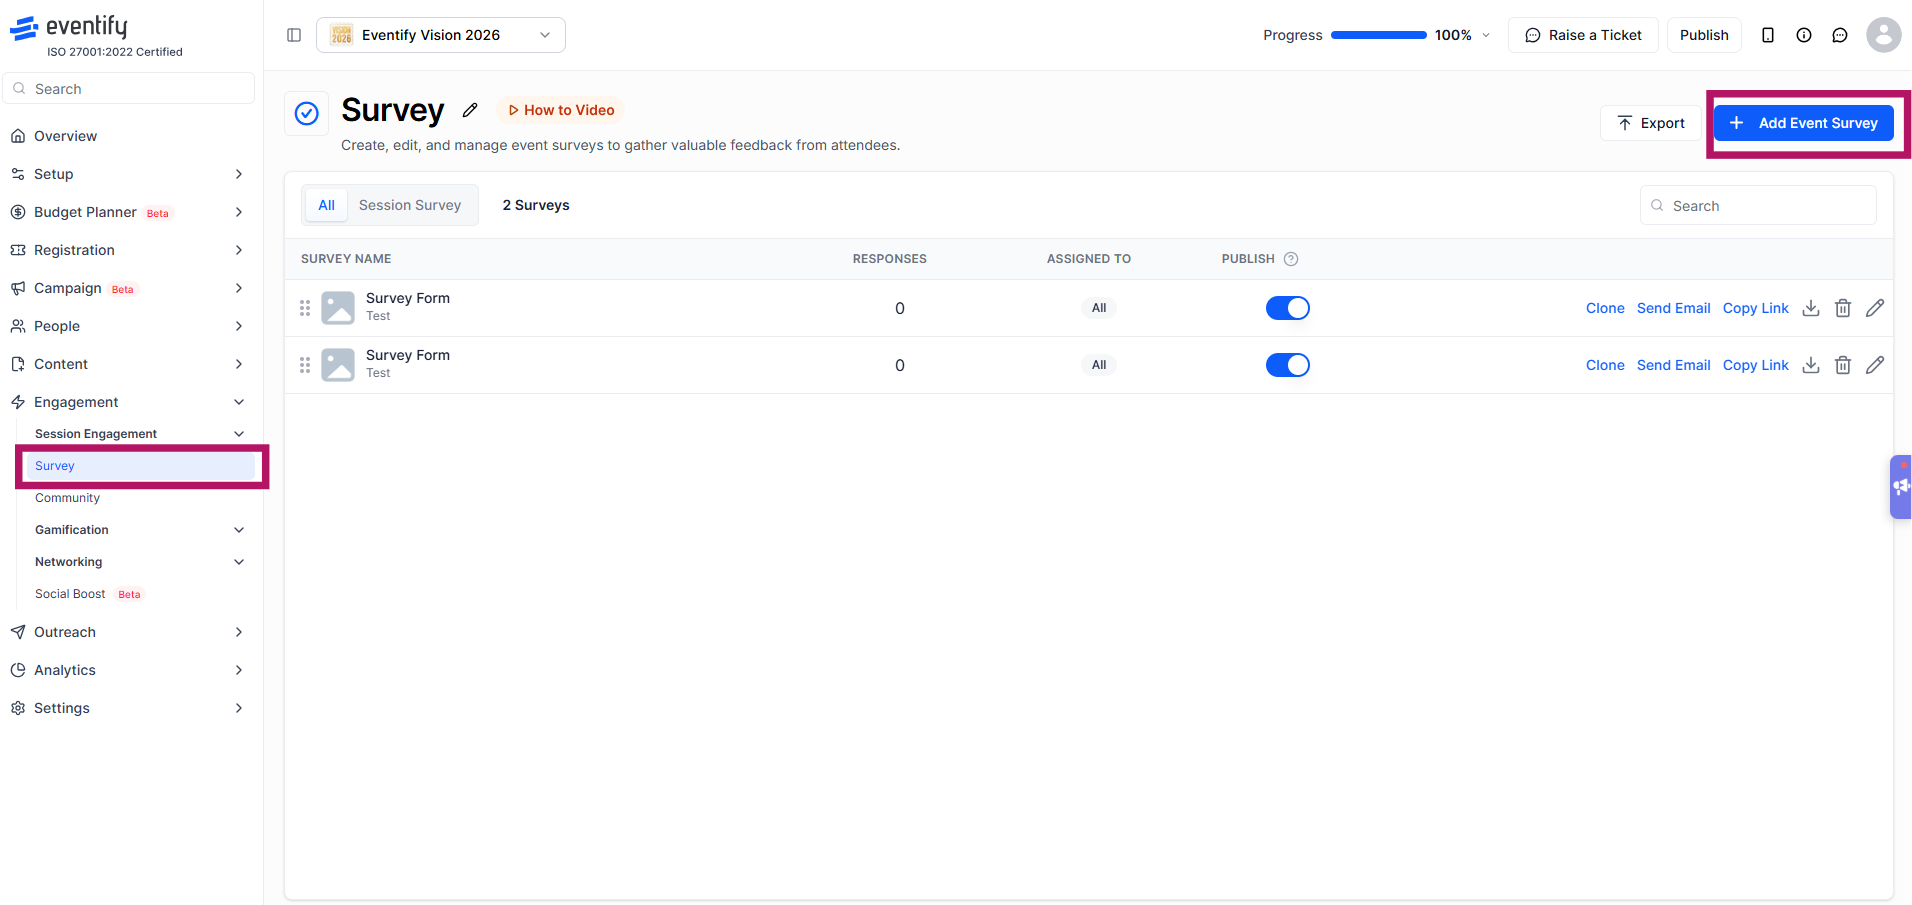
To access the Survey module, log in to the Eventify Admin Panel and navigate to Engagement → Survey. The Survey page displays all surveys created for the event, including the survey name, number of responses received, assigned audience, and publication status. From this page, you can also search for surveys, export survey data, clone surveys, send survey emails, copy survey links, edit surveys, or delete them. To create a new survey, click Add Event Survey.
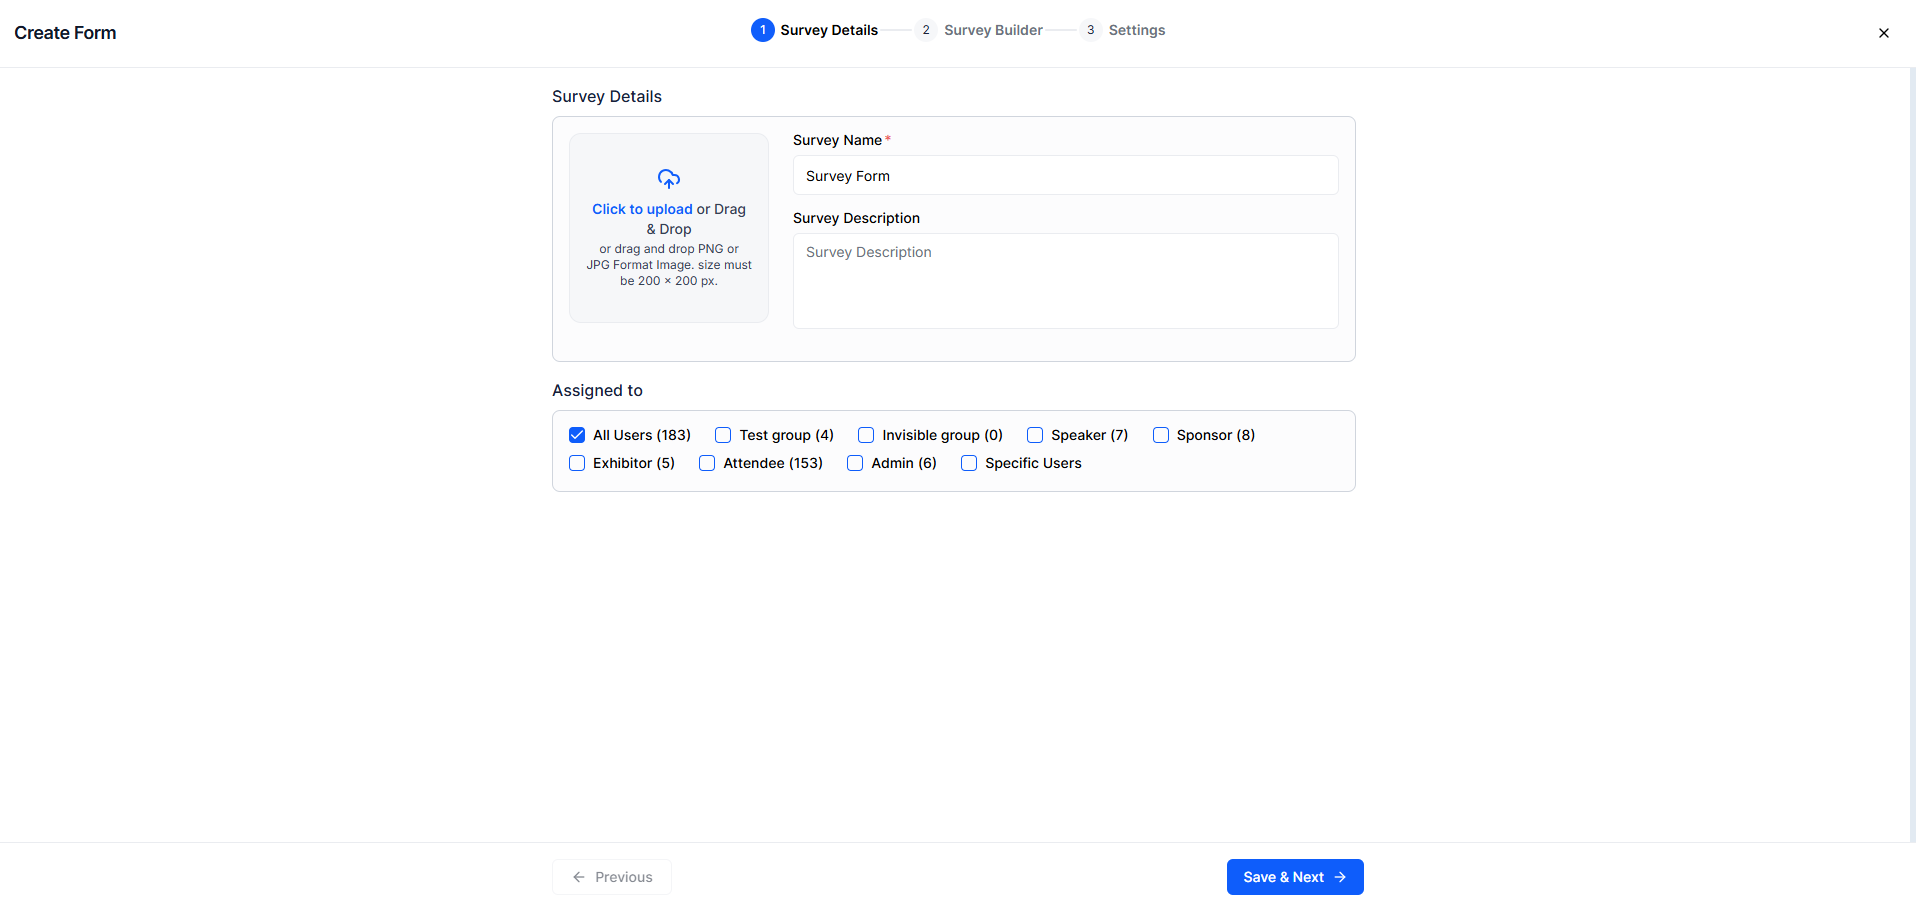
Creating a survey begins with the Survey Details step. Enter a Survey Name, optionally add a Survey Description, and upload a survey image if required. You can then choose who should receive the survey by selecting All Users or one or more user groups such as Attendee, Speaker, Sponsor, Exhibitor, Admin, or any custom groups created for your event. After completing the required information, click Save & Next to continue.
The Survey Builder allows you to design your survey using drag-and-drop form components. Available components include text inputs, number inputs, multi-line inputs, checkboxes, radio buttons, dropdowns, rating fields, emoji ratings, date fields, hyperlinks, labels, and text blocks. Drag any component from the Form Components panel into the survey area to add it to your form, and rearrange questions at any time by dragging them into the preferred order.
Selecting a field opens the Update Field Settings panel, where you can customize the selected component. Depending on the field type, you can edit the field label, view the automatically generated variable name, mark the field as mandatory, choose who can edit the field, define a default value, configure answer options, and set conditional field behavior where supported. After making your changes, click Save to update the field and continue building the survey. When the survey is complete, click Save & Next to proceed to the final step.

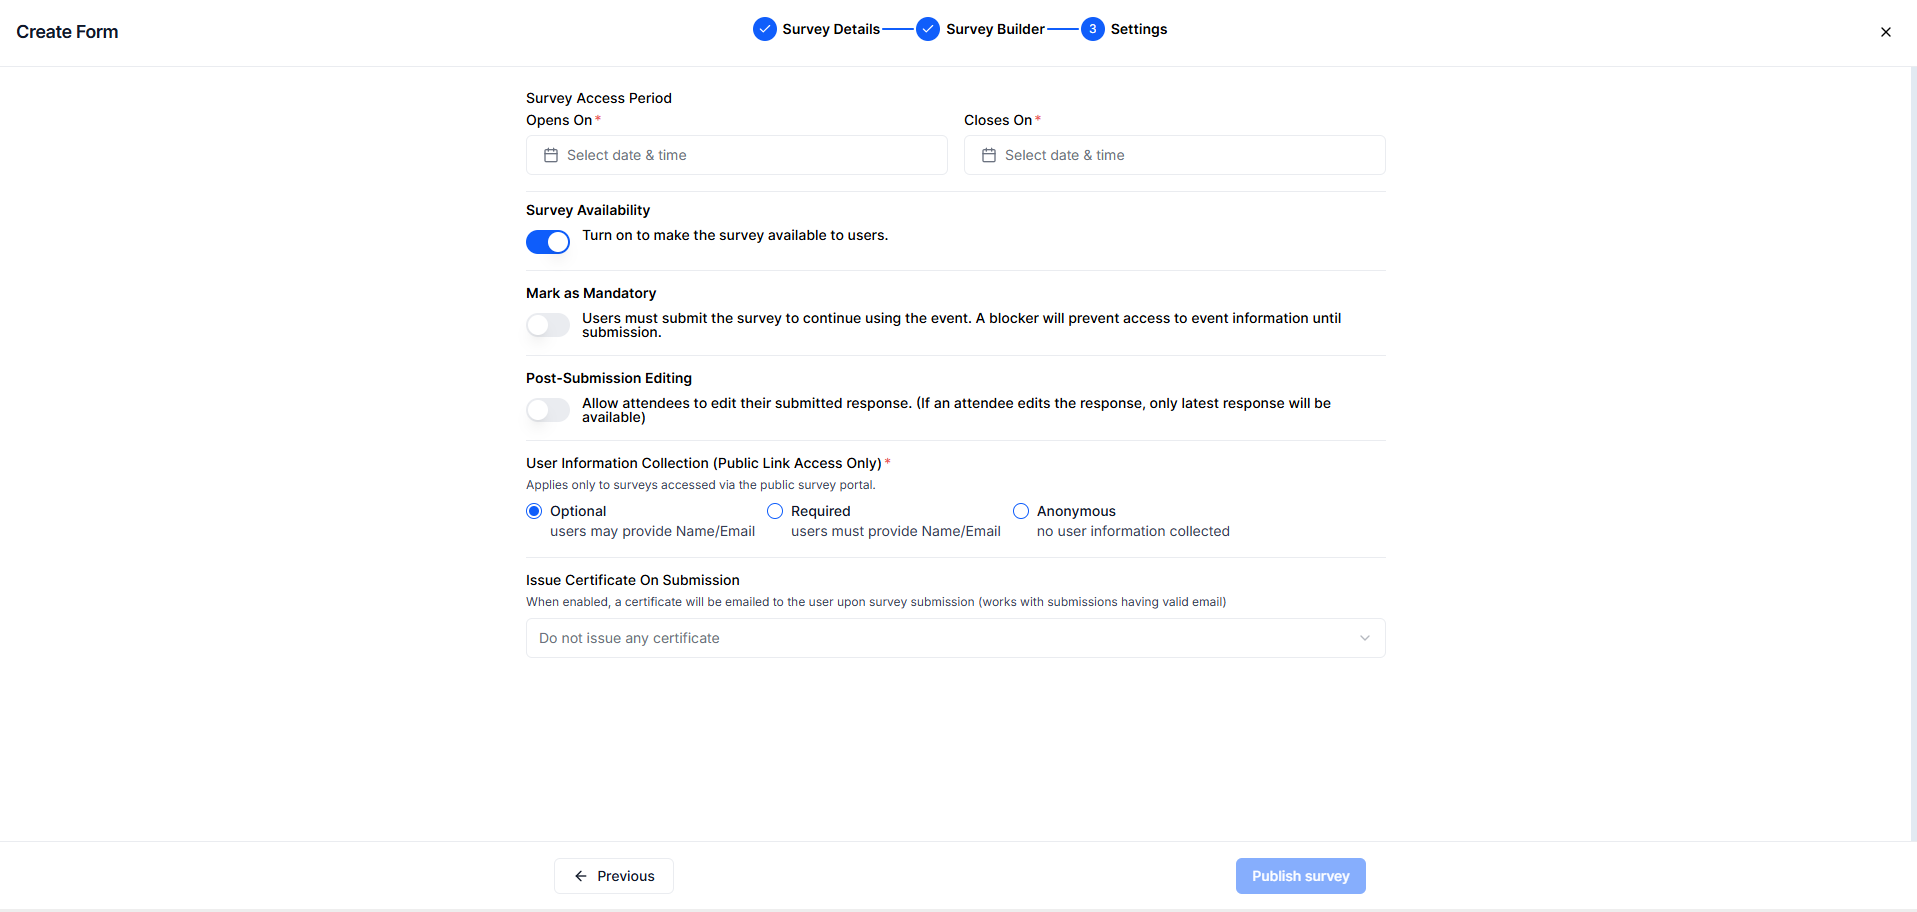
The Settings step allows you to configure how and when attendees can access the survey. Set the Opens On and Closes On date and time to define the survey availability period.
You can enable Survey Availability to make the survey accessible to users, turn on Mark as Mandatory to require attendees to complete the survey before accessing the event, and allow Post-Submission Editing if attendees should be able to update their responses after submission.
For surveys shared through a public link, choose whether user information is Optional, Required, or Anonymous. You can also choose whether to issue a certificate upon survey submission. When you're finished, click Publish Survey to create and publish the survey.
After a survey has been created, it appears on the Survey page. From this page, you can view the number of responses received, see which attendee groups the survey has been assigned to, and control whether the survey is available to attendees using the Publish toggle.
Additional actions are available for every survey, including Clone, Send Email, Copy Link, Export, Edit, and Delete. You can also use the search bar to quickly locate a specific survey when managing multiple forms.

Yes. In Survey Details choose All Users or one or more user groups such as Attendee, Speaker, Sponsor or Exhibitor.
For surveys shared through a public link, you can set user information to Optional, Required or Anonymous.
Yes. In Survey Settings you can choose to issue a certificate upon survey submission.
