Attendees are usually added to an event automatically through ticket purchases or registration forms. During registration, users fill out their own profile details and receive the appropriate access permissions based on their registration type. However, you can also manually add attendees directly from the Eventify Admin Panel whenever needed.
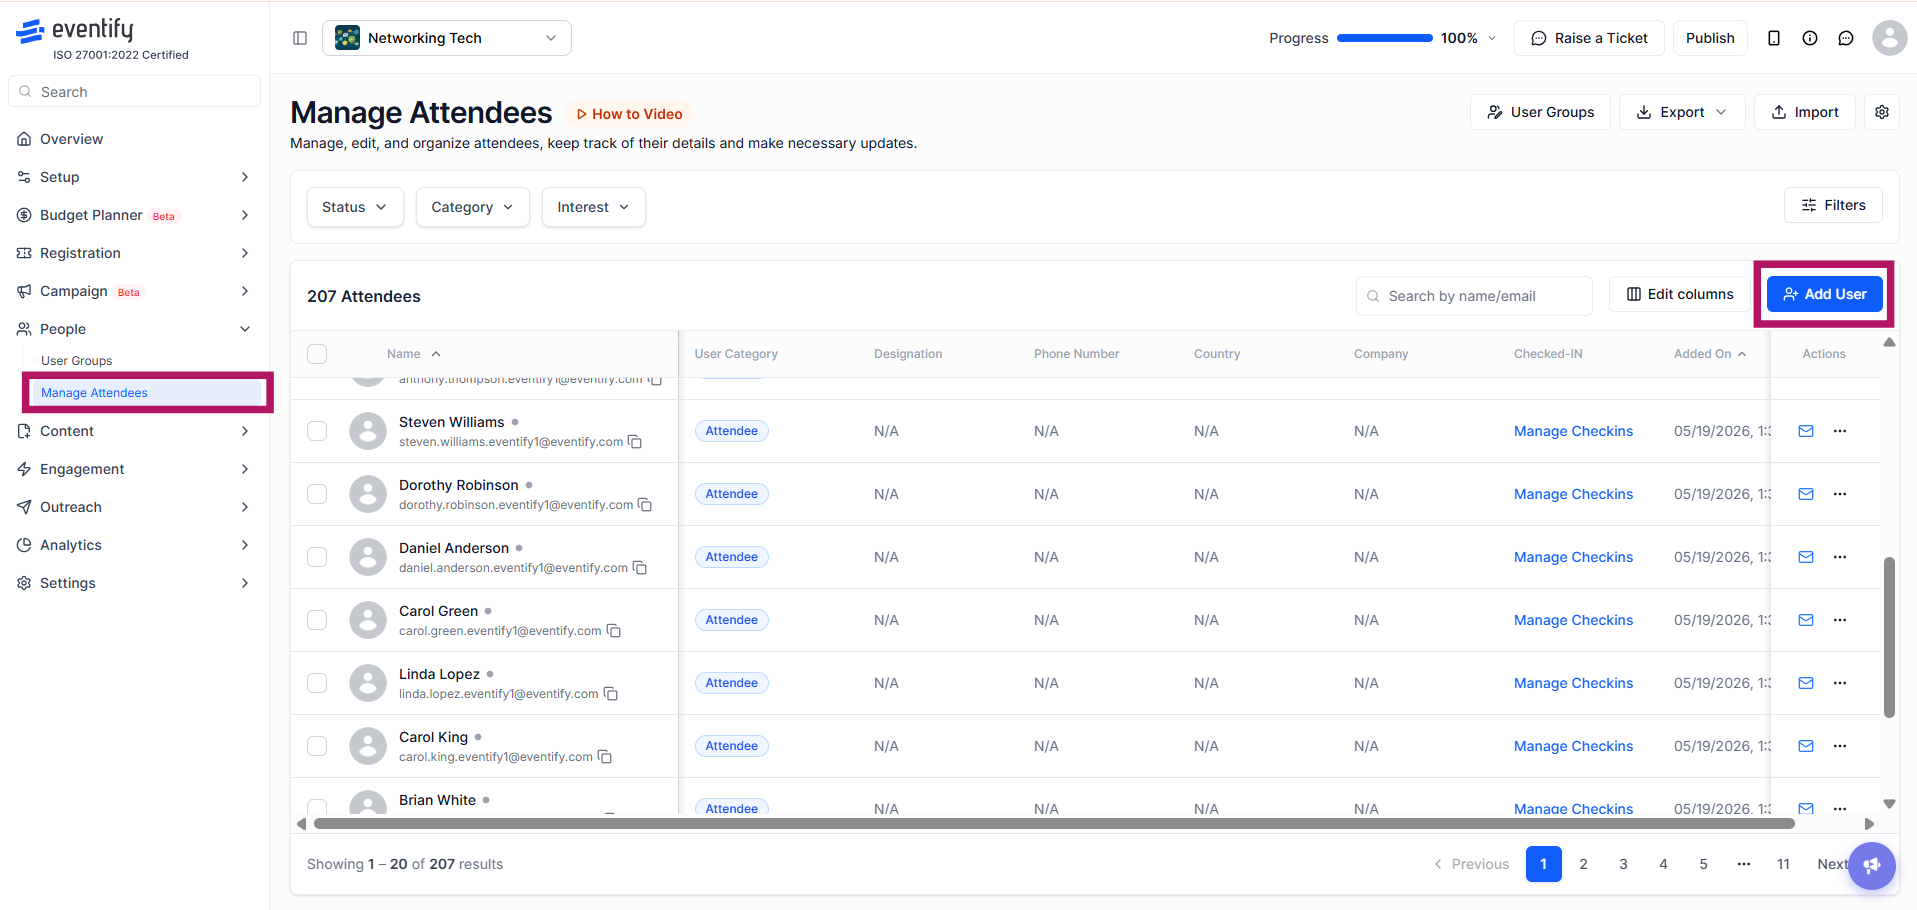
To manually add an attendee, log in to the Eventify Admin Panel and navigate to People >> Manage Attendees. Click on the Add User button to open the Add User pop-up window.
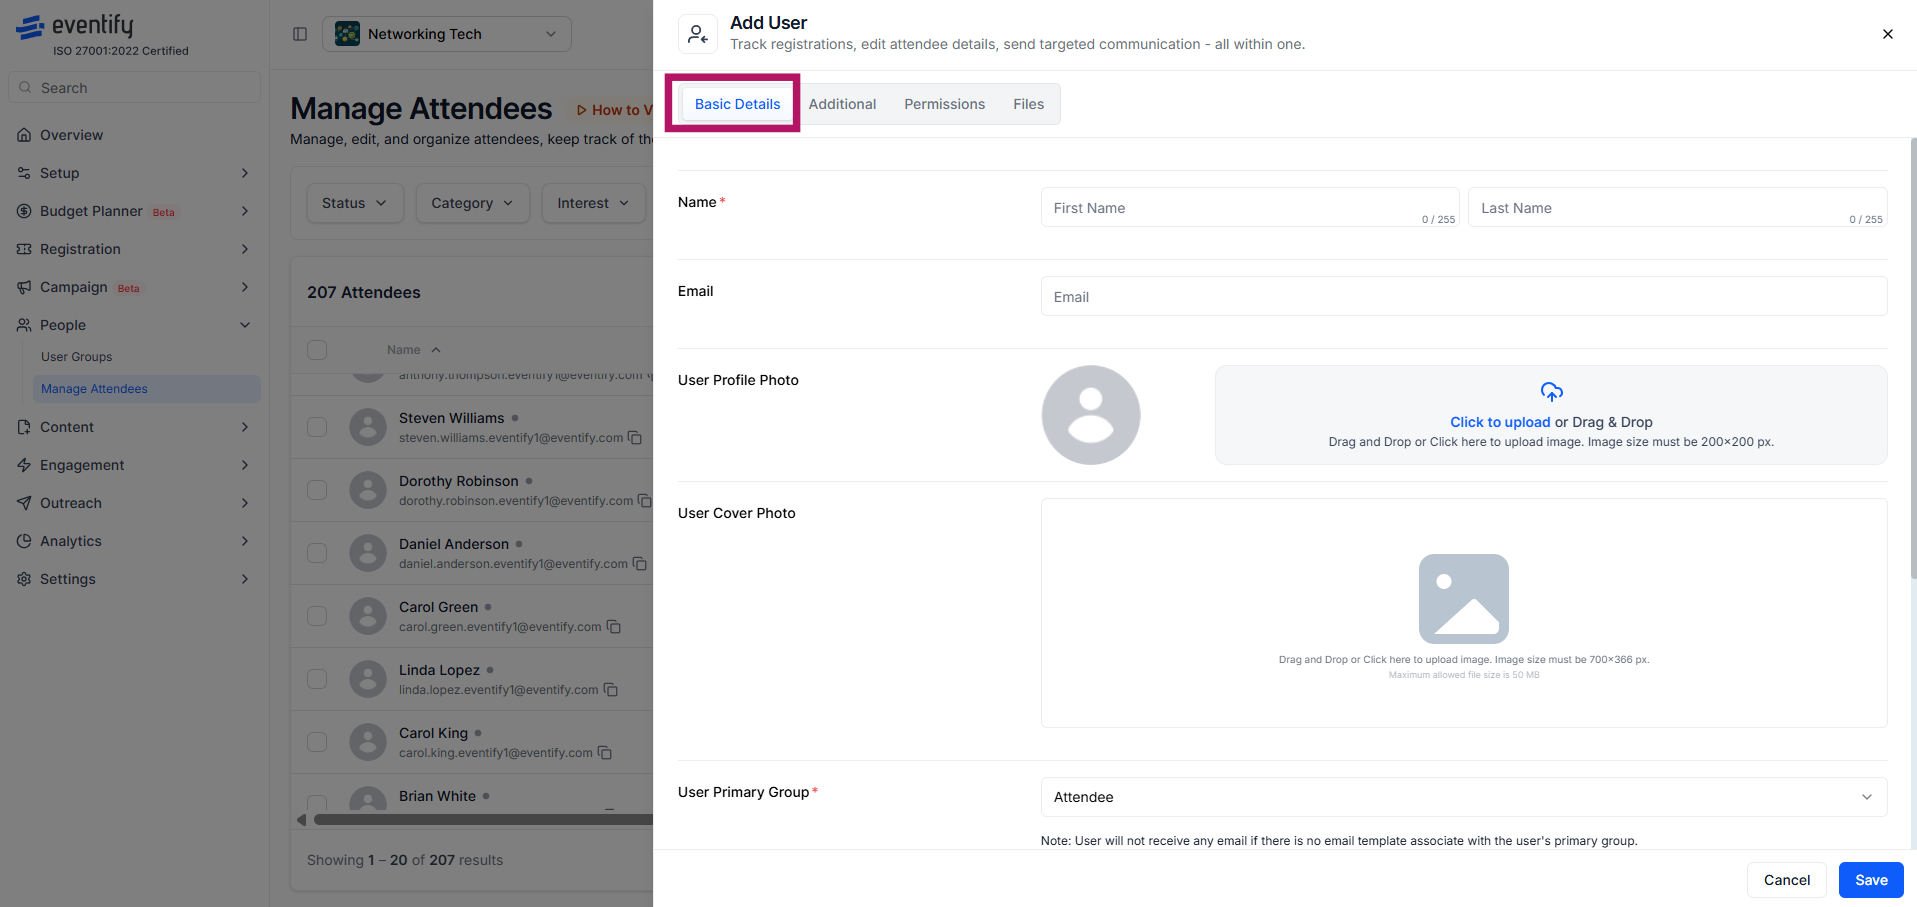
Inside the Basic Details tab, enter the attendee’s information including:
The User Primary Group determines the attendee’s main access level within the event. If the attendee has multiple roles in the event, such as being both a Sponsor and a VIP Guest, you can assign additional groups under User’s Other Groups.
ℹ️ You can assign multiple groups to a single attendee, including custom groups created specifically for your event. You can also click on the Manage Group button to create new groups, edit existing groups, or remove custom groups from the event setup. At this point you can click on Save.
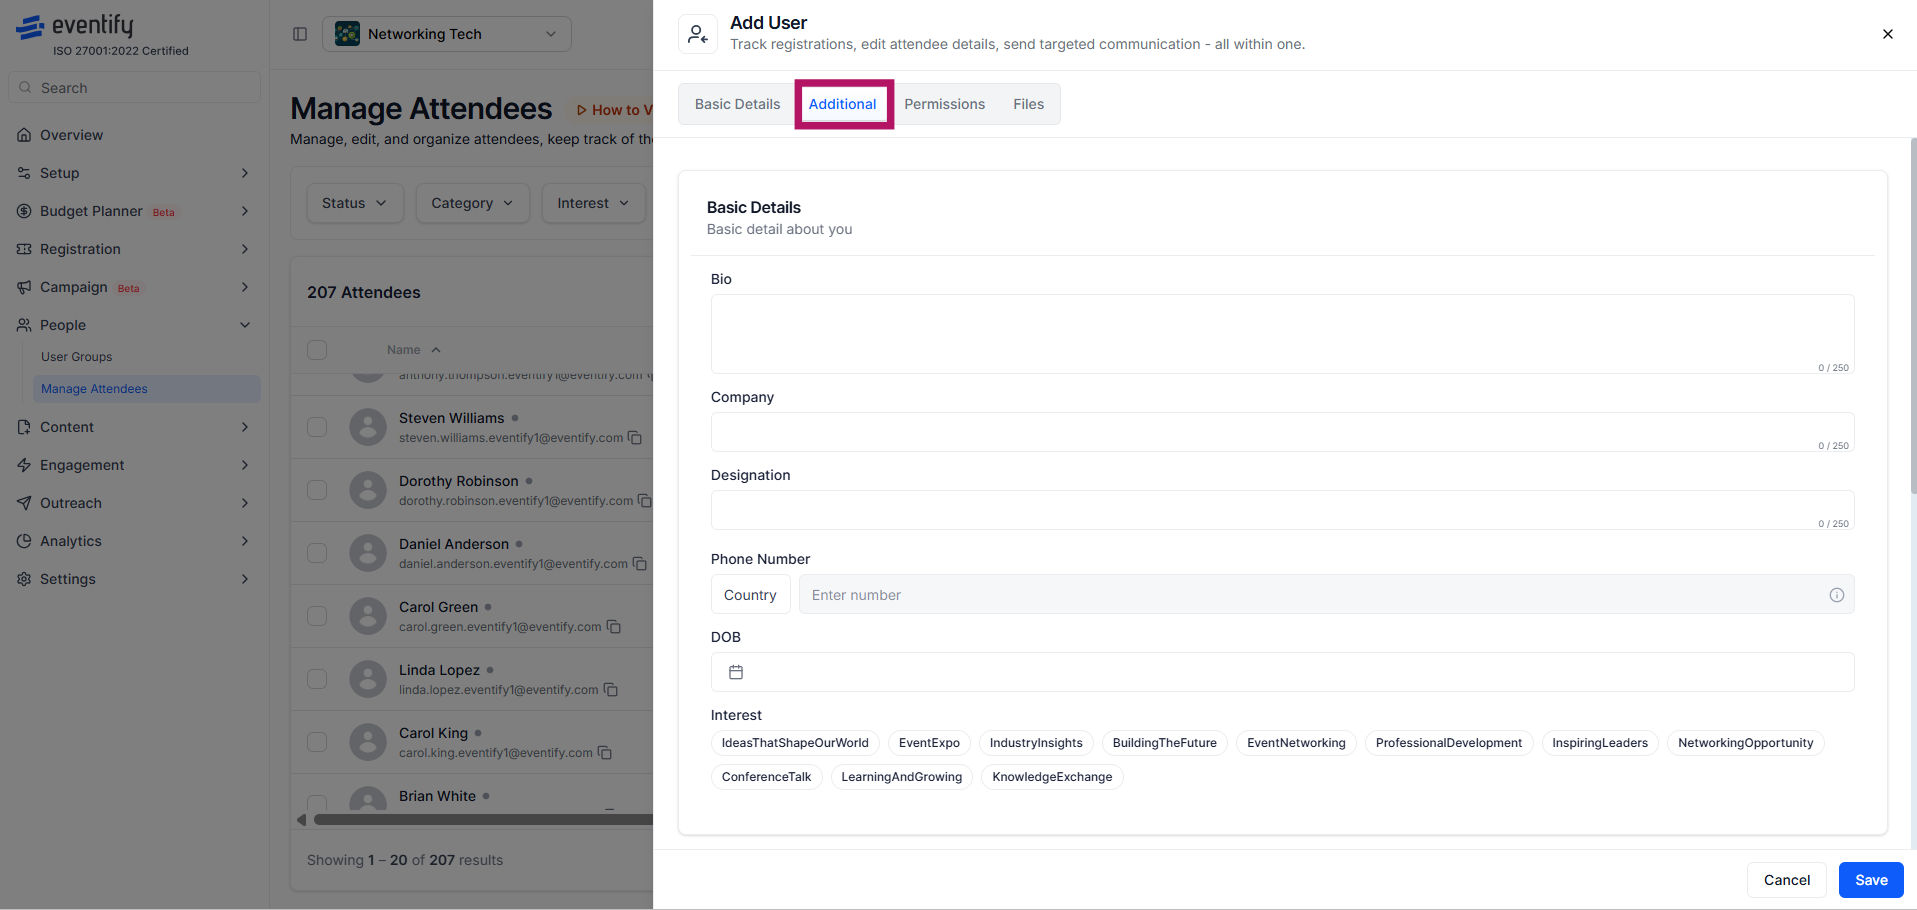
The second tab, Additional, allows organizers to add more attendee information. Here you can fill out custom registration form fields configured for the event, including:
You can also enable Networking/GDPR Consent.
🔺 Enabling Networking/GDPR Consent allows attendees to share their profile and connect with other users inside the app.
ℹ️ Additional attendee fields are fully customizable from Registration >> Registration Forms >> User Group Forms. Once all information is added, click on Save to update the attendee profile.
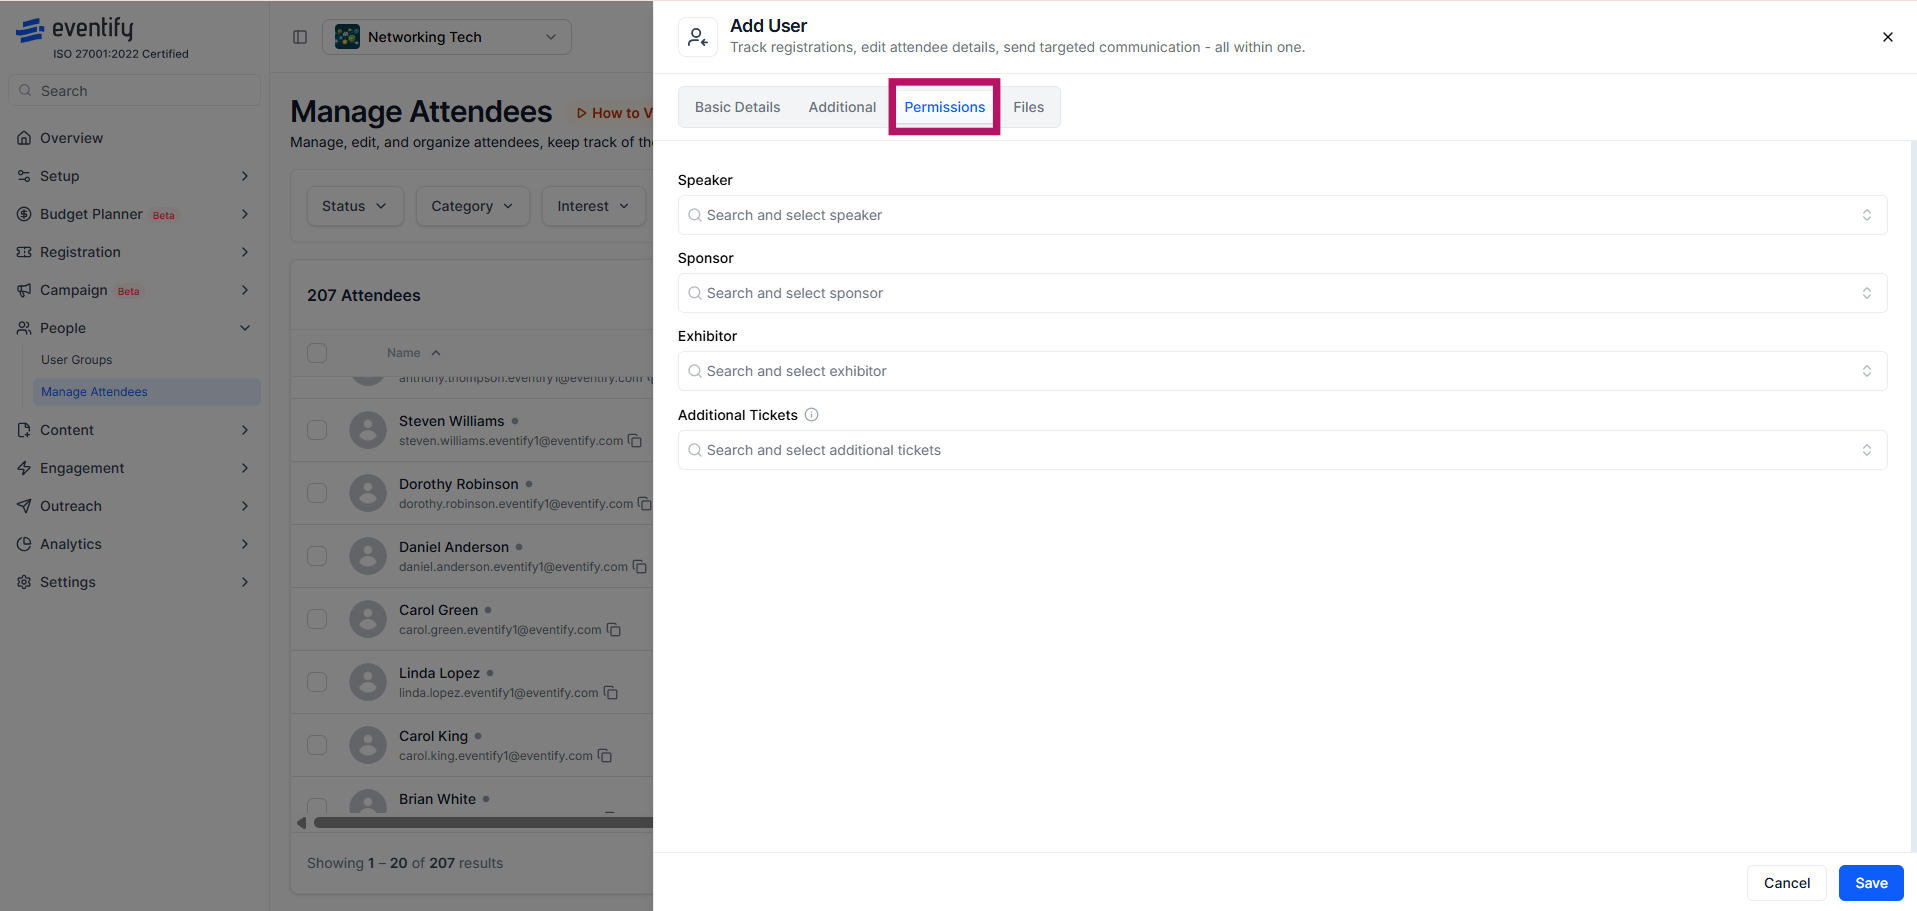
The third tab, Permissions, allows organizers to associate the attendee with specific event entities such as:
You can assign the attendee to one speaker profile, one sponsor profile, and one exhibitor profile where applicable.
🔺 An attendee can only be linked to one Speaker, one Sponsor, and one Exhibitor profile at a time.
The fourth tab, Files, allows organizers to upload private documents for the attendee. These uploaded files are visible only to the specific attendee from their own profile inside the Eventify app and web platform. This section can be used to upload confidential or attendee-specific documents such as passes, contracts, certificates, onboarding documents, or internal files. After uploading the required files, click on Save to complete the attendee setup.

