Update the registration form settings to gather and organize attendee info just the way you want for a smoother event experience.

Interactive Guide
Or check the step-by-step guide
1: Log in to your Eventify account by navigating to the "Eventify Admin Panel"
Once logged in, click on the "Registration tab" in the main menu.
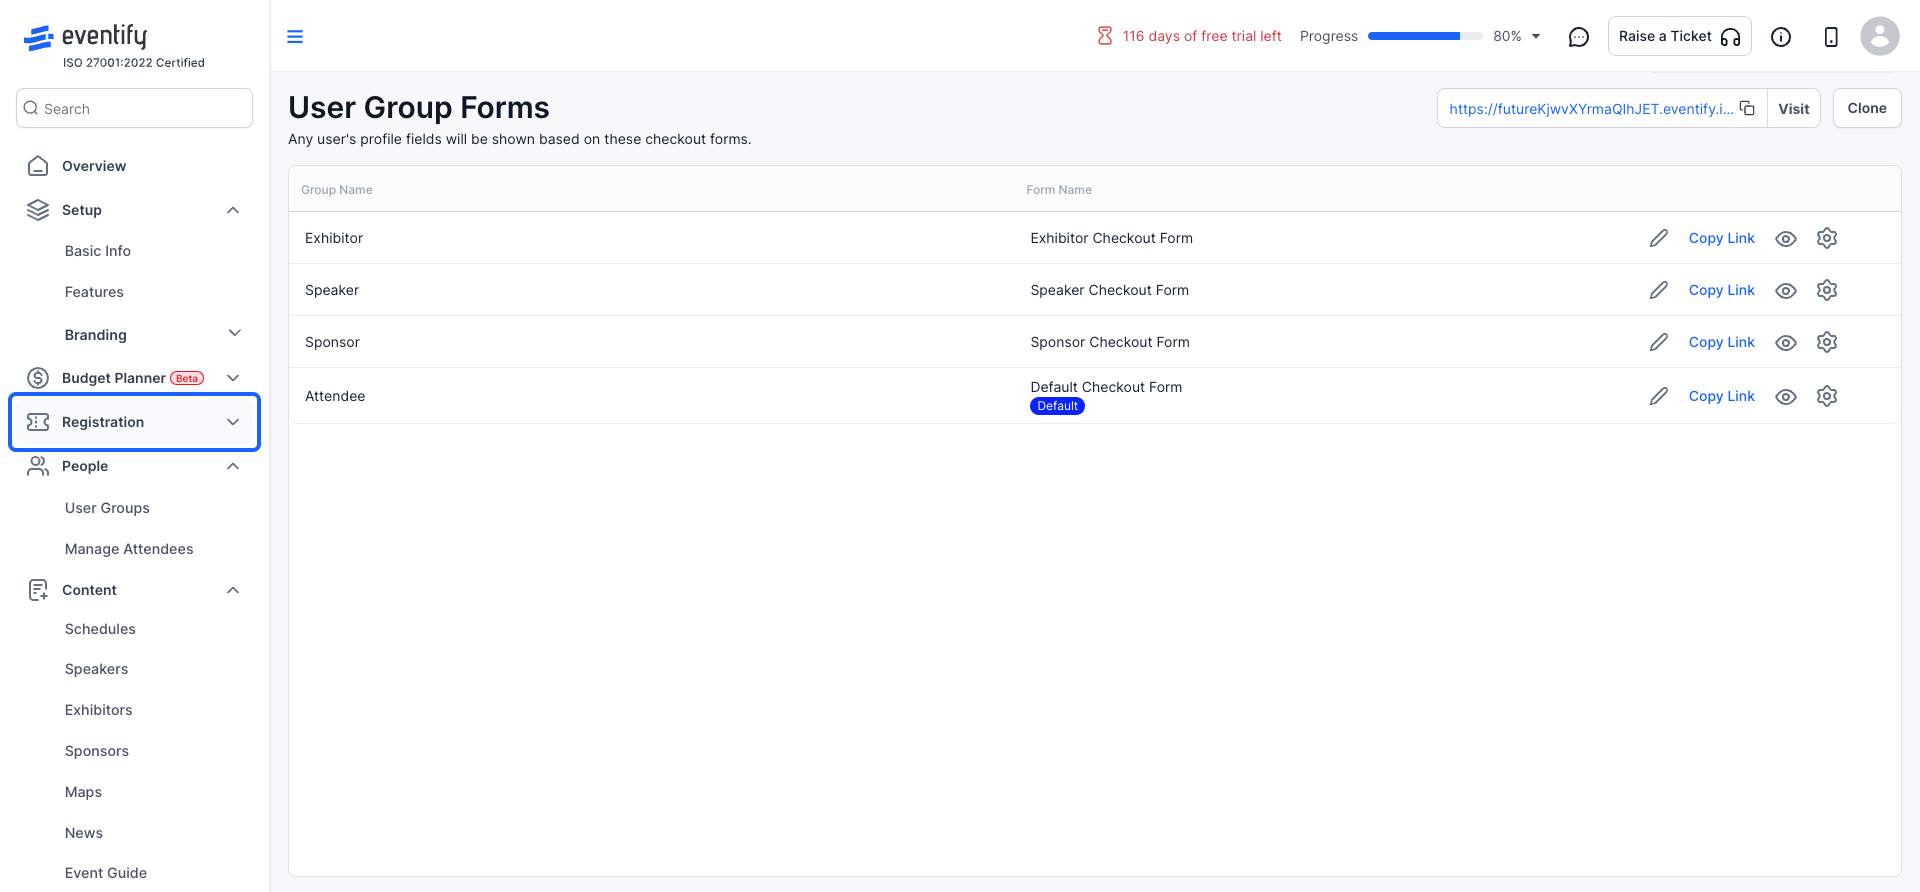
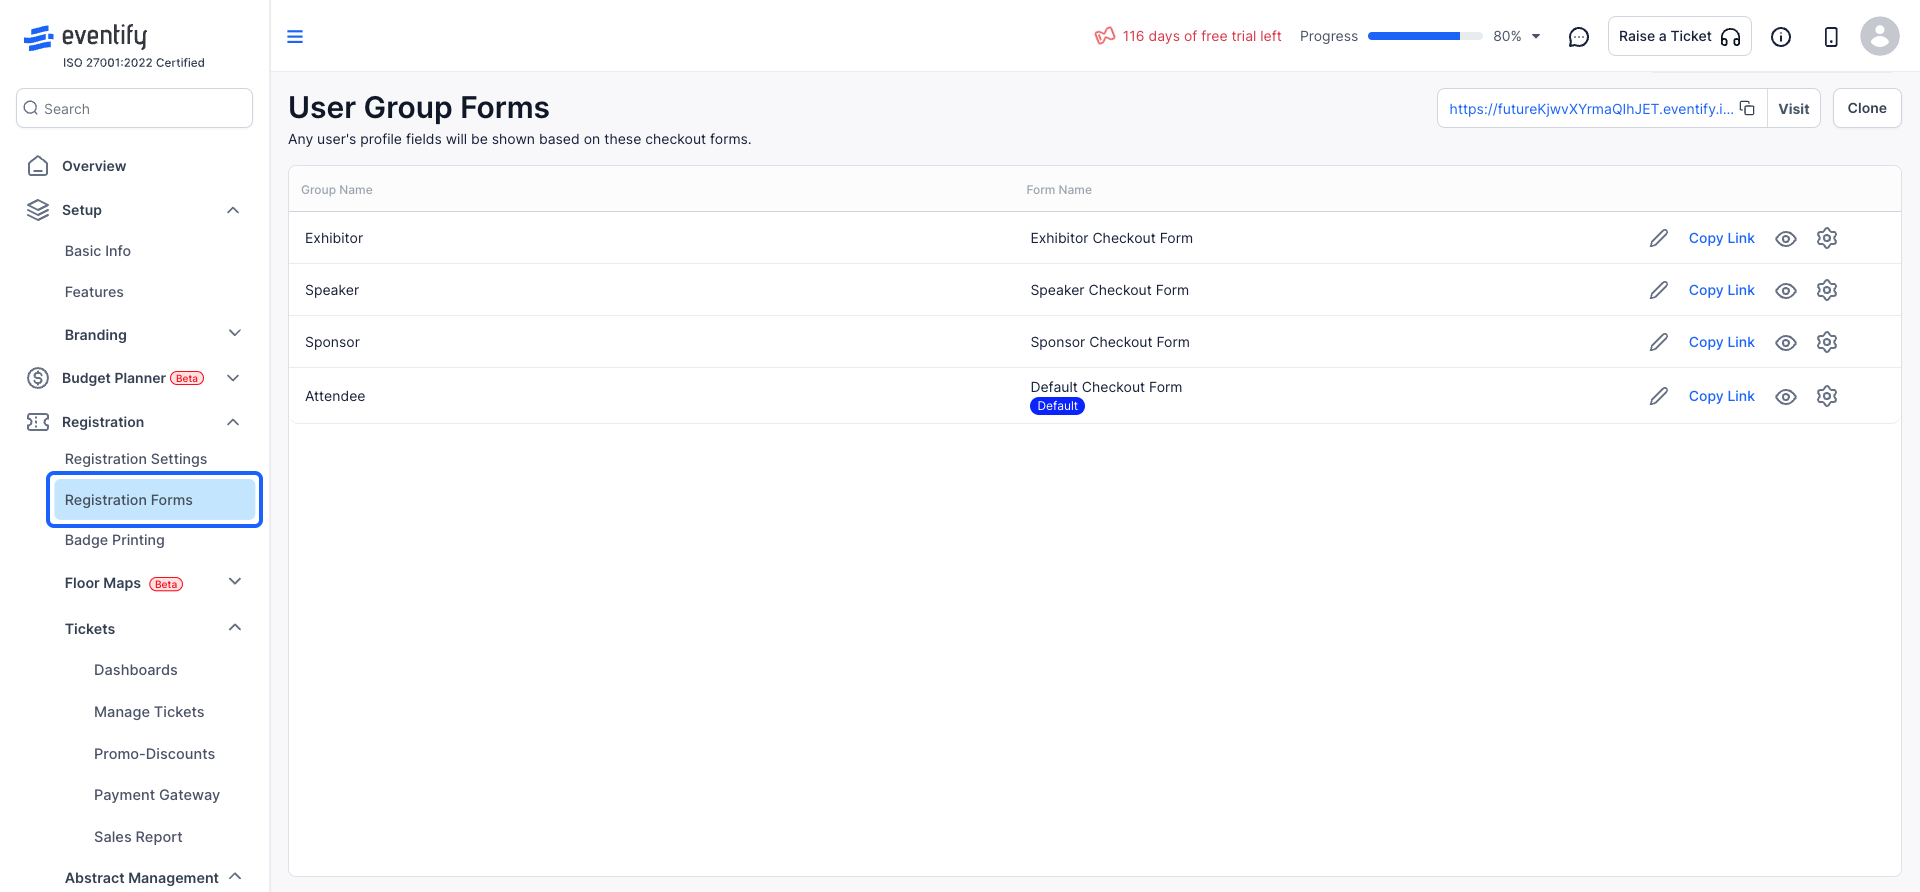
2: From the dropdown, select "Registration Forms"
3: Choose the form you wish to update and click on "Settings" to access the form's settings options.

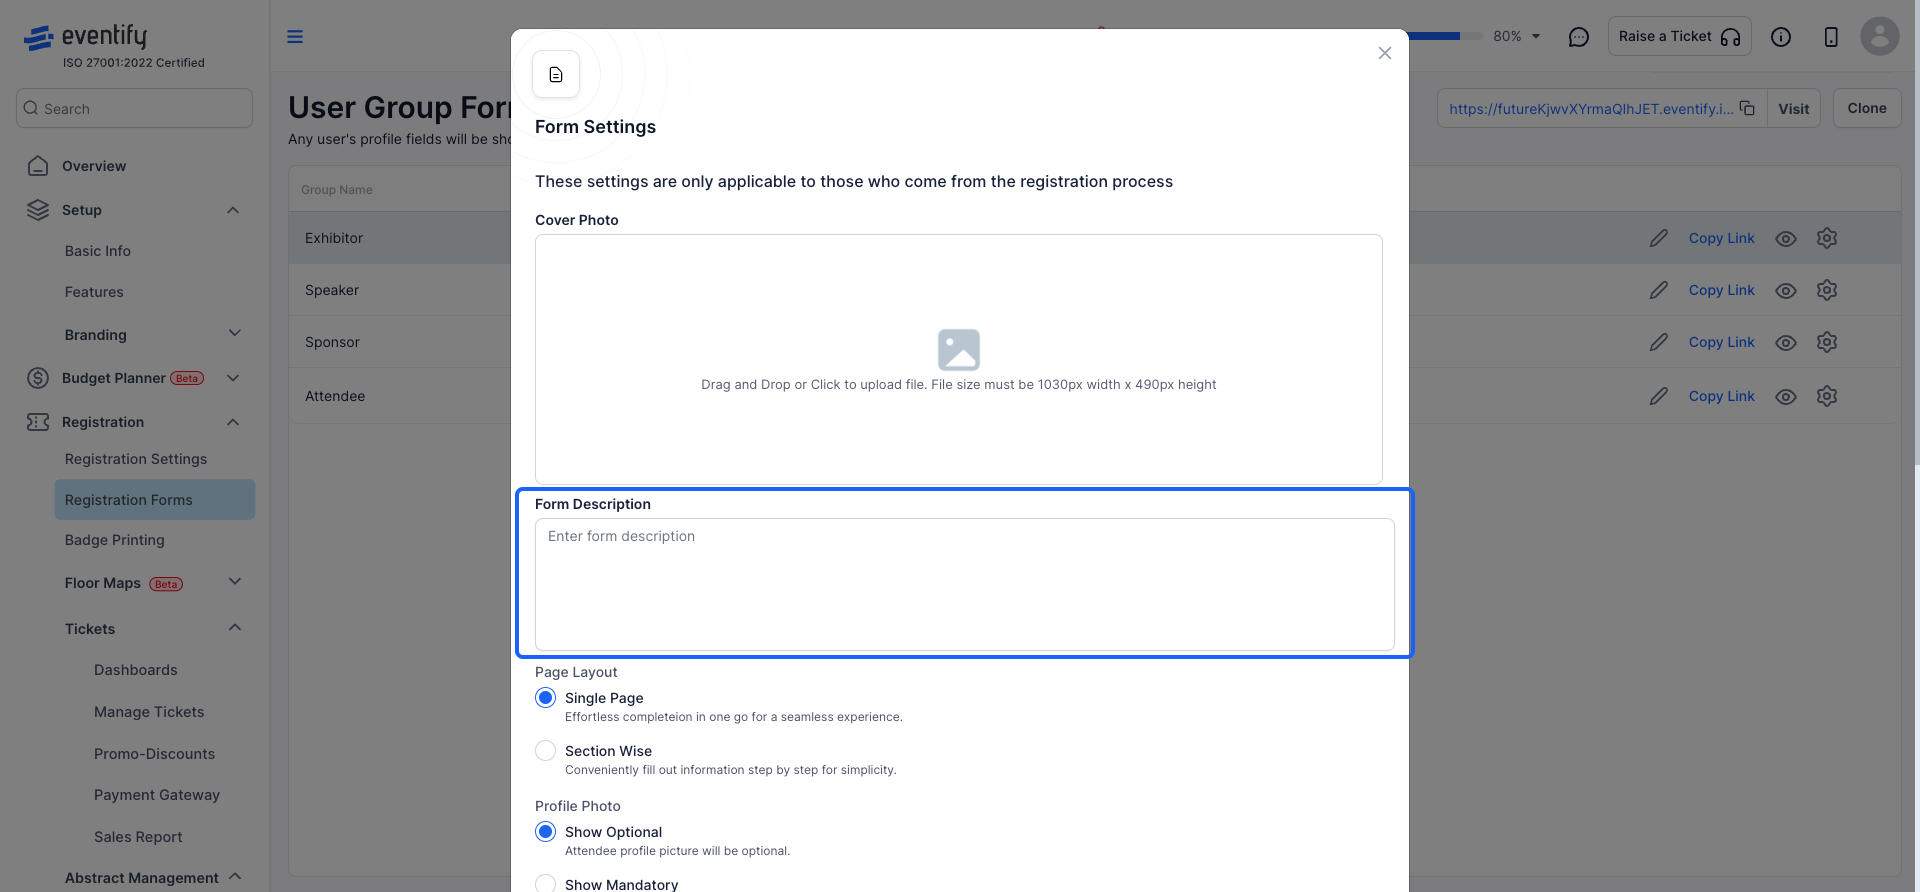
4: You will be able to make changes to the "Form Settings"

5: If you would like to change or upload an image to the form cover, you can do so here.
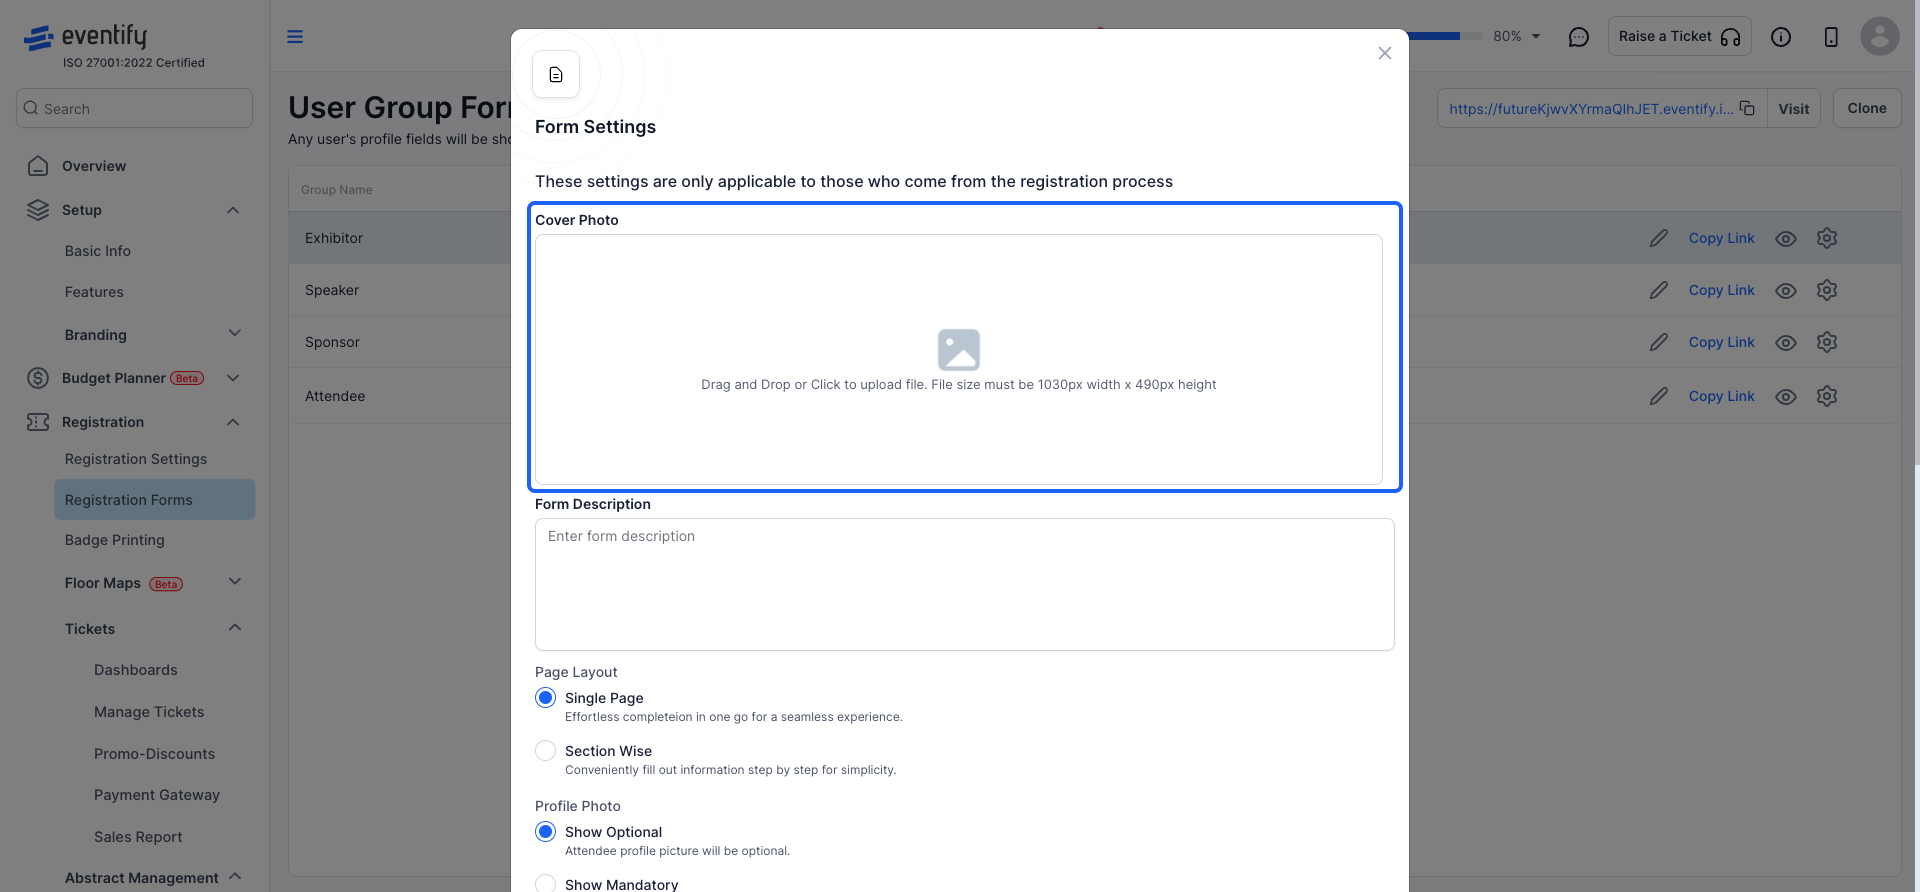
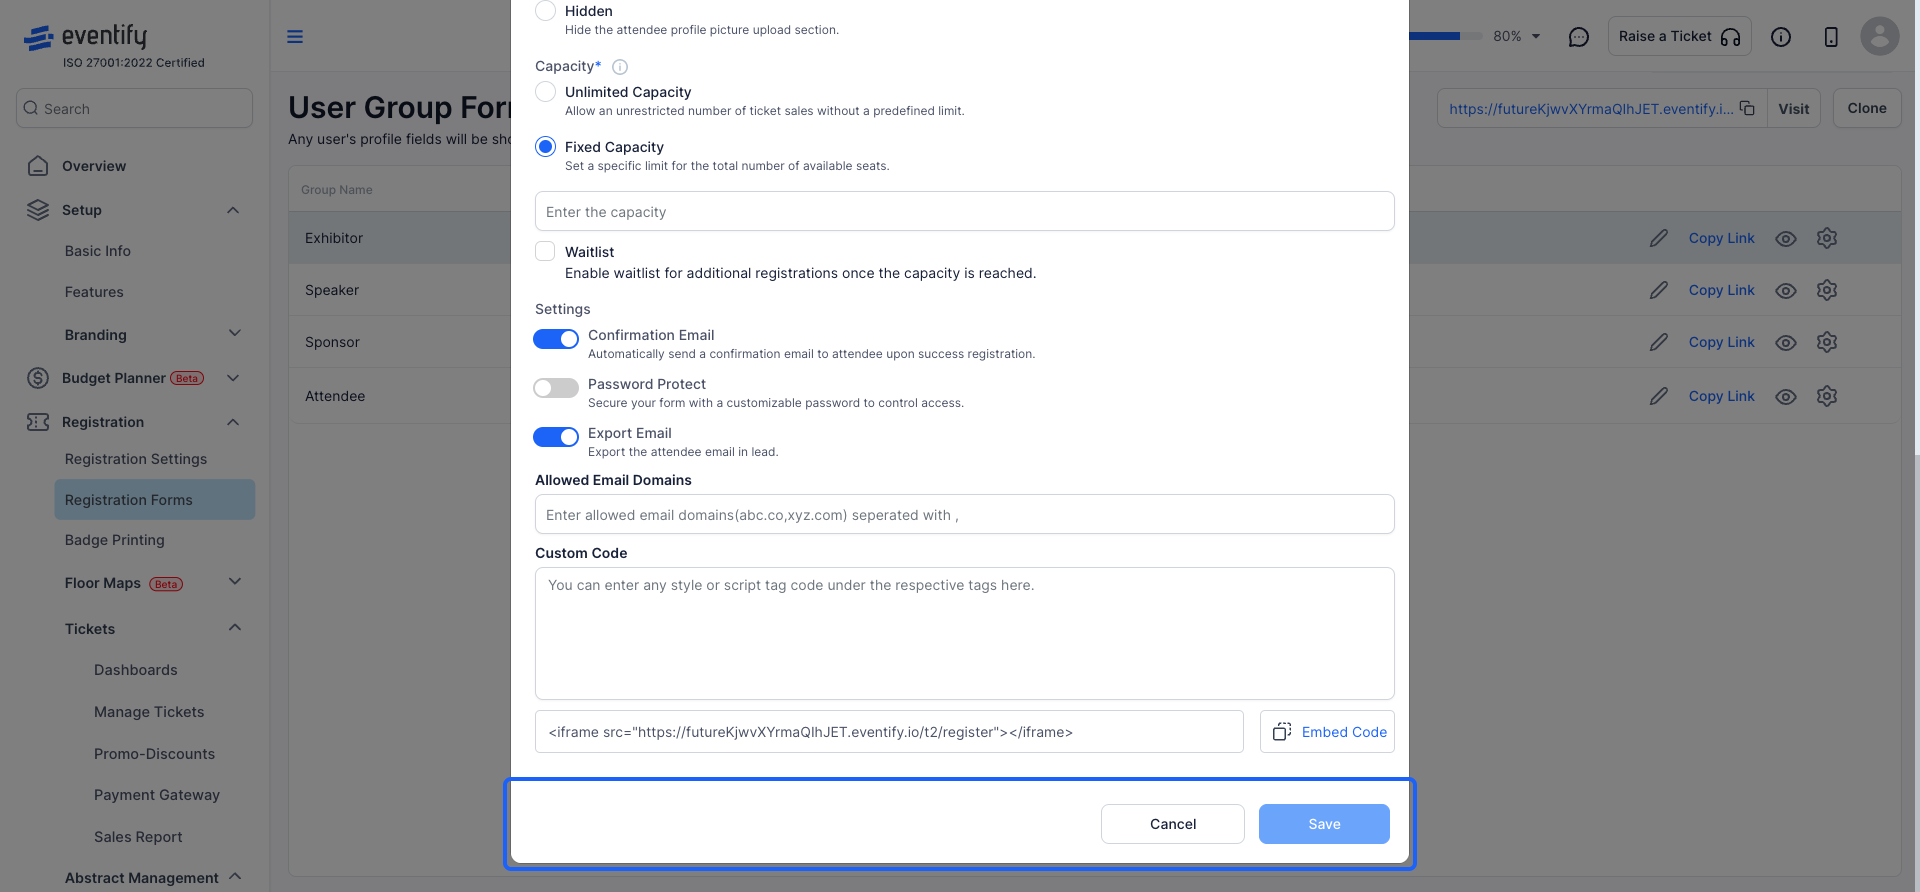
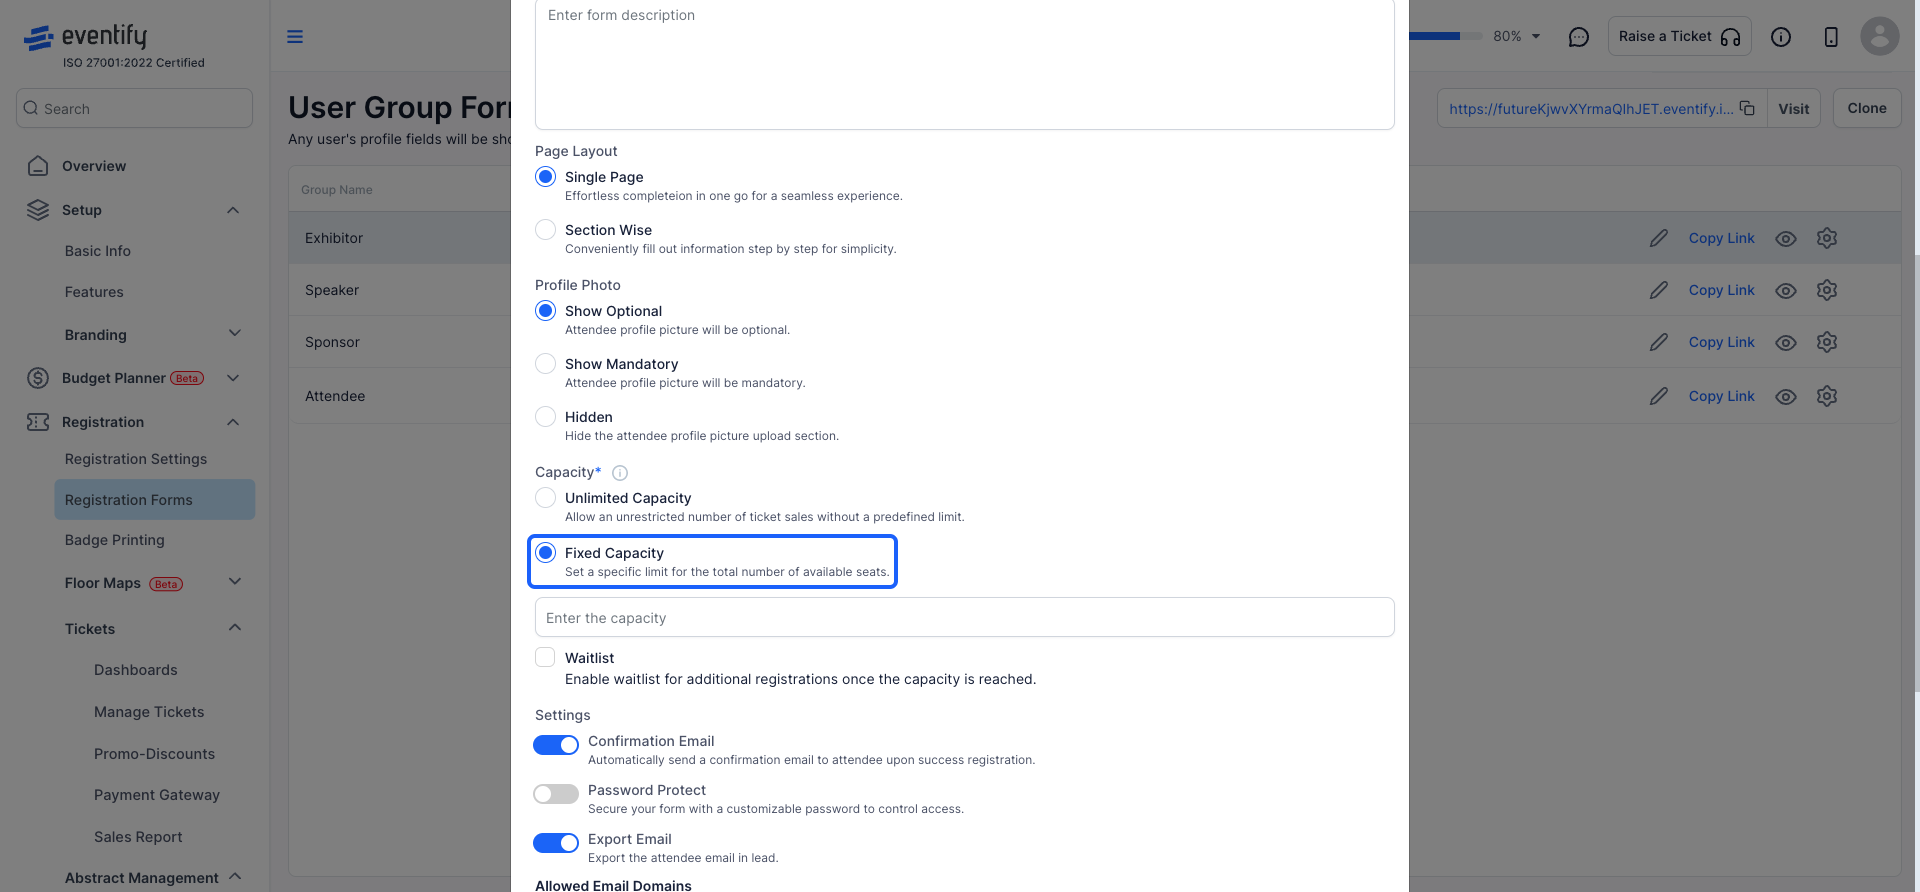
6: Add or edit a brief description of the form.
7: Choose between a single-page layout or a multi-page layout divided by sections.
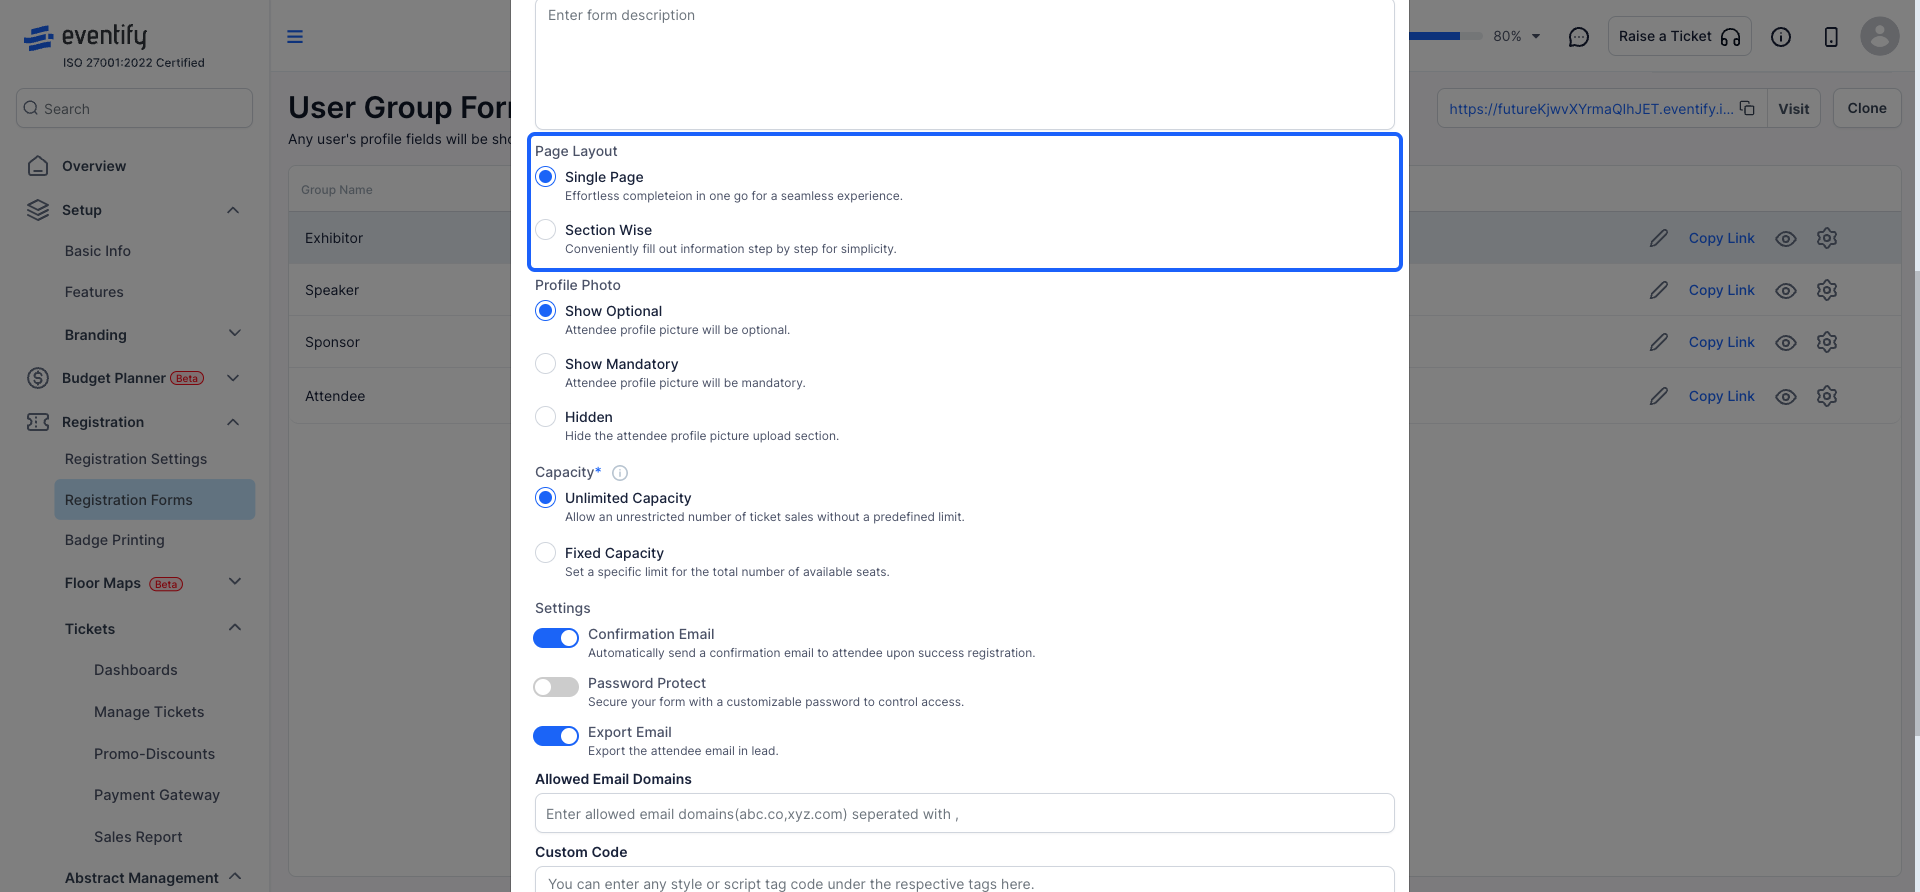
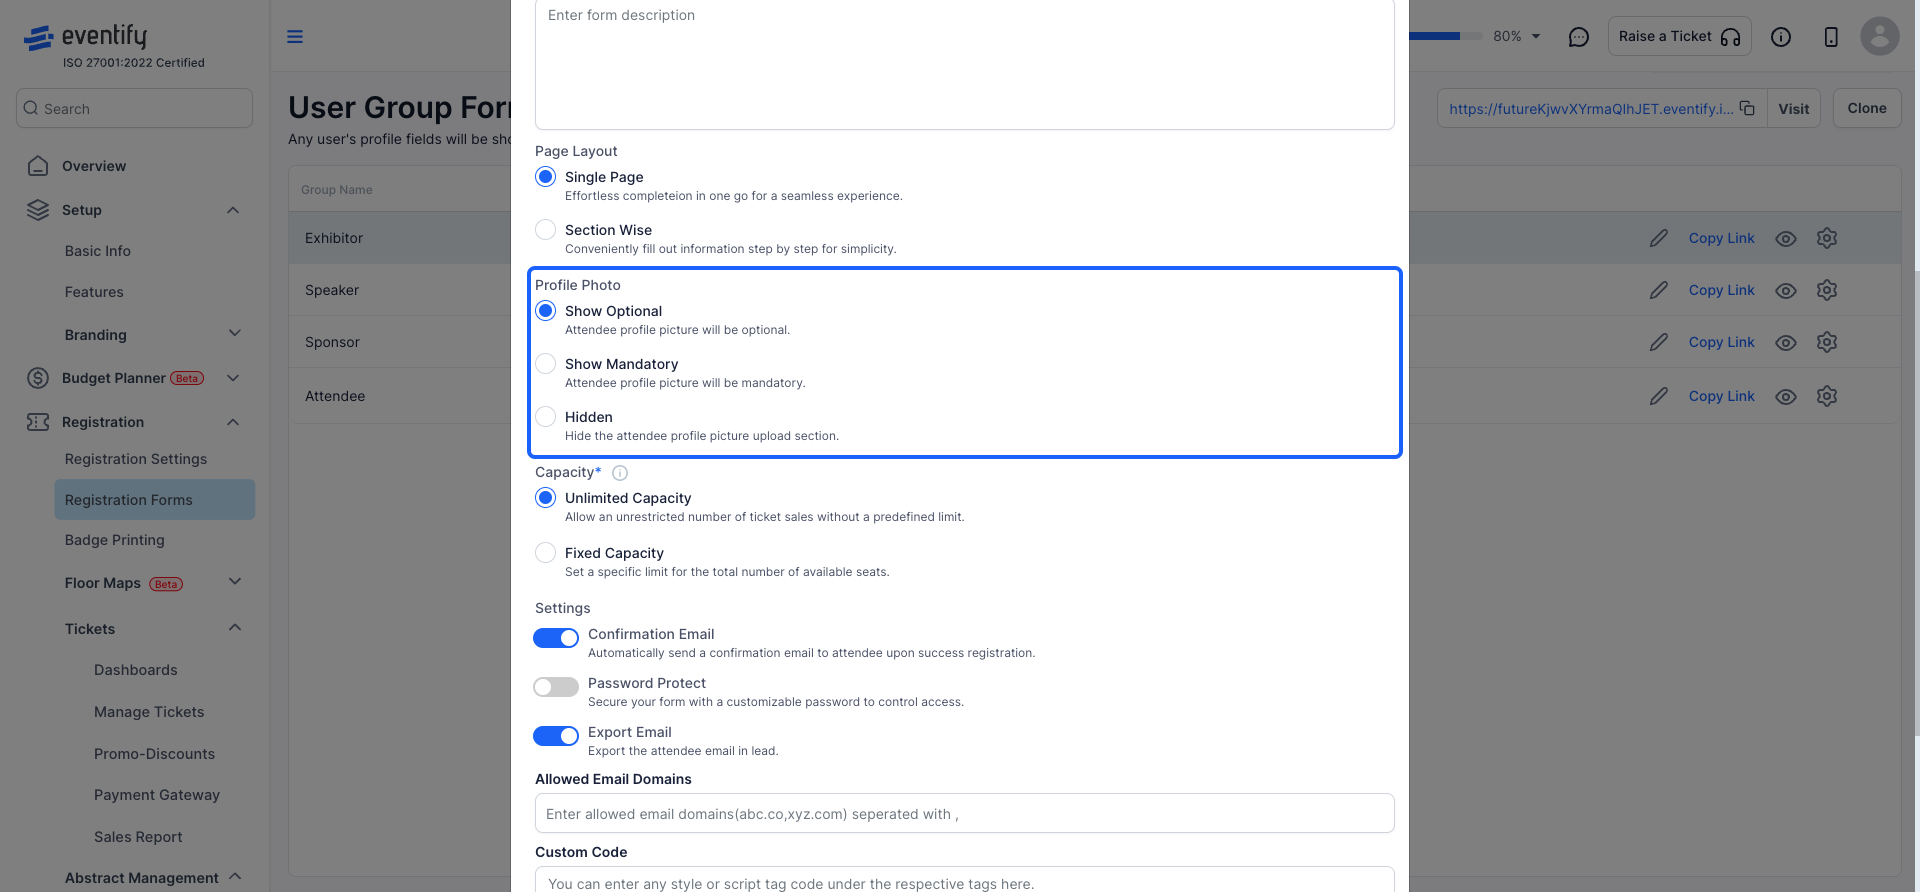
8: Here you can specify the requirement for attendees registering to provide a "Profile Picture"
9: By setting a capacity, you can limit the registrations for a specific user group or allow unlimited registrations.
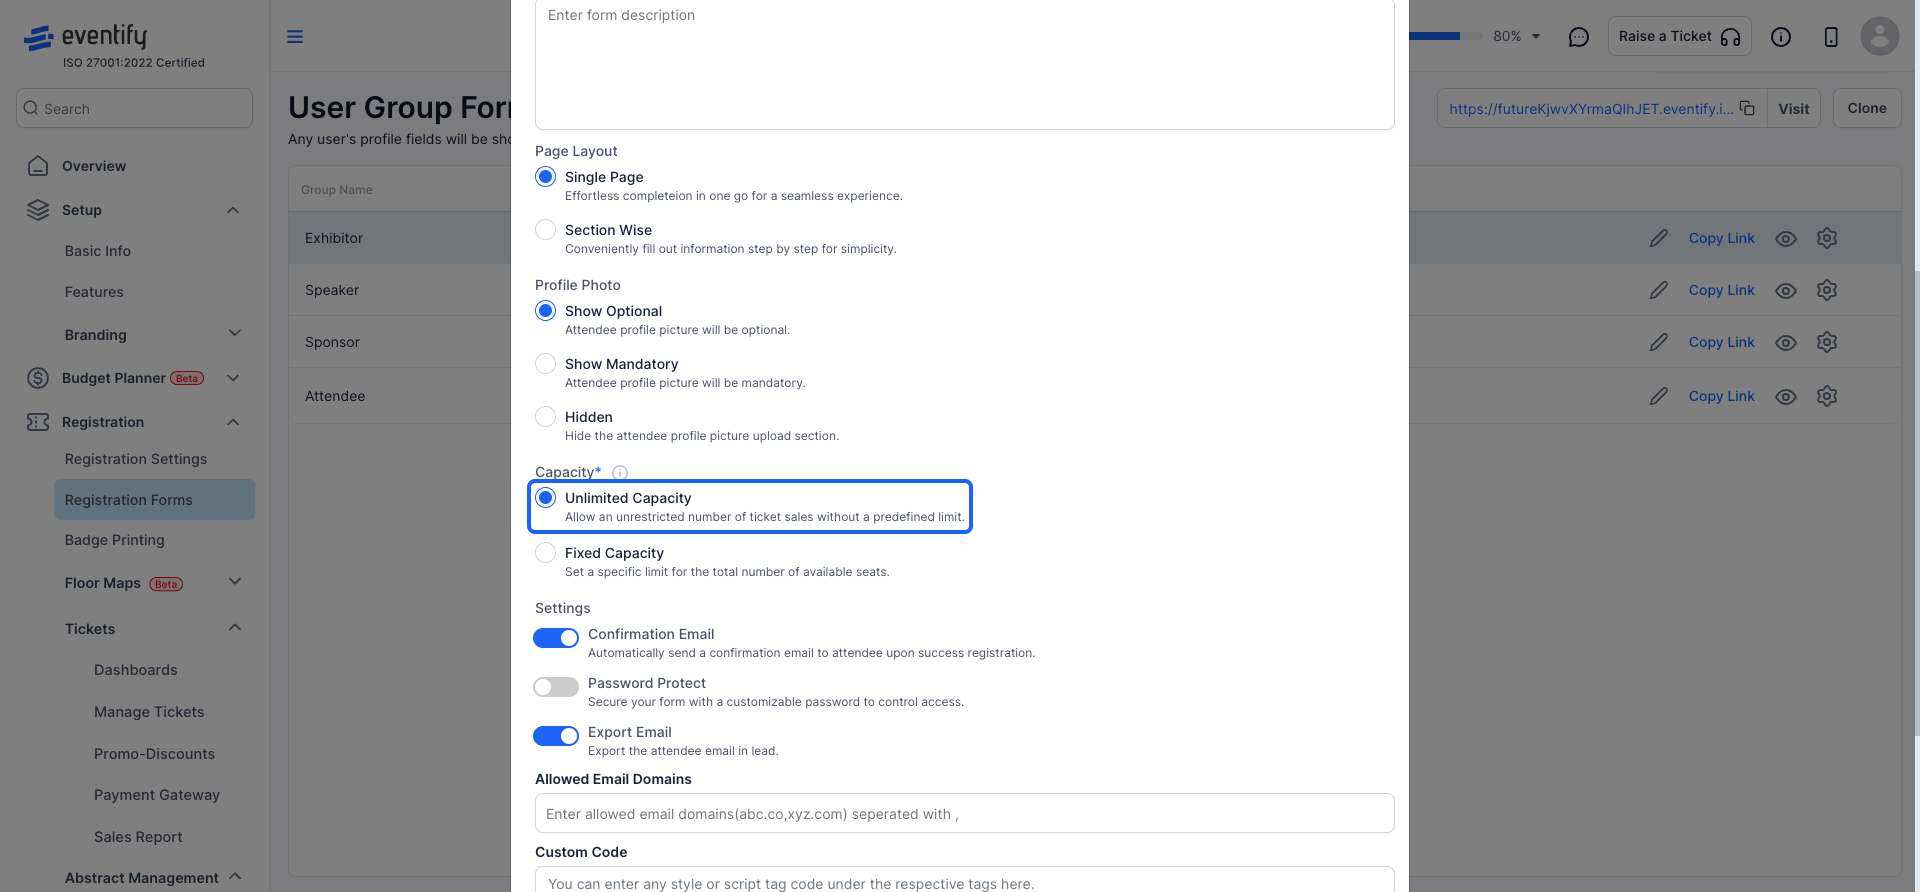
10: Select "Fixed Capacity" to specify the total number of available seats.
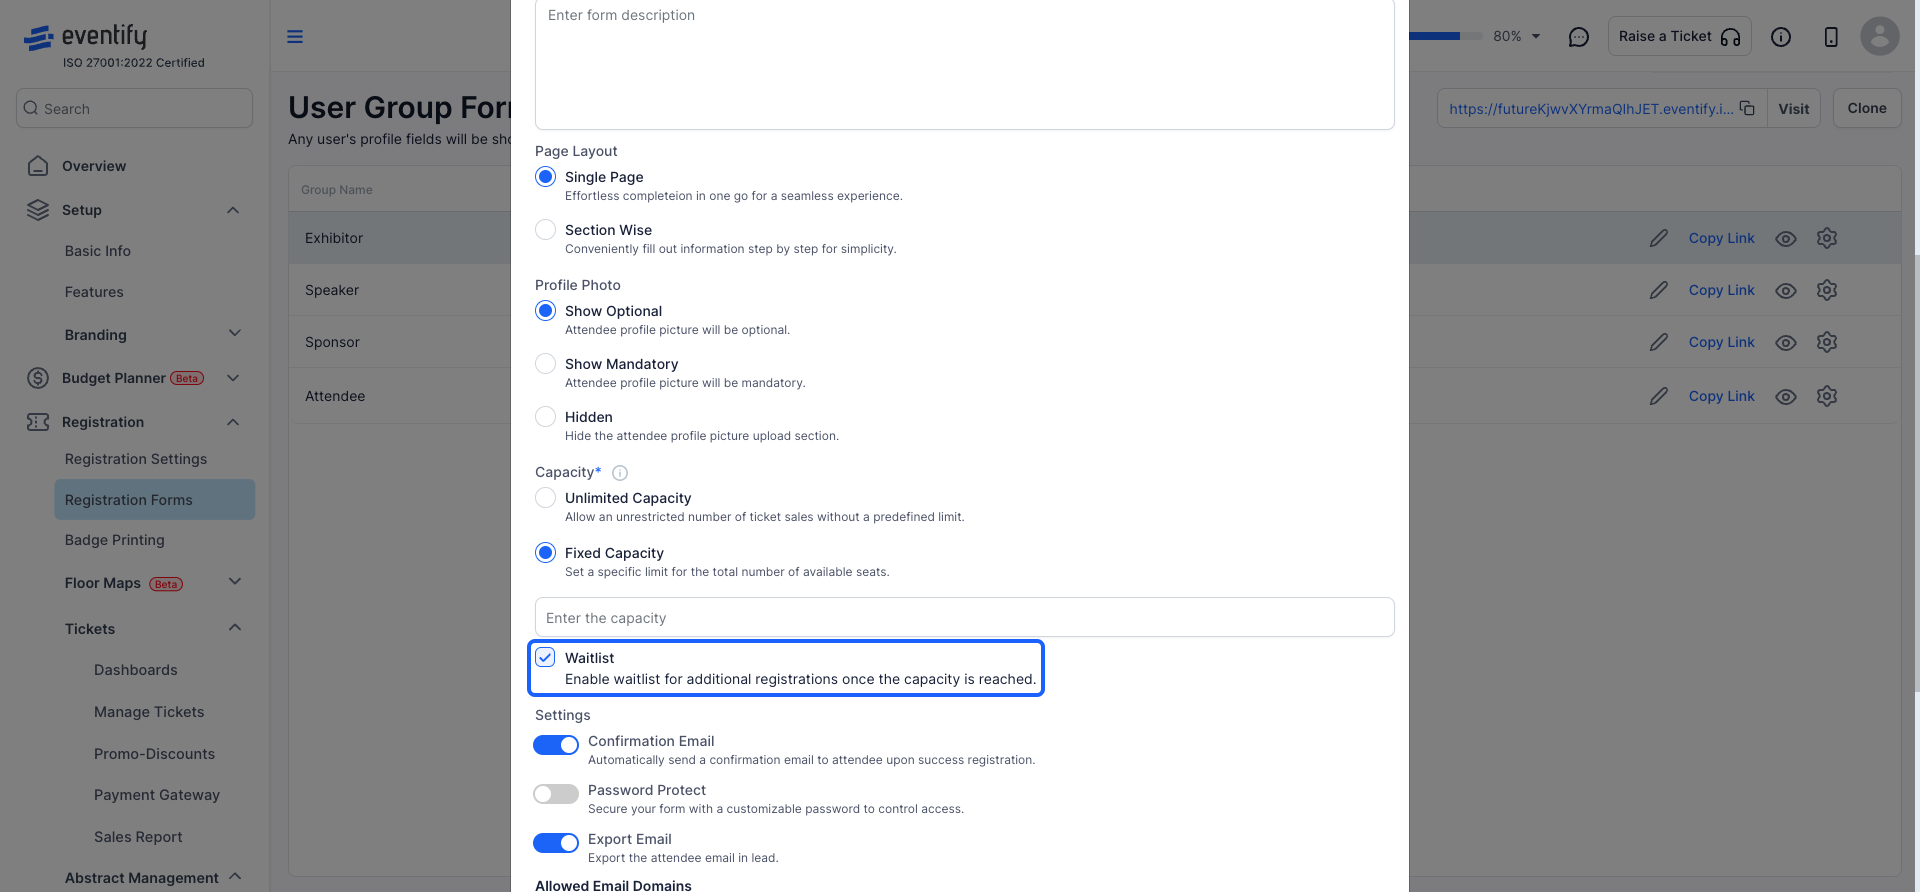
11: You can enable a "Waitlist" for attendees when the registration capacity is reached.
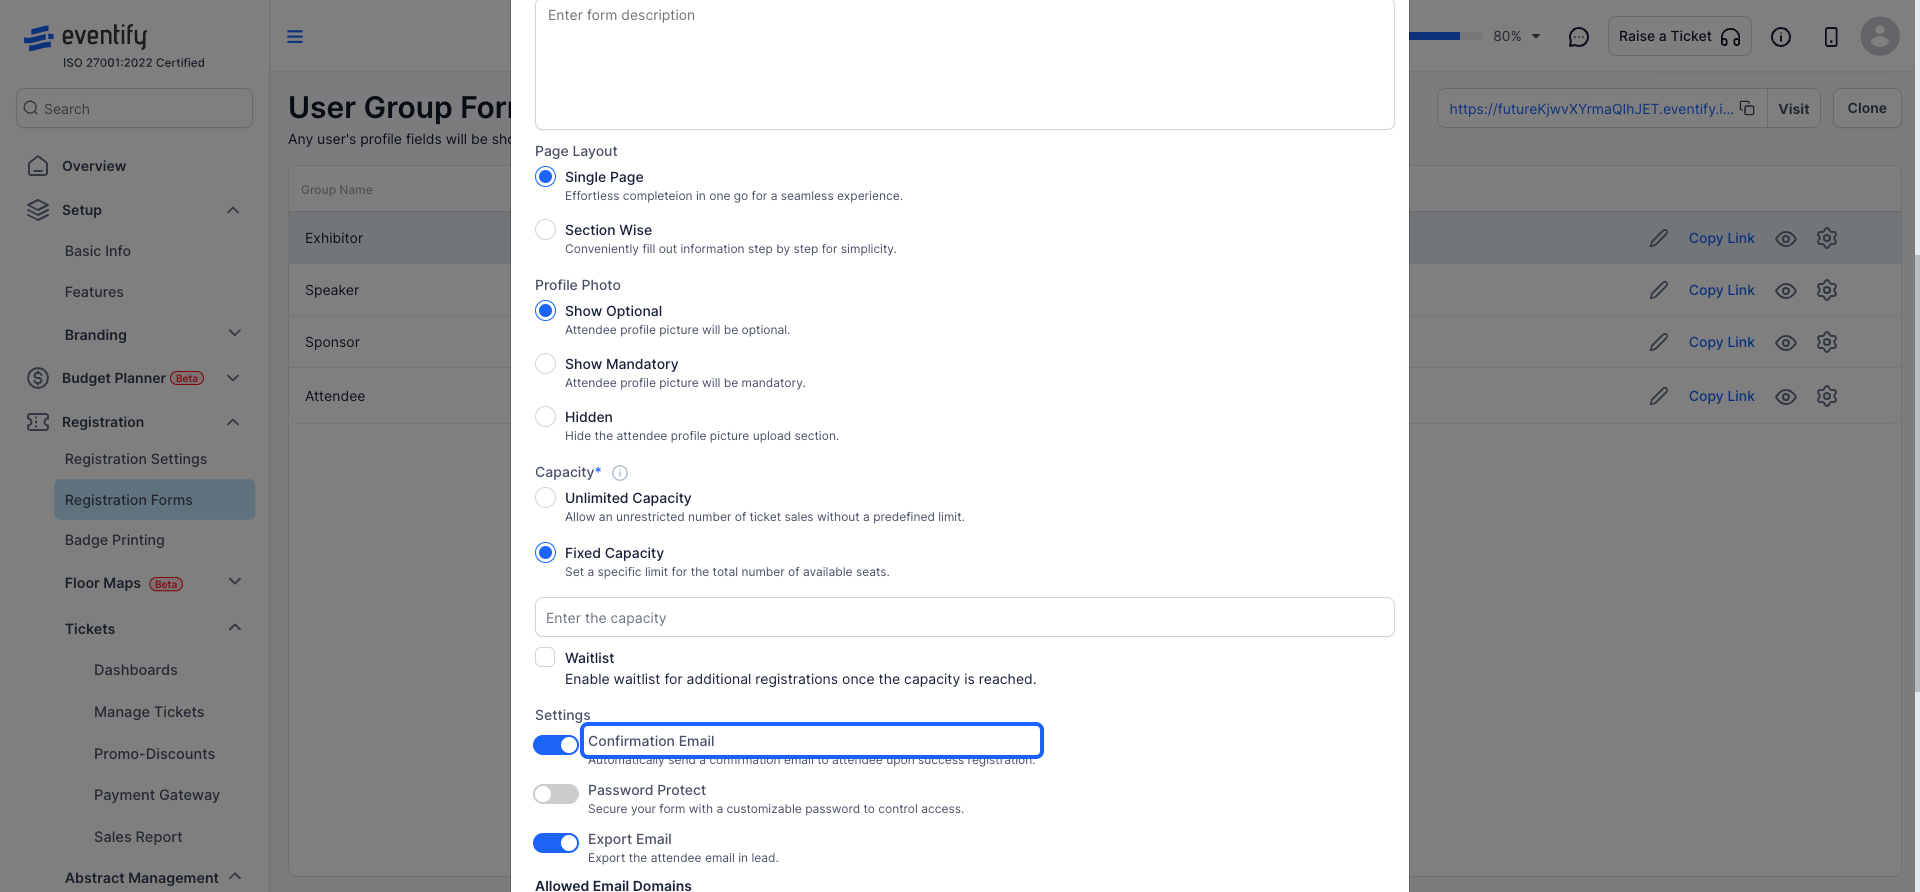
12: You can set this to On, if you wish attendees to receive an email upon completing registration
13: It is strongly suggested that you protect the form with a password if you require private entry through it
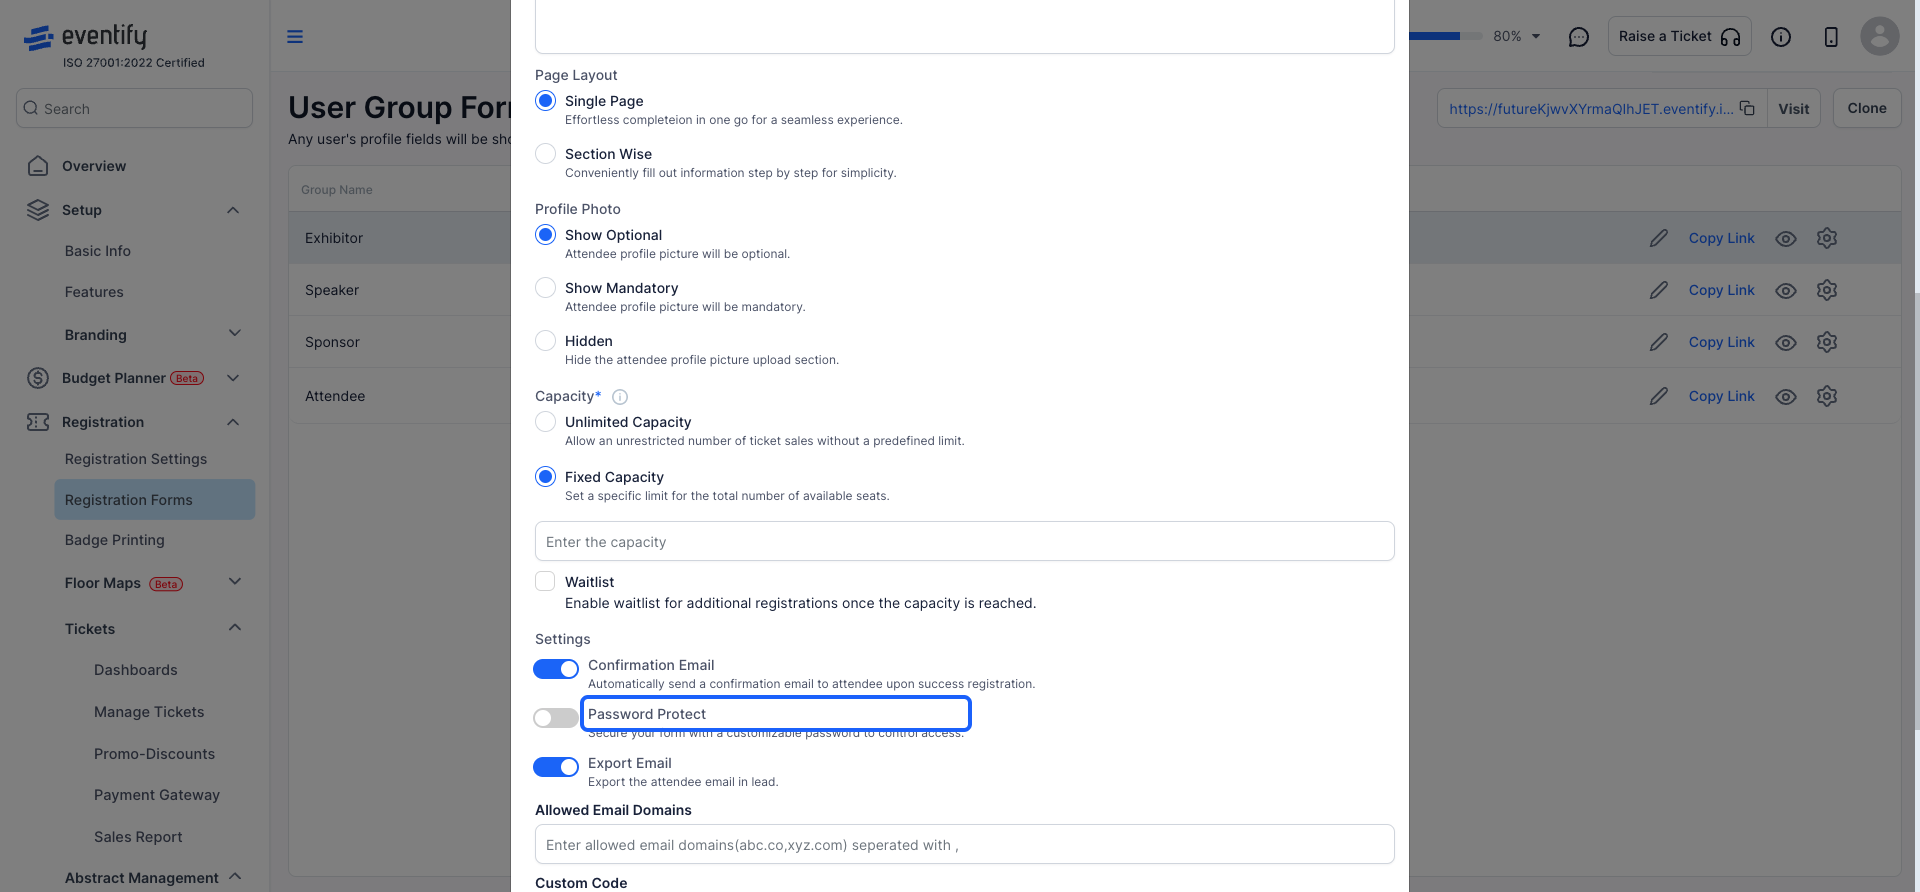
14: Allow attendee email addresses to be exported for lead generation purposes.
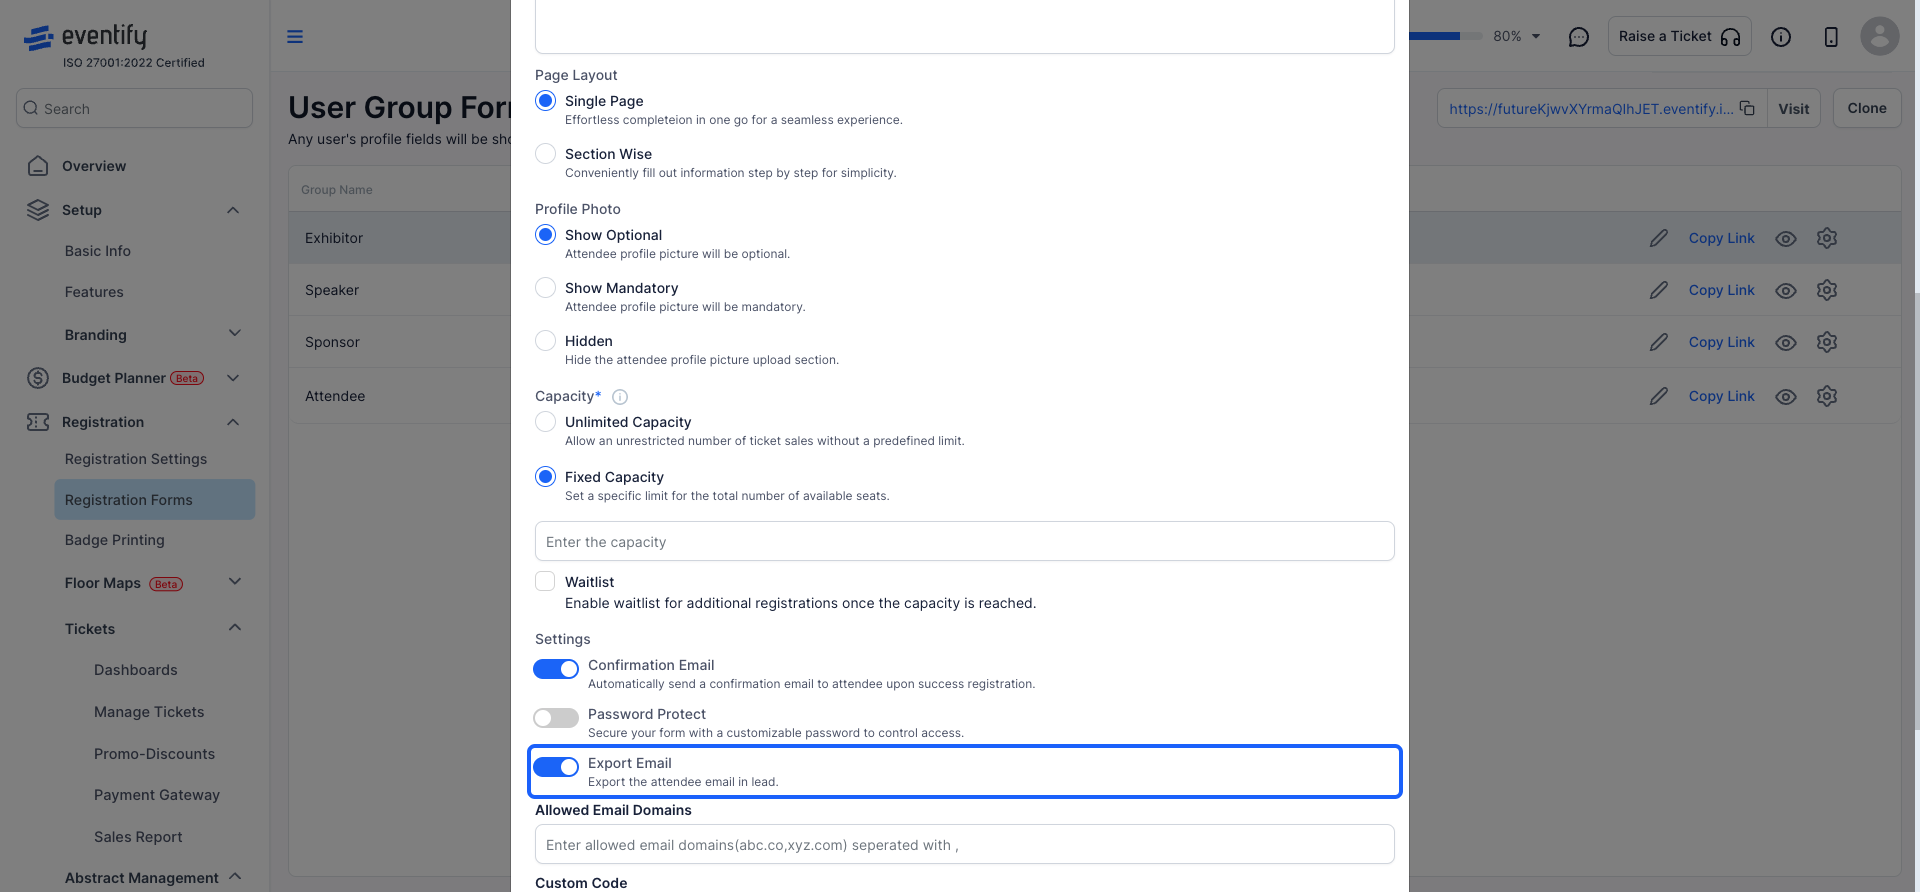
15: Whitelist email domains and block any other domain from registration
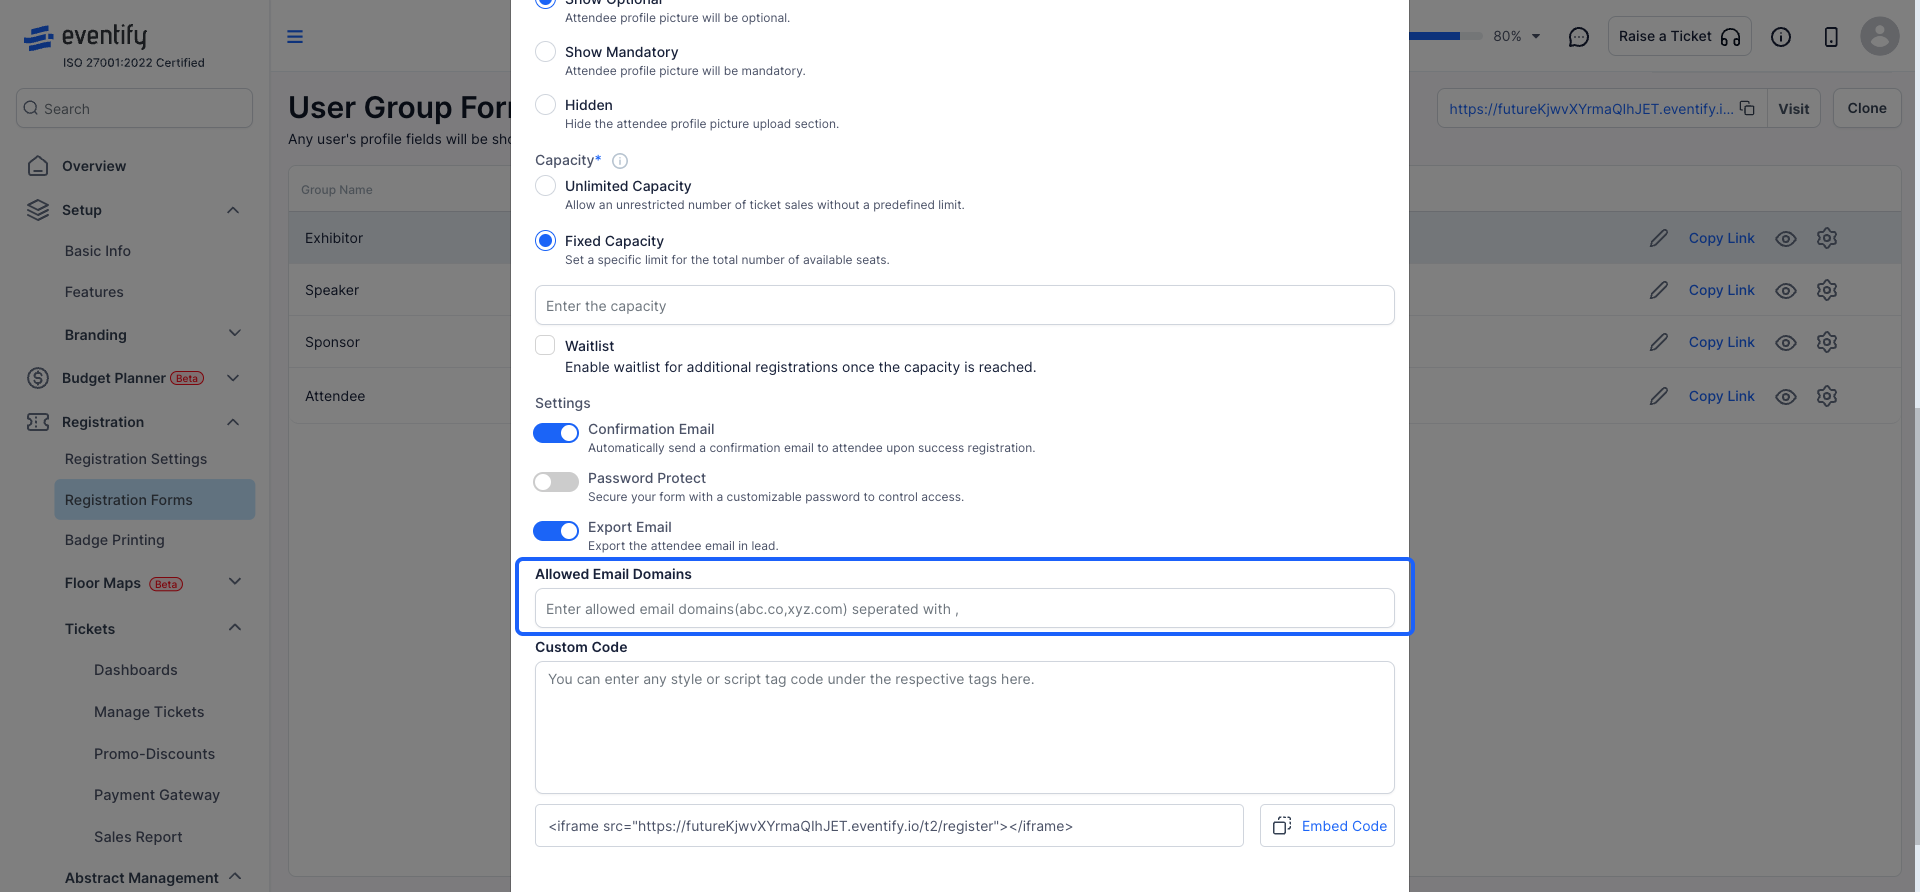
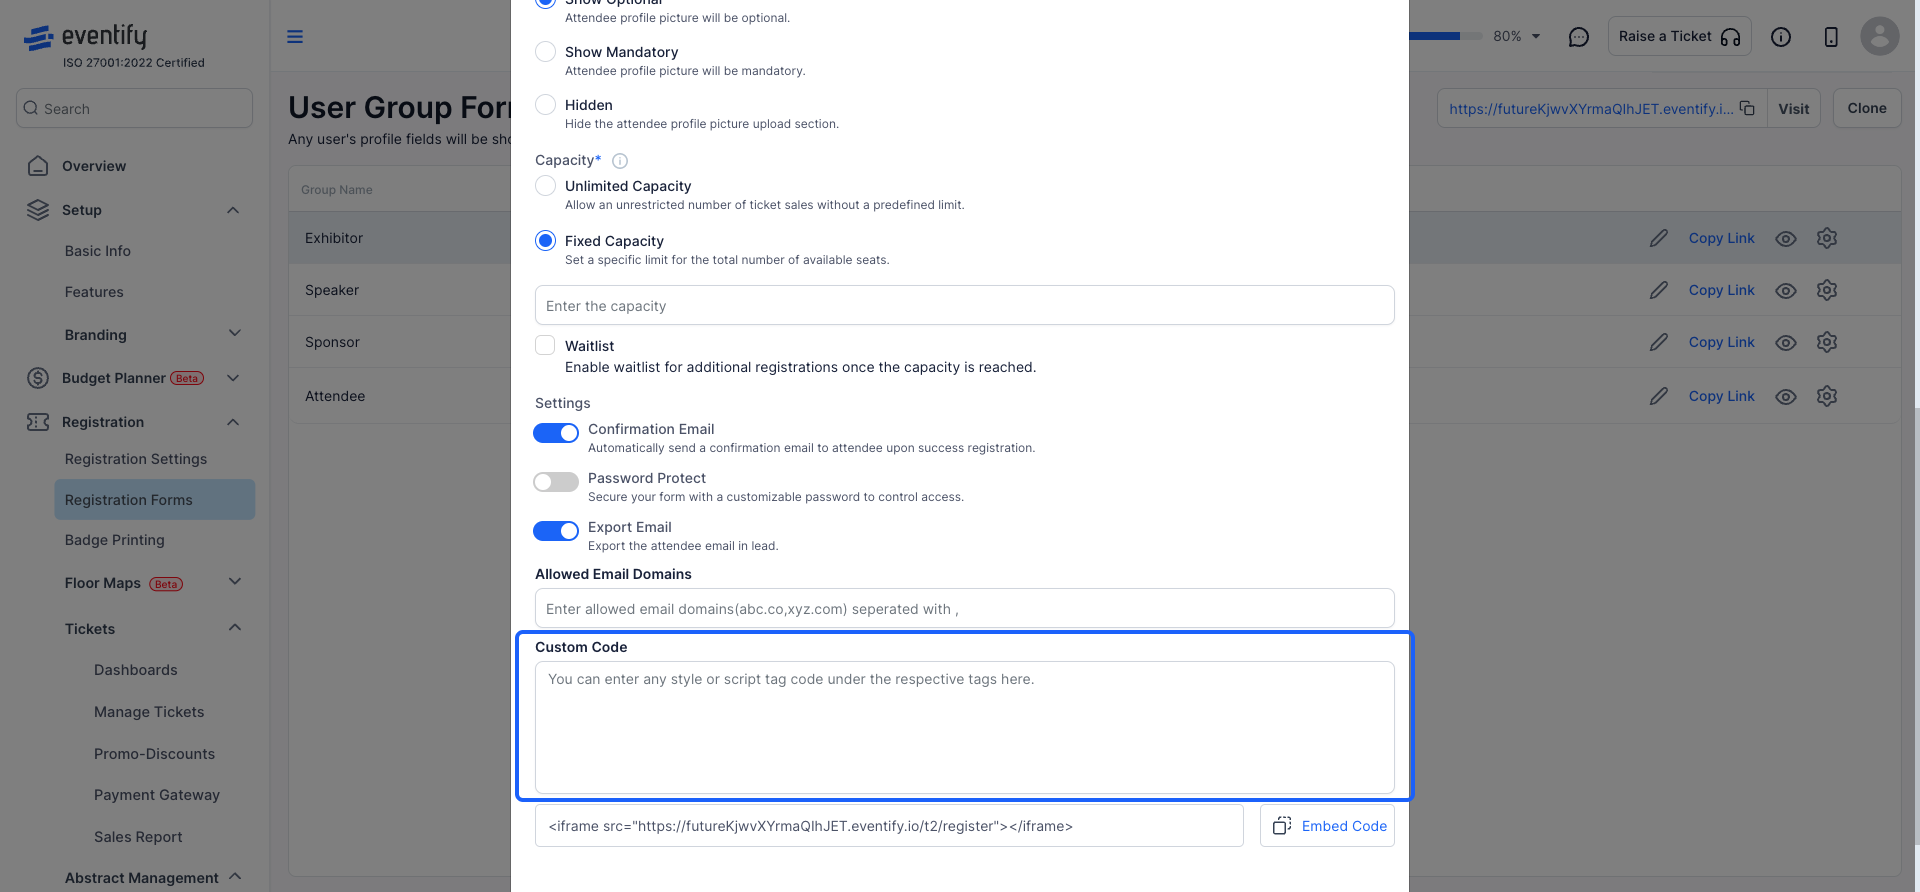
16: Add any custom code if required
17: After making the necessary adjustments, click the "Save" button to confirm your changes before exiting.