One of the first things you'll want to nail down when setting up your event is the dates. Getting this right early on helps attendees plan ahead and makes sure everything else on your event page reflects the correct schedule. Here's how to set your event dates in Eventify.
Log in to your Eventify account and head to the Setup section from your main dashboard. This is your starting point for all the key event configuration settings.
Inside Setup, click on Basic Info. This is where you'll find the core details for your event, including venue and date options.
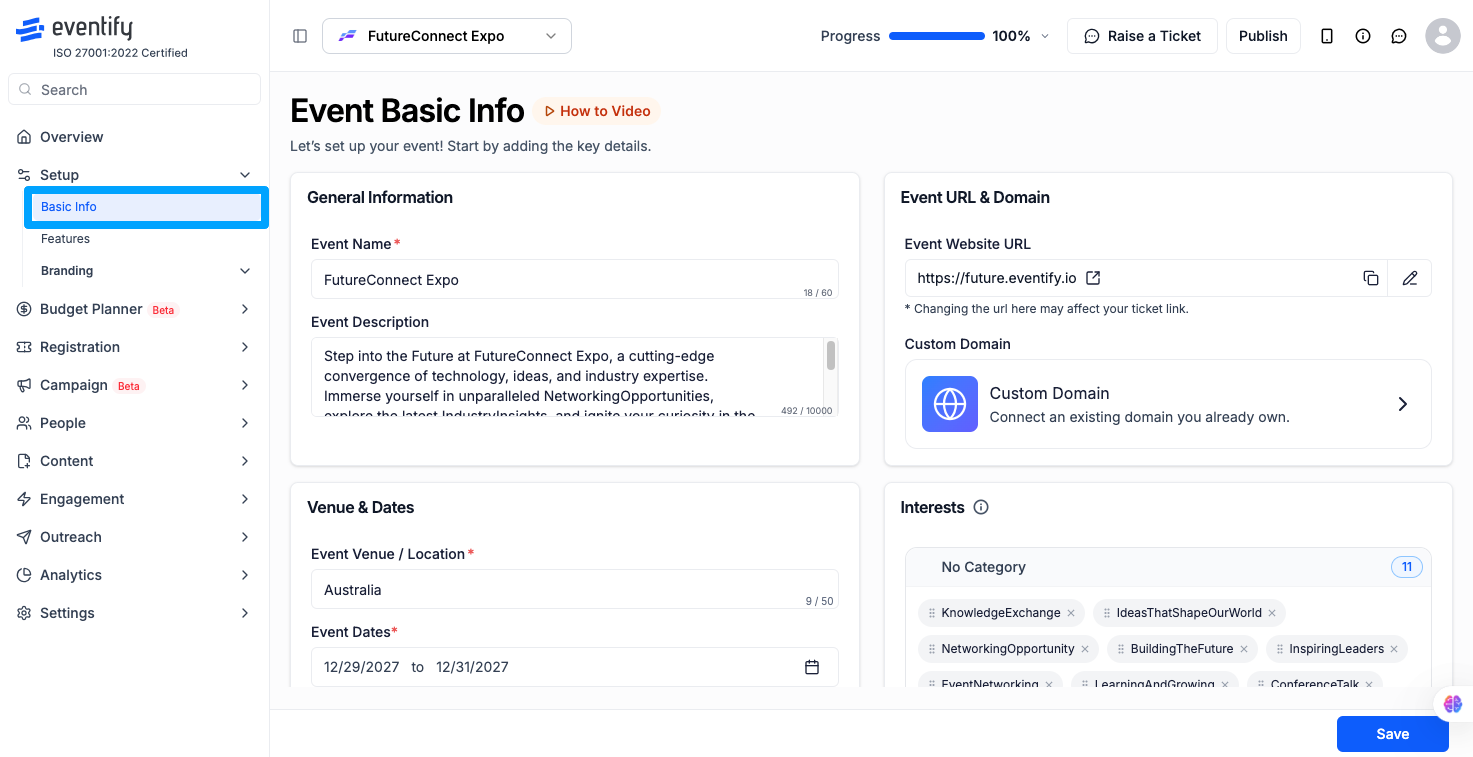
Scroll down to the Venue and Dates section. This is where you can manage both the location and the timing of your event.
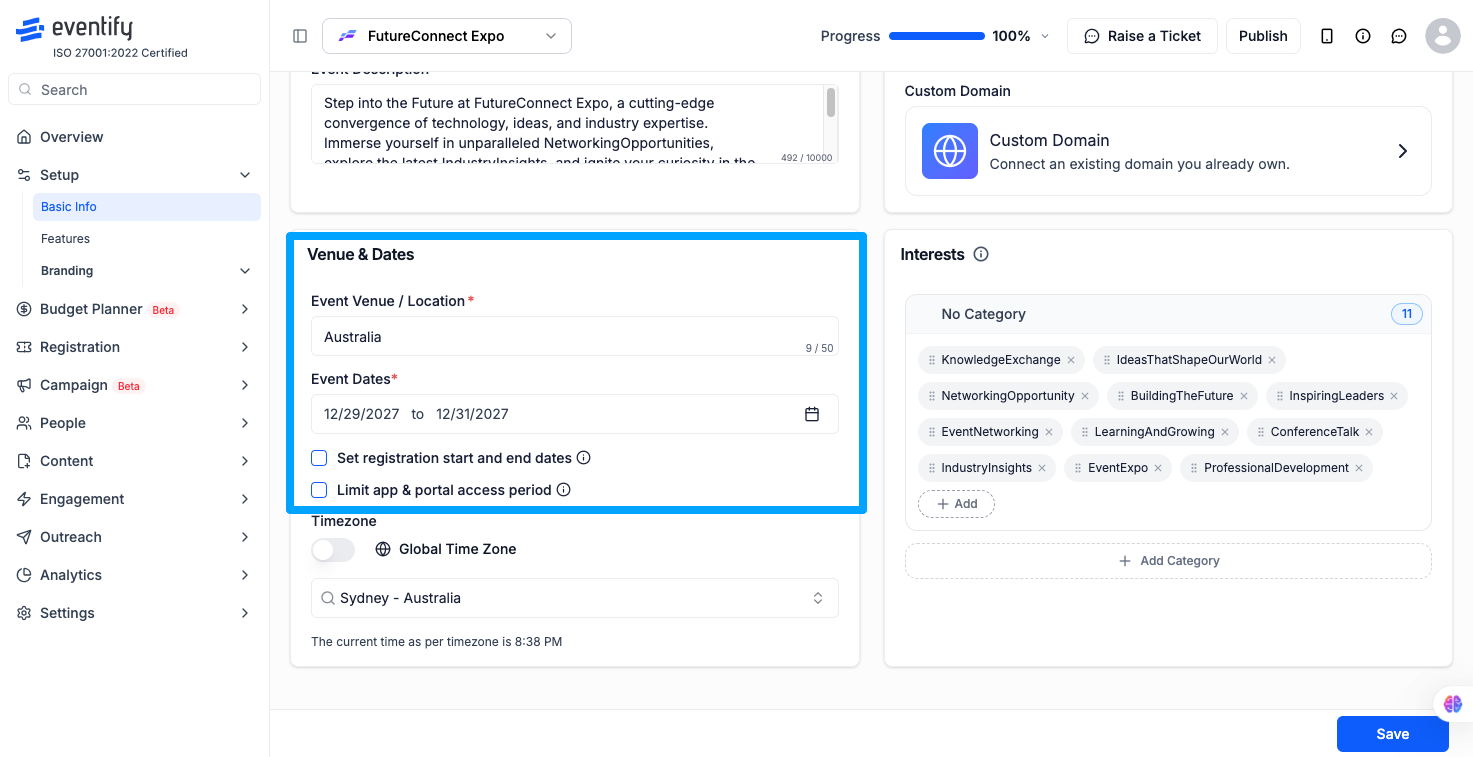
You'll see a small calendar icon next to the date fields. Click on it to open the date picker and start selecting your event dates.
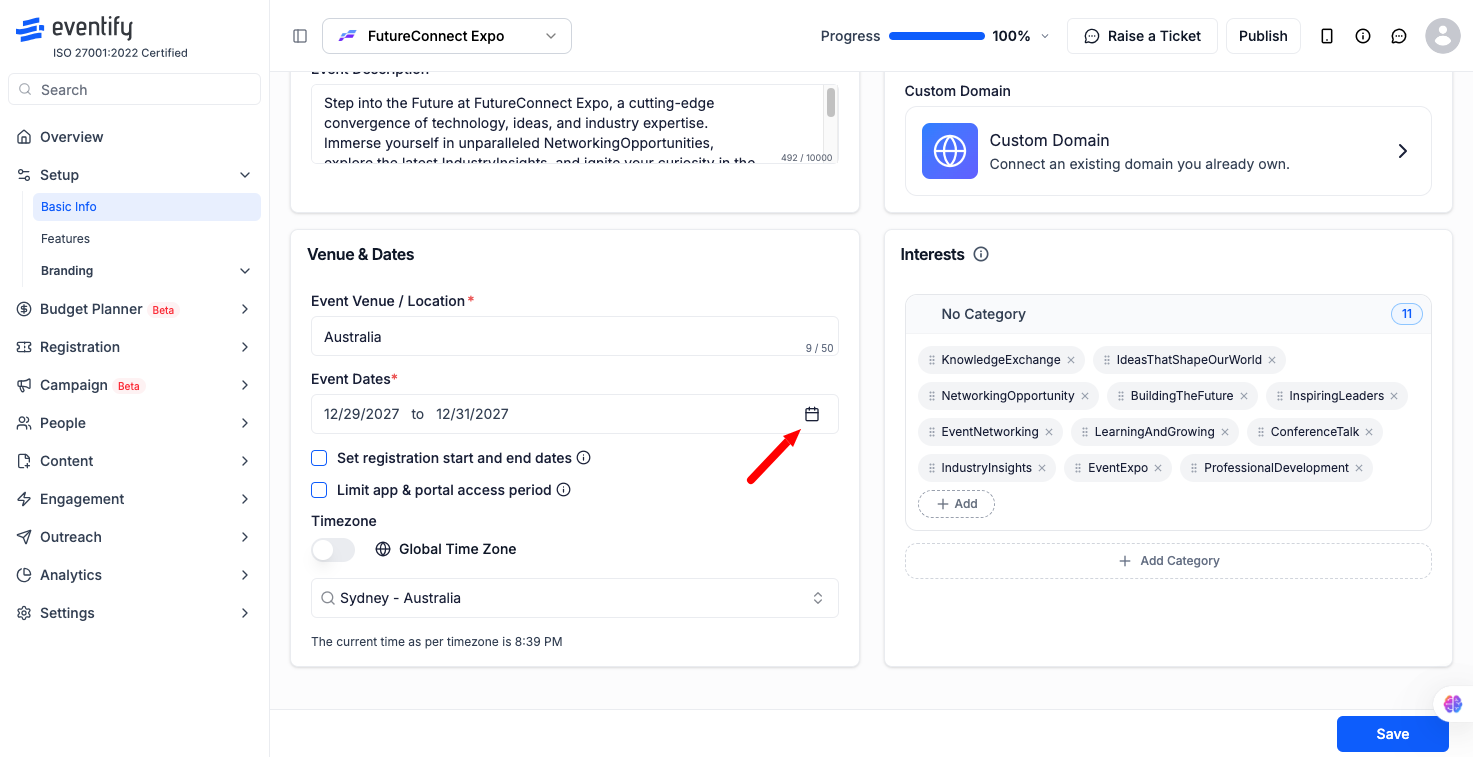
Pick the date your event begins. Use the calendar to navigate to the right month and click on the day you want.
Now select the date your event wraps up. Keep in mind that the maximum duration for an event is 30 days, so your end date needs to fall within that window from the start date.
.png)
Once both dates are selected, they'll be applied to your event right away. You can always come back and update them if your schedule changes.
Q: Can I change the event dates after the event has been published?
Yes, you can update the dates even after your event is live. Just follow the same steps and save the new dates. It's a good idea to let your attendees know about any changes so they're not caught off guard.
Q: What is the maximum duration for an event?
Events on Eventify can run for a maximum of 30 days. If your event spans longer than that, you may want to split it into separate events or reach out to the support team to discuss your options.
Q: Can I set a single-day event?
Absolutely. Just set the start and end date to the same day. Eventify will treat it as a one-day event and display it accordingly on your event page.
Q: Does the event timezone matter when setting dates?
Yes, it does. Make sure your event timezone is set correctly in your settings before locking in the dates. This ensures attendees in different locations see the right times and dates for where the event is actually happening.
Q: Can I set dates for a multi-day event with sessions on specific days?
Yes. Once your overall event dates are set, you can go into the agenda or schedule section to add sessions on specific days within that date range. The event dates act as the overall container, and your sessions sit inside them.
Q: What happens if I accidentally set the wrong dates?
No worries, just go back to the Venue and Dates section, click the calendar icon again, and update them. Changes are applied as soon as you save, so it's a quick fix.
