When your event sells out, the waitlist feature lets interested attendees stay in line. If a spot opens up, you can invite waitlisted people to complete their registration — keeping your event full and ensuring no one gets left out entirely.
There are two ways to enable a waitlist on Eventify: per individual ticket type, or globally across your entire event. This guide walks through both.
Use this option when you want waitlist behaviour on only certain ticket types — for example, a paid VIP ticket but not a free general admission ticket.
How to access: Event Dashboard → Registration → Tickets → Manage Tickets → Edit Ticket → Capacity
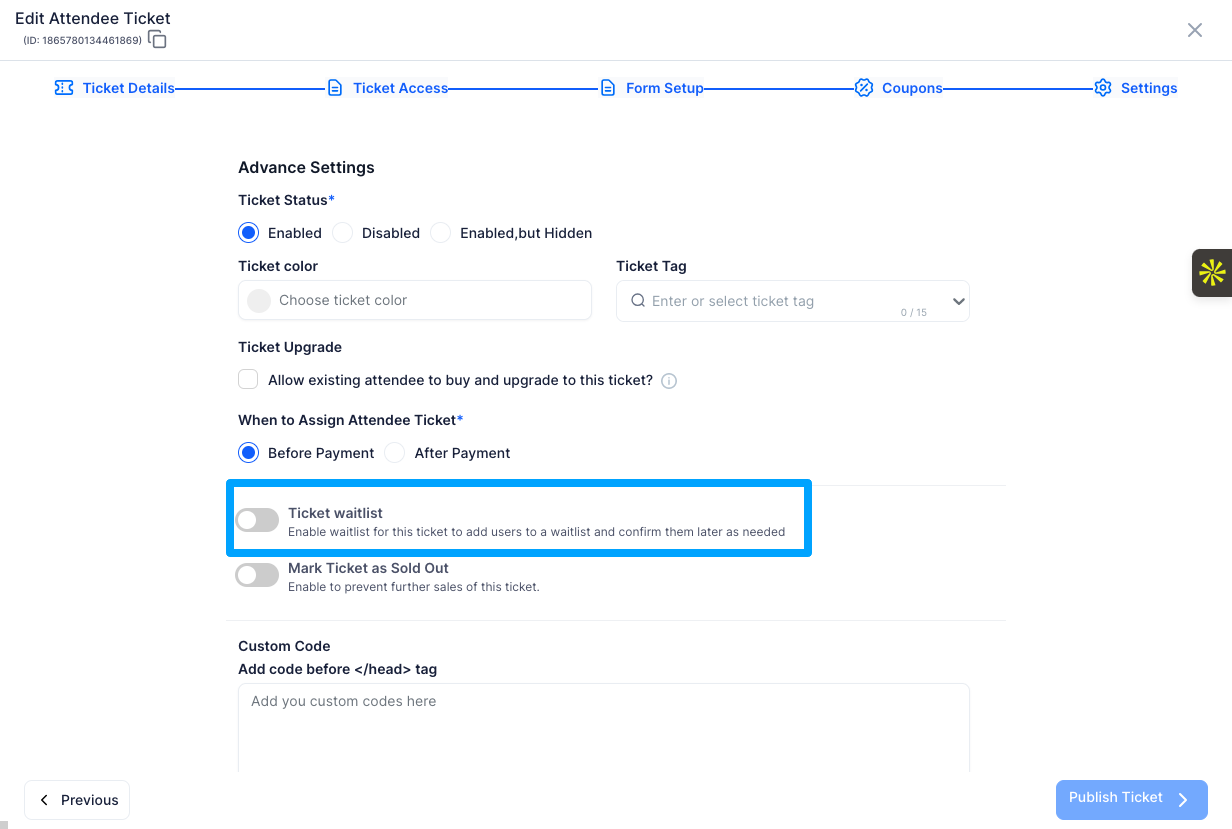
Once the ticket hits capacity, the registration page will automatically show a waitlist signup option instead of the standard registration button for that ticket type.
If you want a waitlist to apply across your entire event — covering both registration forms and ticketing — you can set it from the admin panel at the organisation level.
How to access: Admin Panel → Registration → Registration Settings → Event Capacity tab
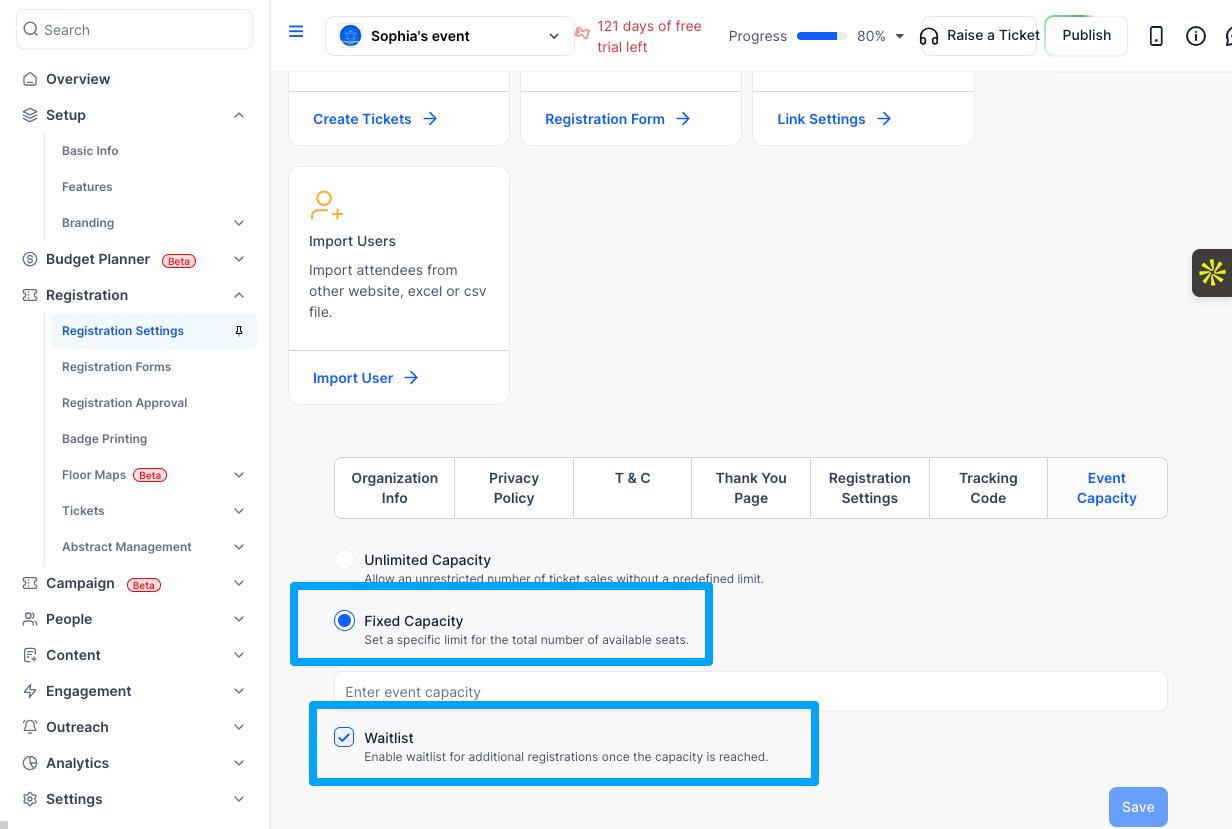
This applies the waitlist to both registration forms and ticketing across the event. When the overall event capacity is reached, all registration entry points will show the waitlist option.
When a ticket or the full event is sold out and waitlisting is enabled, attendees who attempt to register will be prompted to join the waitlist instead. They fill out their details and are placed in queue. You can then review the waitlist and manually invite people to complete their registration when spots become available.
Where you find your waitlisted attendees depends on how they registered.
If they registered via a form, go to People → Manage Tickets in your Event Dashboard. You'll see everyone on the waitlist along with their details under People>Manage Attendees.
If they registered via a ticket, go to Admin Panel → Registration → Tickets → Sales Report and filter the status to Waitlist. This will show you all waitlisted attendees for that ticket type.
Q: What is the difference between the ticket-level waitlist and the global waitlist?
A: The ticket-level waitlist applies only to a specific ticket type. If you have multiple ticket types and only one is sold out, only that ticket will show the waitlist — others remain available. The global waitlist applies to your entire event and is triggered when the total event capacity is reached.
Q: Does enabling the waitlist automatically send invites when spots open?
A: No. You need to manually review the waitlist and invite attendees to register when a spot becomes available. Eventify does not automatically move people off the waitlist.
Q: Can I enable both a ticket-level and a global waitlist at the same time?
A: Yes. If you have a fixed capacity set at both the ticket and event level, both waitlists can be active. The ticket waitlist triggers when that specific ticket sells out; the global waitlist triggers when total event capacity is reached.
Q: Can attendees on the waitlist complete payment when invited?
A: Yes. When you invite a waitlisted attendee, they receive a link to complete their registration, which includes payment if the ticket is paid.
Q: Will the waitlist option show automatically once capacity is hit?
A: Yes. Once a ticket or the event reaches its fixed capacity limit, the waitlist prompt appears automatically on the registration page. You do not need to manually switch anything.
Q: Can I see how many people are on the waitlist?
A: Yes. If attendees joined via a form, go to People → Manage Tickets in your Event Dashboard. If they joined via a ticket, go to Admin Panel → Registration → Tickets → Sales Report and filter by status Waitlist.
Q: What happens if I increase my ticket or event capacity after people join the waitlist?
A: Increasing capacity does not automatically move waitlisted attendees into confirmed registrations. You will still need to manually invite them to register from the waitlist view.
