Kiosk Mode turns a tablet or display screen into a self-service check-in and badge printing station. Attendees scan their QR code, confirm their details, and print their badge without requiring staff assistance. All settings are configured from the admin panel.
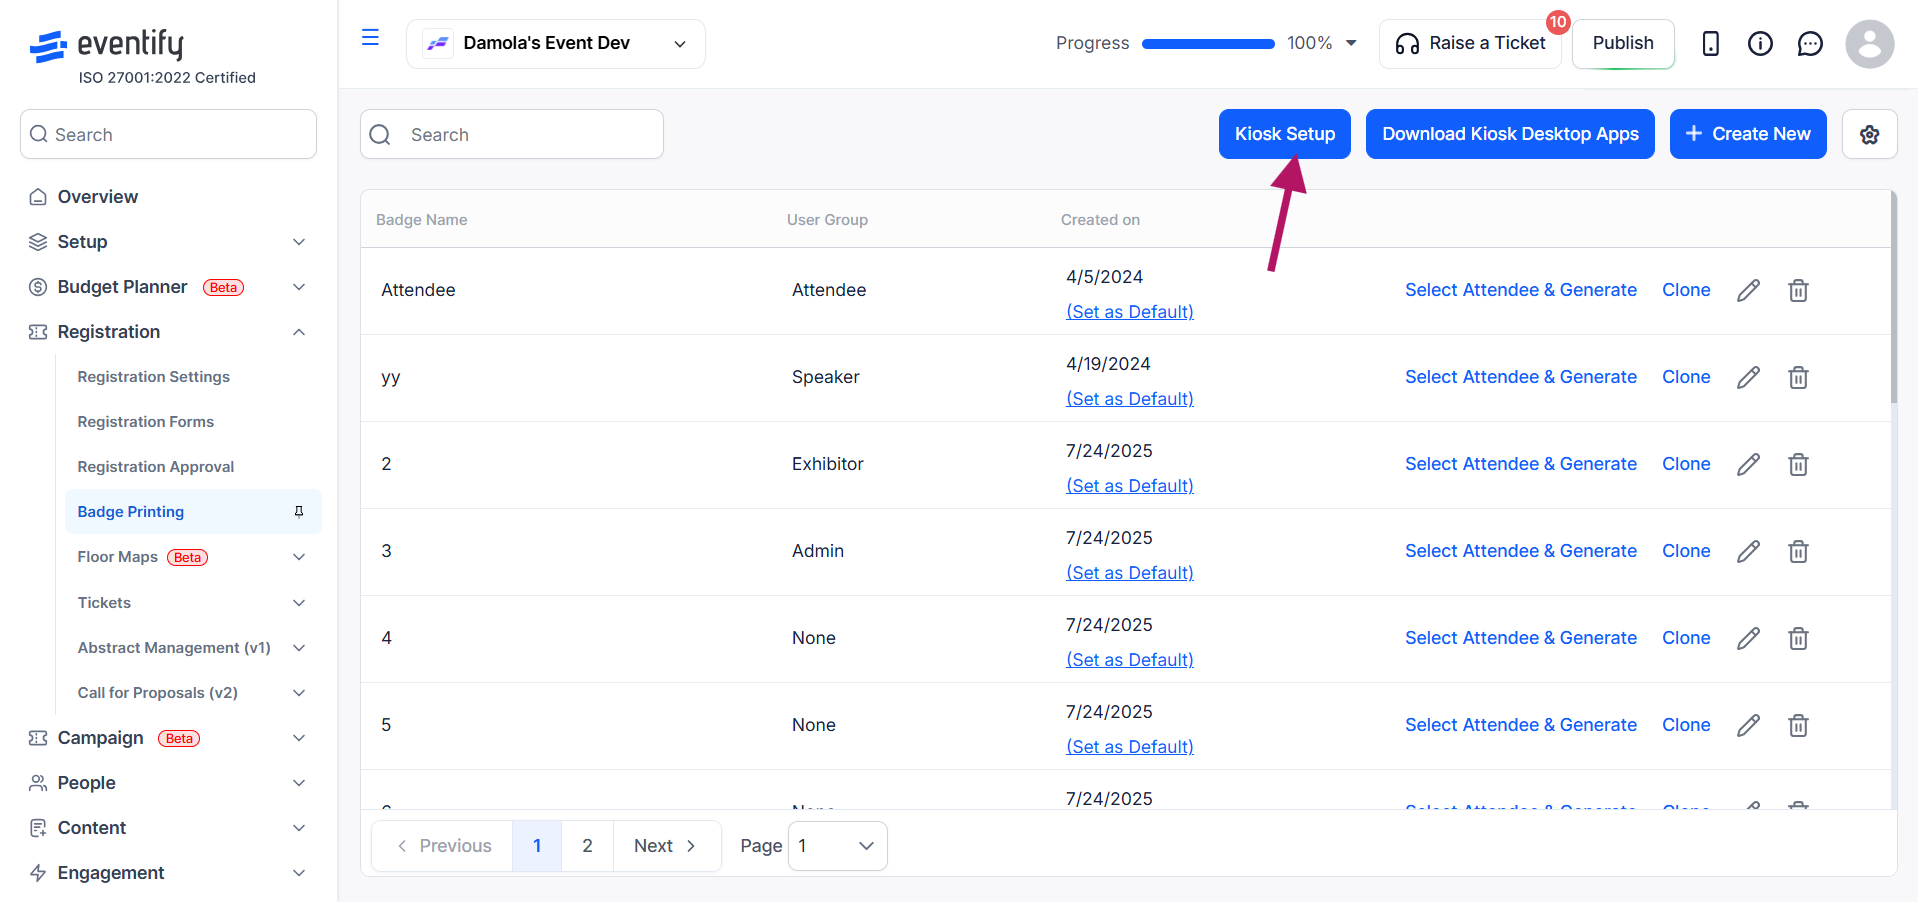
Go to Registration → Badge Printing in the sidebar, then click the Kiosk Setup button.
Set a passcode to control access to the kiosk mode in the admin app, or enable No Passcode to disable it.
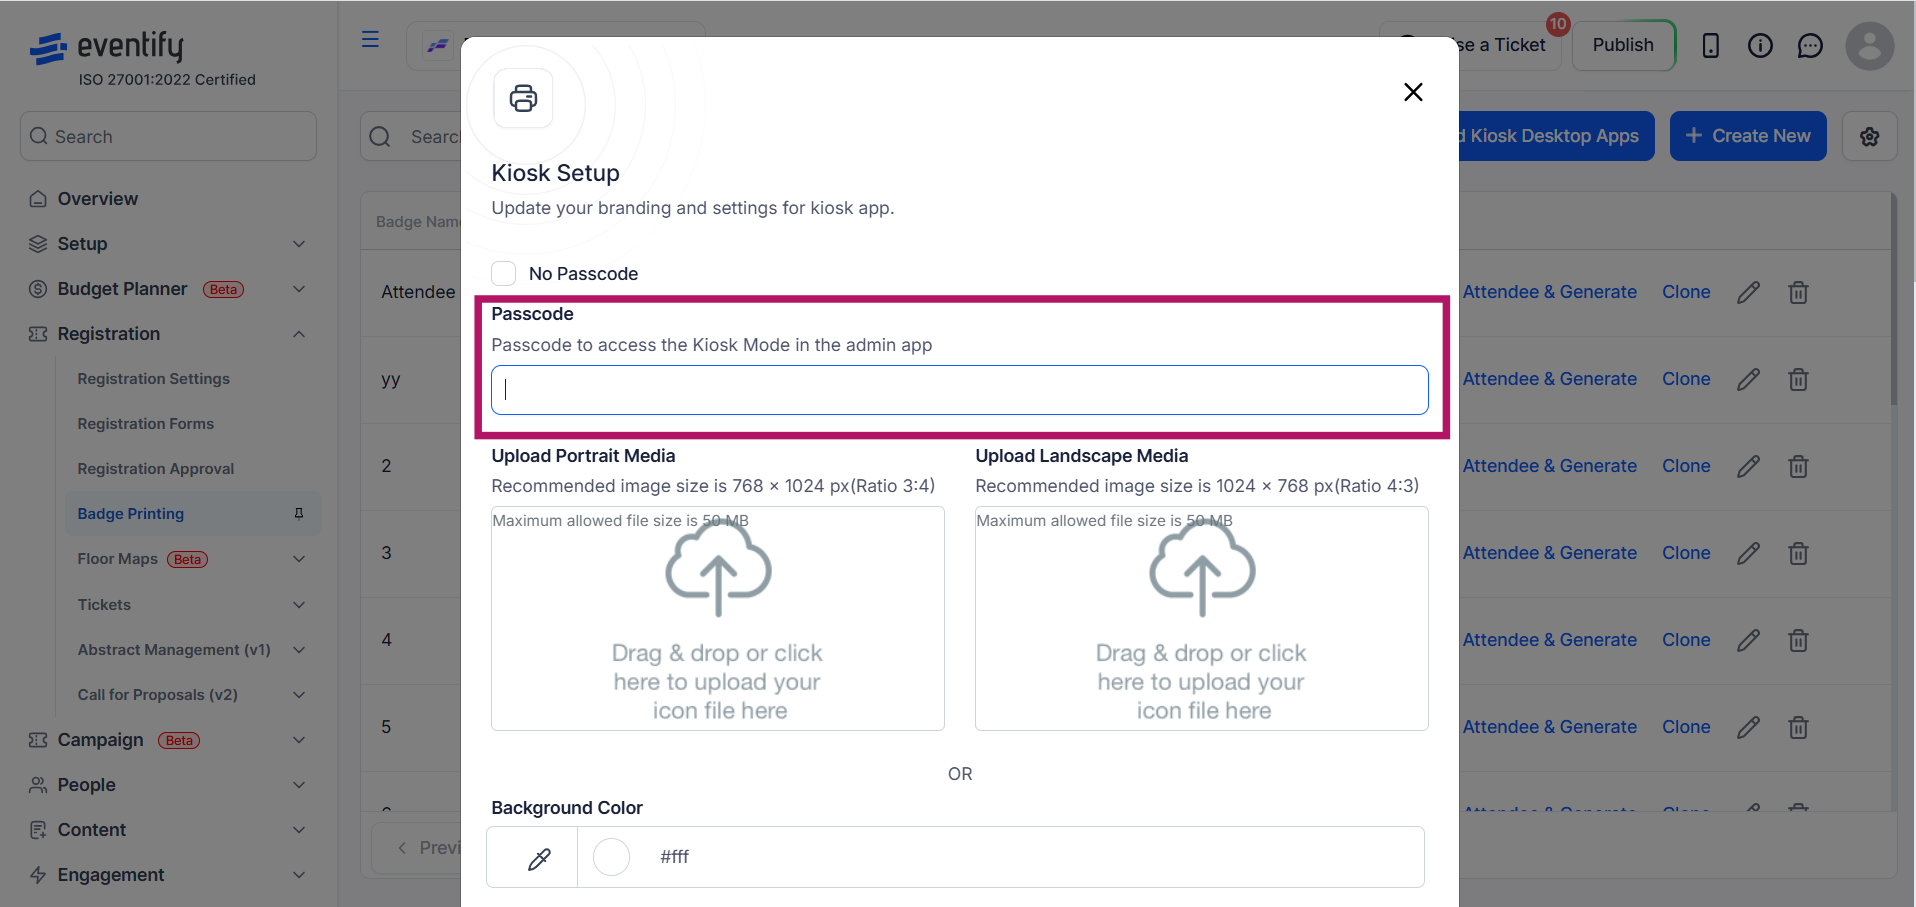
Customize the kiosk’s appearance by uploading portrait (768 × 1024) or landscape (1024 × 768) media. You can also set a background color.

Enable Allow Registration to display a registration option on the kiosk and provide a registration link, with additional customization for the registration button’s position, background color, text color, and label preview.
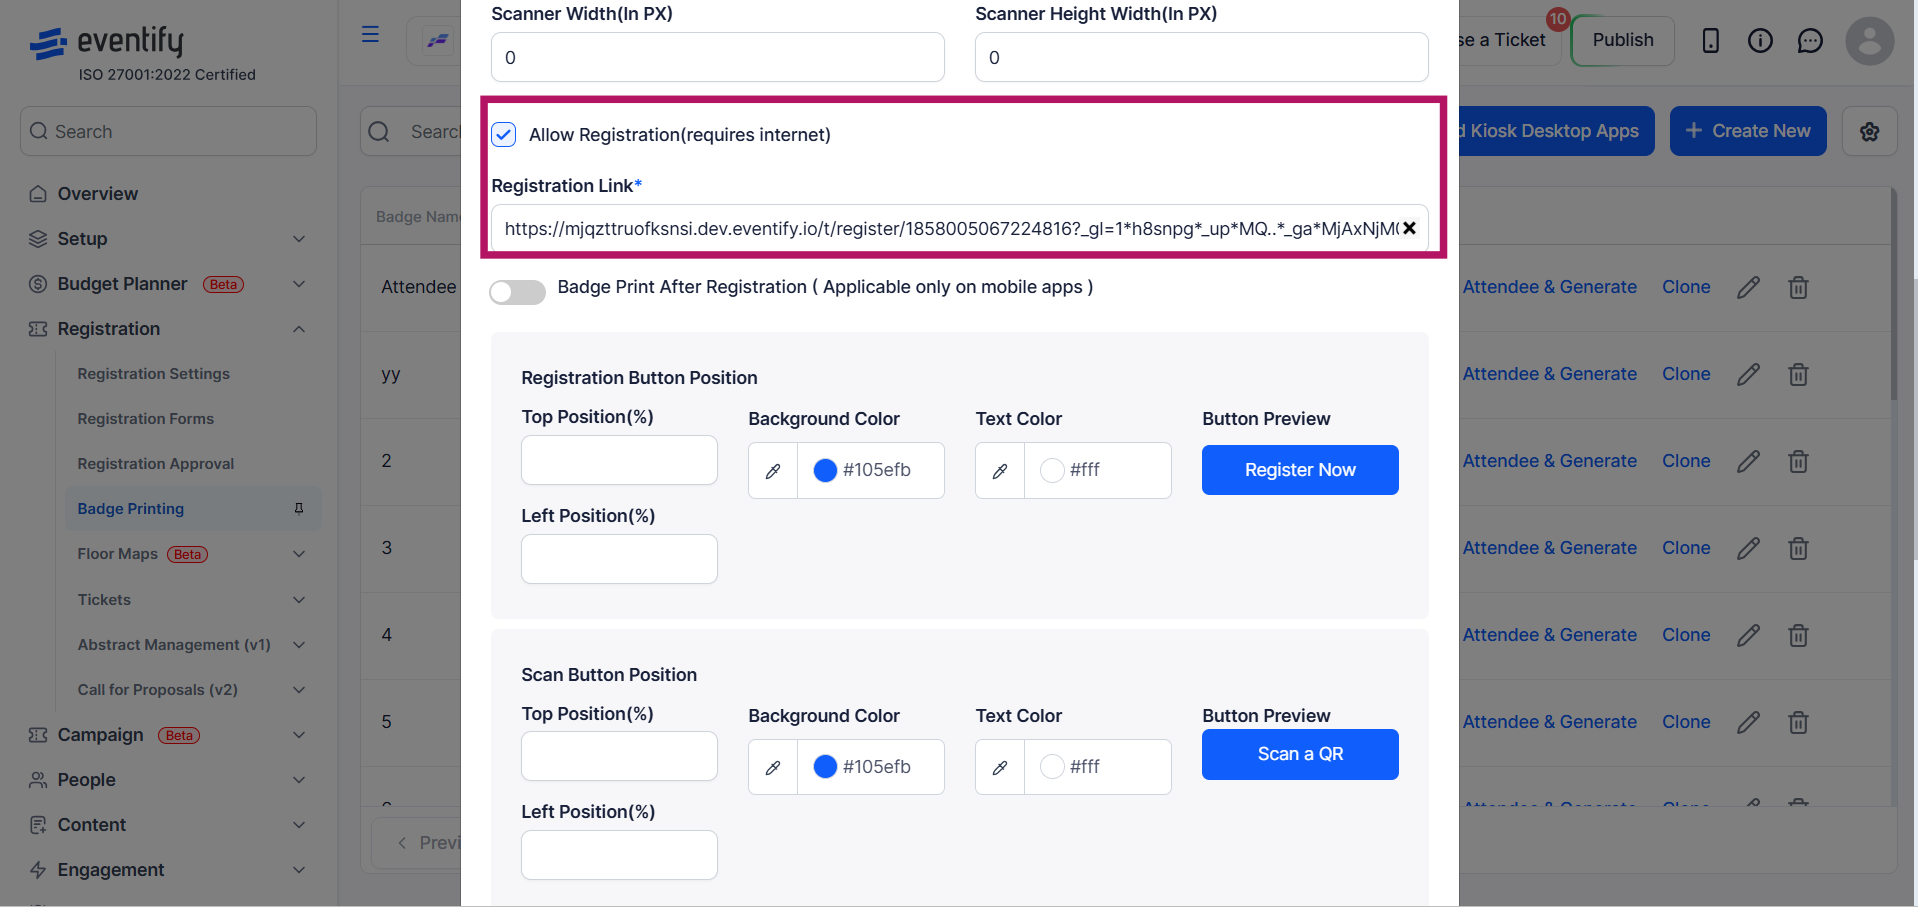
Configure the scan button’s position, background color, text color, and preview appearance to match your event branding.

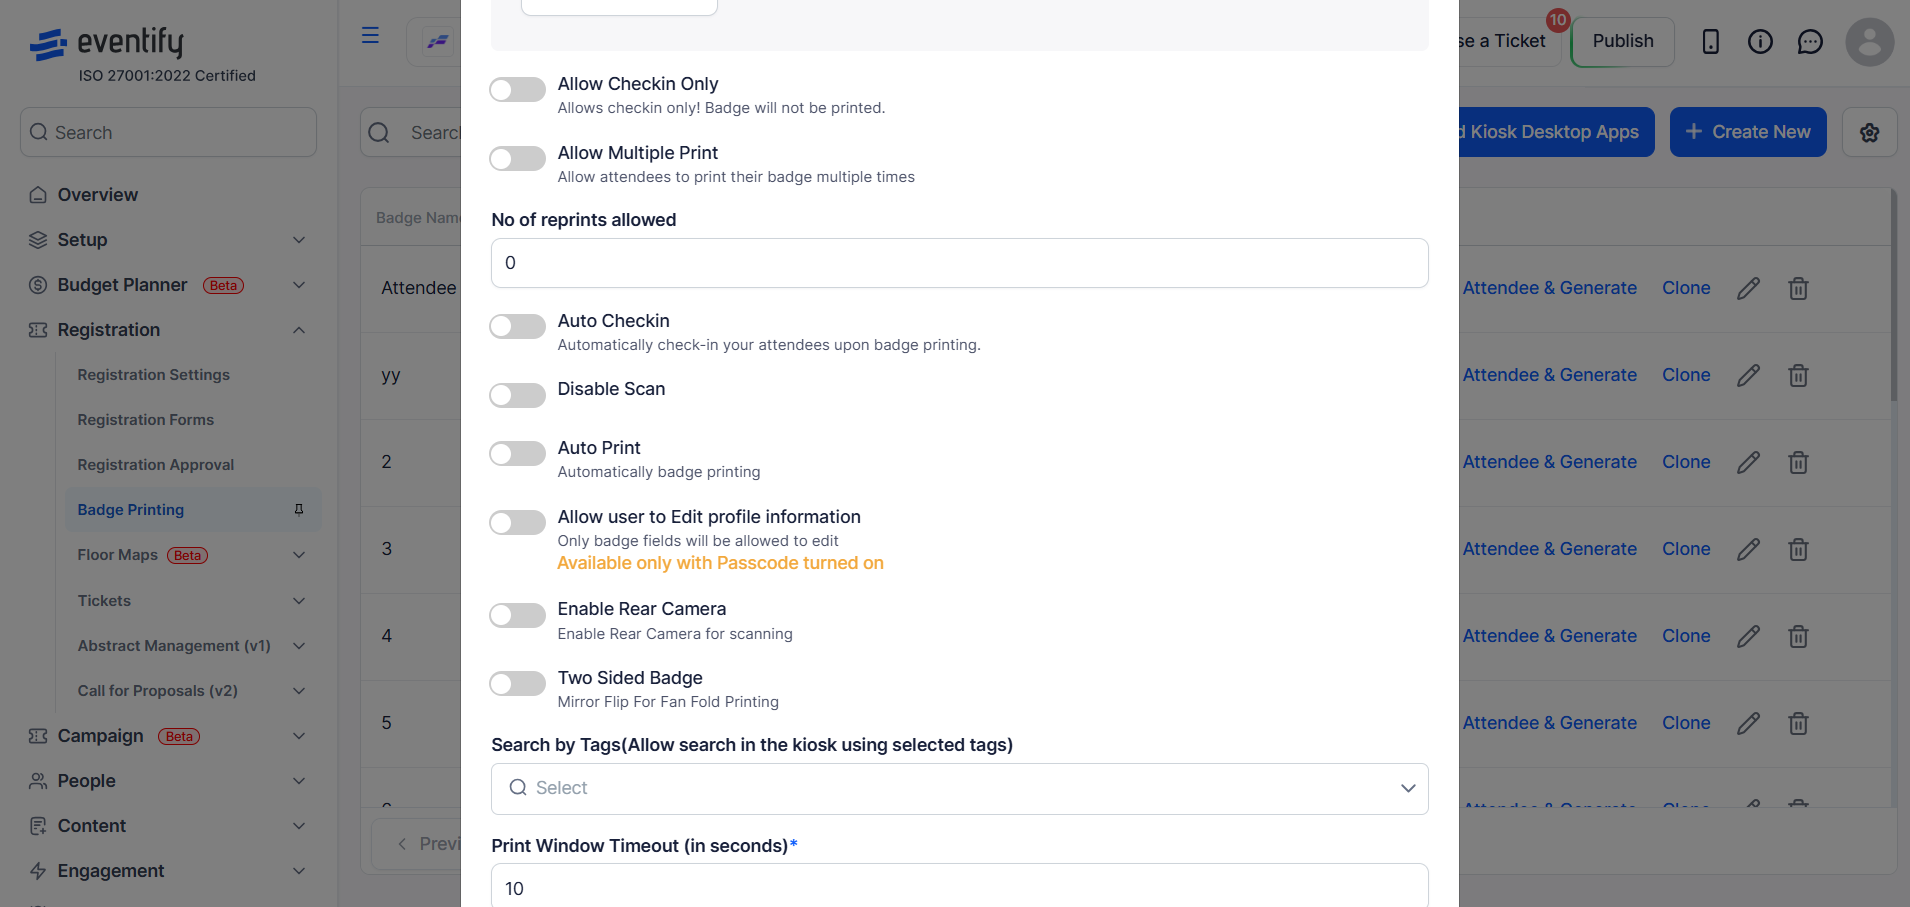
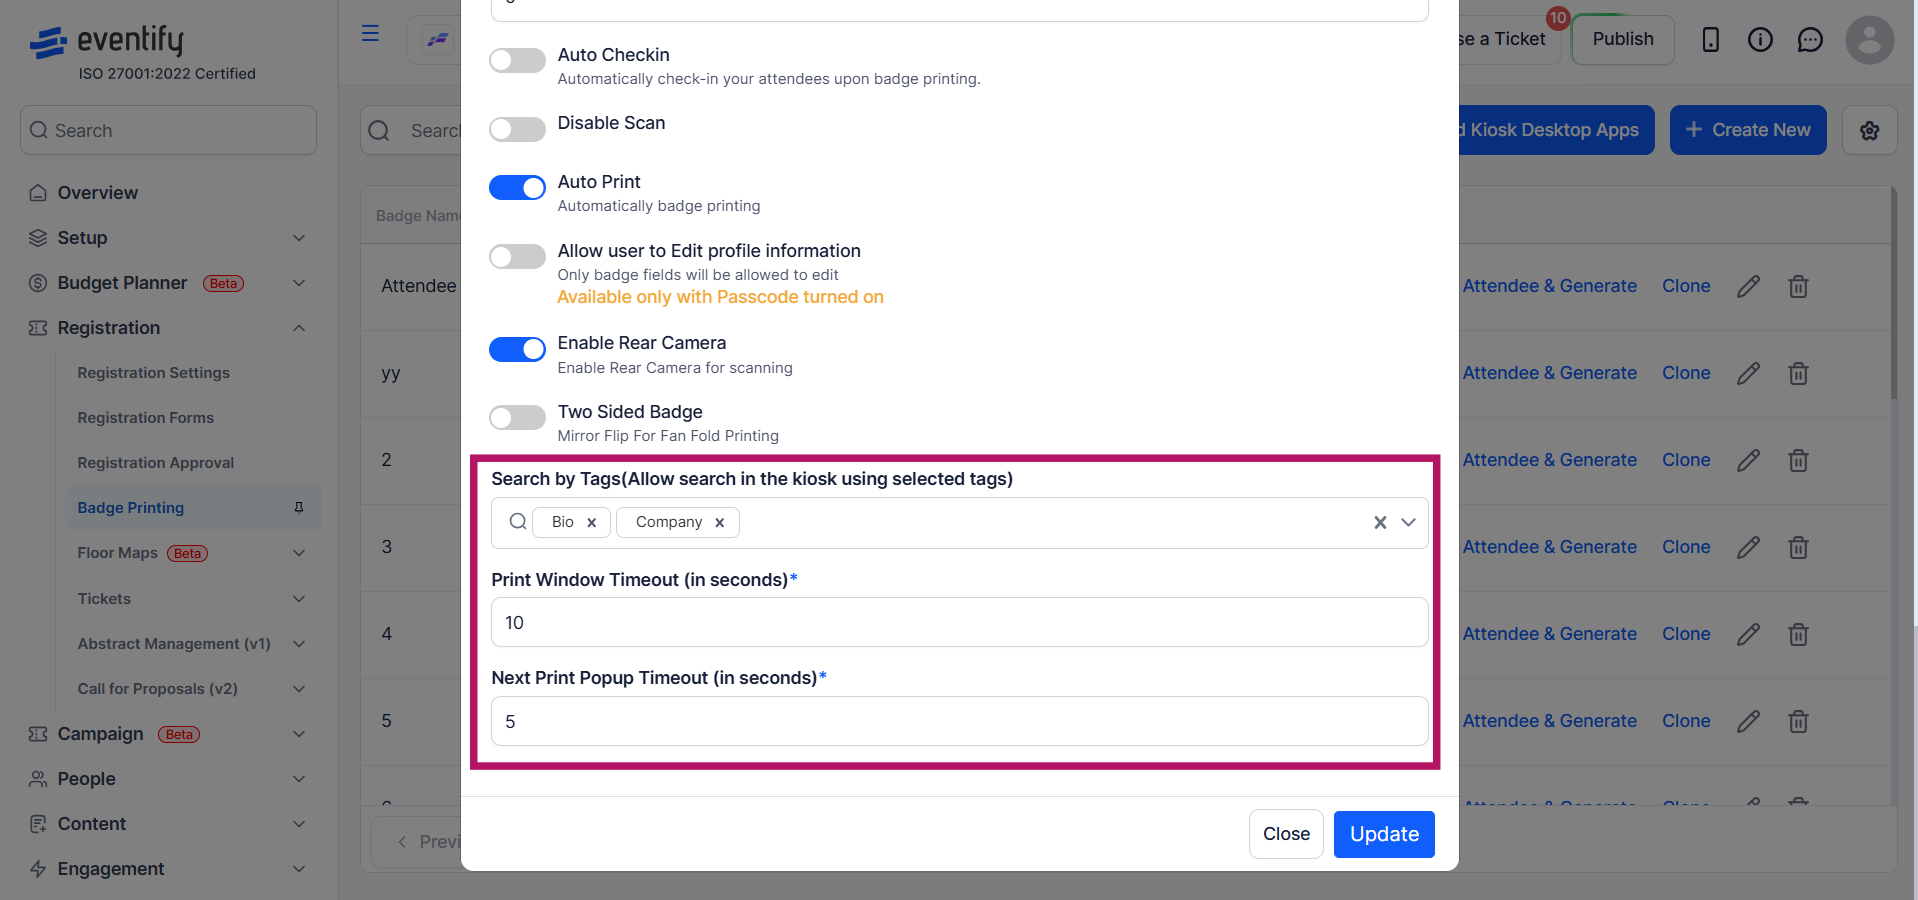
Enable search within the kiosk using selected attendee fields such as bio, company, designation, phone number, date of birth, ID number, interests, Facebook, Twitter, and LinkedIn, and configure timing settings including print window timeout and next print popup timeout.
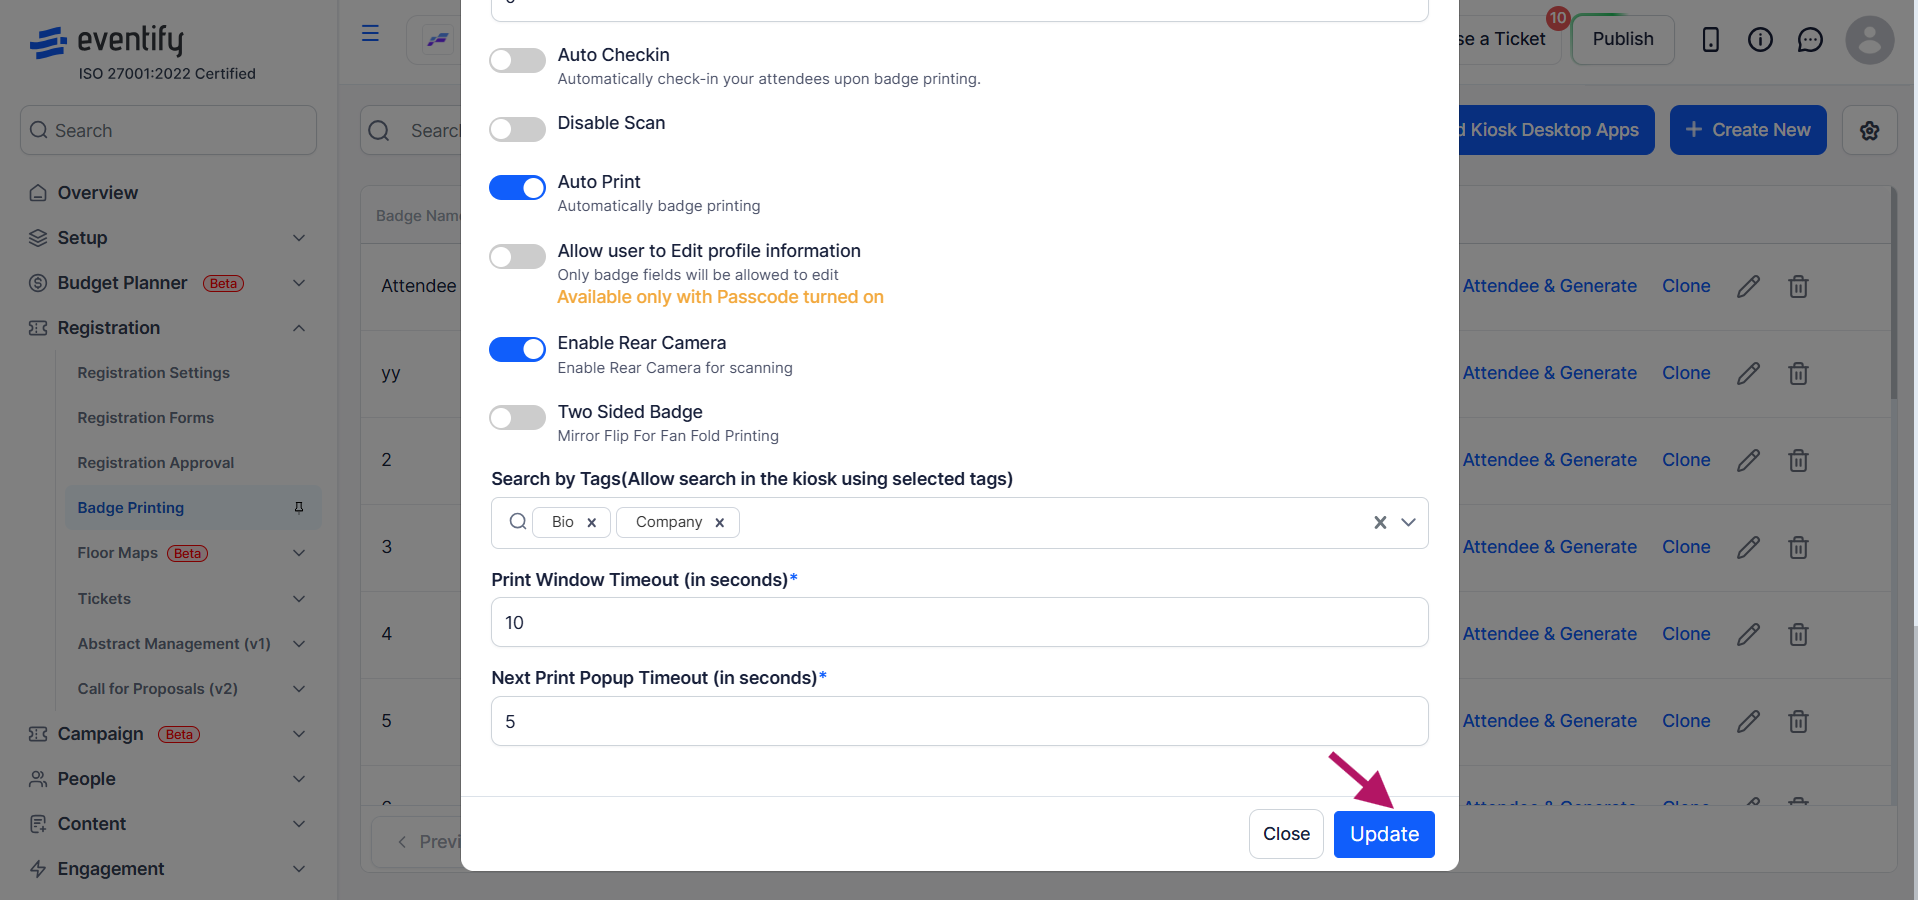
Click Update at the bottom of the Kiosk Setup modal. A success message confirms the settings have been saved.
After saving settings, open the Eventify Kiosk app on your tablet or display device and log in with your event credentials. The kiosk will load your configured settings automatically.
