The Registration Settings section allows you to configure all the core details related to attendee registration, legal policies, ticket behaviour, and access control for your event. It is organised into multiple tabs, each handling a specific part of the registration experience, from organisation details to attendee access rules.
You can access this section via Registration → Registration Settings in the sidebar.
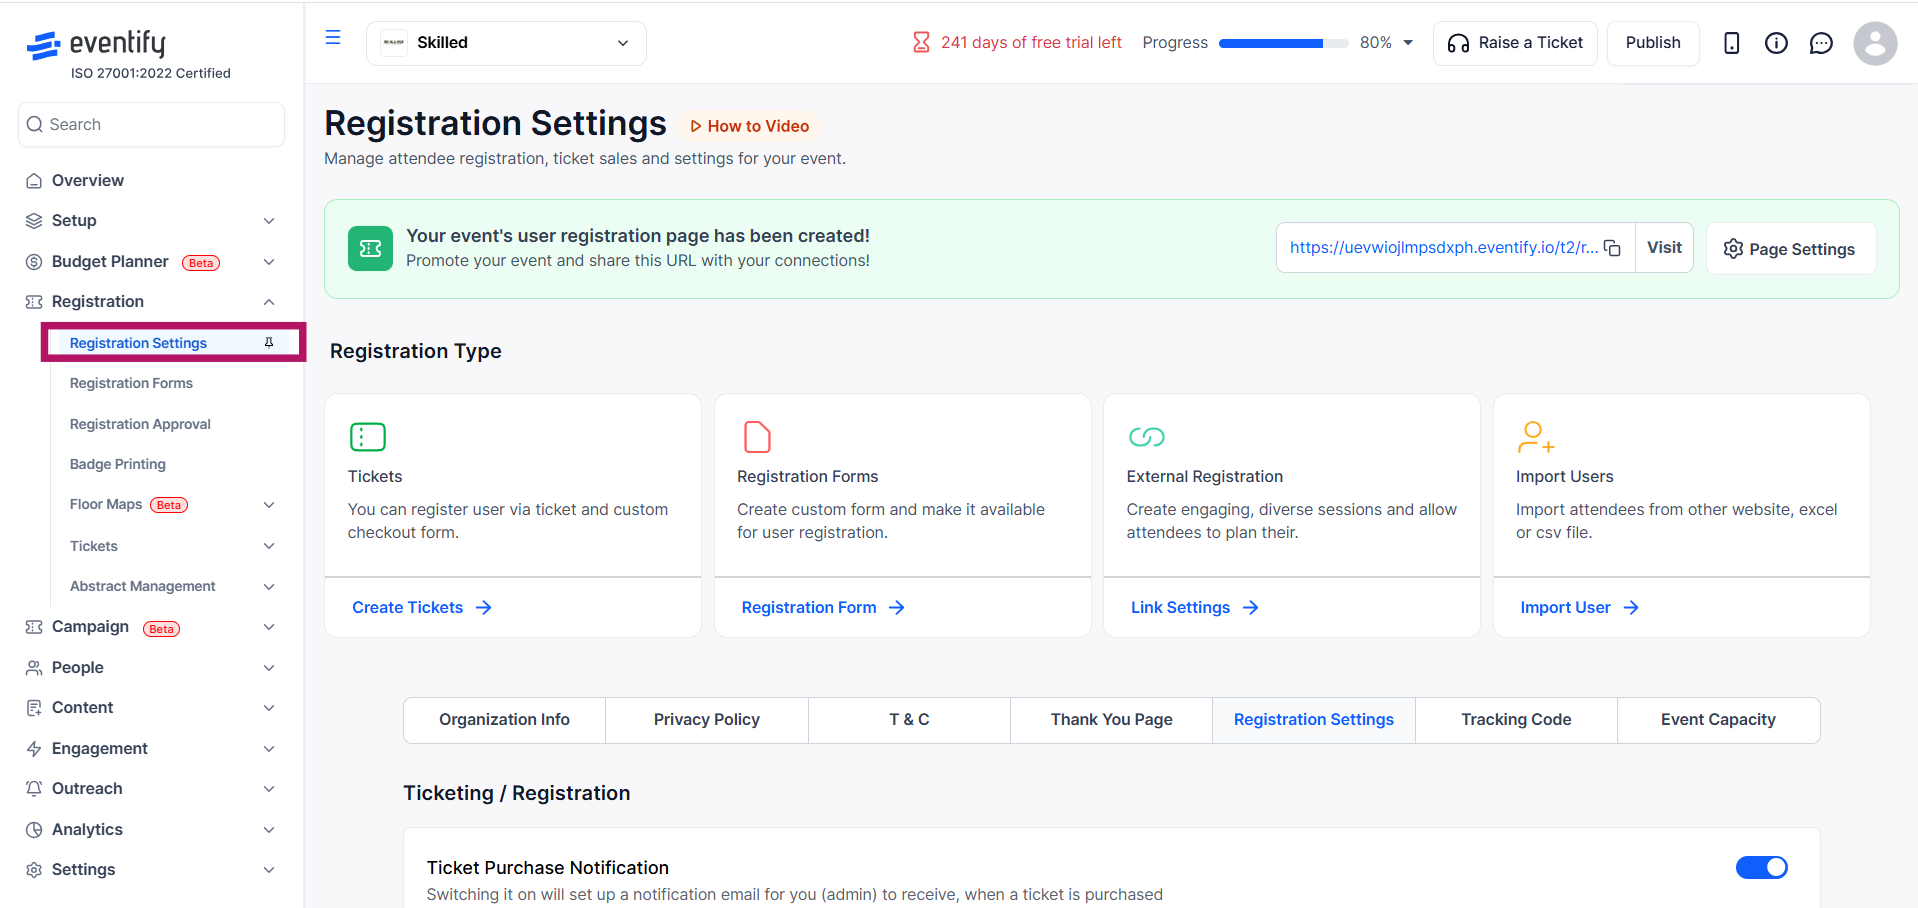
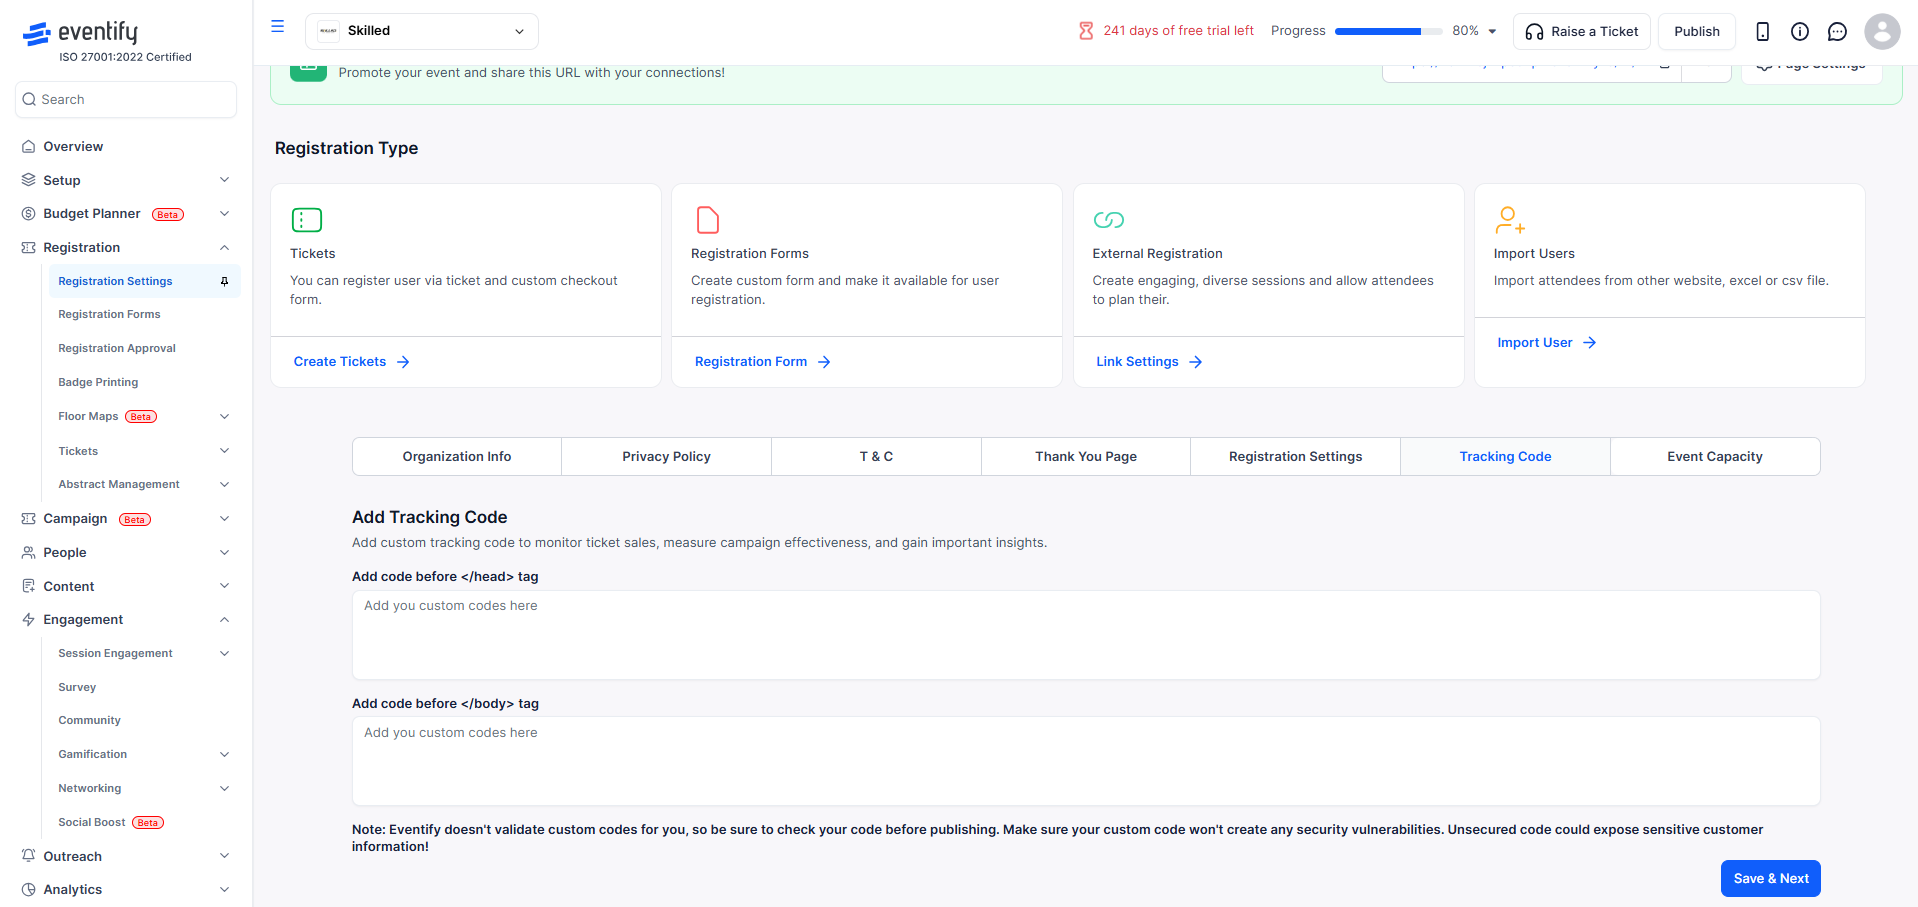
Before configuring the rest of your registration settings, you’ll need to decide how attendees will register for your event. Eventify provides four options within the Registration Type section, each designed for a different use case.
For Tickets, attendees will register by purchasing tickets. Clicking Create Tickets will take you to the Tickets Dashboard, where you can create and manage your ticket types.
For Registration Forms, attendees will register by filling out a custom form. Clicking Registration Form will direct you to the form builder, where you can create and manage your registration forms.
For External Registration, registration will be handled outside Eventify. Clicking Link Settings opens the Event Policy Type modal, where you can define how registration behaves.
For Import Users, you can upload an existing list of attendees. Clicking Import User opens the import workflow, where you can upload a CSV or XLSX file, map your data fields, and complete the import process.
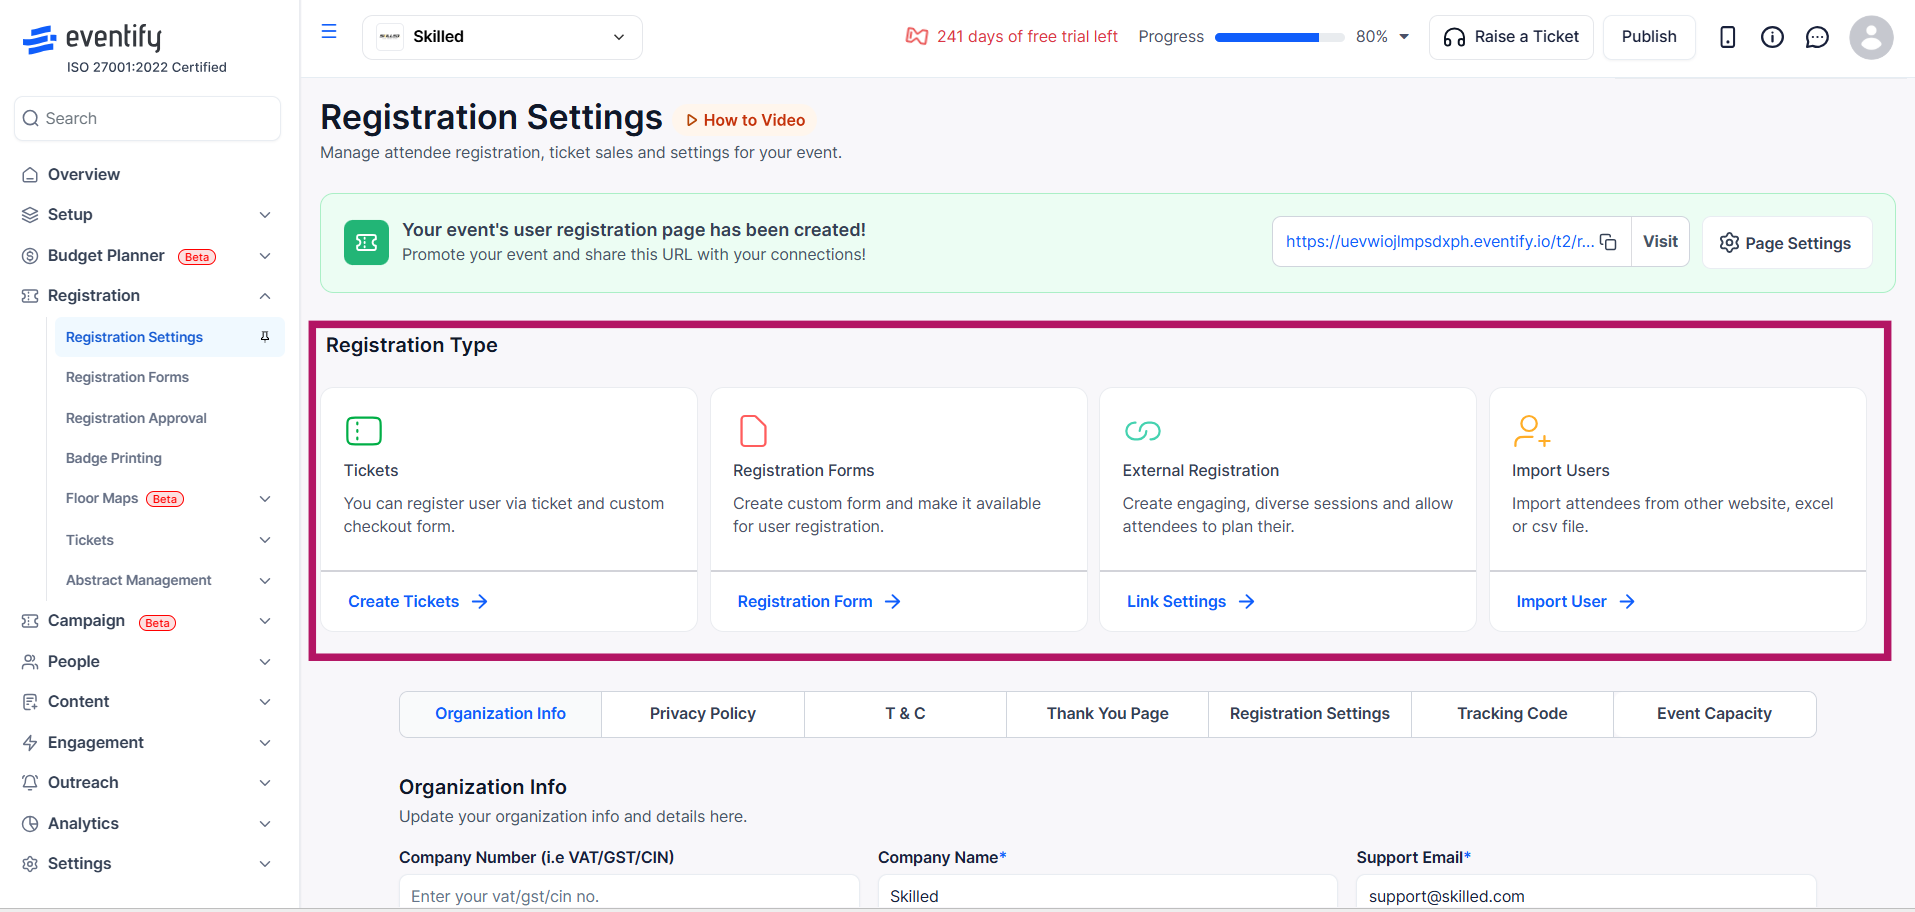
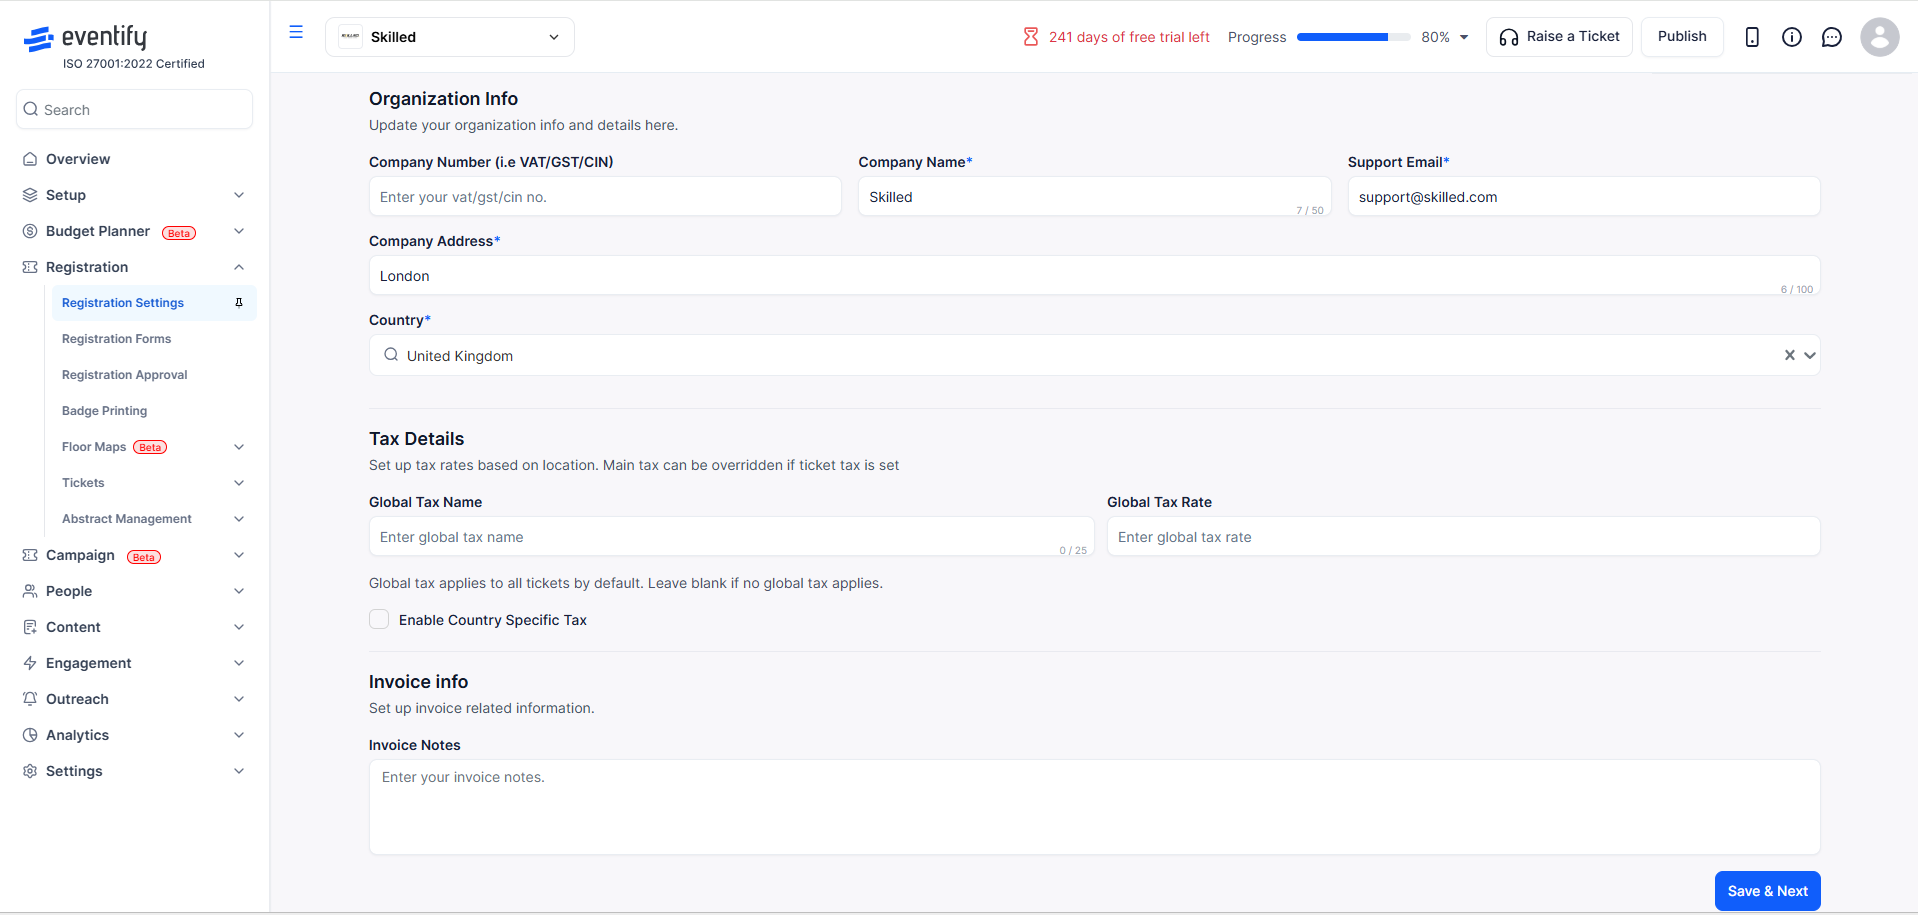
Enter your organisation details, ensuring that all required fields - company name, company address, country and support email - are completed . Fields such as the company number (VAT/GST/CIN) are optional but recommended if you need tax-compliant invoices. In the Tax Details section, the global tax name and rate and the option to enable country-specific tax are optional and should only be filled if you want taxes to apply across tickets. The Invoice Notes field is optional and can be used to include any additional information that should appear on attendee invoices.
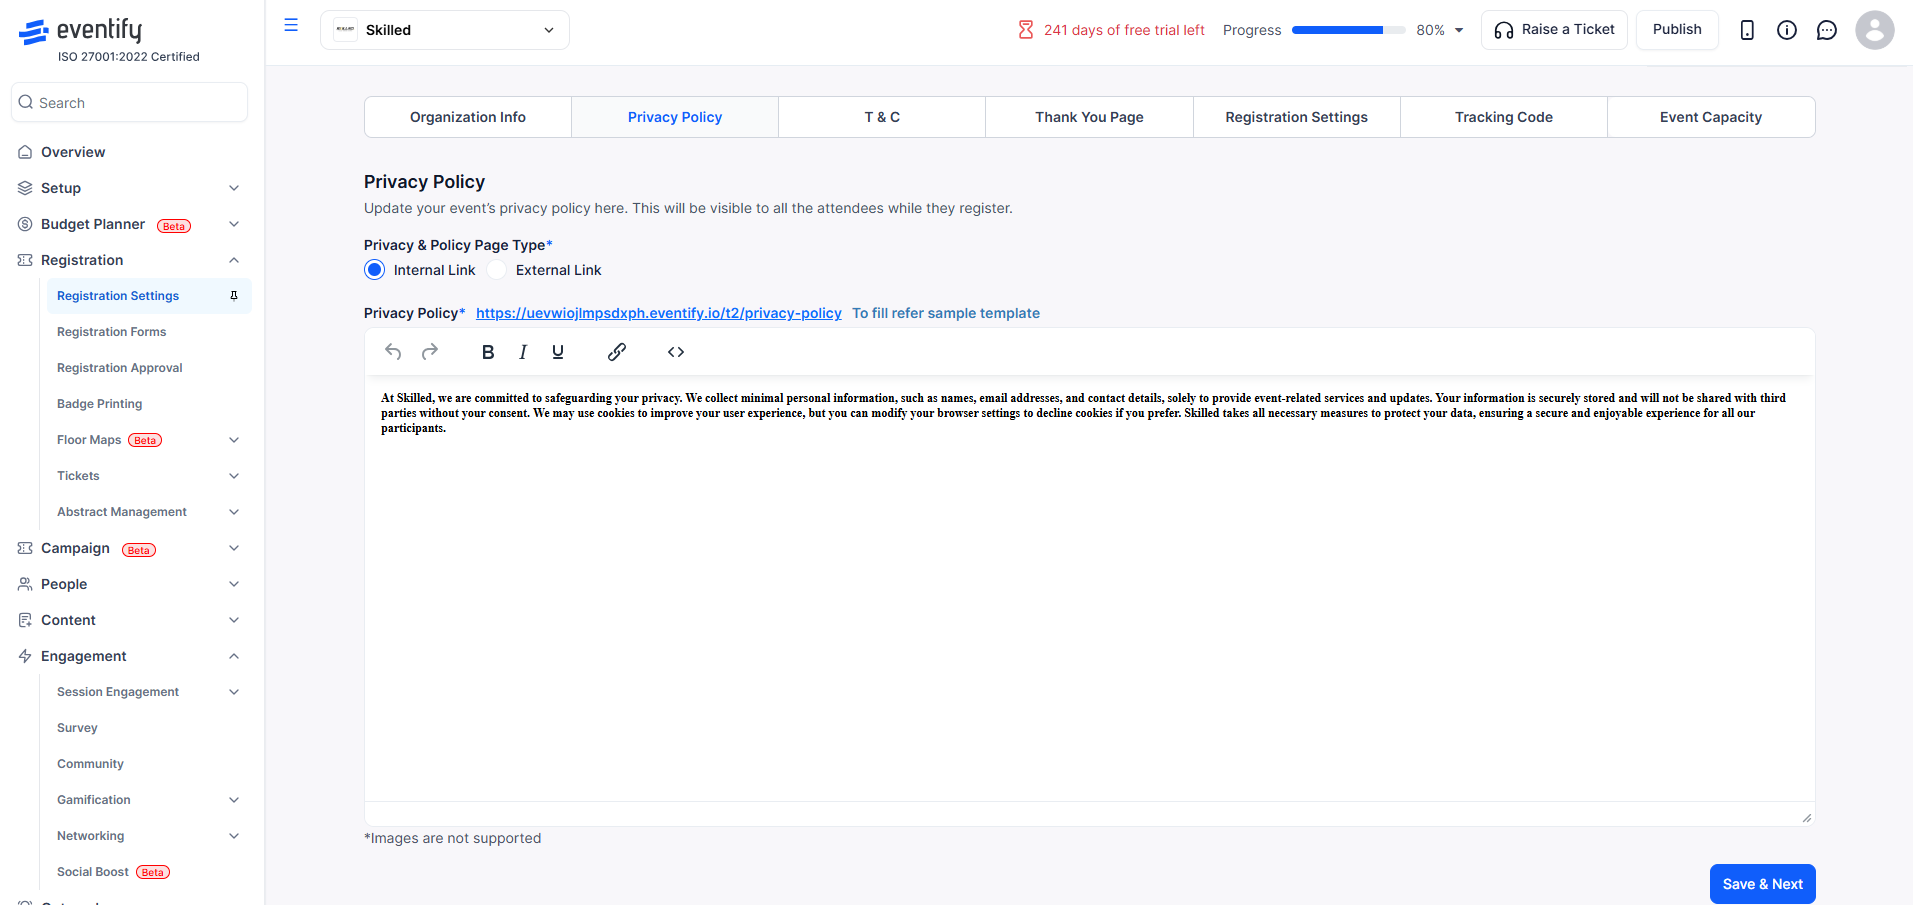
Set up the privacy policy that attendees will see during registration on the Privacy Policy tab, which is a required field. If using the internal link option, use the text editor to format and structure your content. If you select external link, you need to provide a valid URL.
On the T & C tab, you can choose to host the content internally or link to an external page. If you choose the internal option, you need to enter the content. If you select the external option, you must provide a valid URL. Enabling the Refund Policy is optional, but if you switch it on, you need to enter the refund policy content so that attendees can view the terms during checkout.

On the Thank You Page tab, you must choose whether to display a custom message or redirect users to an external page. If you select the text option, you are required to enter a thank you message. If you choose an external link, you need to provide a valid URL. The offline thank you message is optional but recommended if you expect offline registrations.

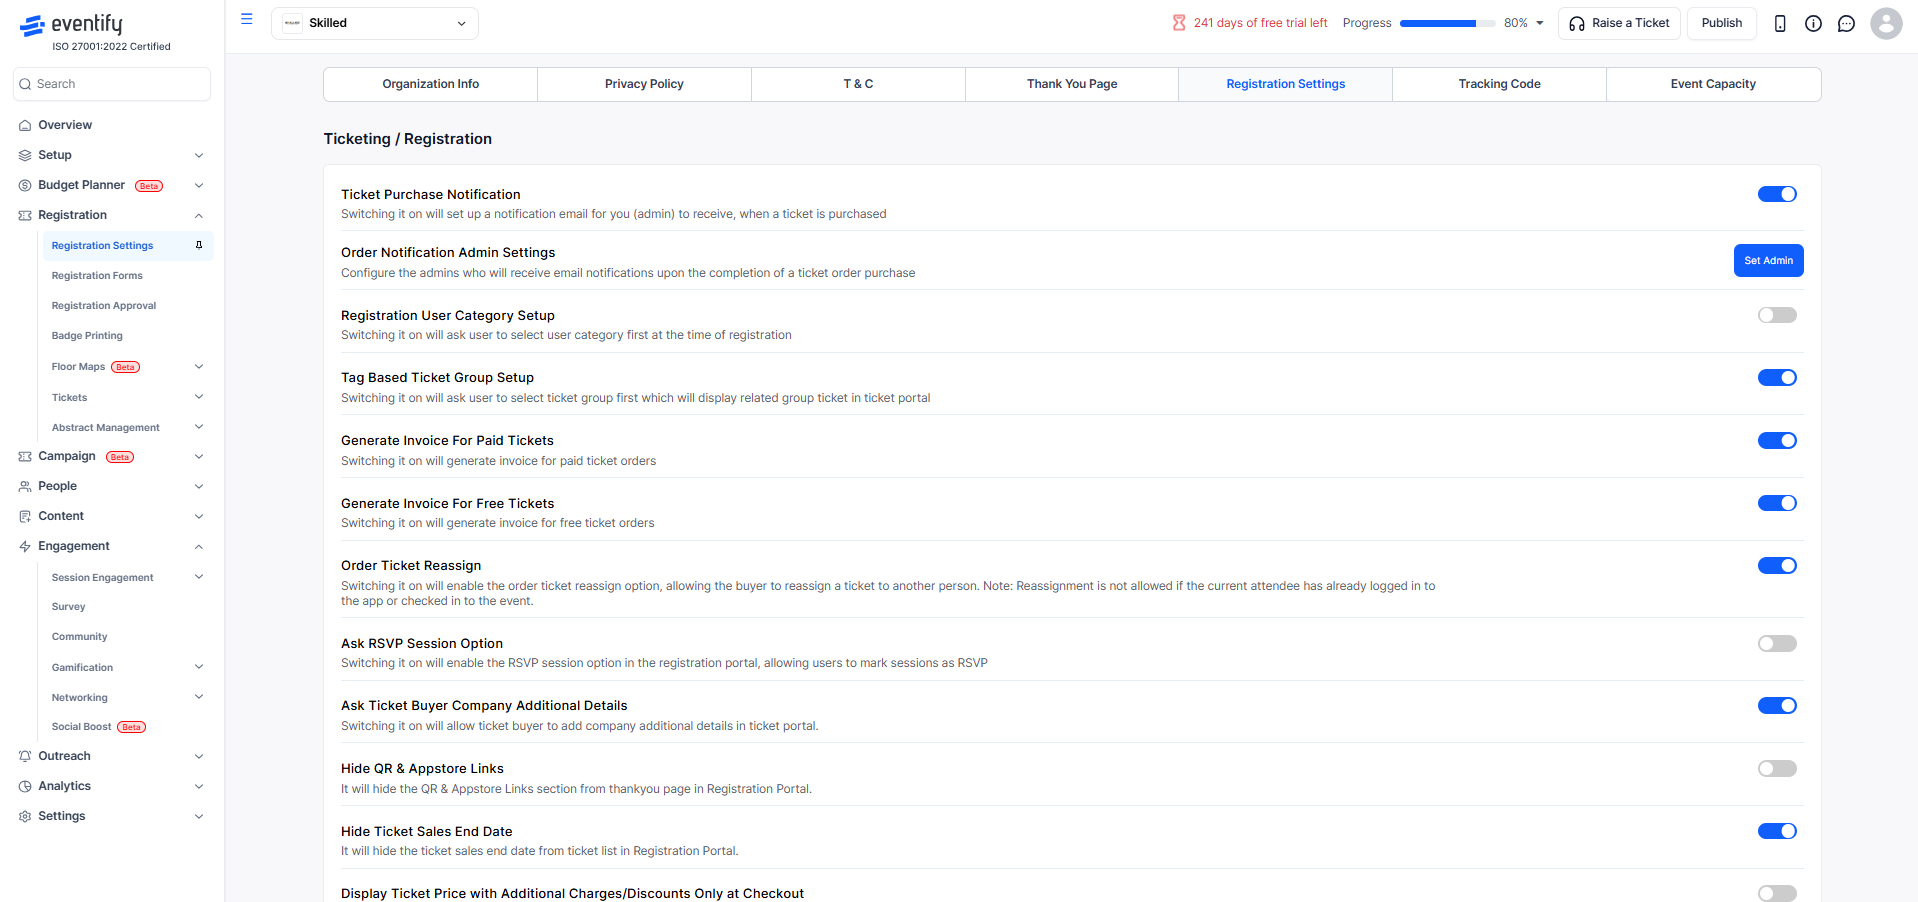
The Registration Settings tab is divided into two main sections: Ticketing / Registration and Registration and Login Dates. In the Ticketing / Registration section, you can control how ticket purchases and attendee behaviour are managed. All options here are optional toggles that you can enable based on your event needs.
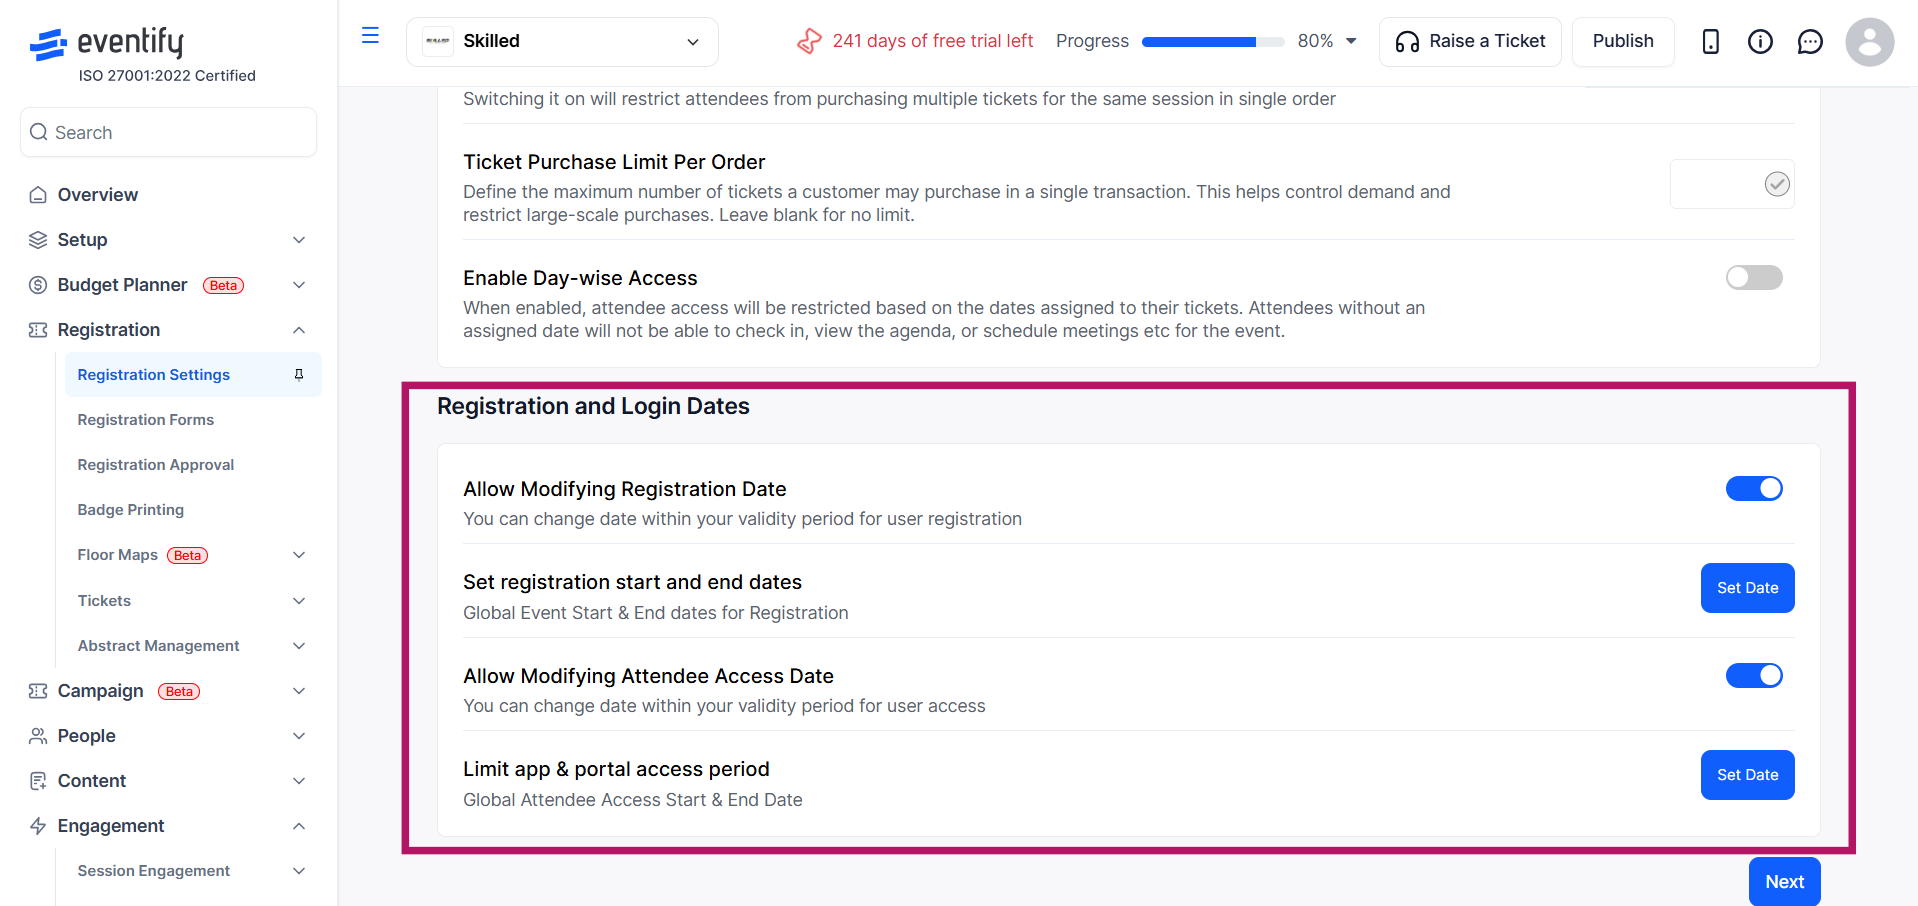
In the Registration and Login Dates section, you can define when users are allowed to register and access the event.
Add a tracking code if needed to integrate analytics or marketing tools. This section is entirely optional and can be left blank if you do not require tracking.
Set your event capacity by choosing between Unlimited Capacity or Fixed Capacity. If you select unlimited capacity, there will be no restriction on the number of attendees who can register. If you select fixed capacity, you will be required to enter a maximum number of attendees, and registrations will automatically stop once that limit is reached. You can also enable waitlist, which allows additional users to join a waitlist after the event reaches full capacity.

Q: What happens when registration reaches the close date?
A: The registration form automatically becomes inaccessible, and attendees will see a message indicating that registration is closed.
Q: Can I set both an open date and a close date?
A: Yes, you can set both. If only a close date is configured, registration will remain open immediately until that date.
Q: Does the contact email receive attendee replies?
A: Yes, the contact email is set as the reply-to address on confirmation emails, so any attendee who replies to their confirmation will reach this address.
Q: What happens when event capacity is reached?
A: If a fixed capacity is set, registration will automatically close once the limit is reached. If waitlist registration is enabled, additional users will be added to the waitlist instead of being able to register.
Q: Can I change registration settings after going live?
A: Yes, you can update most registration settings at any time; however, changes may affect the attendee experience, so it’s recommended to review updates carefully before applying them.
