Contact Lists help you organize your contacts into groups for targeted campaigns. Before adding contacts, you should create lists to keep them organized. This guide shows you how to create, edit, delete, and manage your contact lists.
From the Eventify Admin Panel, click on Campaign in the left sidebar.

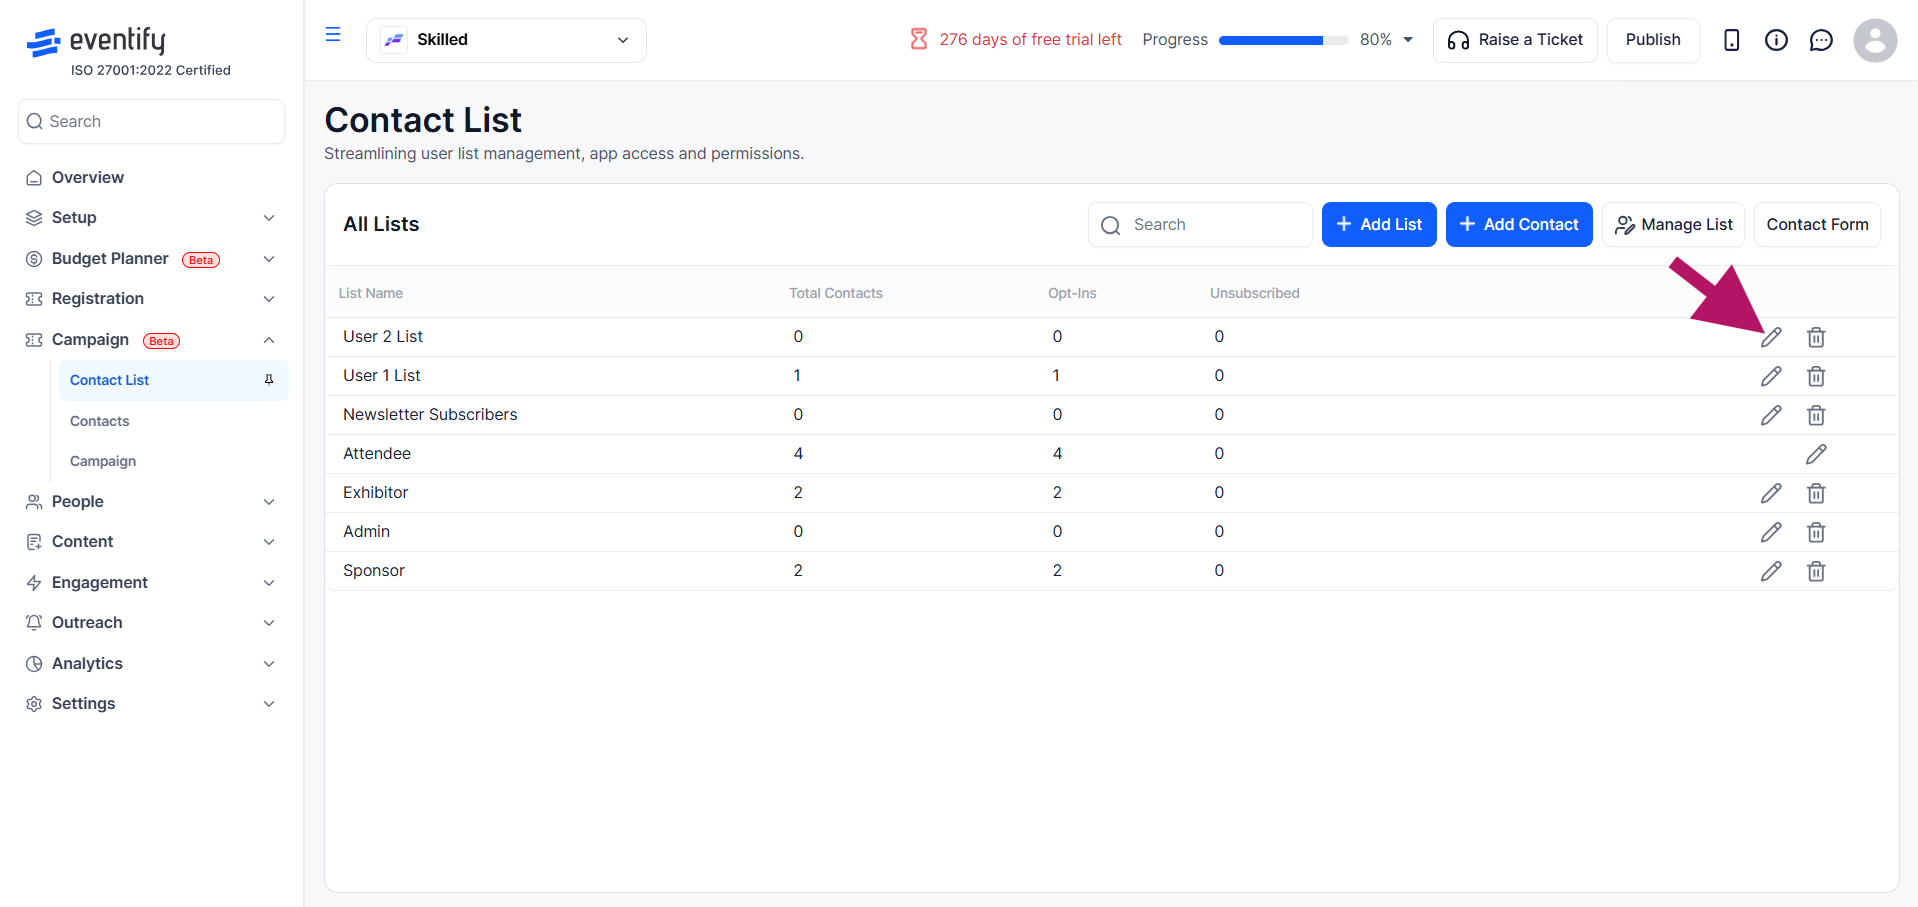
Click the Contact List tab to view all your existing contact lists. You will see each list along with the number of contacts, opt-in count, and unsubscribed count.

Click the Add List button at the top of the Contact List page to create a new list.

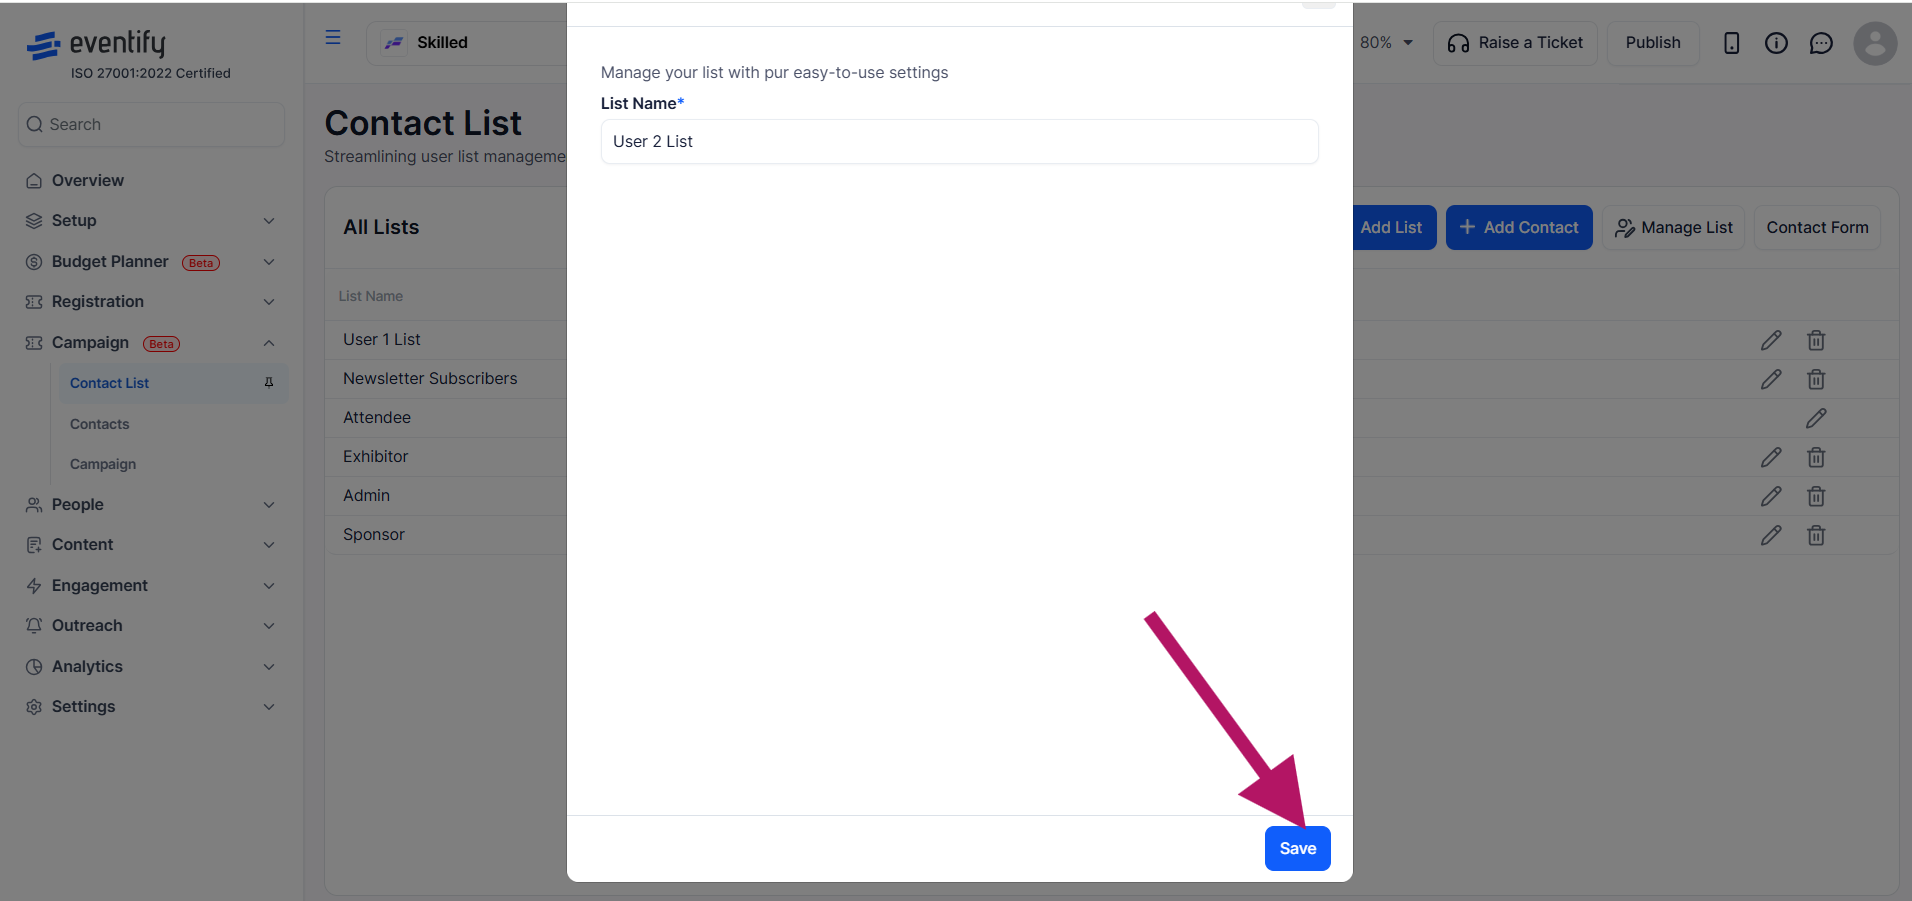
Type a descriptive name for your list (e.g., "VIP Speakers", "Sponsors 2026", "Newsletter Subscribers"). The name must be unique — you cannot have two lists with the same name.

Click the Save button to create your new contact list. It will now appear in the list view, ready for you to add contacts to it.
Find the list you want to rename and click the pencil (edit) icon on that row.
Make your changes and click Save to update the list name.

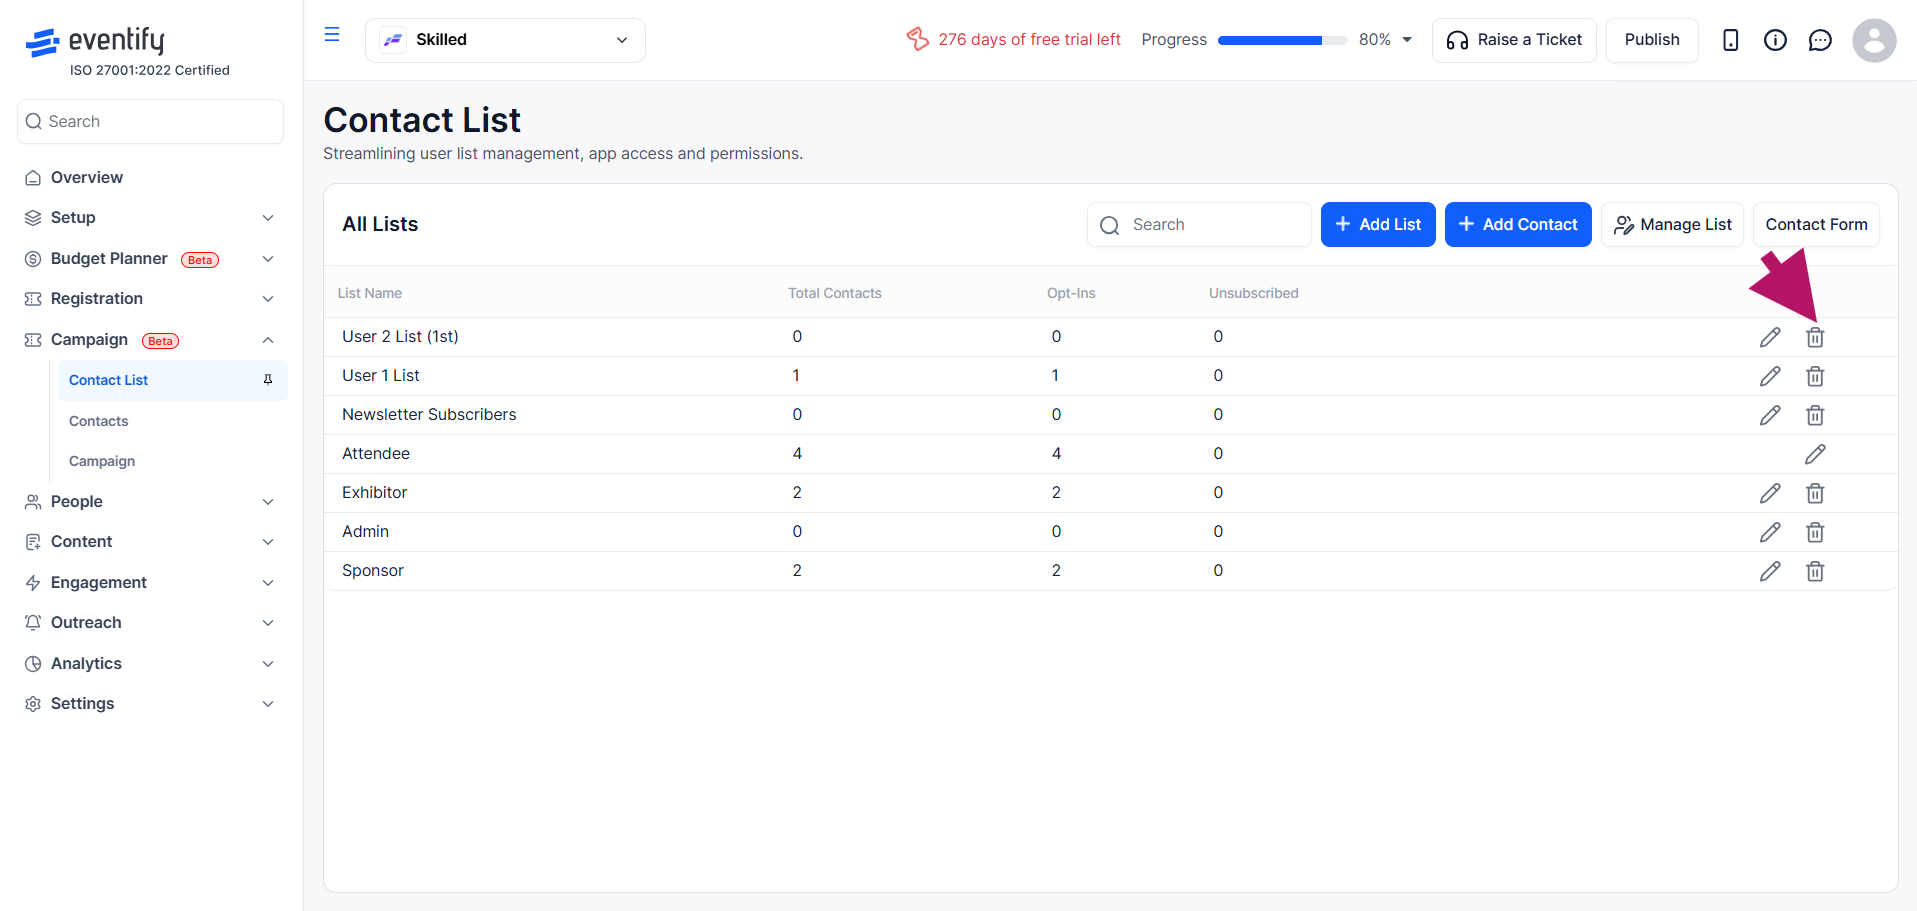
Find the list you want to remove and click the bin (delete) icon. This will delete the list. Note: Deleting a list does not delete the contacts in it — they remain in your contact database and can be assigned to other lists.
Click on any list name to open a detailed view showing all contacts in that list. You will see:
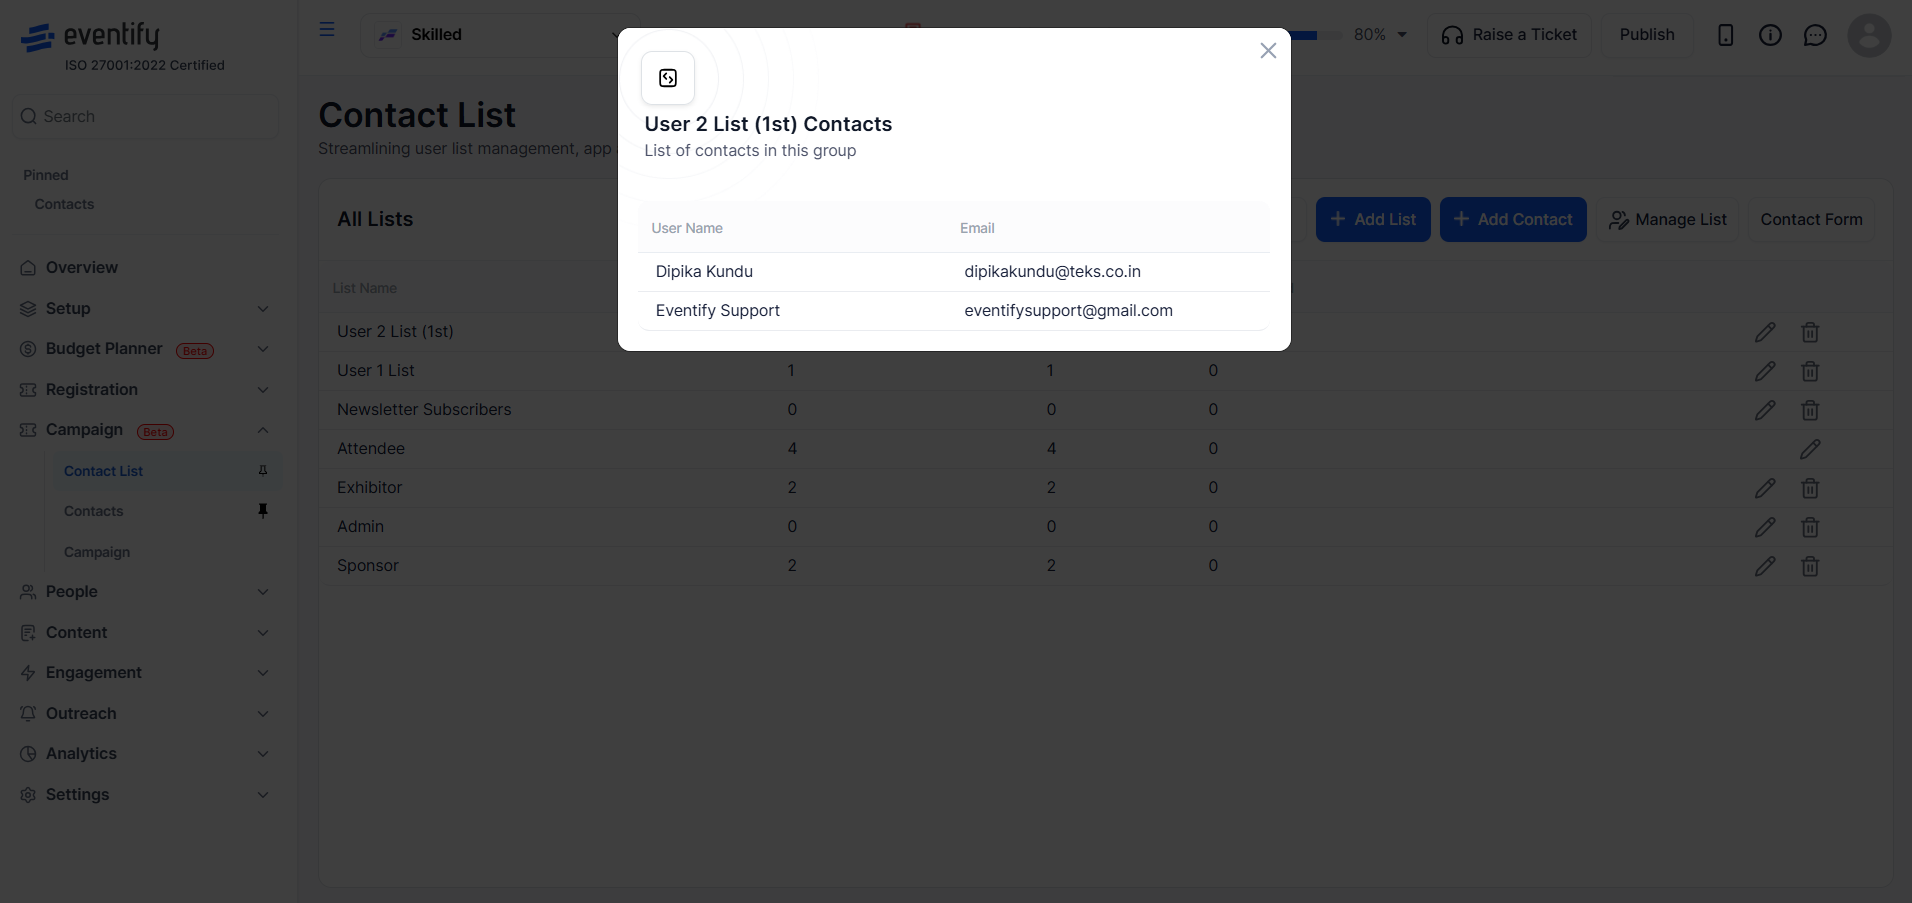
If your list has many contacts, use the pagination controls at the bottom to navigate through pages.

Each contact list displays three key metrics:
These statistics help you understand the health and effectiveness of each list before using it in a campaign. For example, a high unsubscribe count may indicate that your content is not aligned with that audience, while a strong opt-in rate shows a more engaged group.
When creating an email campaign, you will be asked to select a Contact Group as your target audience. The lists you create in the Contact List section will appear as selectable options at this stage.
To use a list:
Organizing your contacts into well-defined lists allows you to send more targeted and relevant messages, improving engagement and overall campaign performance.
