The Registration Settings page is your starting point for managing how attendees register for your event. You can find it by going to your Event Dashboard, clicking Registration in the left sidebar, and selecting Registration Settings.
Once you're on the page, you'll see your live registration page URL at the top. You can copy it to share with attendees, click Visit to preview it, or open Page Settings to customize the page further.
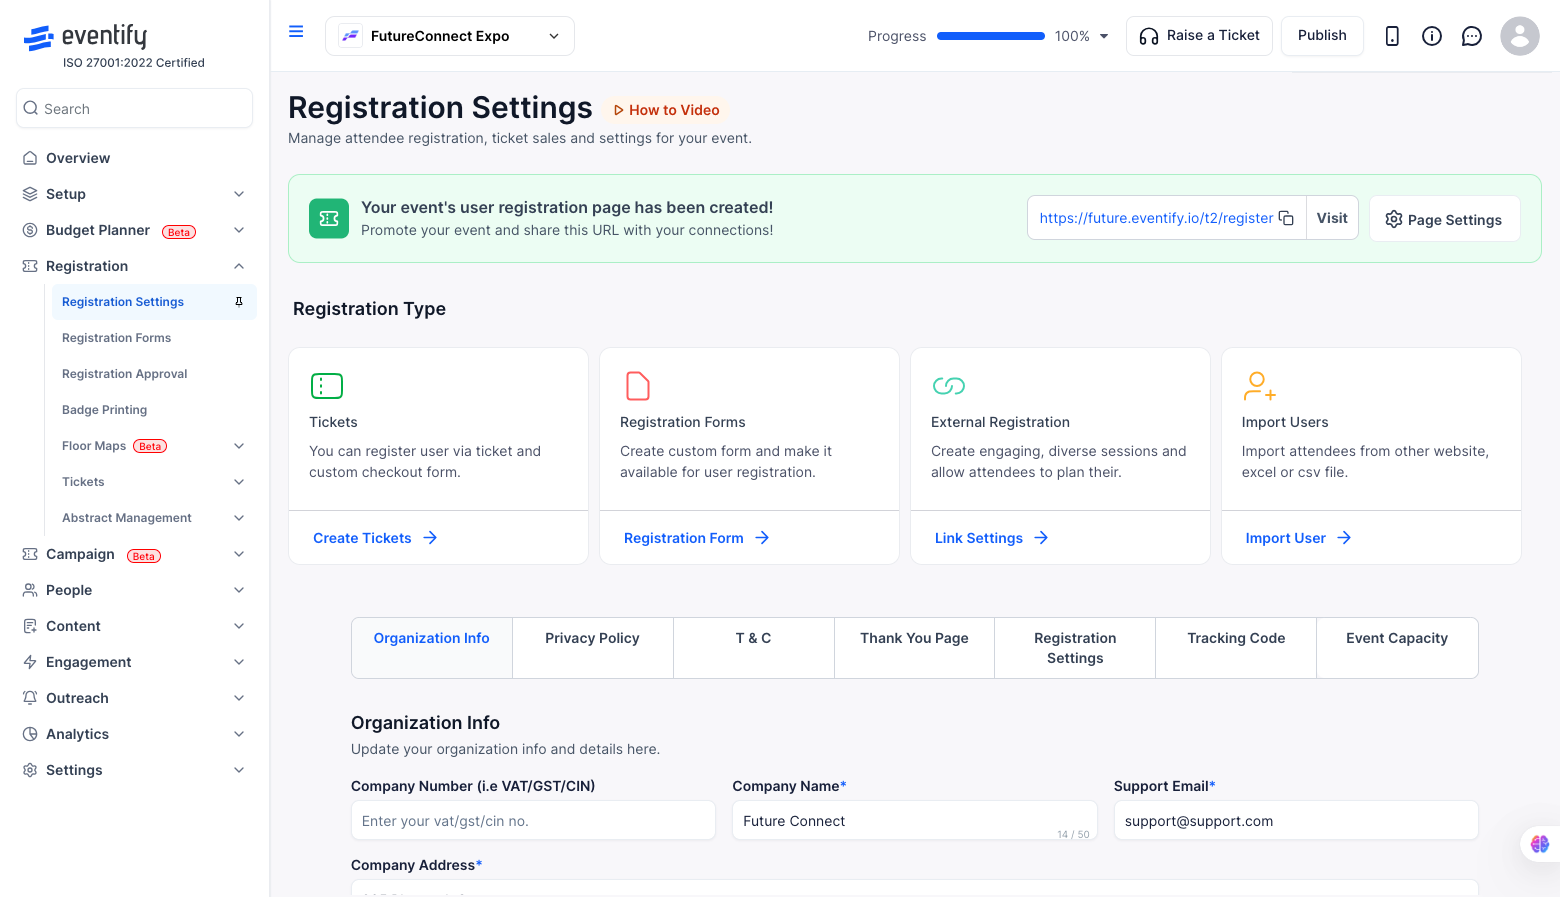
The first thing you'll want to set is your Registration Type. Eventify gives you four options depending on how you want to manage attendee sign-ups.
Tickets — Use this if you want attendees to register by purchasing or claiming a ticket. You can create multiple ticket types with custom pricing, capacity, and checkout settings.
Registration Forms — This lets you build a custom form and make it available for attendee registration. Useful when you need to collect specific information from registrants beyond a standard checkout.
External Registration — If you're using a third-party platform to handle registrations, you can link to it here. Attendees will be redirected to your external registration link instead of registering through Eventify directly.
Import Users — This option lets you add attendees in bulk by importing them from another website, an Excel file, or a CSV file. Handy when you already have a list of confirmed attendees.
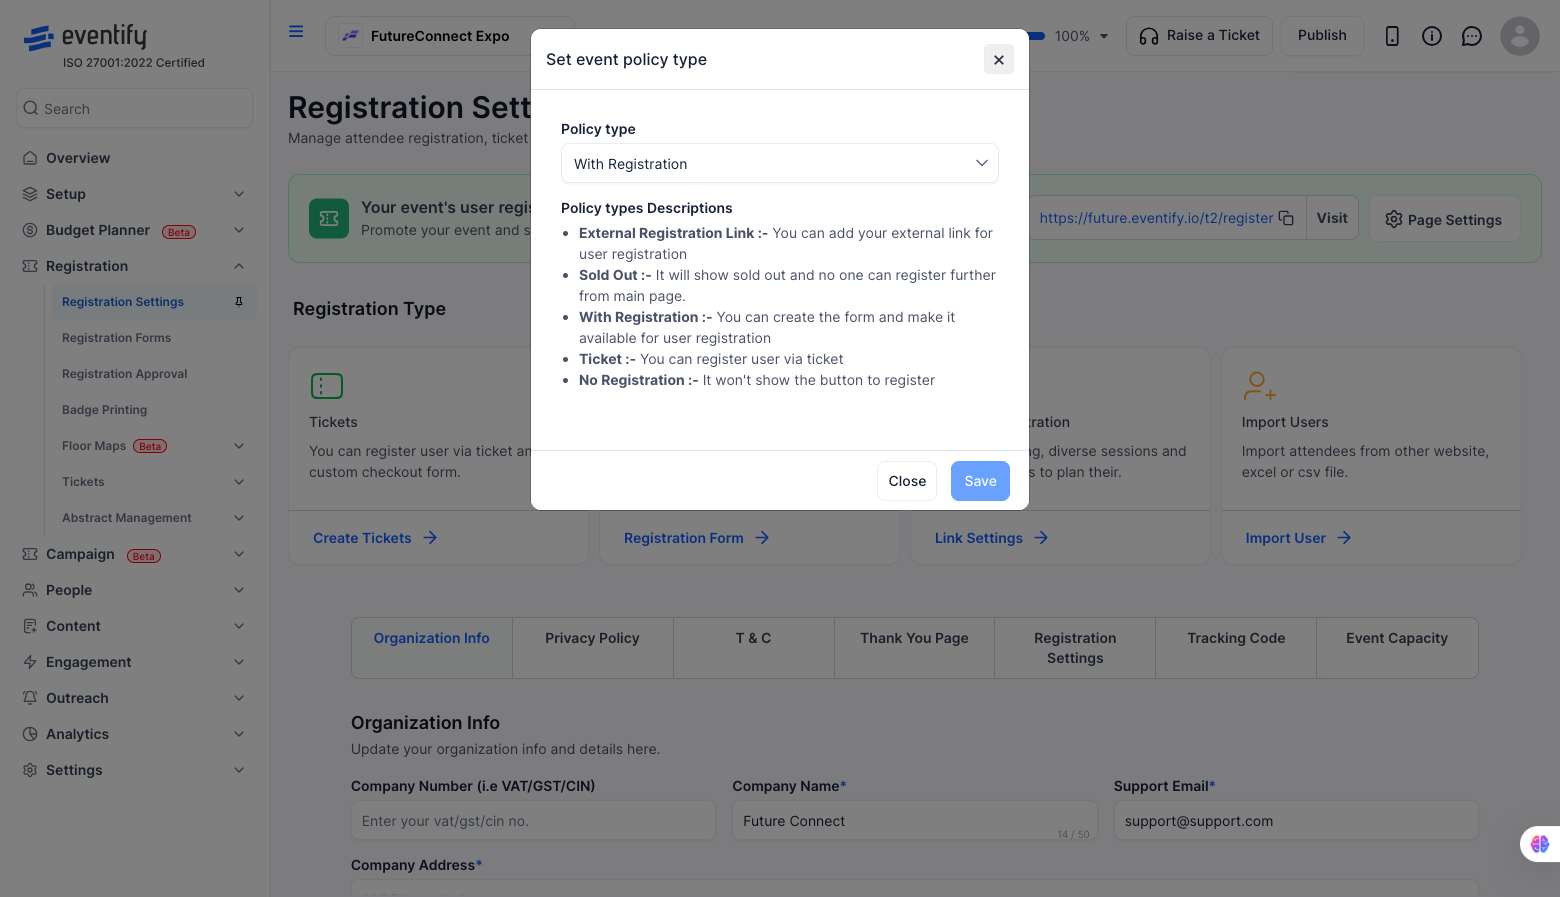
You can also set a policy type that controls the overall registration behaviour for your event. To change it, click the policy type button on the Registration Settings page and choose from the following options.
With Registration — The default setting. Attendees can register through the form you've set up.
Ticket — Registration is handled through tickets. Attendees register by selecting and completing a ticket.
External Registration Link — Attendees are directed to an external URL you provide instead of registering on Eventify.
Sold Out — Registration is visibly closed. The registration button is replaced with a sold out message, and no one can register from the main page.
No Registration — The registration button is hidden entirely. Use this if your event doesn't require sign-ups or if you want to temporarily remove the option.
Below the registration type cards, you'll find a row of tabs that cover the finer details of your registration setup.
Organization Info — Add your company name, logo, support email, and address. This information appears on the registration page and in emails sent to attendees.
Privacy Policy — Add a privacy policy that attendees must acknowledge before completing registration.
T&C — Add terms and conditions that appear during the registration process.
Thank You Page — Customize the message or page attendees see after successfully registering.
Registration Settings — Control when registration opens and closes, set capacity limits, and configure other registration-specific options.
Tracking Code — Add custom tracking scripts (such as Google Analytics or Meta Pixel) to your registration page.
Event Capacity — Set the maximum number of attendees allowed to register for your event.
.png)
Q: What is the difference between the Tickets and Registration Forms registration types?
Tickets are best when you want attendees to go through a checkout process — for example, when selling paid tickets or offering different ticket tiers. Registration Forms are better suited when you want to collect specific information from attendees without a ticketing or payment flow.
Q: Can I switch registration types after my event is live?
Yes, you can change the Registration Type at any time from the Registration Settings page. However, switching types mid-event may affect existing registrations, so it's recommended to make this change before your event goes public or when no active registrations are in progress.
Q: How do I temporarily stop new registrations without hiding the button entirely?
Use the Sold Out policy type. This keeps the registration area visible but replaces the registration button with a sold out message, signalling to attendees that spots are no longer available.
Q: How do I add attendees who registered outside of Eventify?
Use the Import Users registration type. It allows you to bulk-add attendees by uploading an Excel or CSV file, or importing from another platform.
Q: Where does my Organization Info appear to attendees?
The details you enter under the Organization Info tab — including your company name, support email, and address — appear on the registration page itself and in confirmation or notification emails sent to attendees.
Q: Can I add both a Privacy Policy and Terms & Conditions?
Yes. The Privacy Policy and T&C are separate tabs in Registration Settings, and you can configure both independently. Attendees will be asked to acknowledge them during the registration process.
Q: How do I track registrations from a marketing campaign?
Use the Tracking Code tab to add scripts like Google Analytics or Meta Pixel to your registration page. This allows you to attribute registrations to specific campaigns and monitor conversion performance.
Q: What happens when the event reaches its capacity limit?
Once the maximum number of attendees set under Event Capacity is reached, new registrations are automatically blocked. You can also manually switch the policy to Sold Out before hitting the limit if you want to close registrations early.
