Once your contact lists and form fields are set up, you can start adding contacts. This guide covers all the ways to add contacts — manually one by one, or in bulk using CSV/Excel import.
From the Eventify Admin Panel, click on Campaign in the left sidebar.

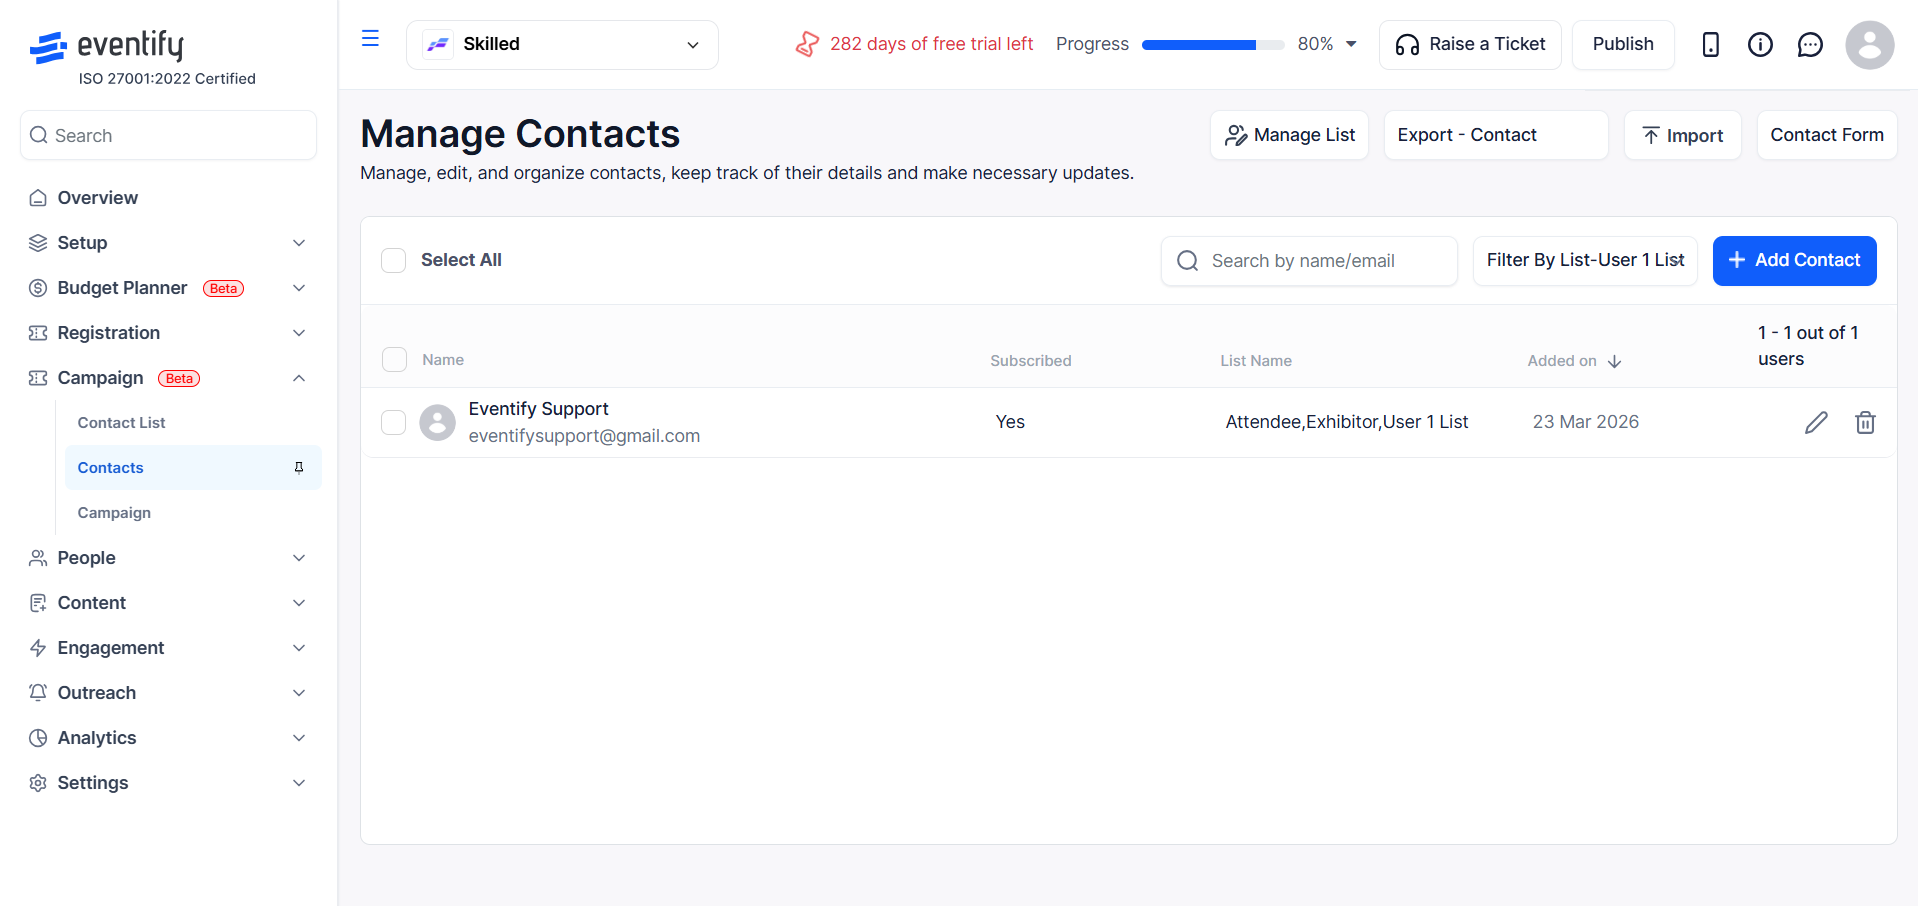
Click the Contacts tab to view your contact database.
Click the Add Contact button to open the contact creation form.

Enter the contact's email address. This is required and serves as the unique identifier for each contact.

Fill in the contact's First Name and Last Name. Both fields are required.
Select one or more Contact Lists from the dropdown to assign this contact to. These are the lists you created in the previous step.

Click on Additional Details to add more information:

Click Save to add the contact to your database and assign them to the selected lists.

For adding many contacts at once, use the bulk import feature with a CSV or Excel file.
In the Contacts section, click the Import button to start the bulk import process.

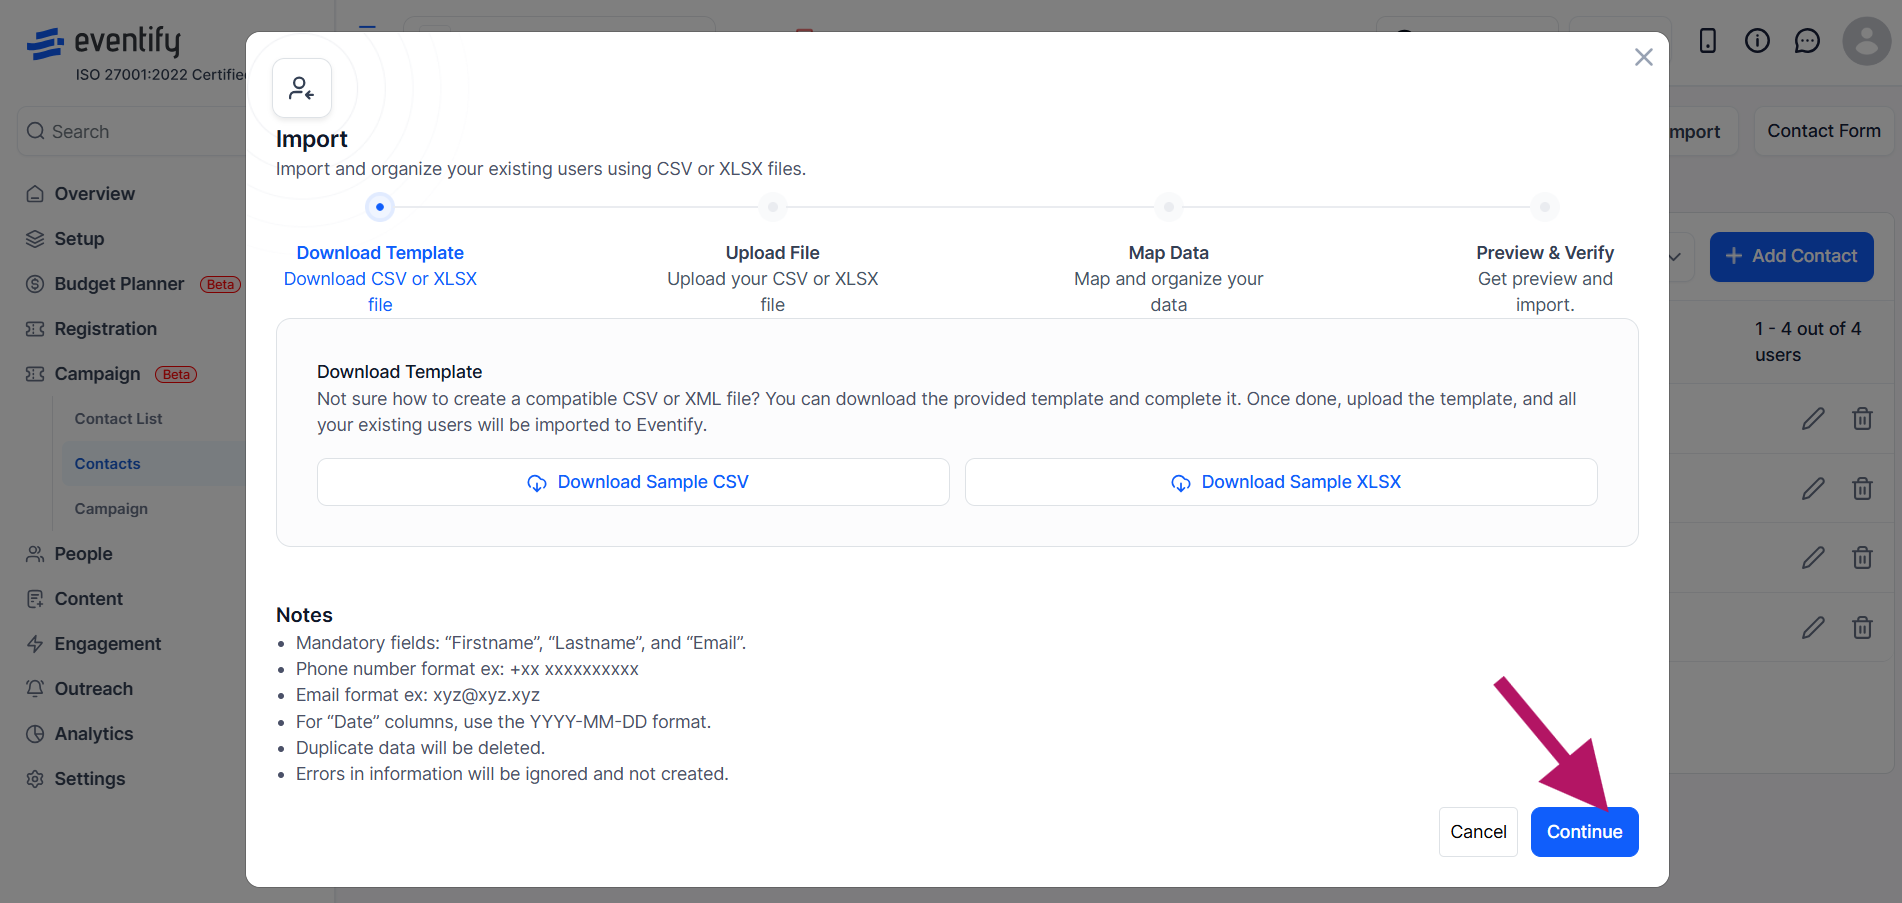
If you are not sure about the file format, click Download Template to get a pre-formatted CSV file with the correct column headers. Fill in your contact data using this template.

Click Continue to move to the file upload step.
Drag and drop your file or click to browse and select it. The file should contain columns for the contact fields you want to populate (e.g., Email, First Name, Last Name, Company, etc.).

The system will display your file's column headers alongside the contact form fields. Map each column to the correct contact field by selecting from the dropdown. This ensures your data goes into the right fields.
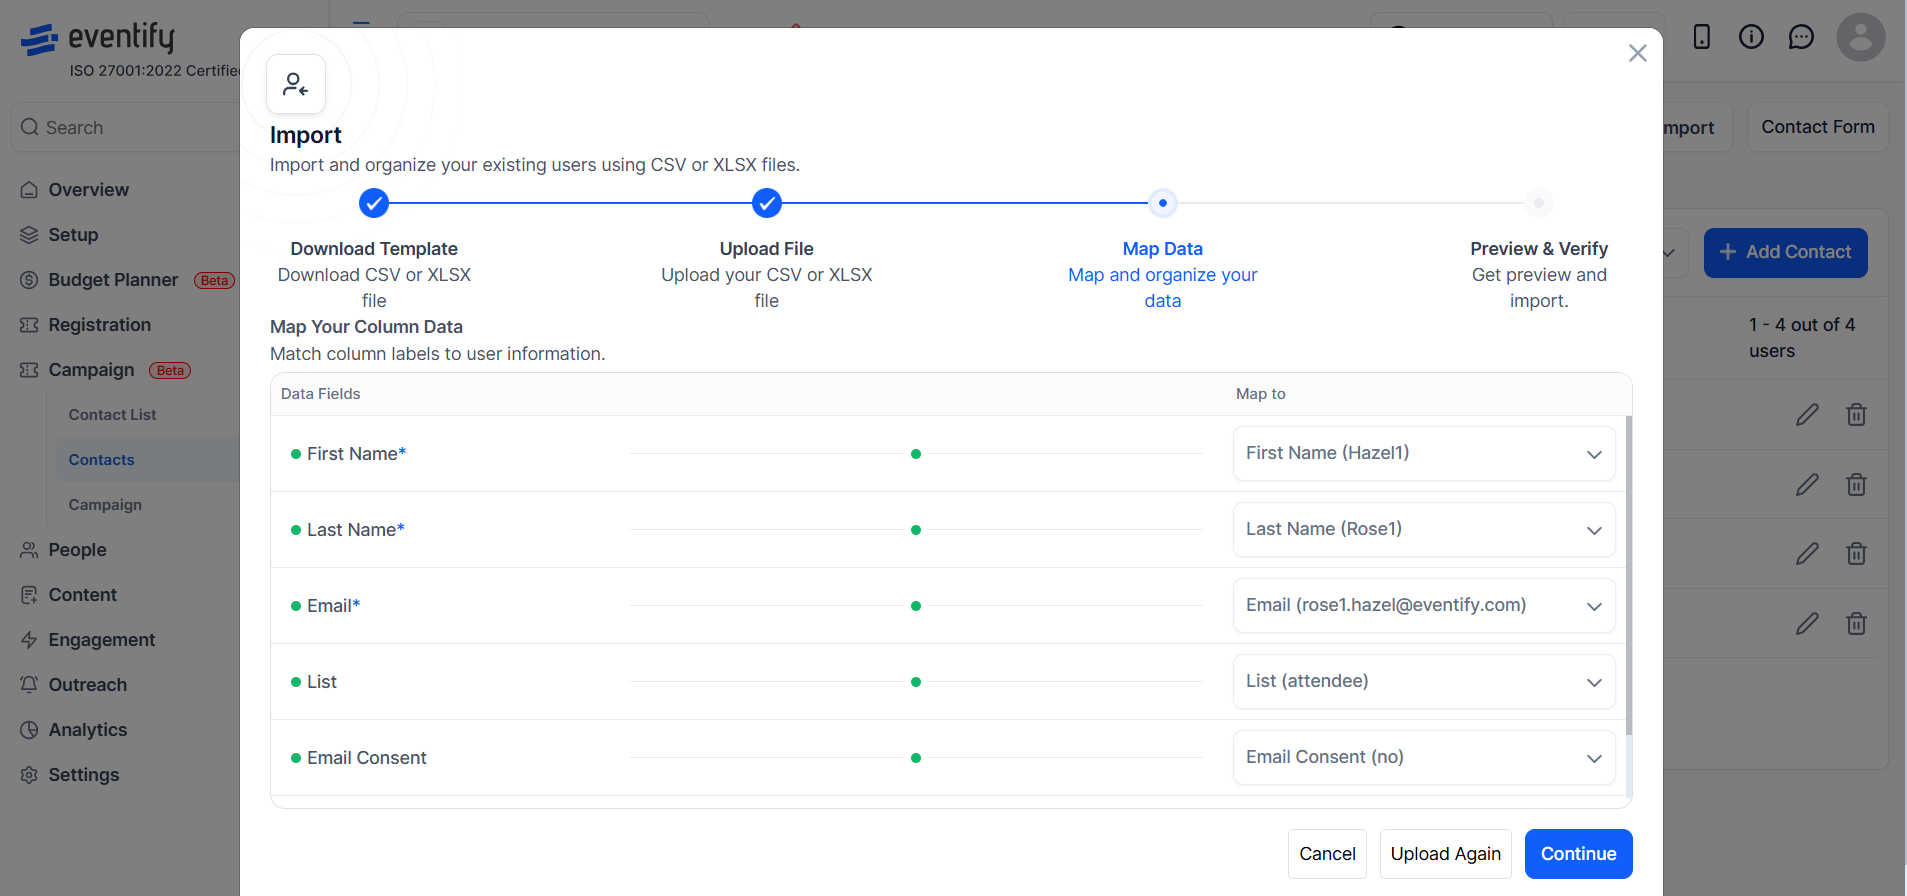
Once all columns are mapped correctly, click Continue to proceed.

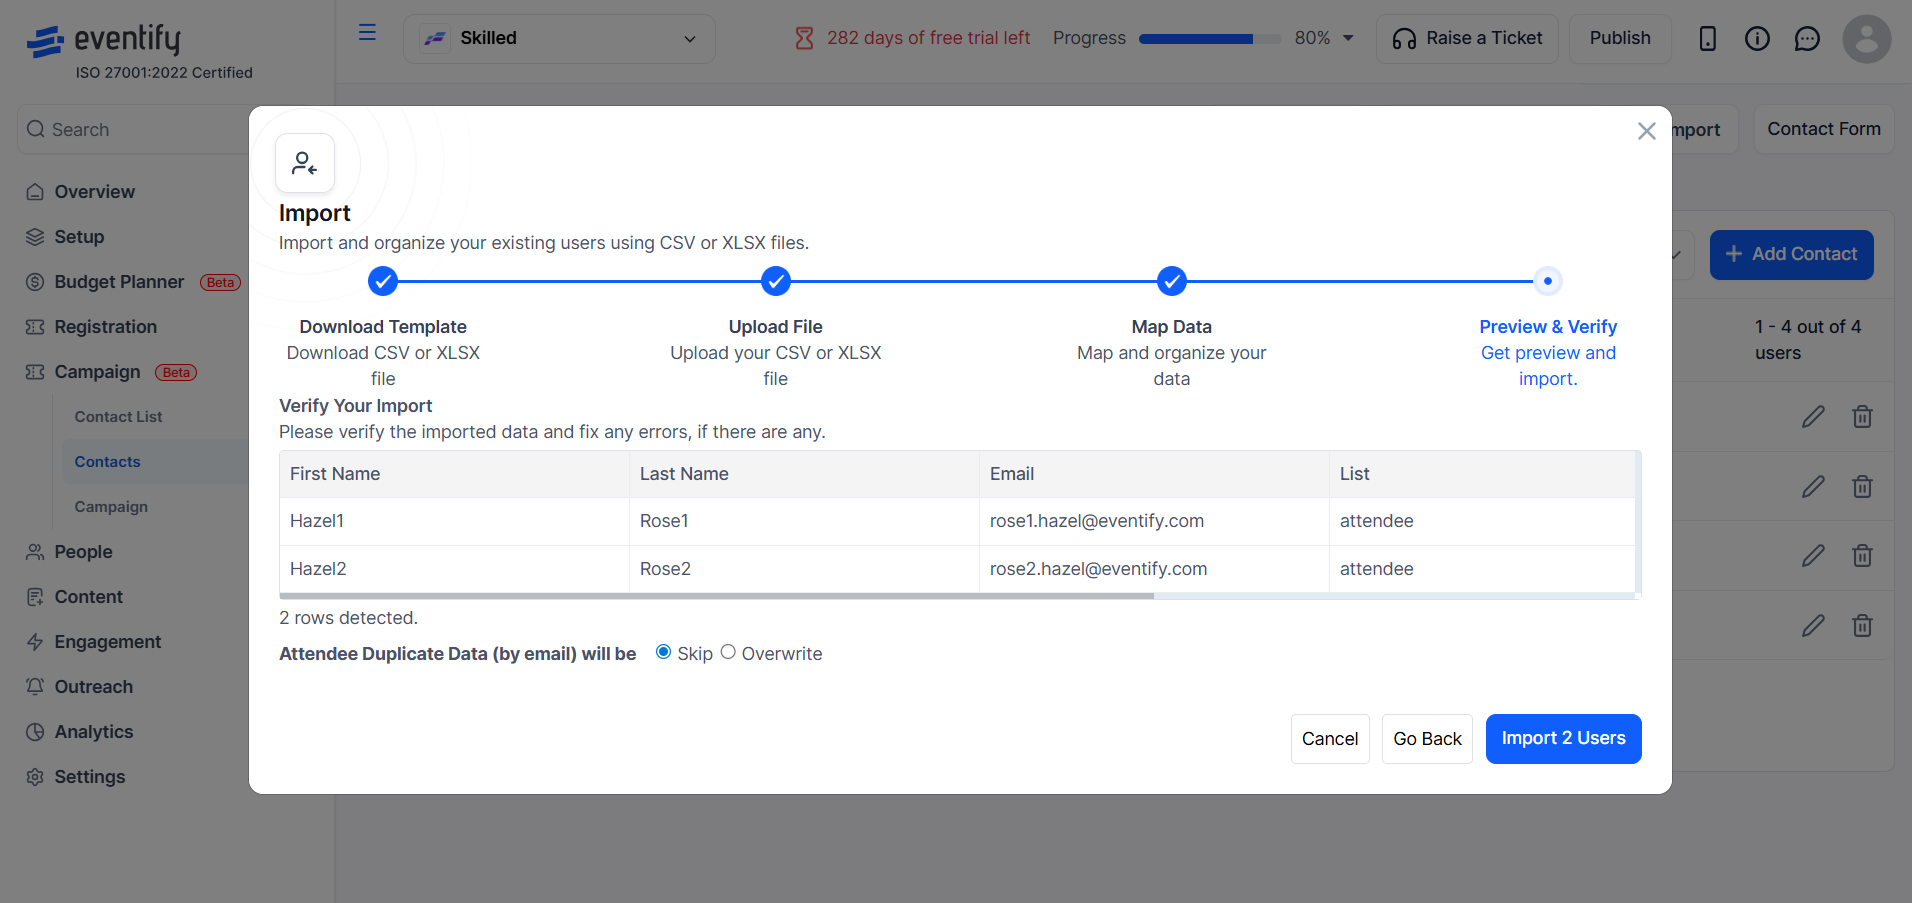
If your import file contains contacts that already exist in the system (matched by email), you have two options:
If you selected Overwrite, you will be asked whether blank fields in your import file should overwrite existing data. Choose carefully — selecting Yes means empty cells in your file will clear existing data for those fields.
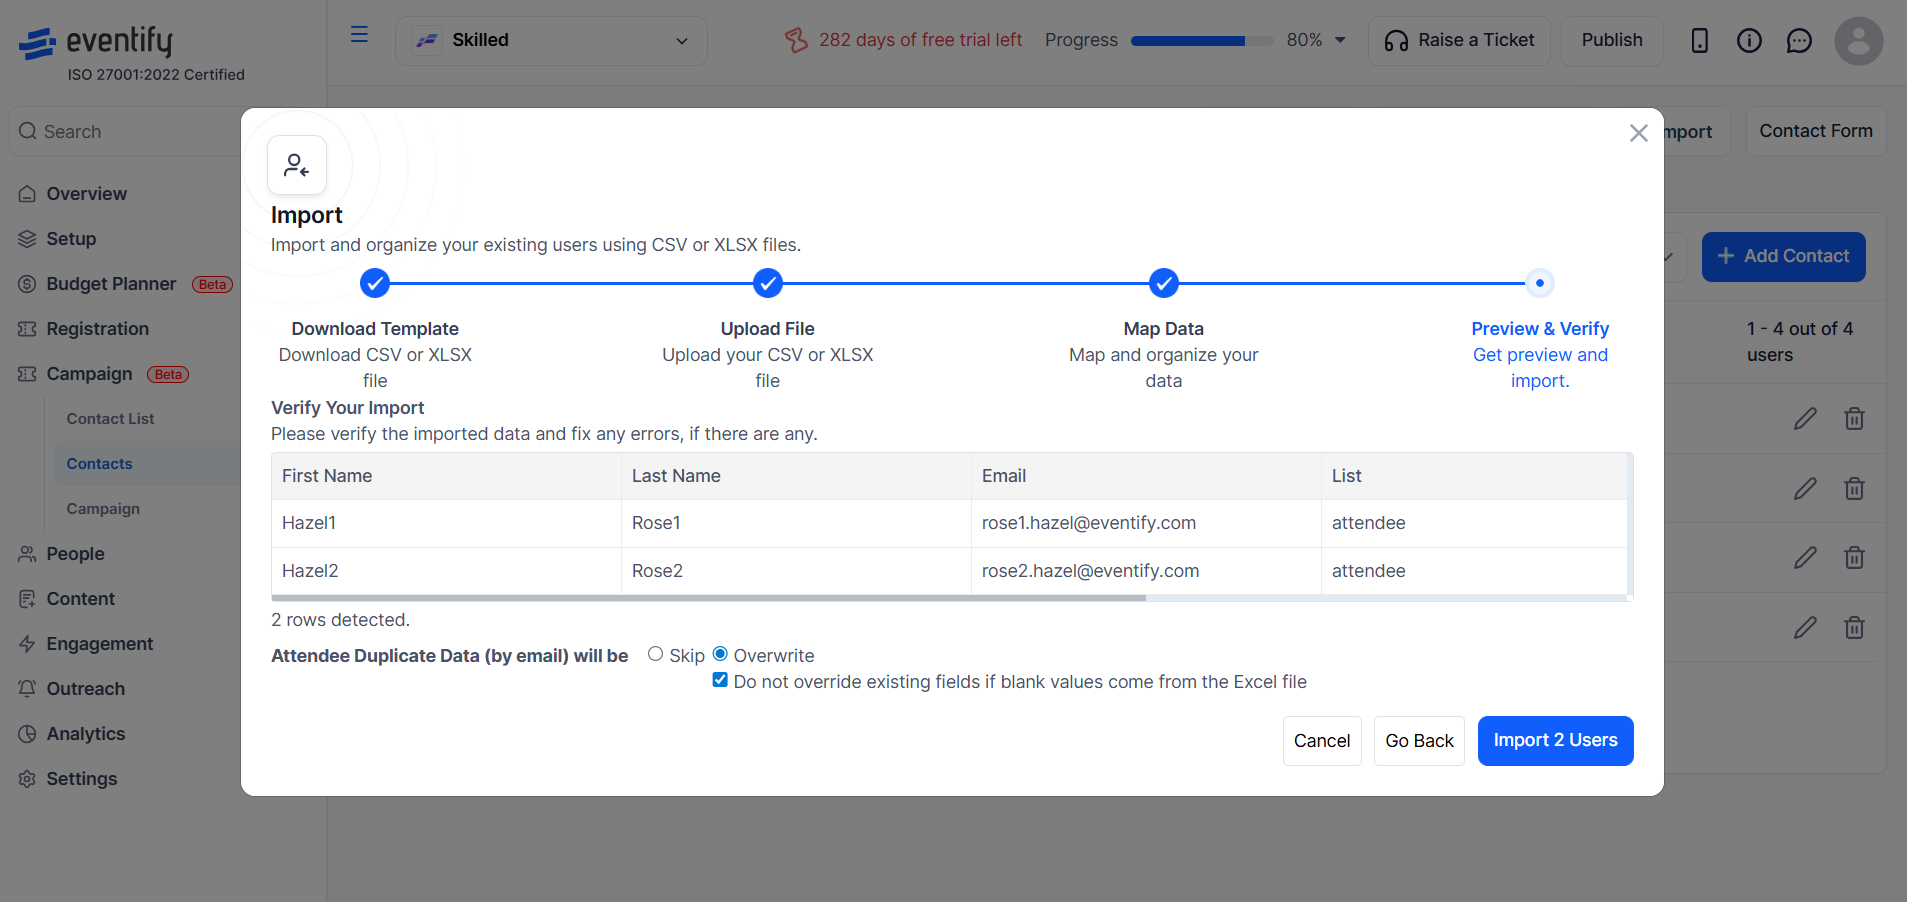
Click the Import button to begin processing your file. The system will validate the data, check for duplicates, and import the contacts according to your settings.

Click the Manage List tab to view and update which lists your existing contacts belong to.

Use the search bar to find a contact by name or email.

Click on a contact to see and modify their list assignments. Add or remove lists as needed, then close the panel to save changes.

Type a name or email in the search bar to quickly find specific contacts.

Use the filter dropdown to show only contacts belonging to a specific list or category.
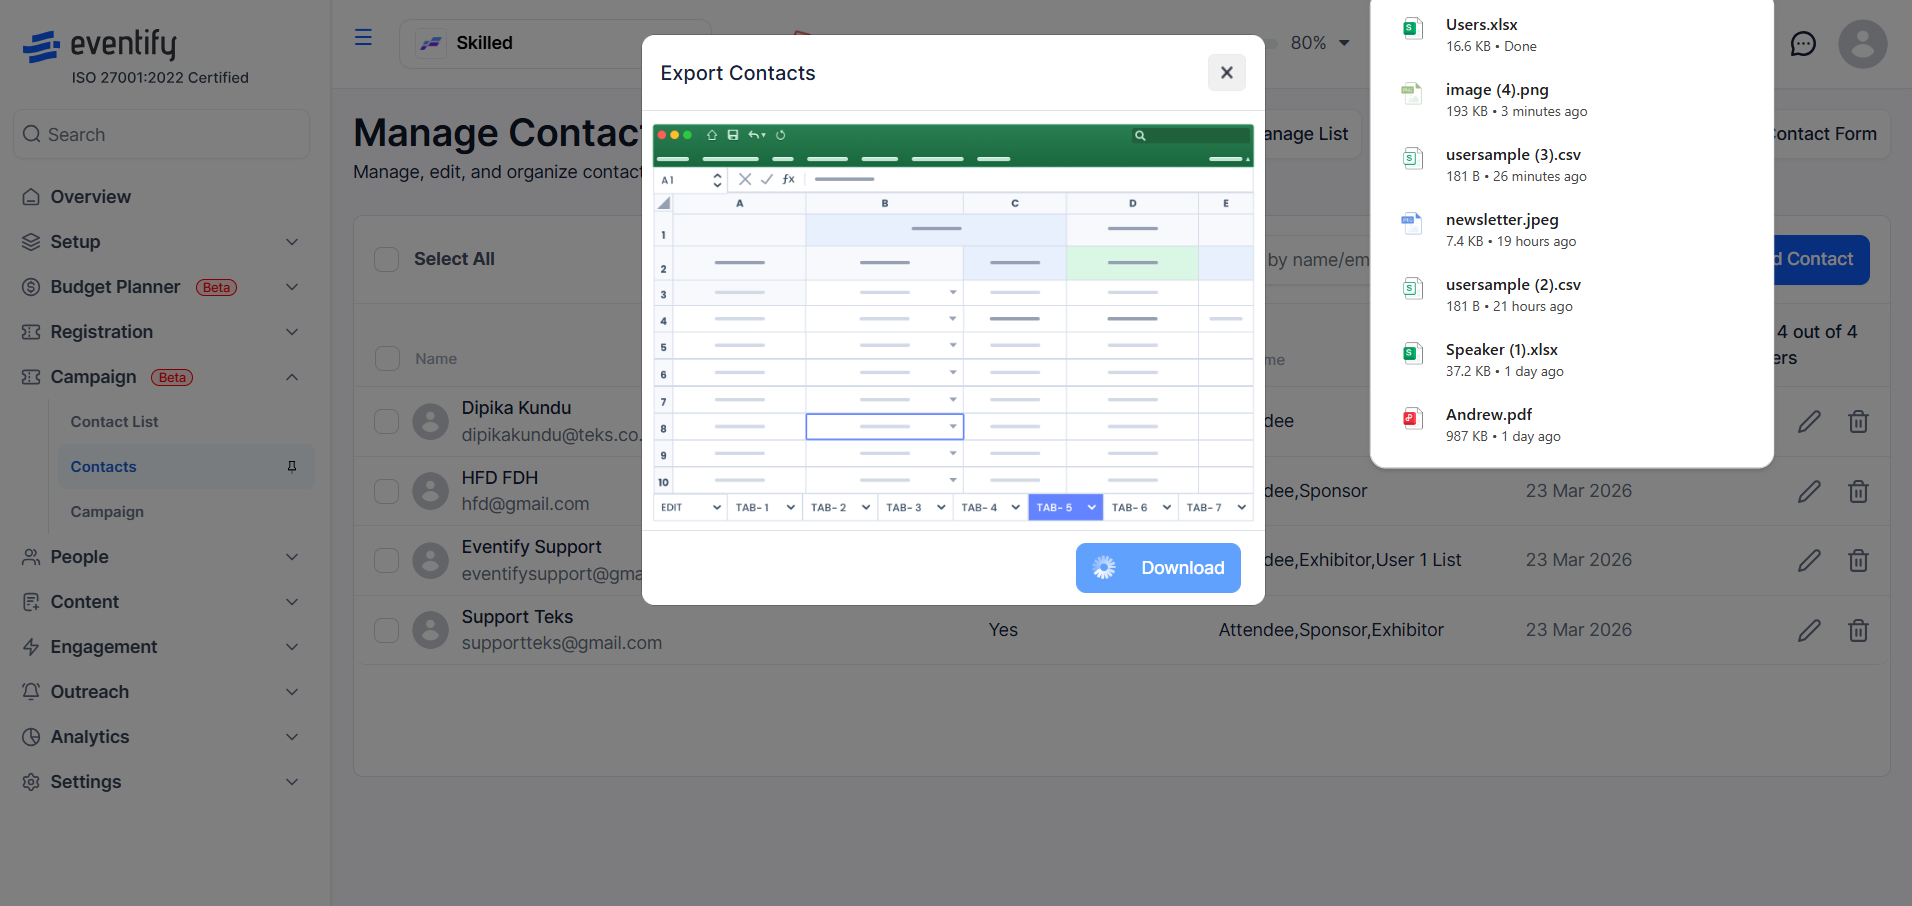
In the Contacts section, click the Export button to open the export dialog.

Click Download to export your contacts as a CSV/Excel file. Only fields marked as Exportable in your contact form will be included.