Want attendees to register for your event on their own? Here is how to set up a public registration page on Eventify so anyone with the link can sign up without needing an invite.
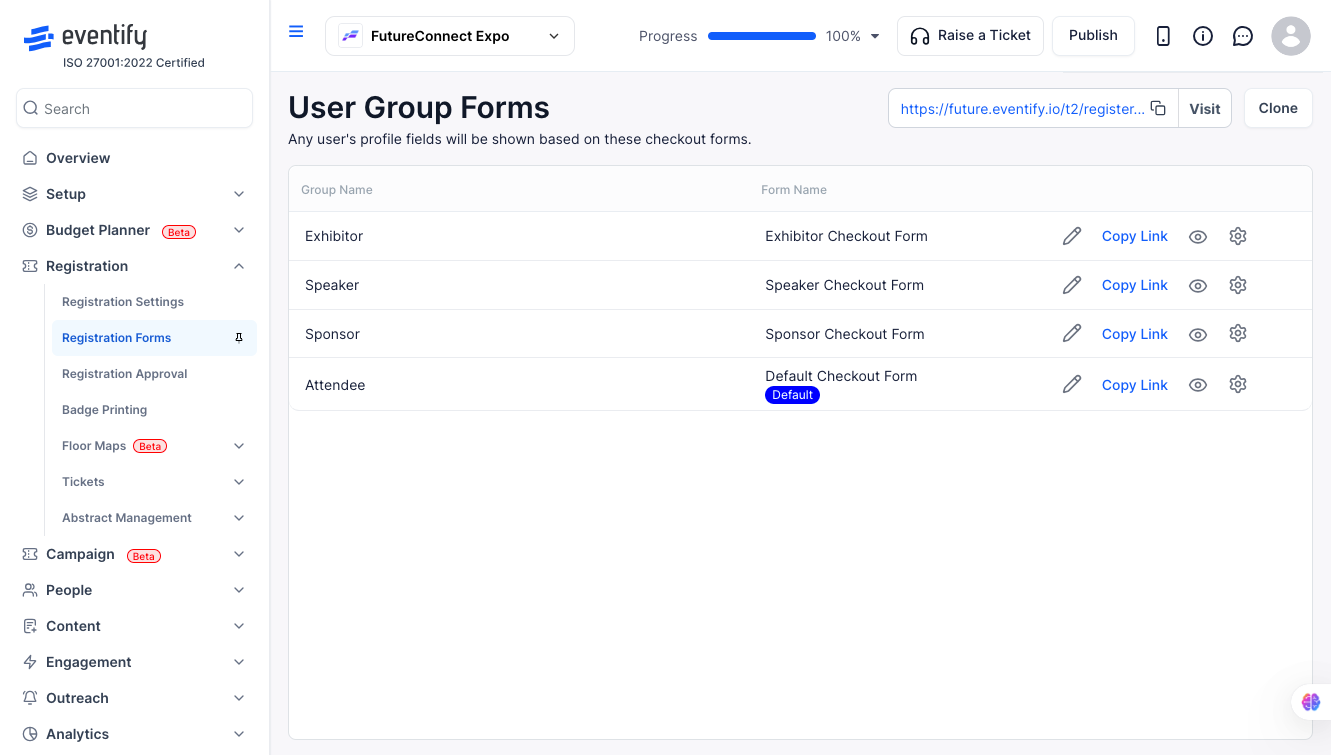
Head over to your Admin Panel and go to Registration > Registration Form. Here you can build out the form the way you want it — add or remove fields, rearrange them, and make sure you are only asking attendees for what you actually need.
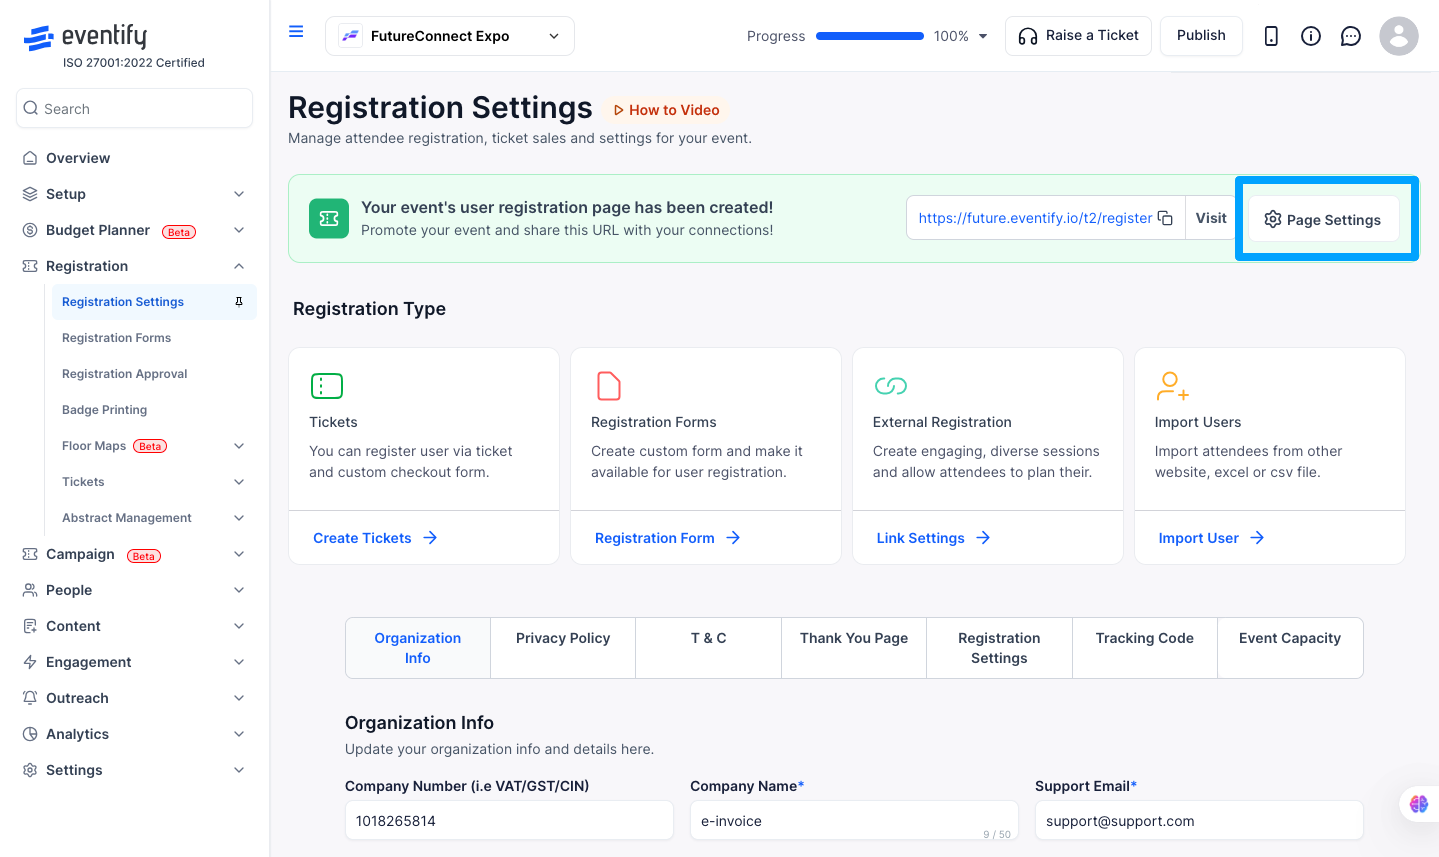
Once your form is ready, go to Registration > Registration Settings > Page Settings. Look for the Policy Type option and set it to allow public registration. This is what opens up your event so anyone can register, not just people you have personally invited.
After saving your settings, grab the registration URL and share it with your attendees — post it on social media, drop it in an email, add it to your website, wherever your audience will see it. Anyone who clicks the link will land directly on your registration form and can sign up right away.
Want to make it even easier for people to register? You can embed the registration form directly on your website using the registration URL. Just add it as the destination for a Register Now button, or use an iframe embed if your site supports it. That way attendees never have to leave your page to sign up.
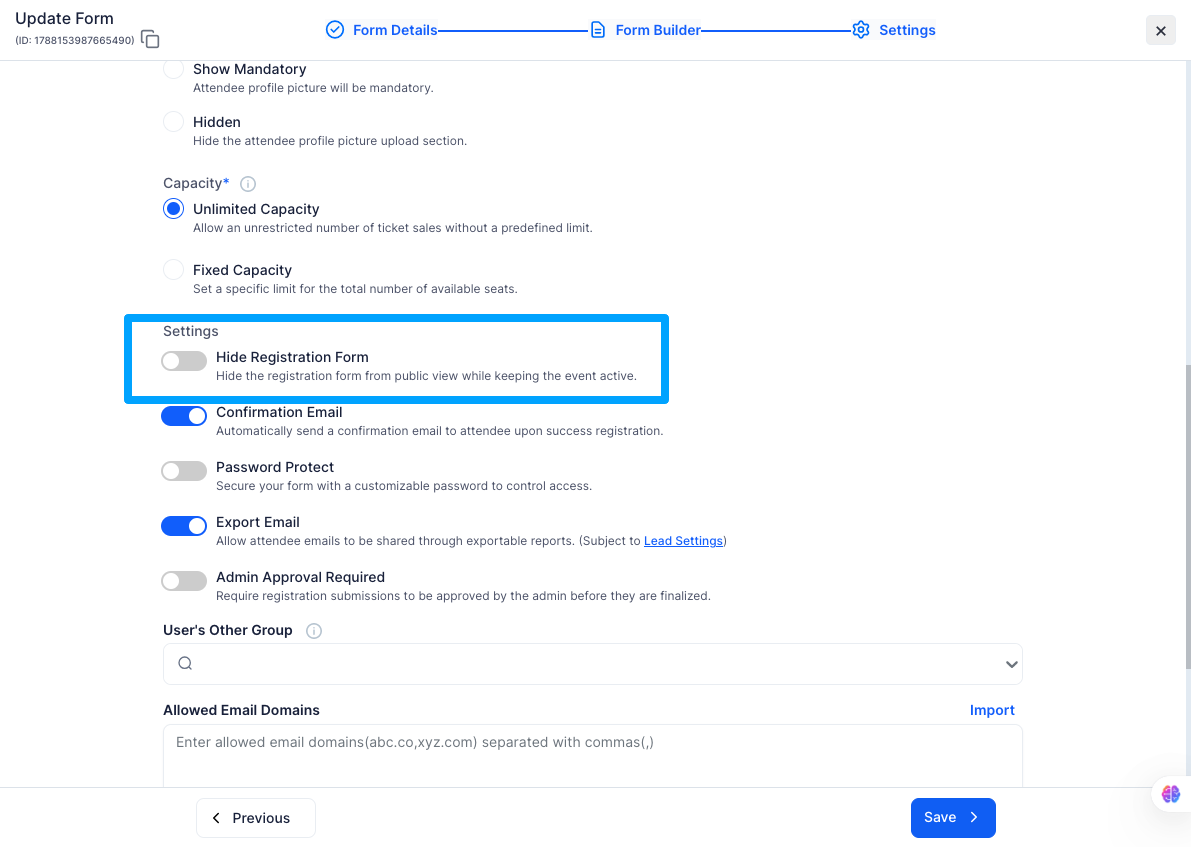
There are times when you want to keep your event active but stop showing the registration form to the public — for example, when registrations are closed for a specific group but the event is still live. Eventify has a dedicated toggle for this called Hide Registration Form.
You can find it under the Settings tab inside your Registration Form. Just toggle it on and the form will be hidden from public view while your event stays active. Attendees visiting the registration page will not see the form, but everything else about your event remains live and accessible.
To turn it back on, simply go back to the same Settings tab and toggle it off again.
Q: Do I need to publish my event before making registration public?
A: Yes. Your event needs to be published and not in draft state before attendees can access the registration page. Make sure everything looks good before you go live.
Q: Can I hide the registration form without taking down my event?
A: Yes. Go to the Settings tab inside your Registration Form and toggle on Hide Registration Form. This hides the form from public view while keeping your event fully active. You can turn it back on at any time from the same place.
Q: Can I make registration public for some ticket types and private for others?
A: Ticket-level visibility is managed separately through Ticket Visibility settings. The registration page itself is set as either public or private as a whole — you cannot mix the two at the page level.
Q: Will the registration URL change if I update my settings?
A: No. Your registration URL is permanent and tied to your event. Updating your form or policy settings will not change the link you have already shared. Any new updates made to the form or policies will automatically reflect on the registration page and will not affect attendees who have already registered.
Q: Can attendees access the registration page before I set it to public?
A: No. Until you set the policy to public, the page is not accessible to attendees. They will either see an error or get redirected.
Q: How do I temporarily stop accepting registrations without deleting anything?
A: Go back to Registration > Registration Settings > Page Settings and change the Policy Type to Closed. This pauses sign-ups without taking down your registration page entirely.
Q: Can I share the registration link before the event is published?
A: You can copy and save the link ahead of time, but attendees will not be able to register until both the event and the registration policy are set to public.
