Edit the Campaign contact form in Eventify to add or remove form components, rename fields and variables, and set which fields are mandatory.
Easily update the contact form within your campaign to collect the right information.
This article is the quick click-by-click version. For a full reference of the default sections, field types and field settings such as Visibility and Exportable, see How to Set Up Contact Form Fields for Email Campaigns.
Step-by-step guide
1: Access the Eventify Admin Panel and navigate to Campaign
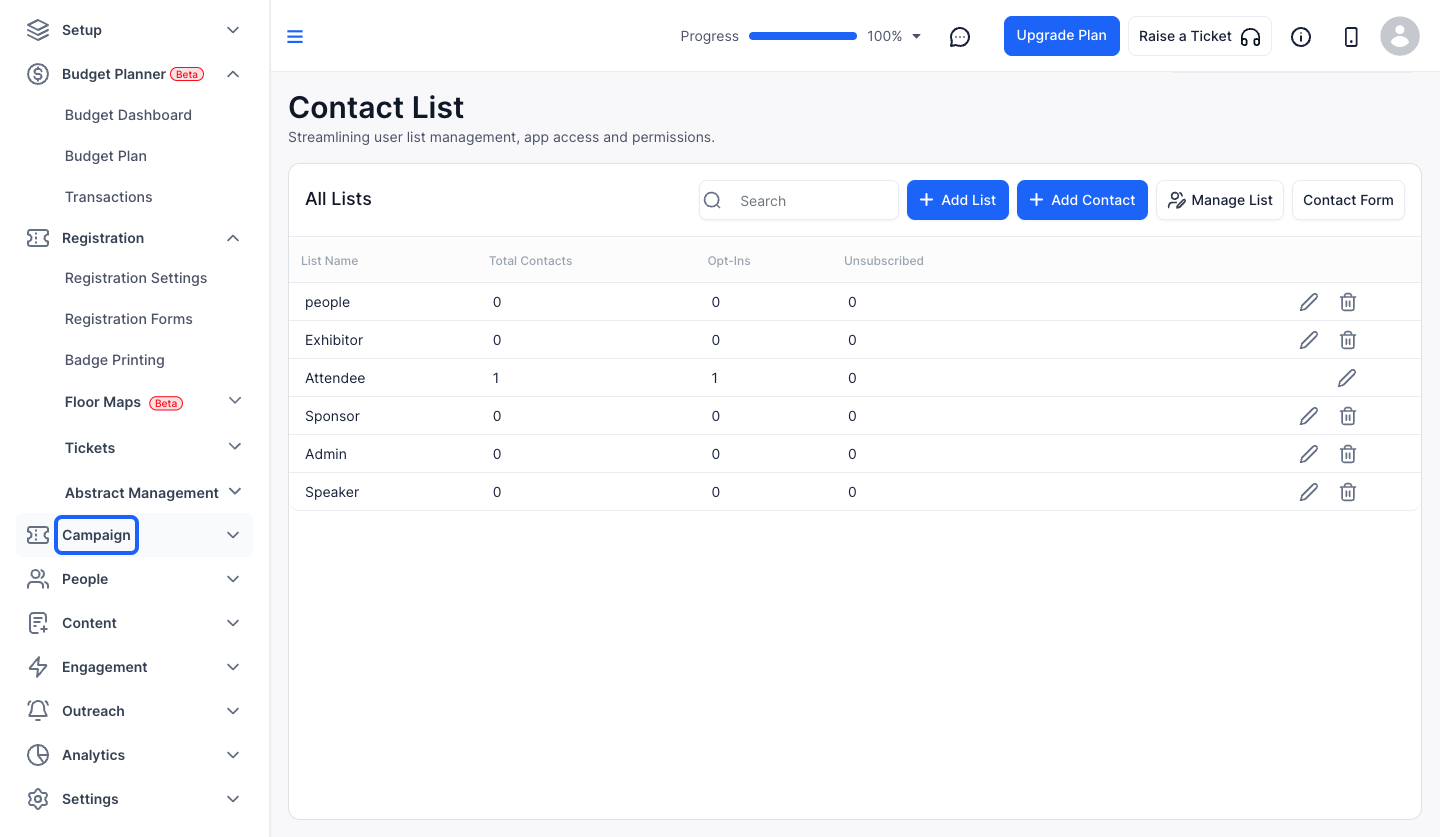
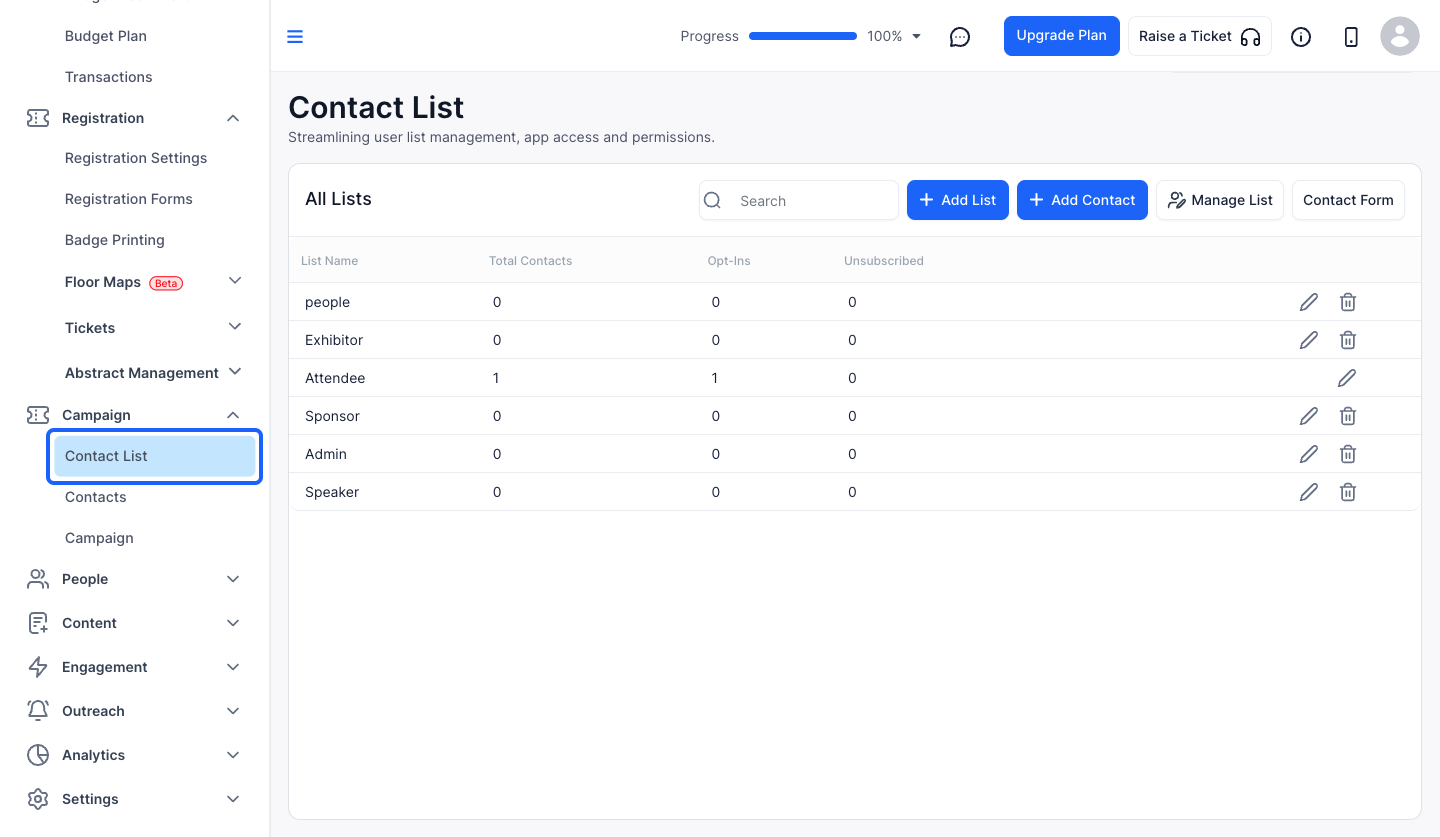
2: Click on Contact List
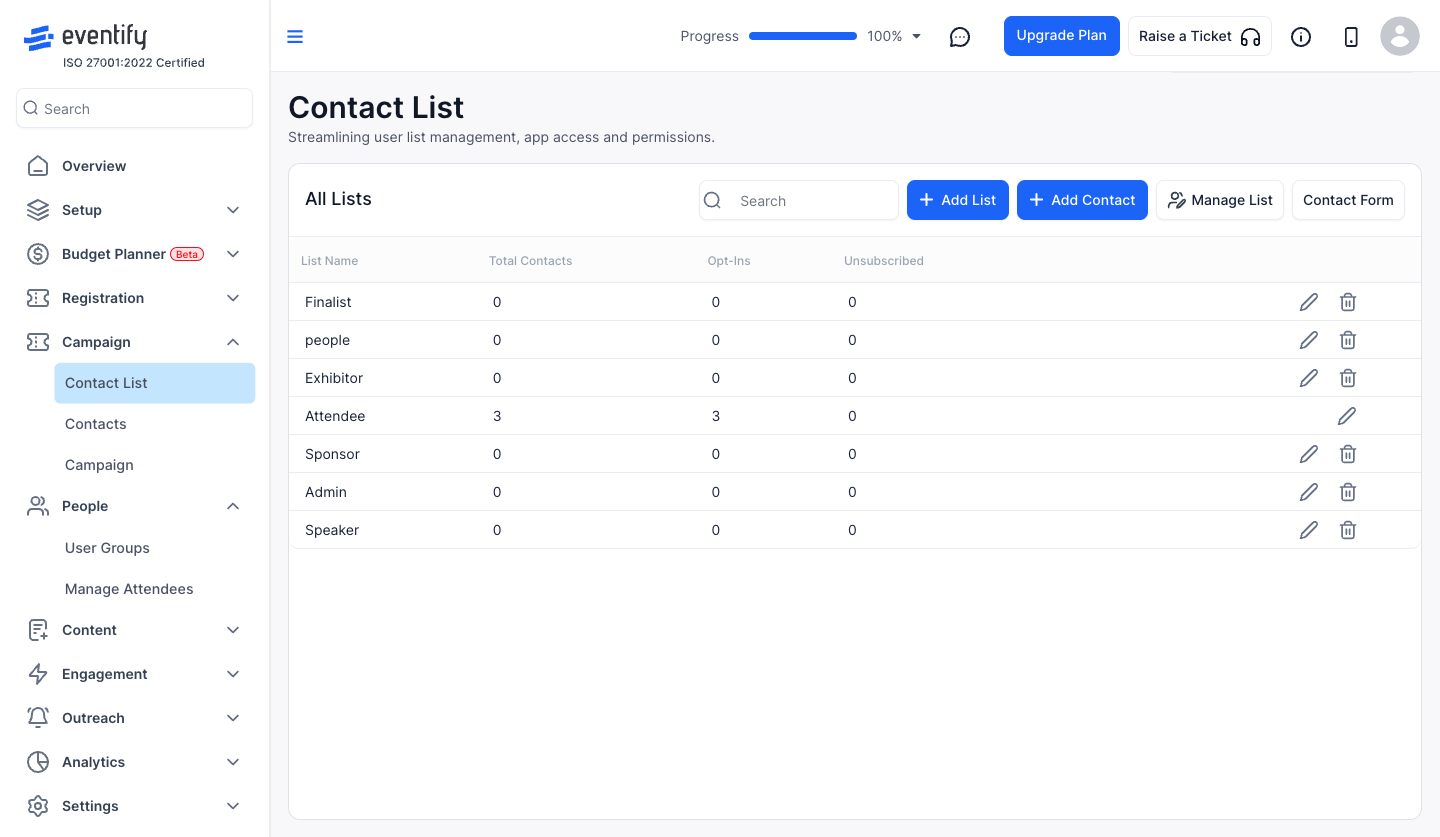
3: Click on Contact Form to customize the form
4: You can Drag & Drop the Form Components to add them
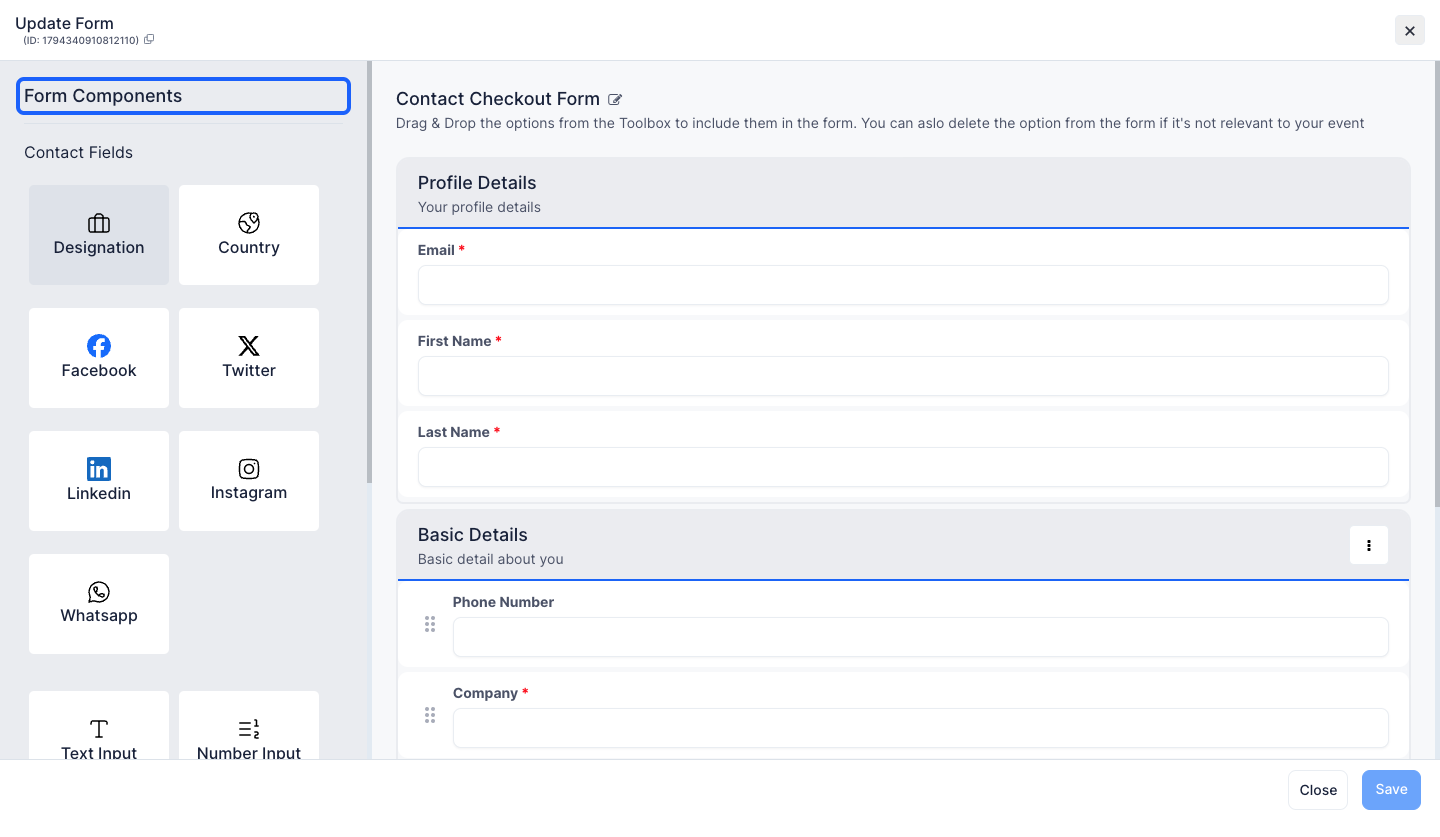
5: You can change the form name
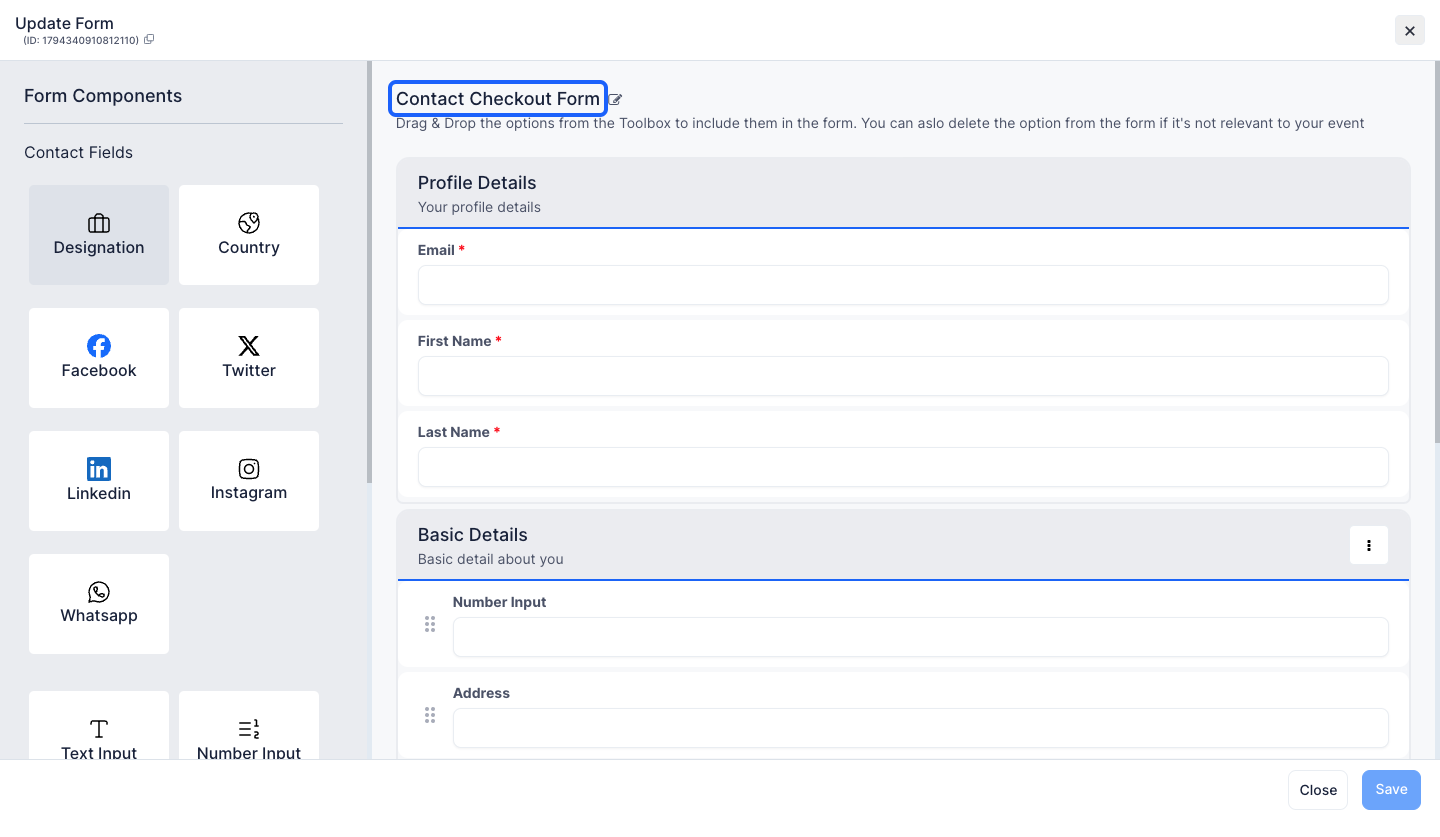
6: Note: You cannot edit or delete the Profile Details section
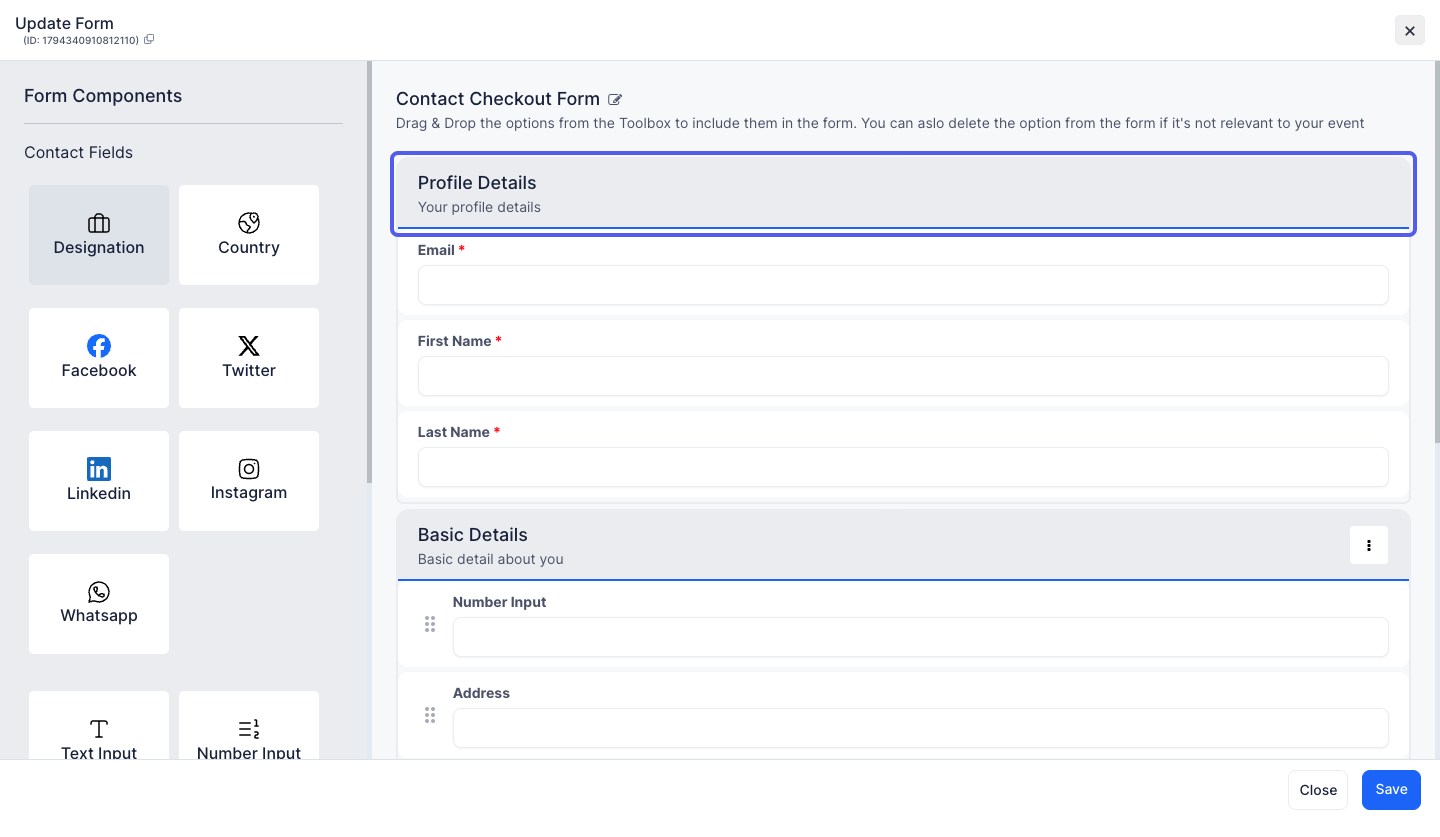
7: Customize the basic details section by adding or removing form components
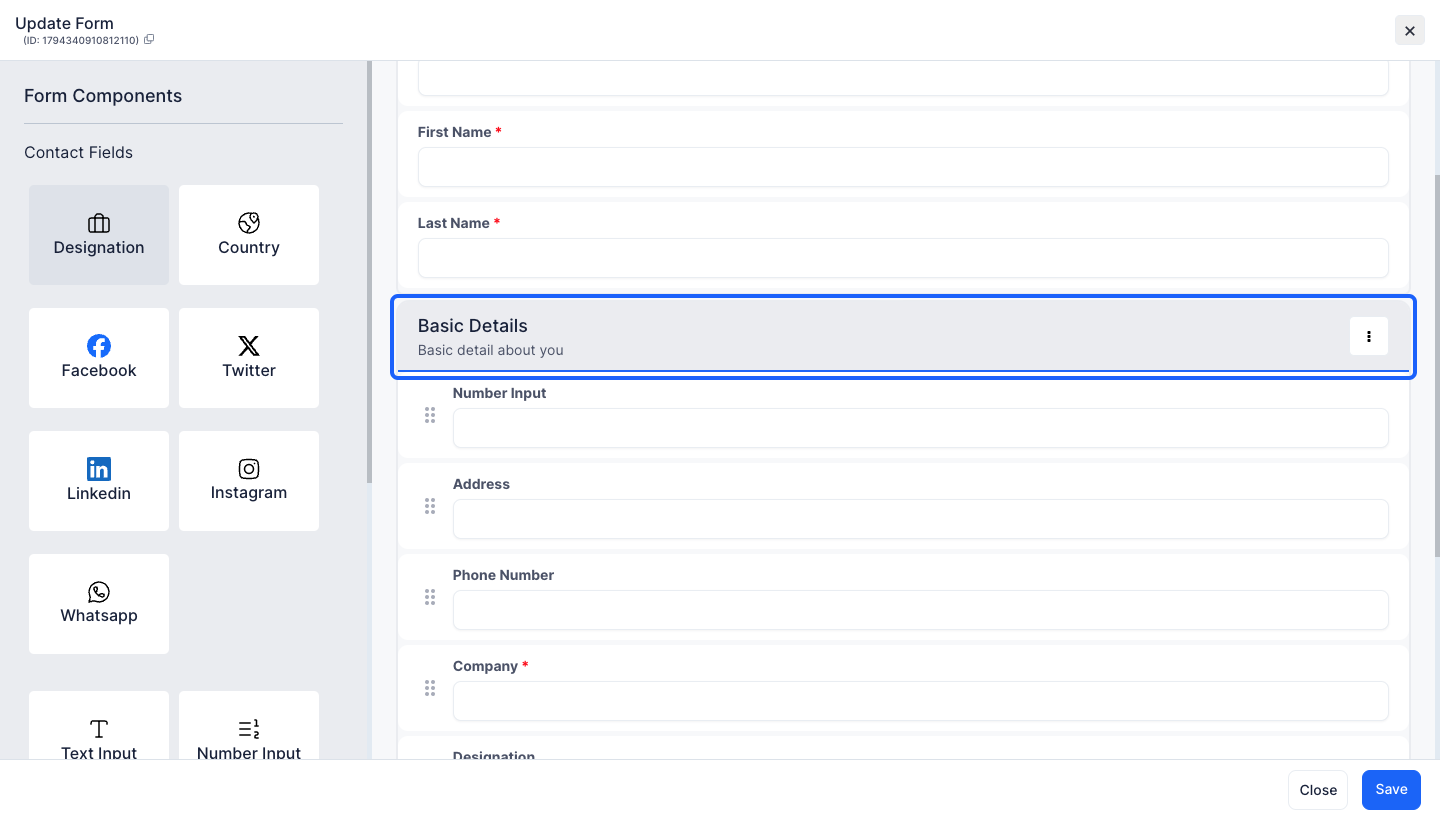
8: You can add or remove multiple form components in this section too
Note: You cannot delete Opt-In field
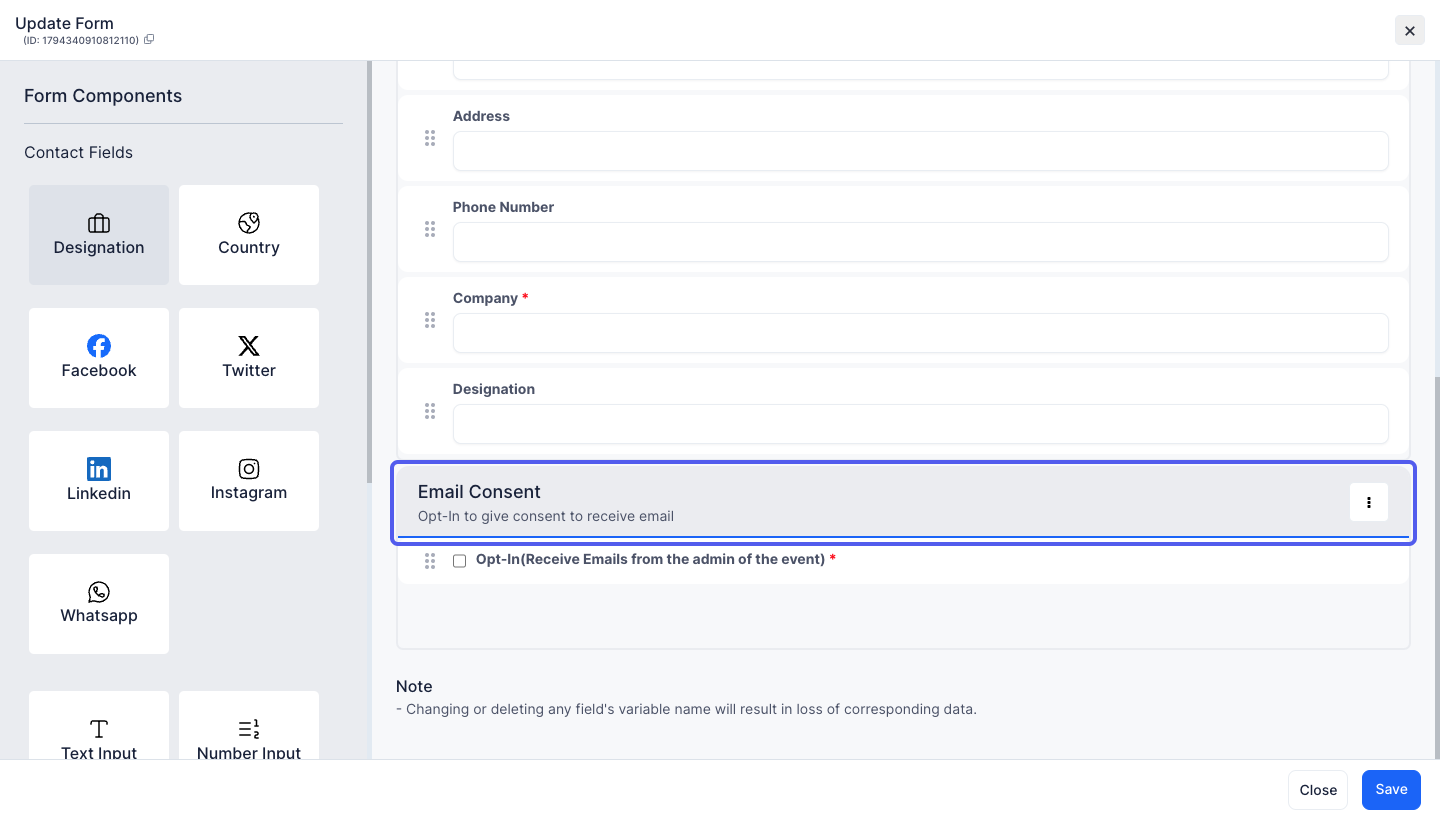
9: You can also edit individual component
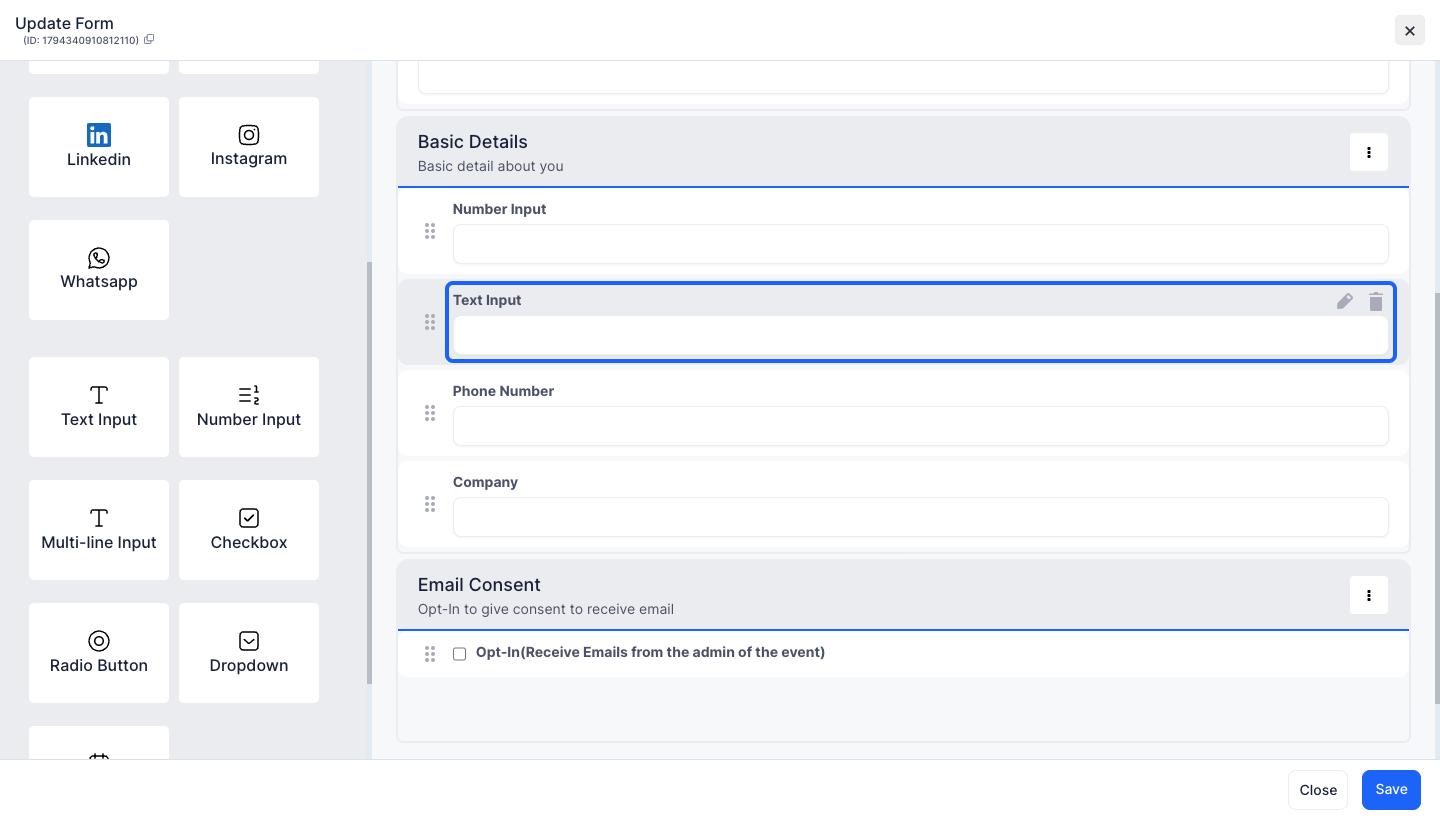
10: Click the "pencil" icon to edit
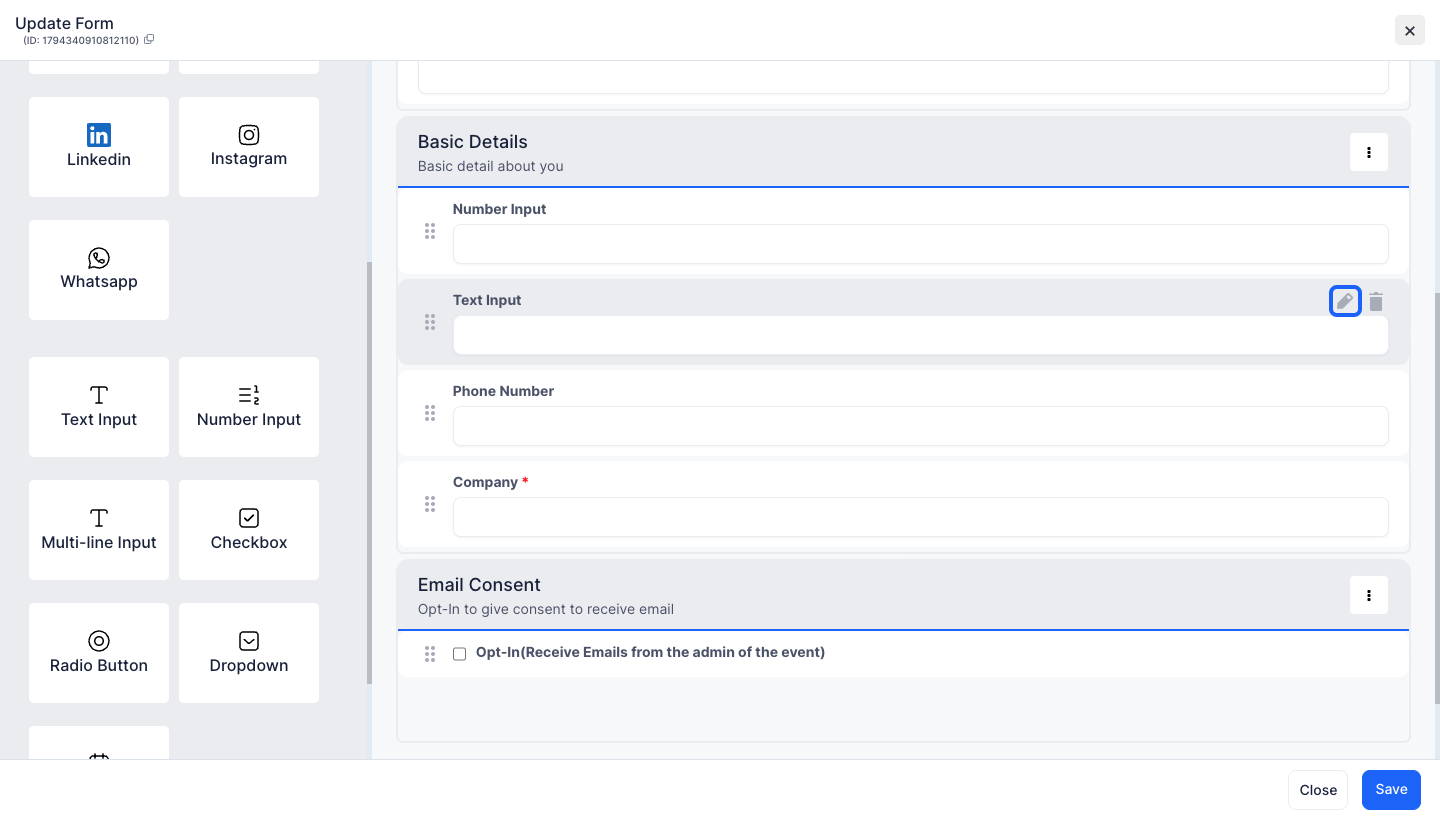
11: You can edit the component's name
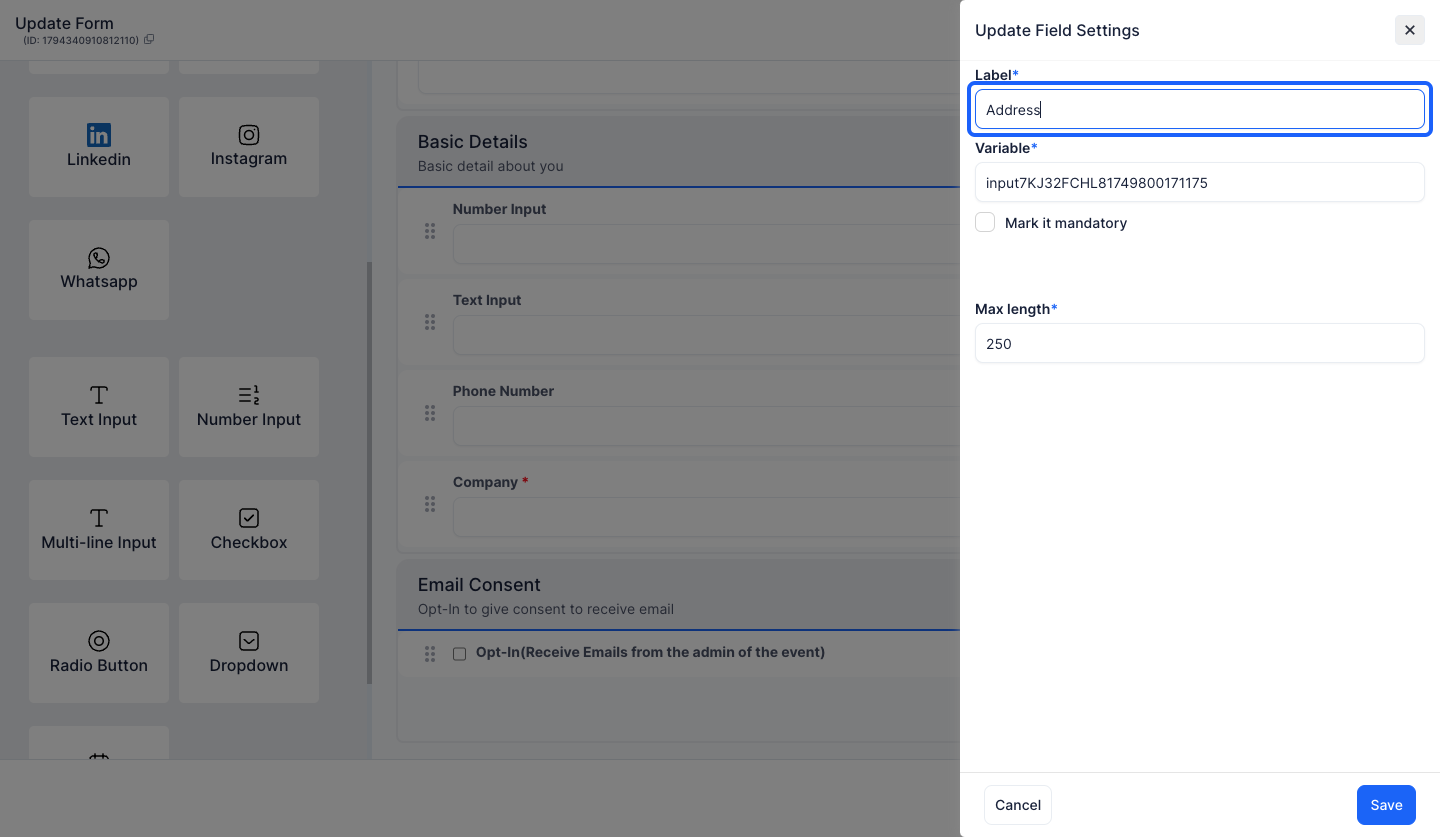
12: The variable can be changed too
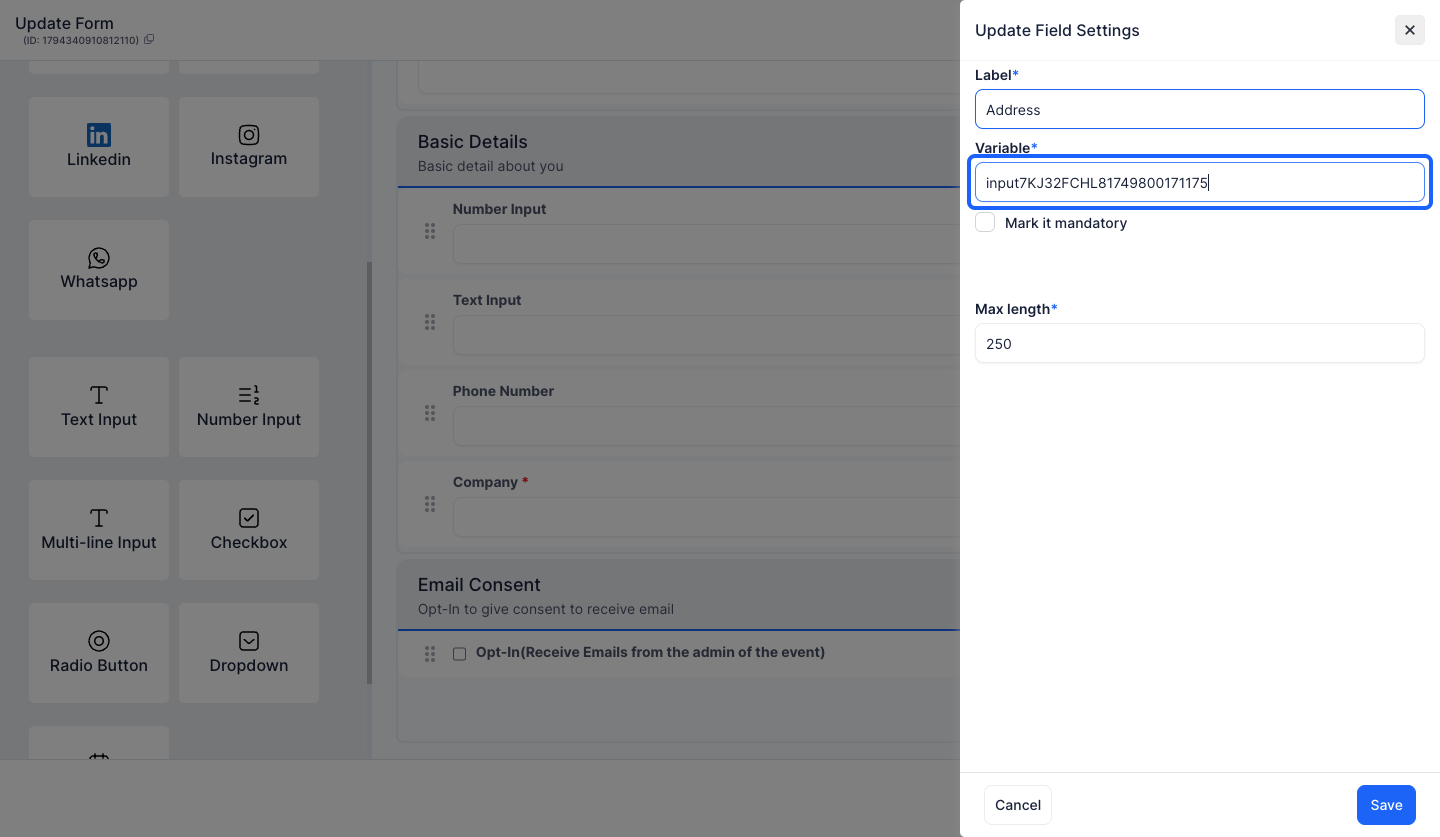
13: To make the field mandatory, keep it checked
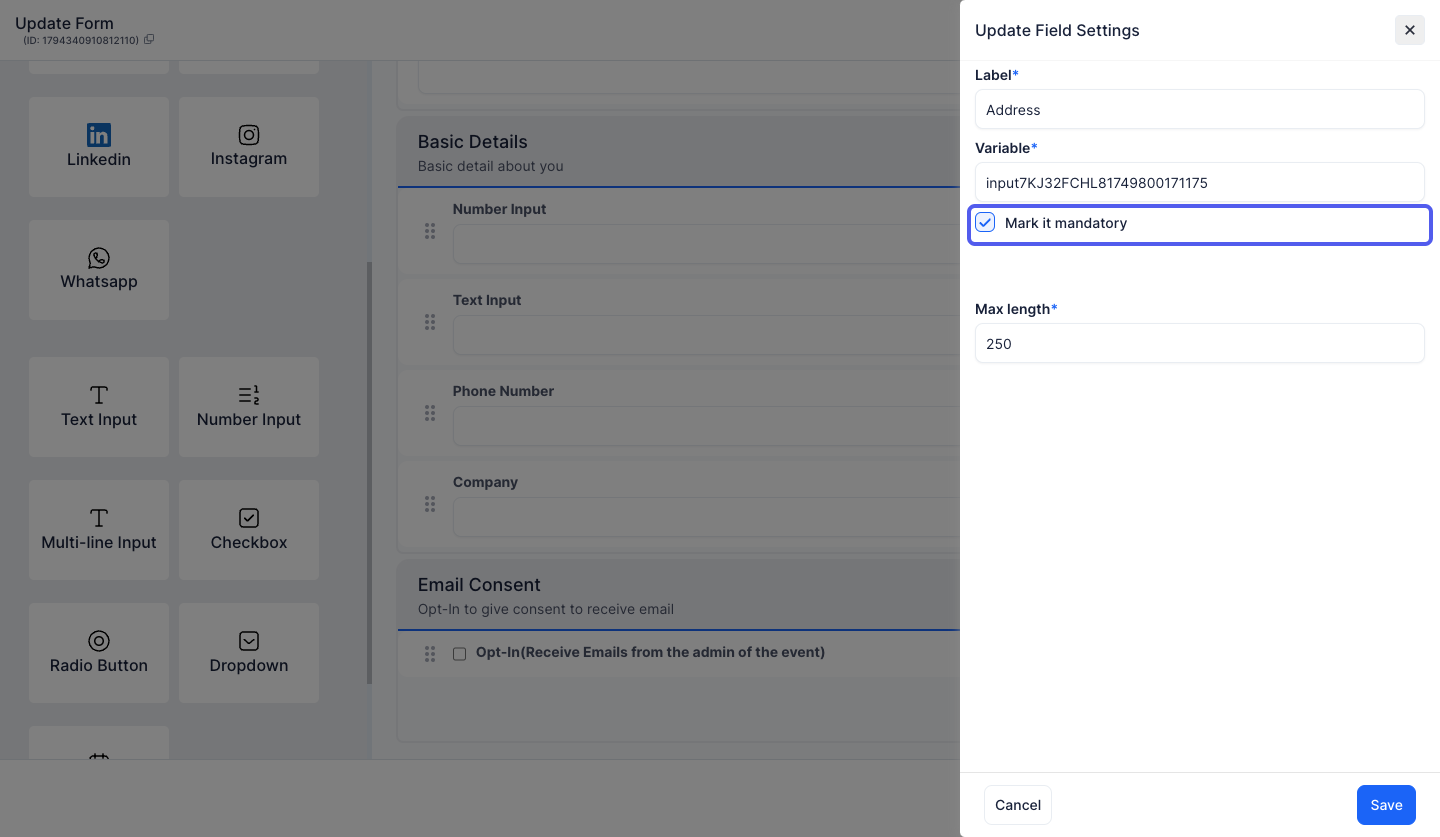
14: Keep it unchecked if you don't want to make the field mandatory
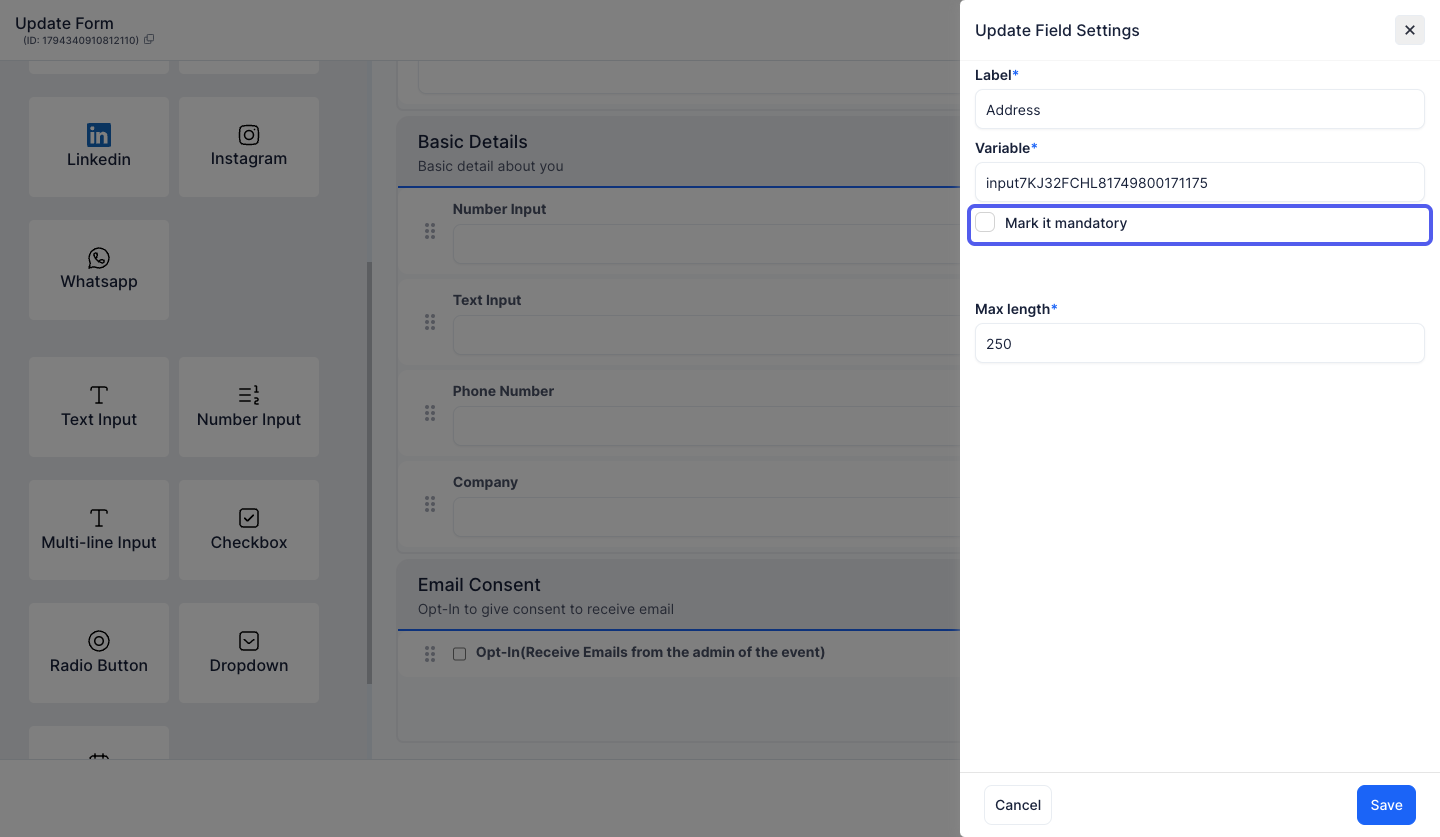
15: Change the Maximum Length if required
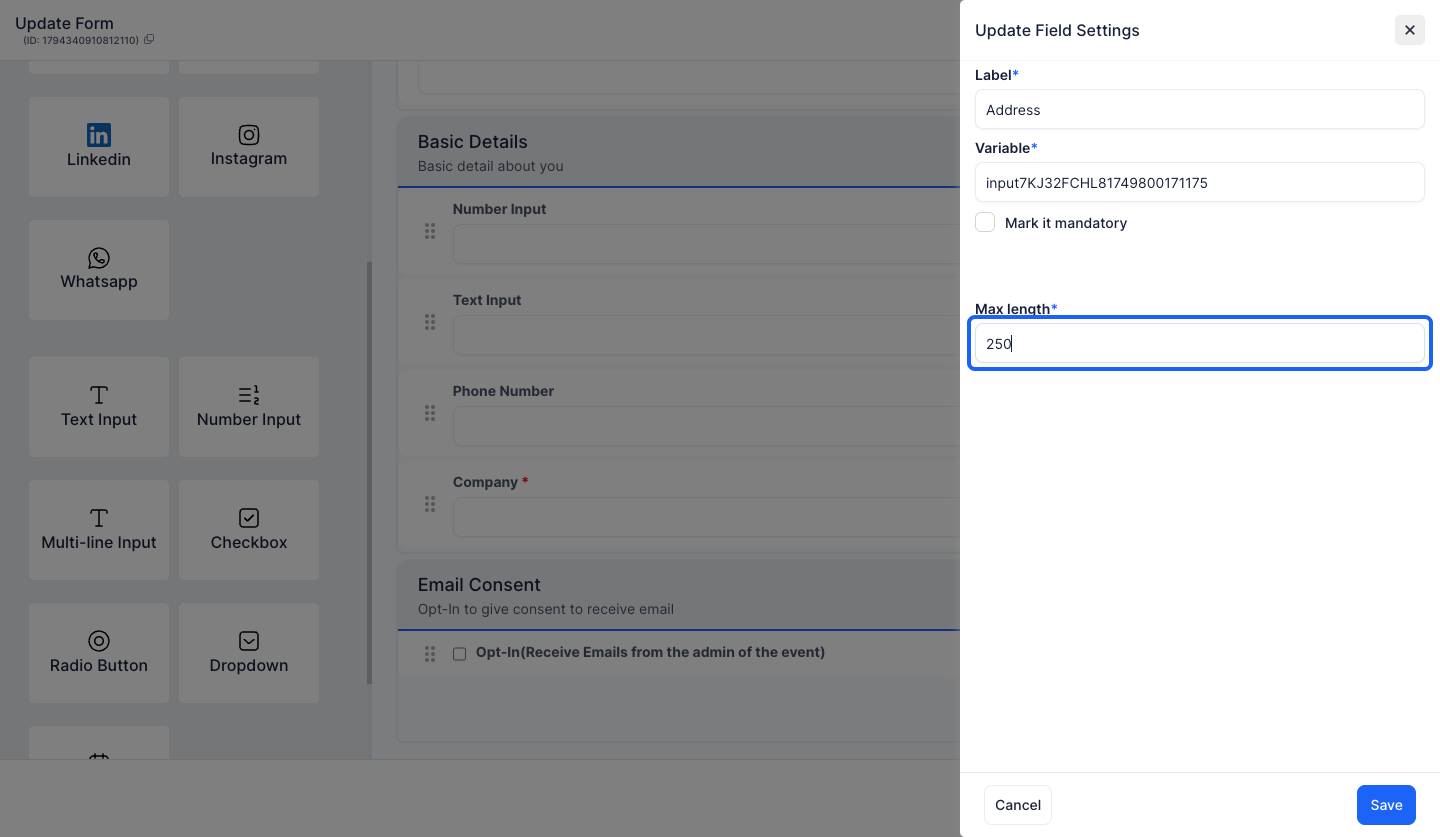
16: Click the “Save” button to save the changes
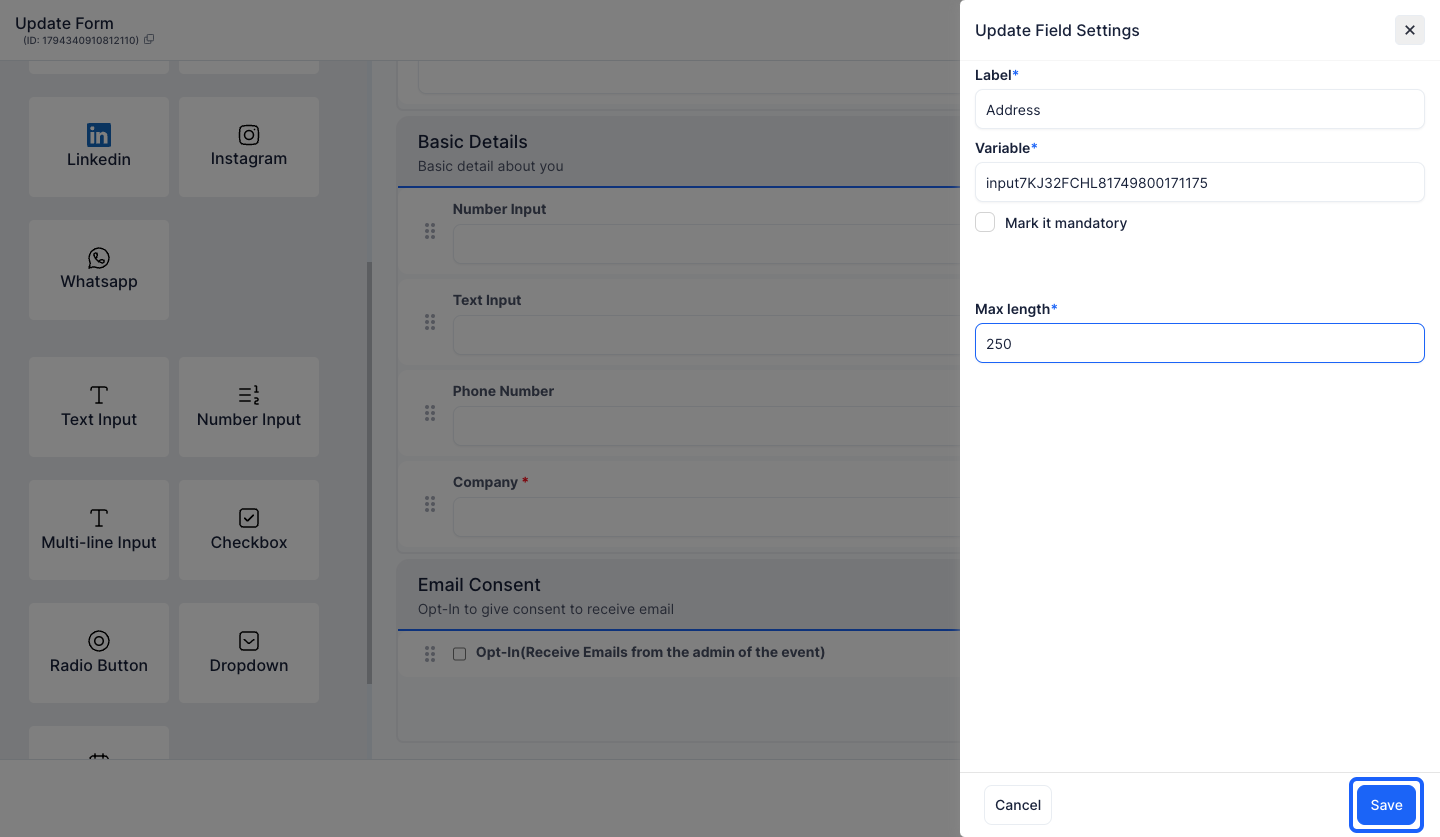
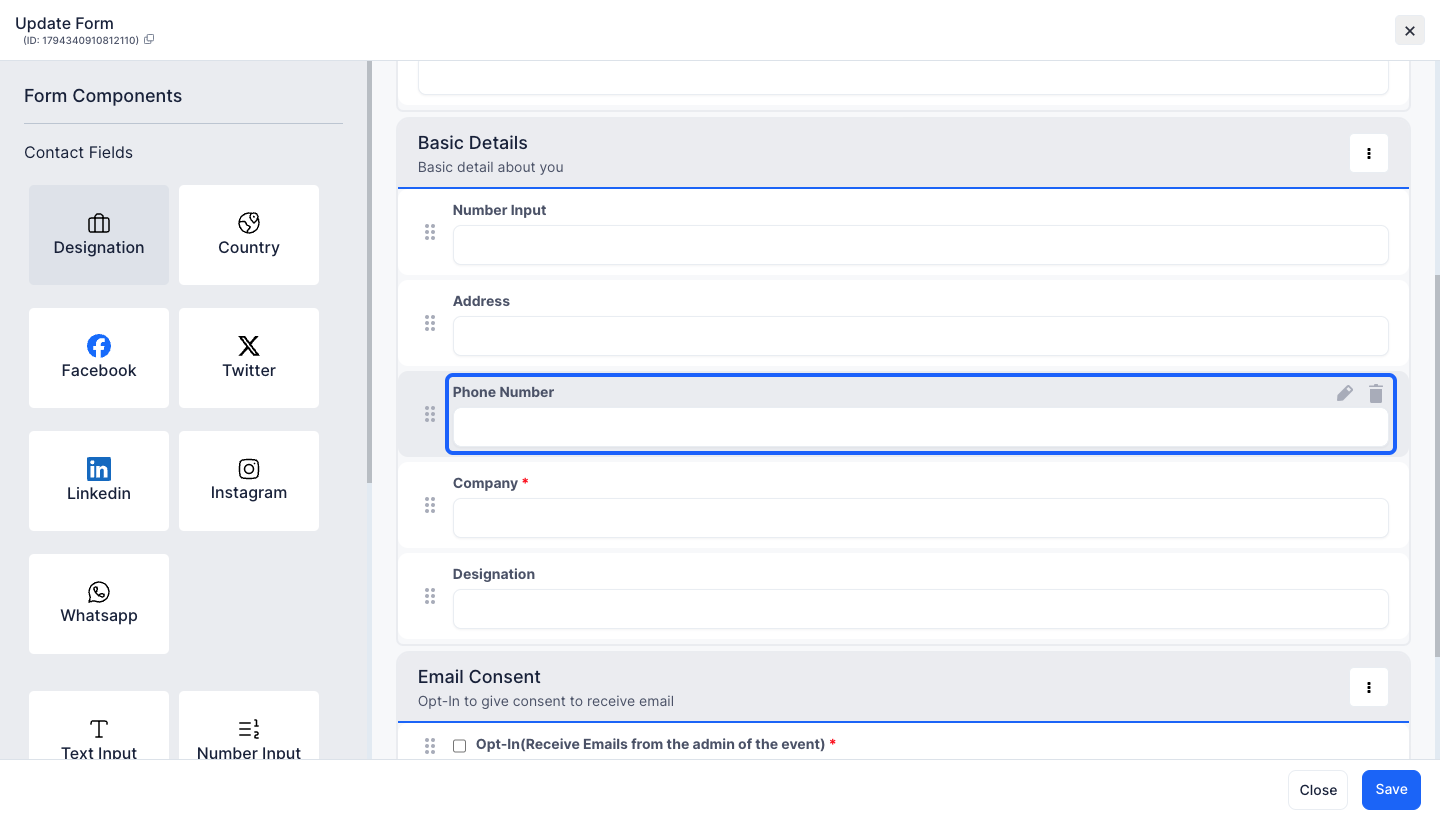
17: To delete a component, click the “delete” icon
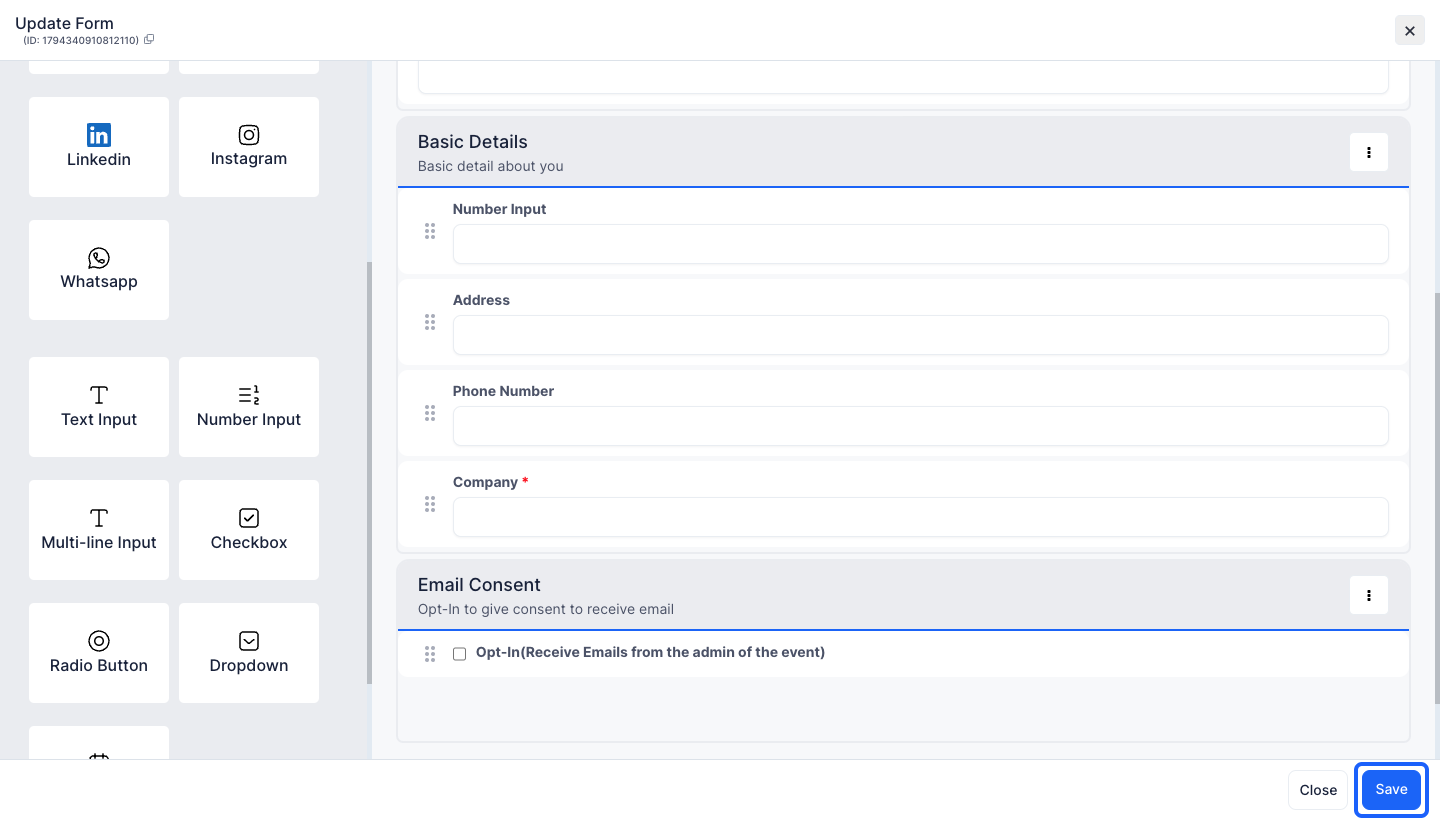
18: Click the “Save” button to save the updated form
Frequently Asked Questions
Can I delete the Opt-In field from the contact form?
No. The Opt-In field cannot be deleted.
Can I edit the Profile Details section?
No. The Profile Details section cannot be edited or deleted.

