Creating meeting rooms or spaces helps in organizing structured interactions within your event. Follow the steps below to create and manage meeting rooms or spaces in the Eventify platform.
Step-by-step guide
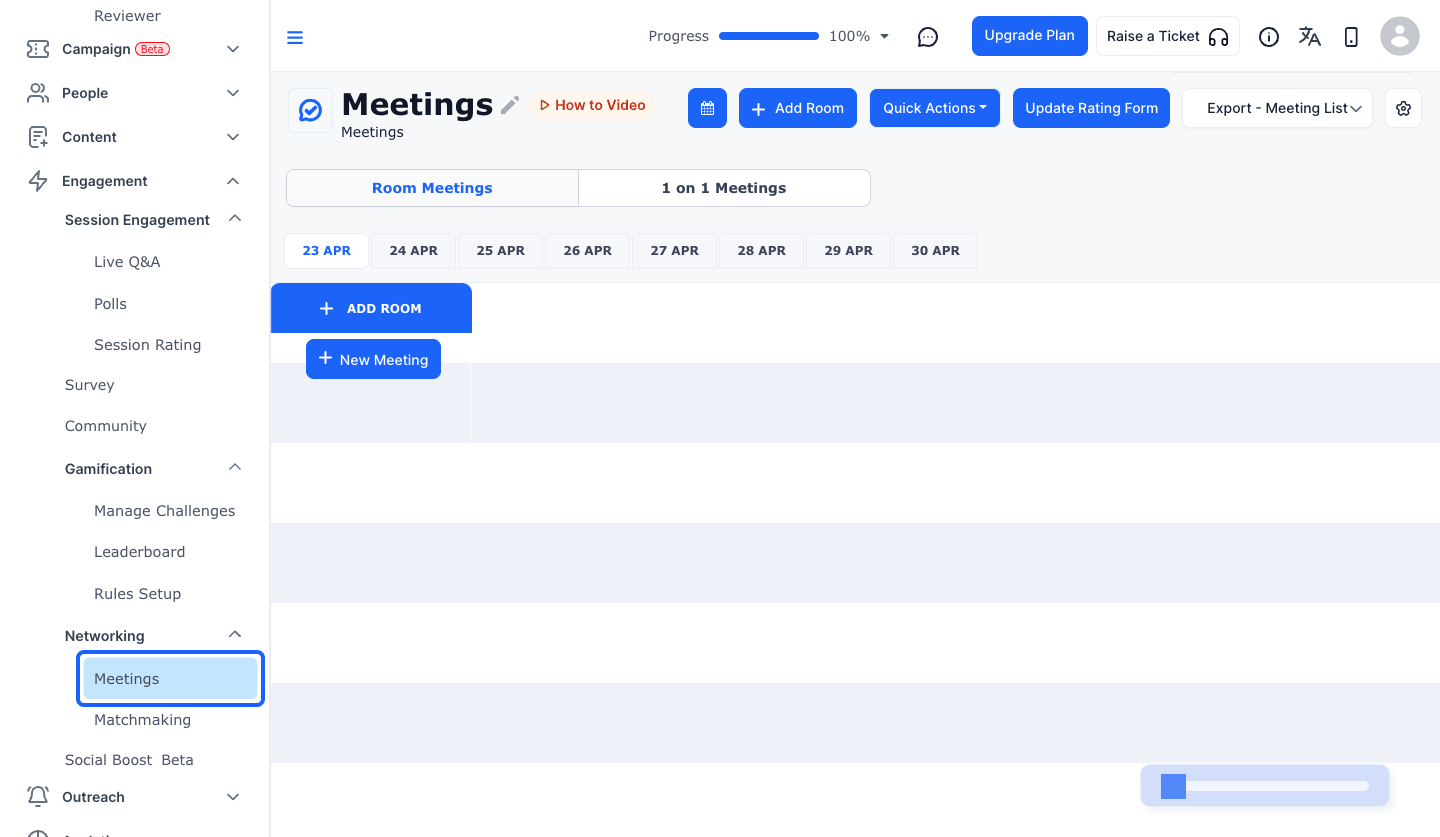
1: Login to Eventify Admin panel and go to Engagement > Networking > Meetings
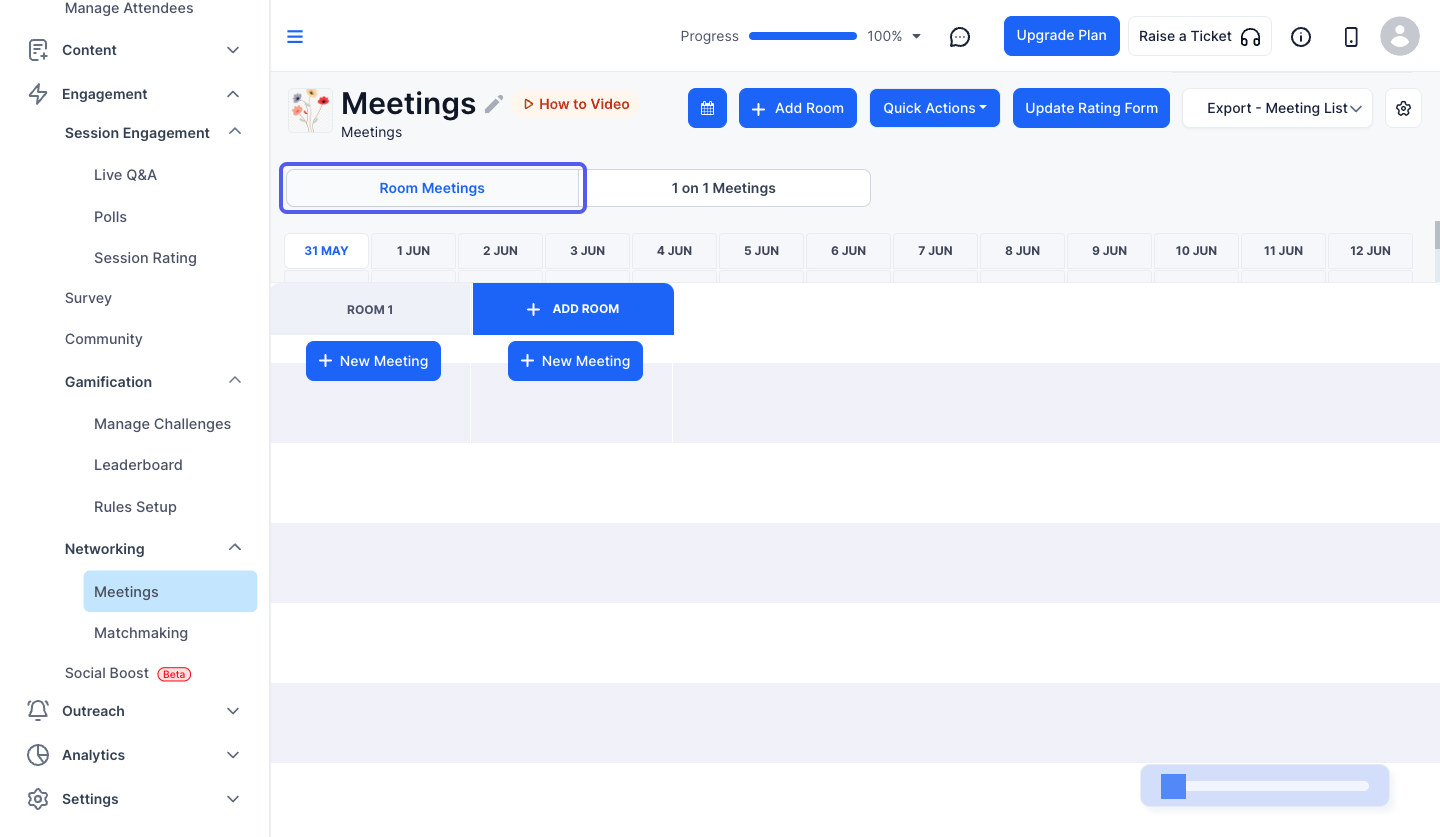
2: Click on "Room Meetings" to create Room Meetings
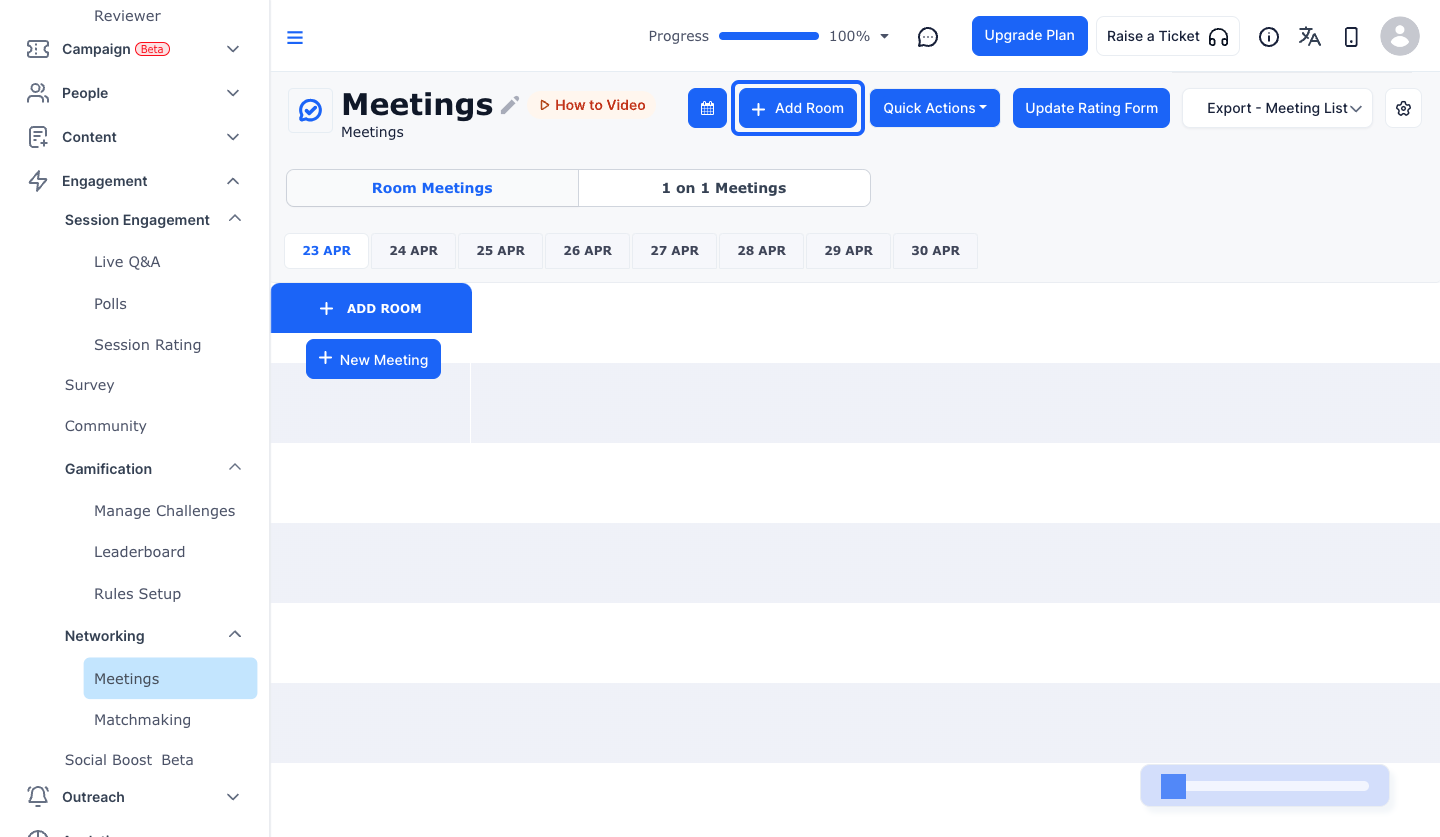
3: Click the “Add Room” button to add a new room
4: Enter the Room / Table Name
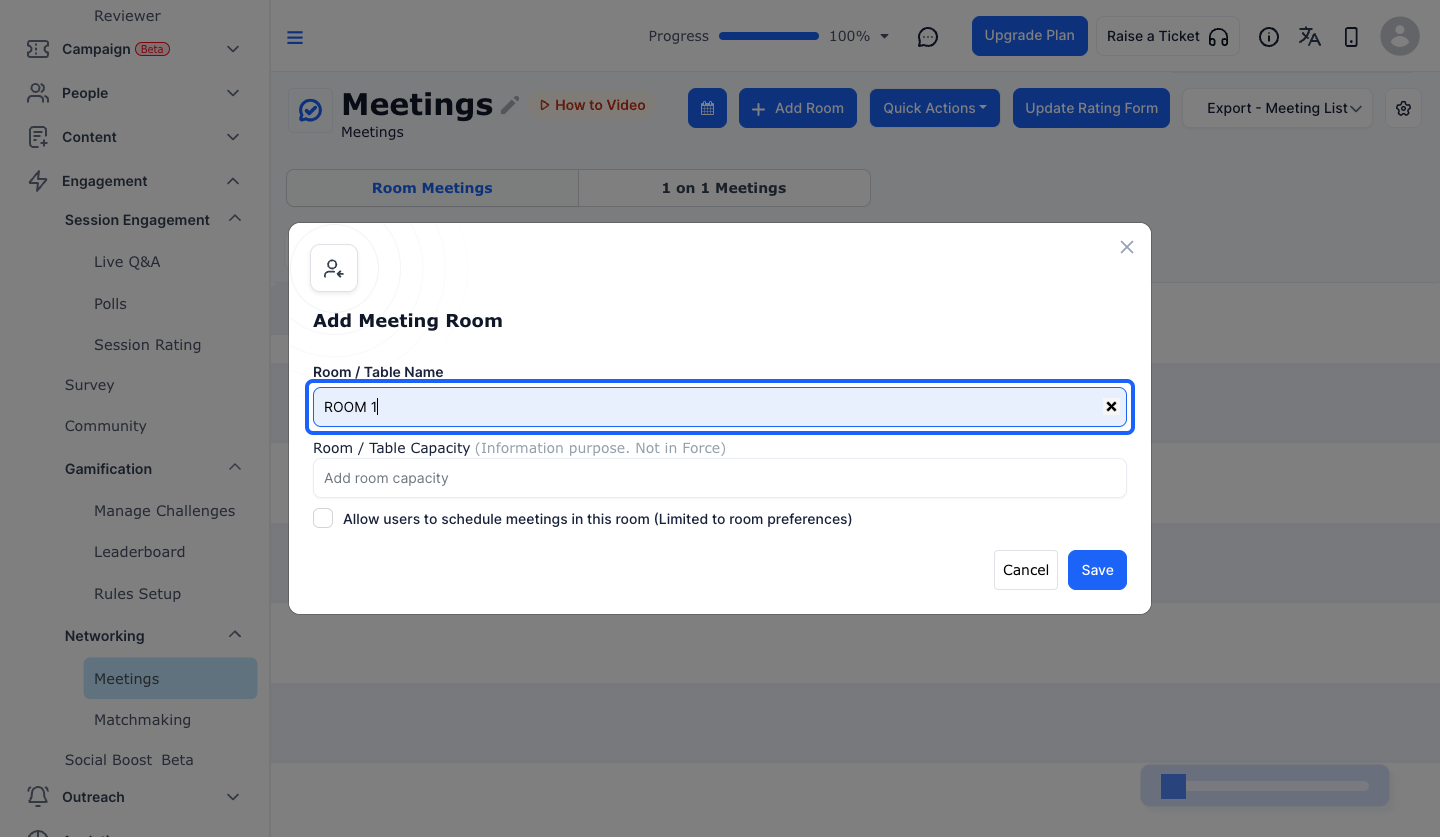
5: Enter the Room / Table Capacity
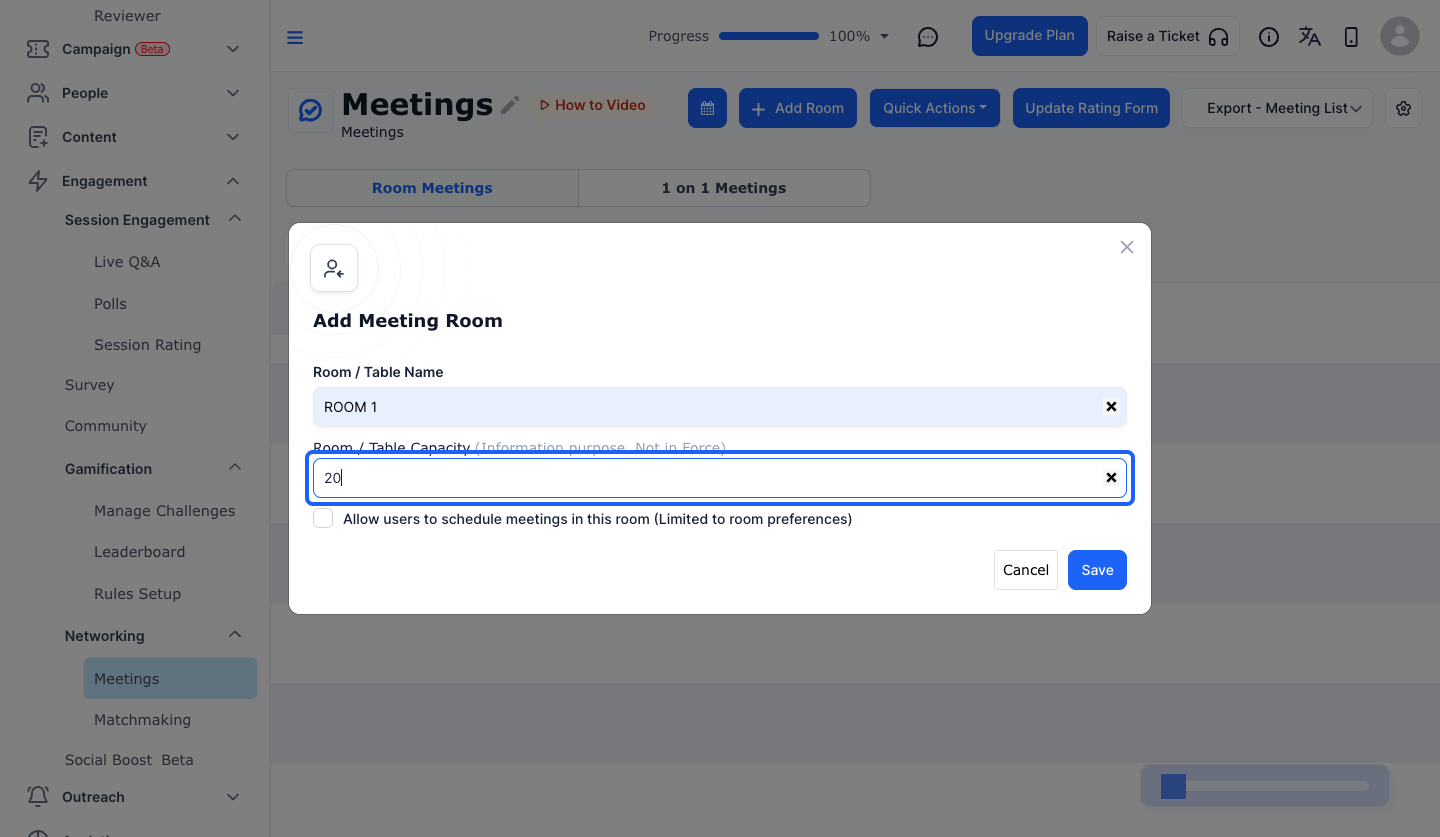
6: If you don't want users to schedule meetings in this room then keep this unchecked
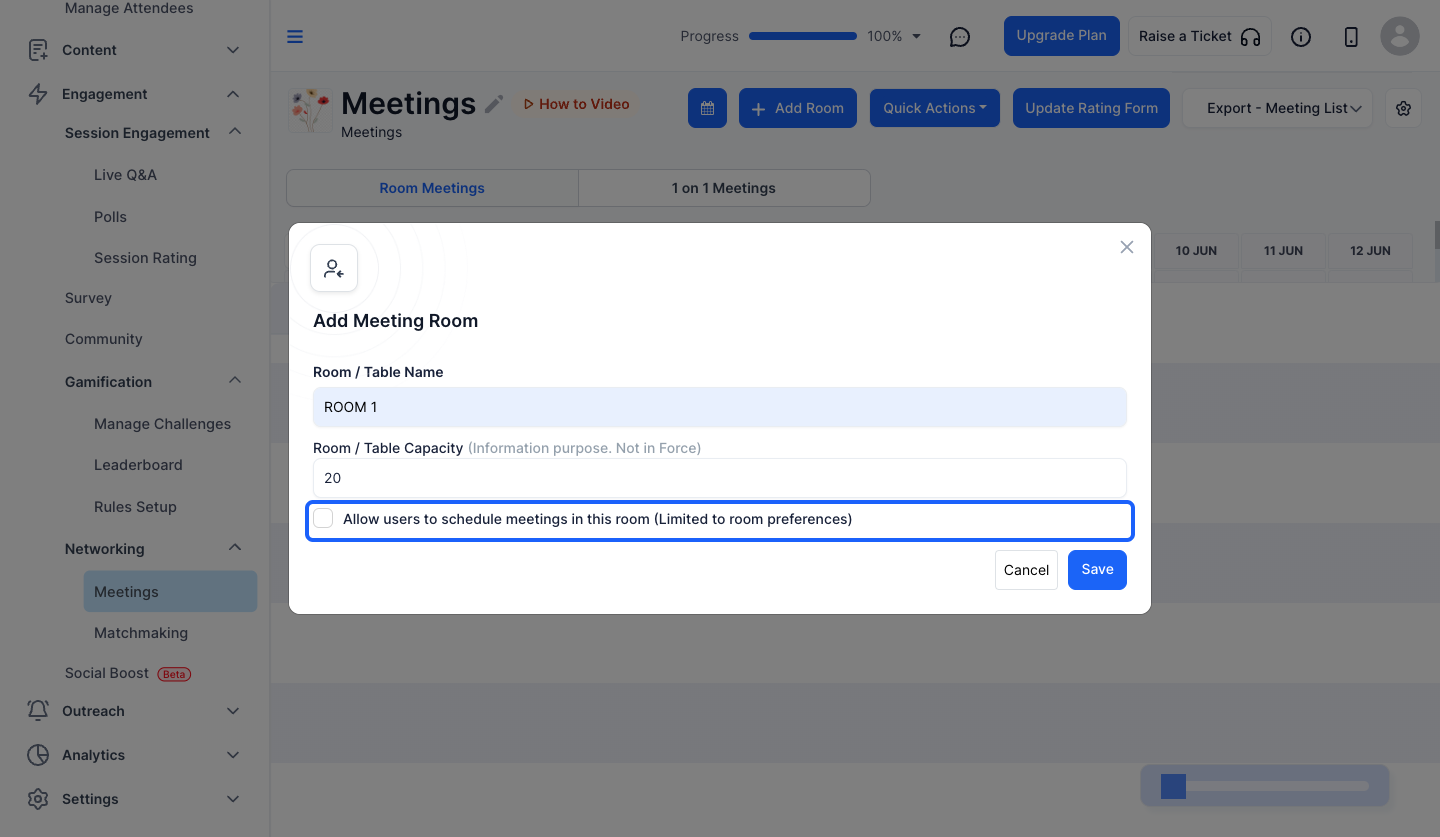
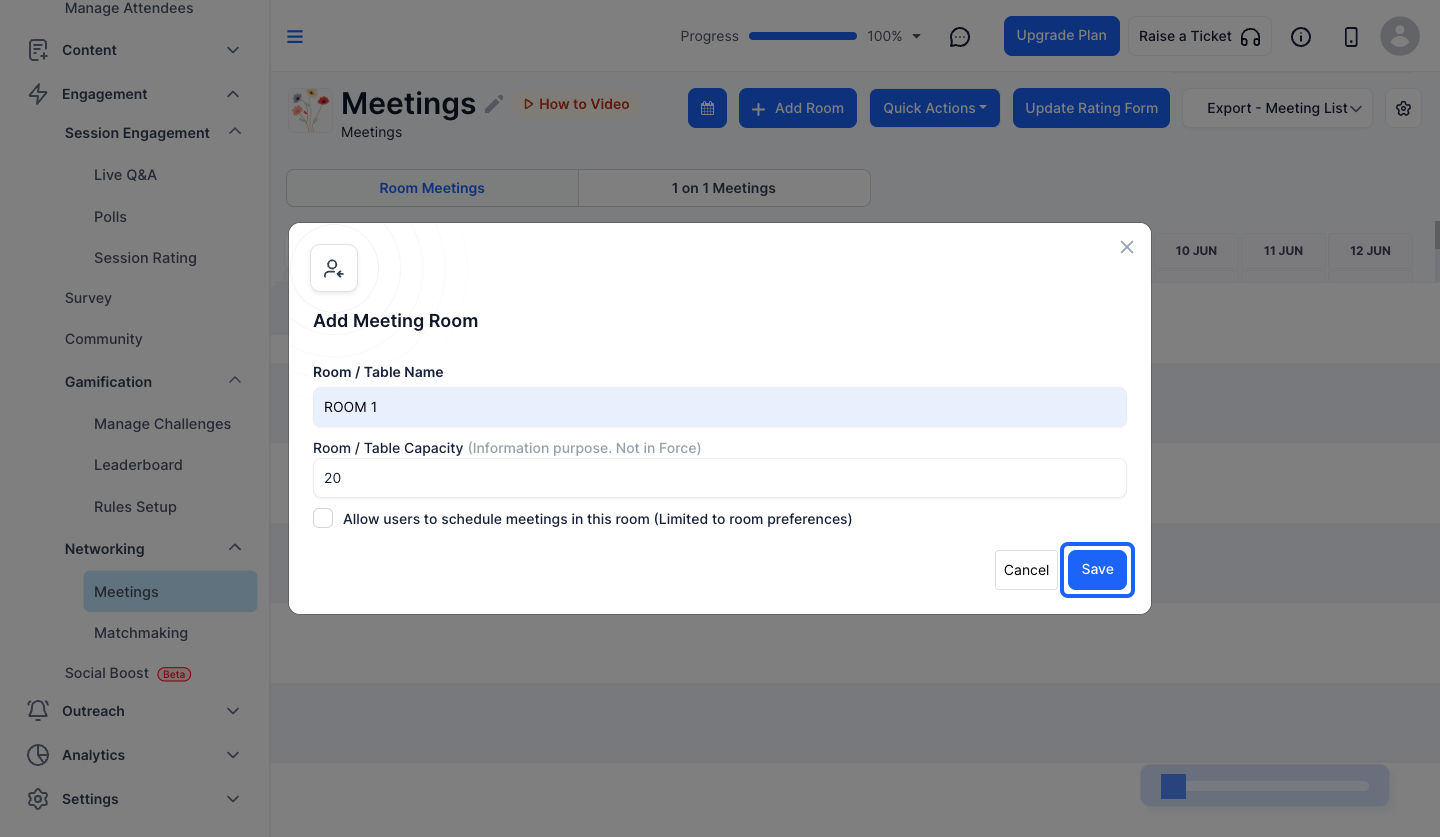
7: Click the “Save” button to create the room
8: Keep this checked to allow users to schedule meetings in this room
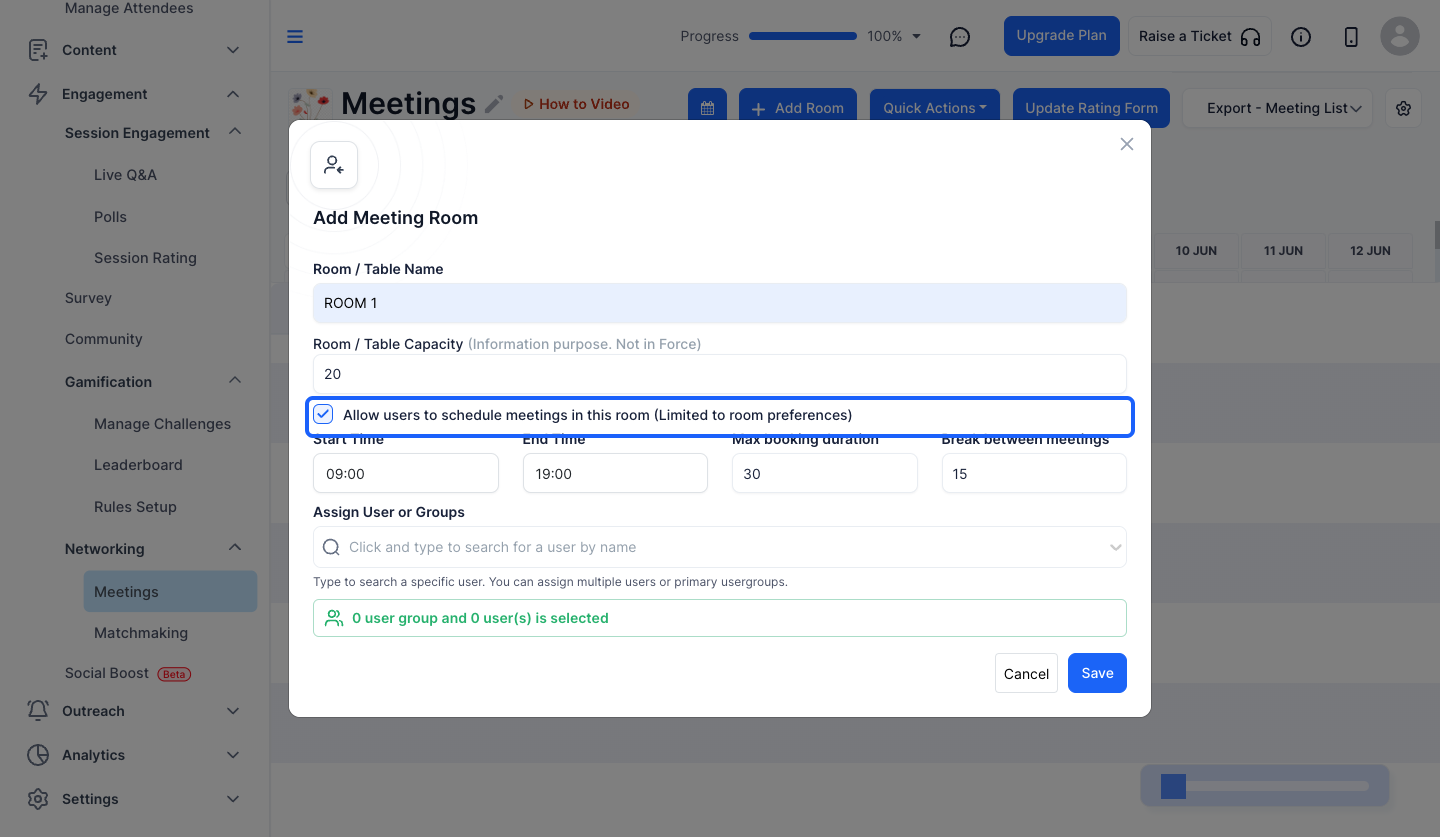
9: Enter the Start Time
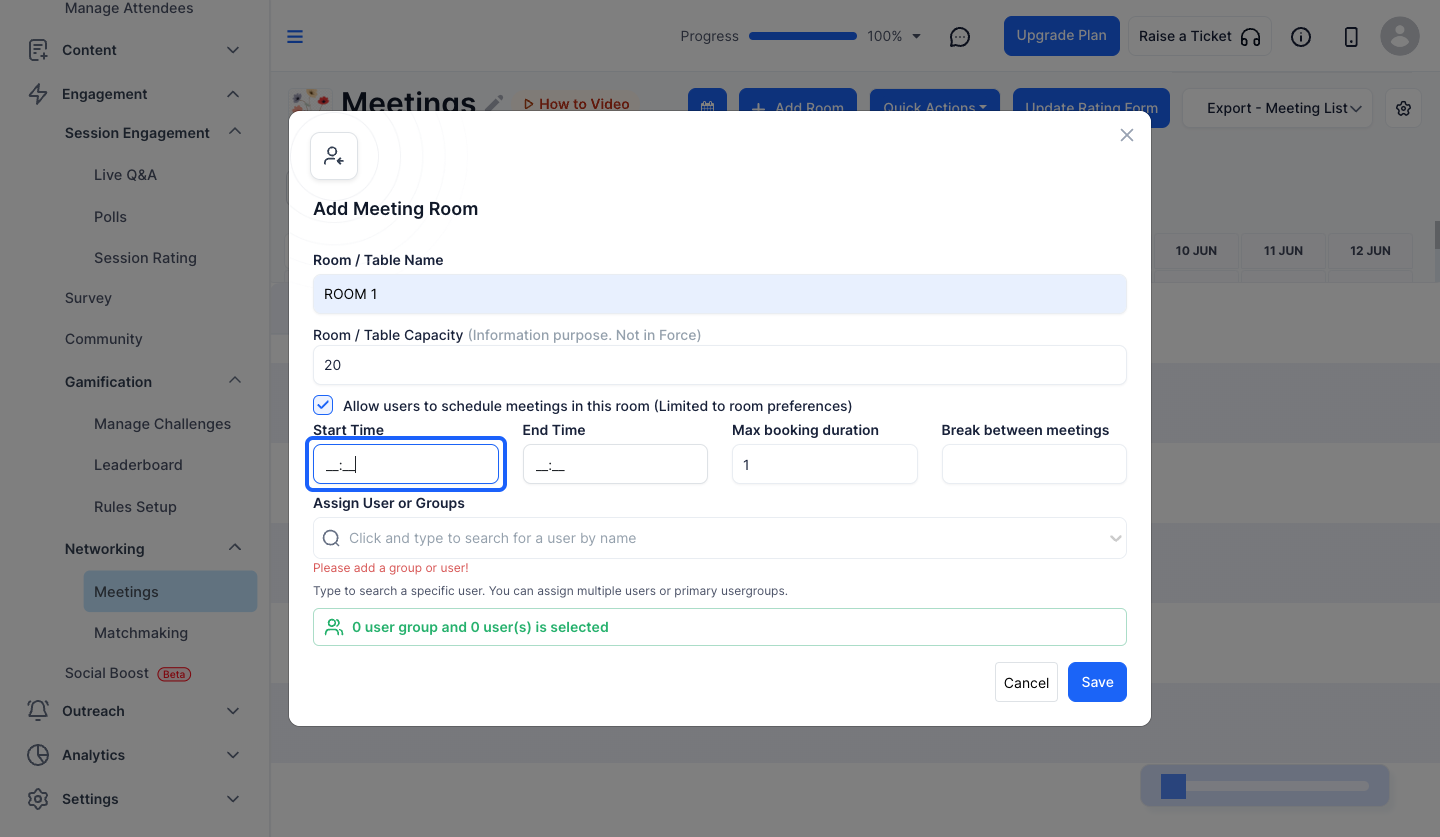
10: Enter the End Time
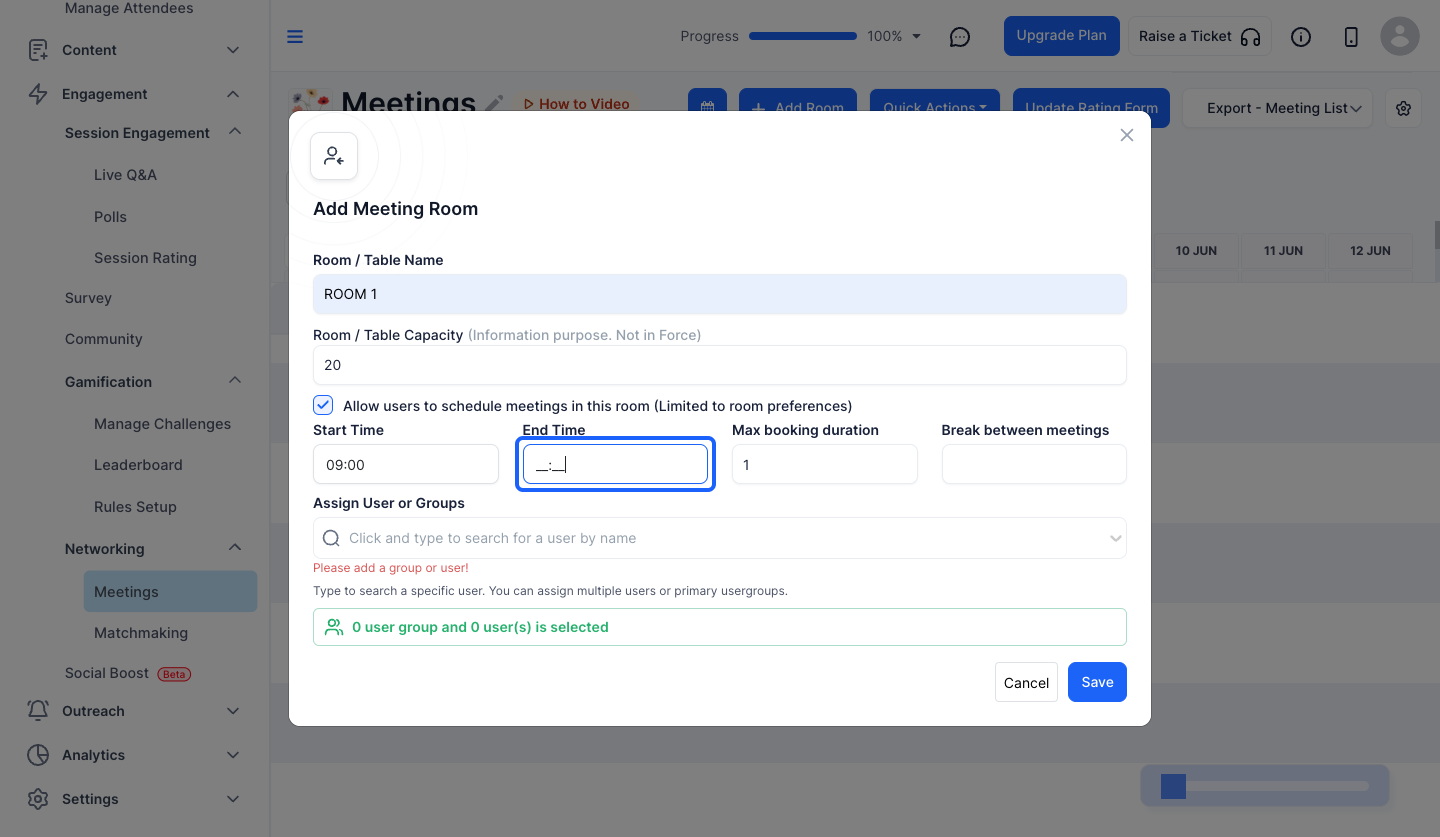
11: Enter the Maximum Booking Duration
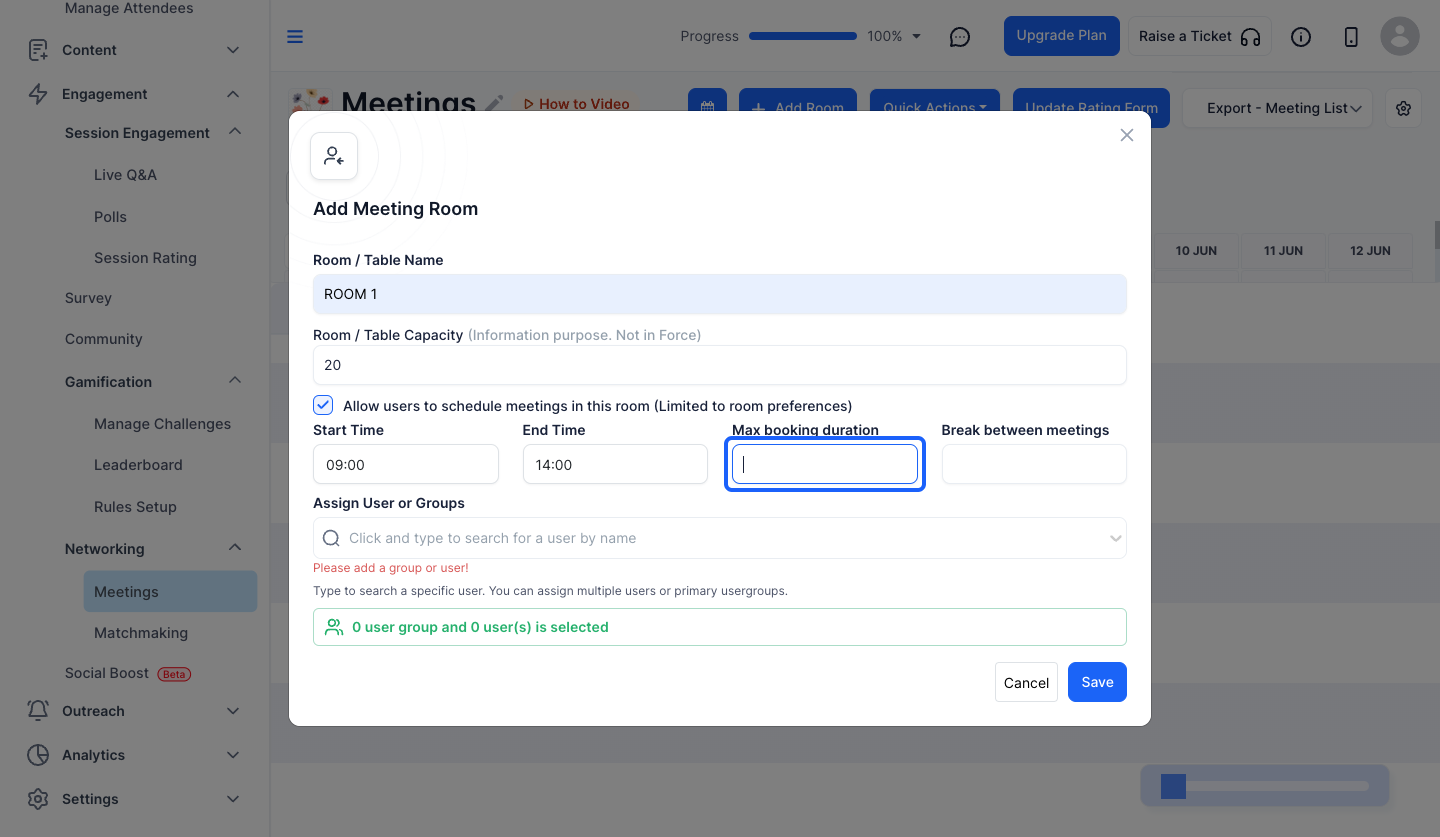
12: Enter the duration of break between the meetings
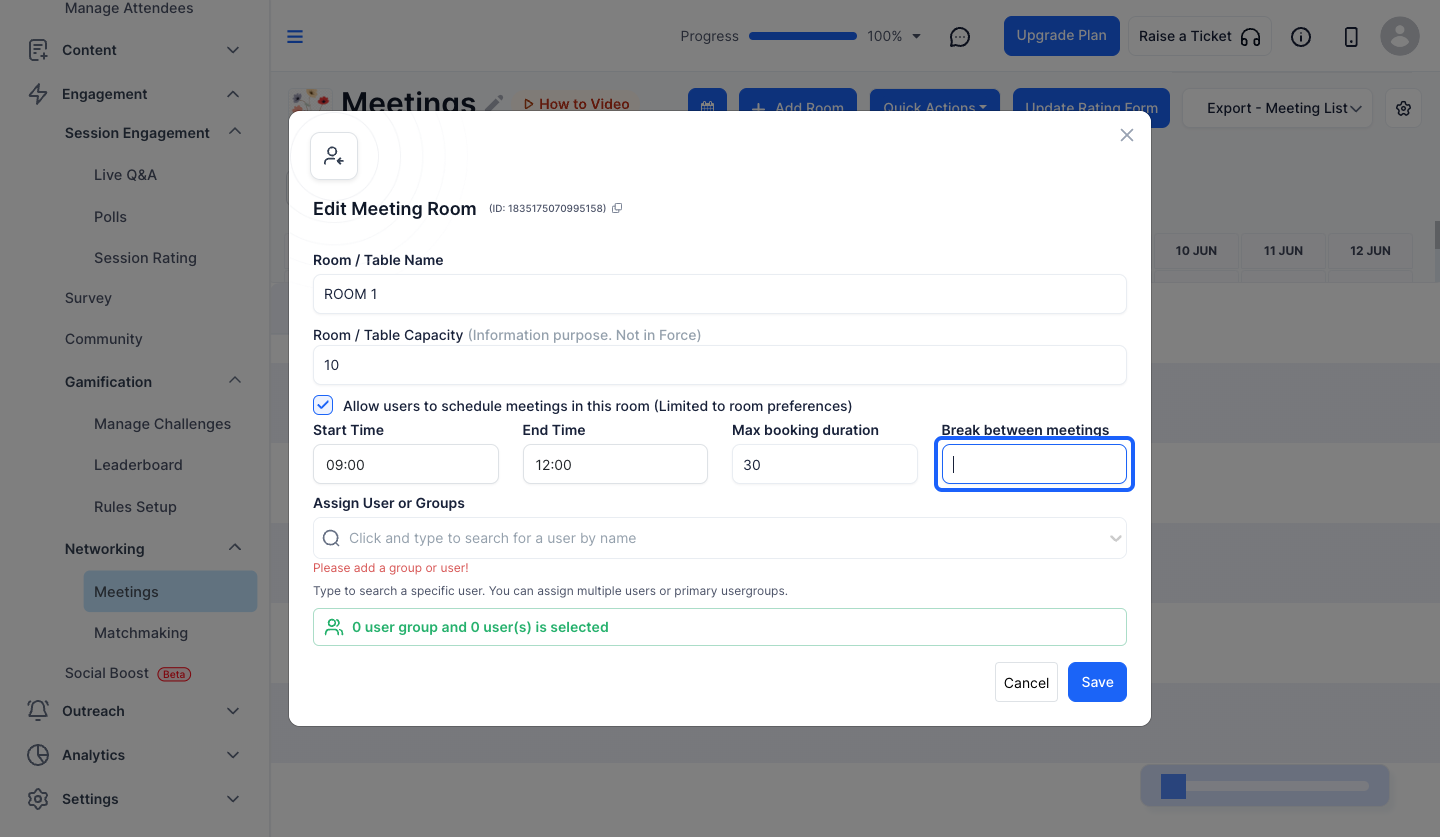
13: Select one or more Users or Groups from the dropdown to assign to the Room
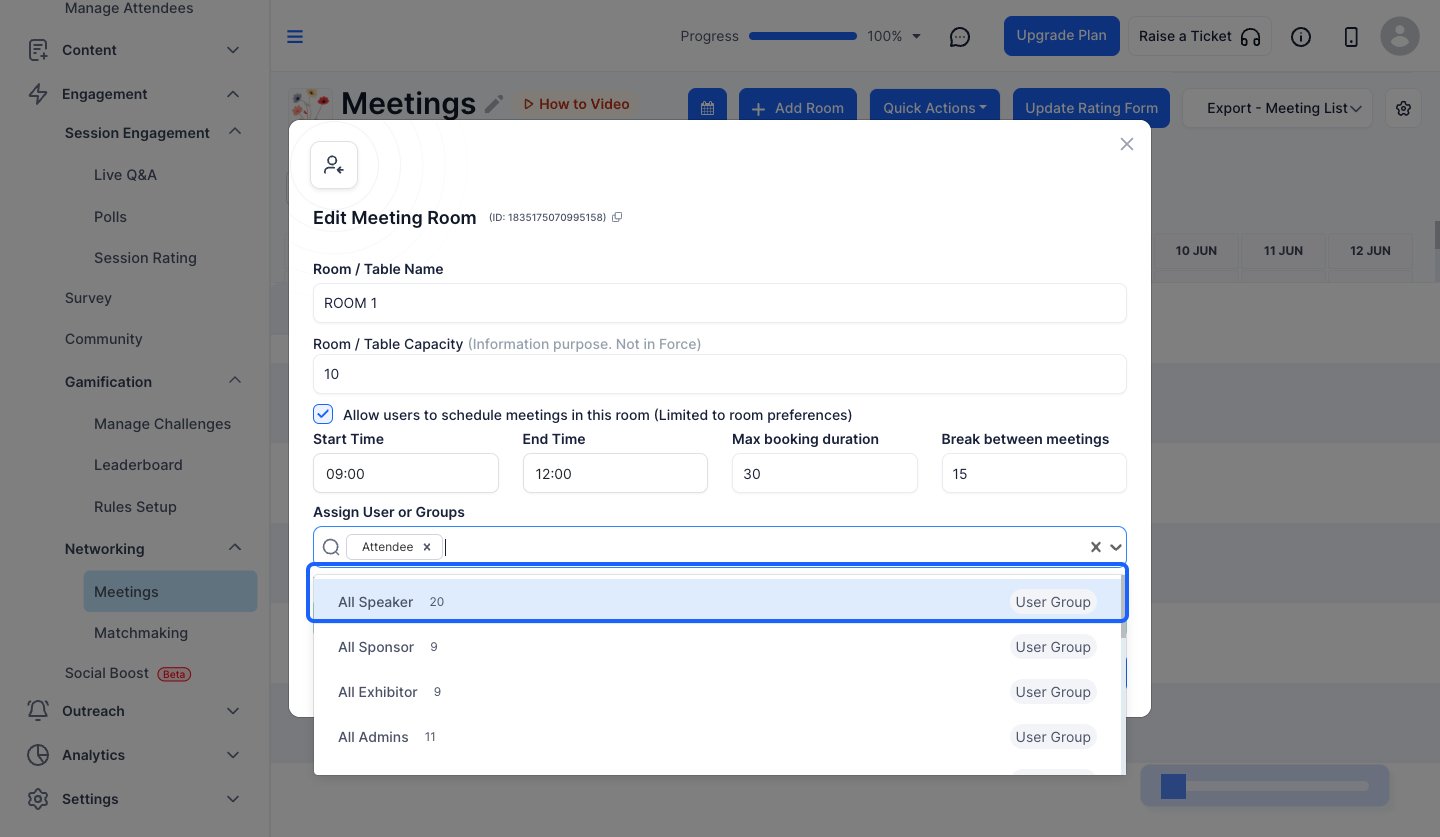
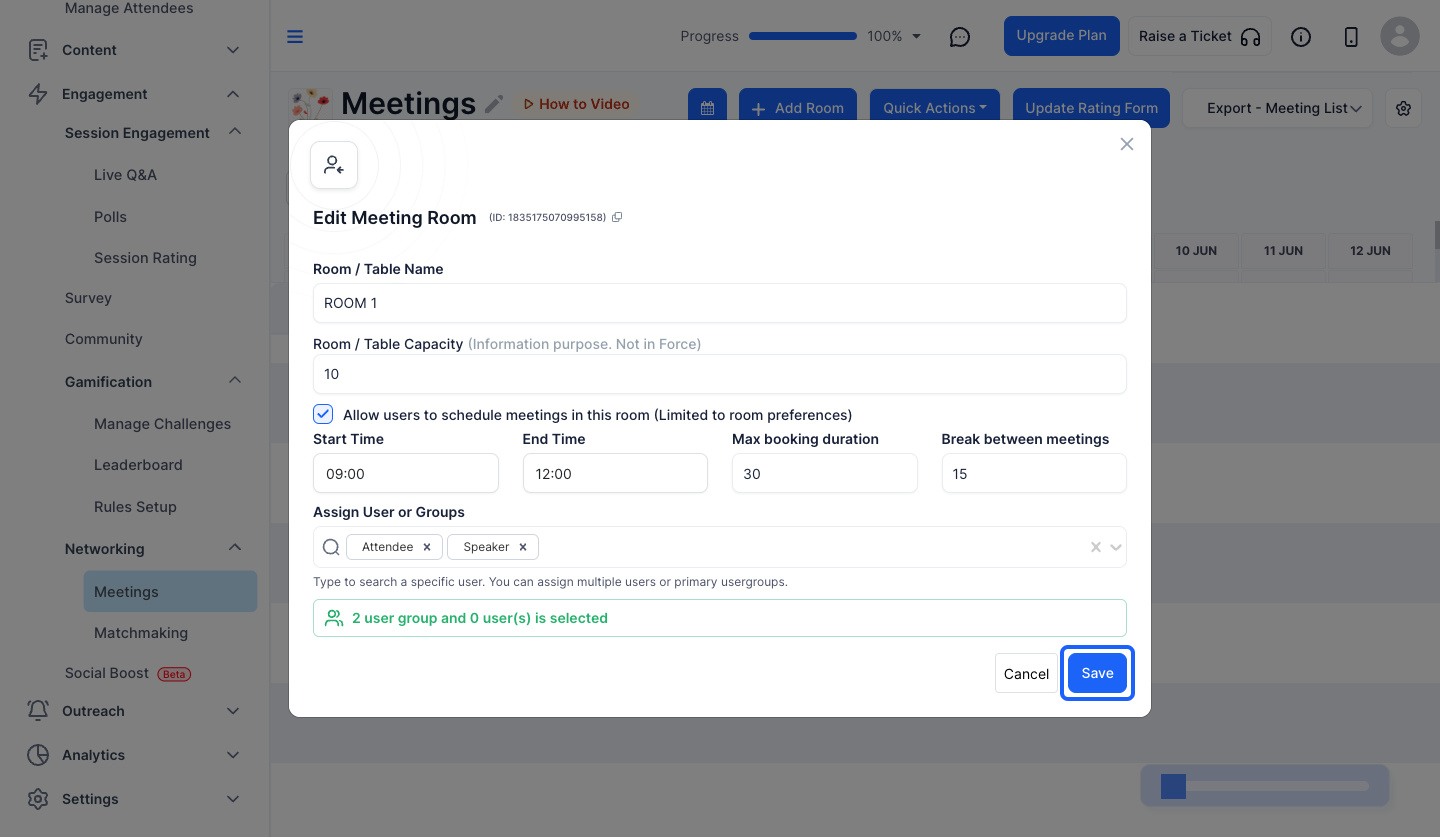
14: Click the “Save” button to create the room
Need to set up many rooms? Use Quick Actions > Import Room or Quick Actions > Bulk Create Rooms on the Meetings page. See How To Create and Manage Meeting Rooms in Eventify.
Frequently Asked Questions
Can I create a room that attendees cannot book?
Yes. Leave the scheduling option unchecked and users will not be able to schedule meetings in that room.
Can I limit which attendees can use a meeting room?
Yes. Select one or more users or groups from the dropdown to assign them to the room.
Can I add a break between meetings in a room?
Yes. Enter the duration of the break between meetings when you set up the room.

