In addition to resulting in losses running up to millions of dollars, the Covid-19 global pandemic has changed the very way the events industry works. Social distancing is the new norm - and that being so, many organisers are converting their in-person events to virtual conferences or webinars (or at least, an online version of their physical events).
Some time back, we had already highlighted how postponing an event is definitely a better option than cancelling it altogether. Having an online event for the time being - till things return to normal - is the smart alternative.At Eventify, we understood this requirement very early. In fact, we were among the first movers to implement robust features for hosting an online event on our platform - with seamless integration with popular videoconferencing tools like Zoom and YouTube Live. Over here, we will give you a detailed, step-by-step guideline on how to use Eventify as the best webinar platform:
Step I → Choose A Package. Get Onboard.
This is, obviously, the very first stage. We offer multiple per-event and annual subscription packages on our event management platform. Take the free live demo, discuss the customisations you need, select the best package for you, ask for a quote, and get onboard.
Step II → Start Setting Up Your Event From The Backend
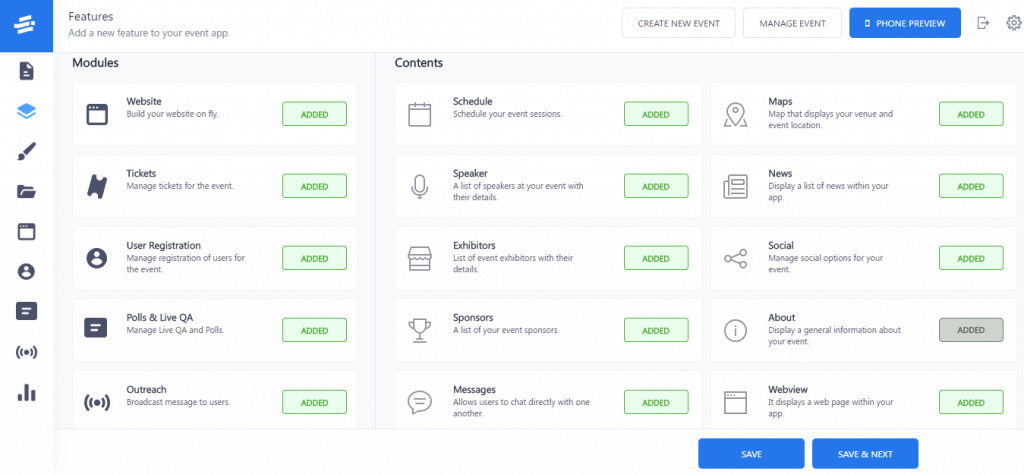
The best thing about using Eventify as an online event planner platform is that, you do not need to do anything groundbreakingly new. Get started with adding your event’s info (Overview, Schedules, Speakers, Exhibitors, Sponsors, Users, Ticketing (if you have taken it), etc.) - just like you would do for a physical conference. Implementing the live videoconferencing feature involves a small tweak in the individual sessions - and that can be done later.

Note: If you so want, our team can set up your event on the Eventify platform on your behalf. There are no additional charges for this.
Step III → A Quick Detour. Note The New Features On Eventify.
Since we last released a user guide for our event app builder platform, a series of new features have been implemented on it. The focus of all these changes has been the same - to enhance the usability and scalability of Eventify, and to offer greater customization.

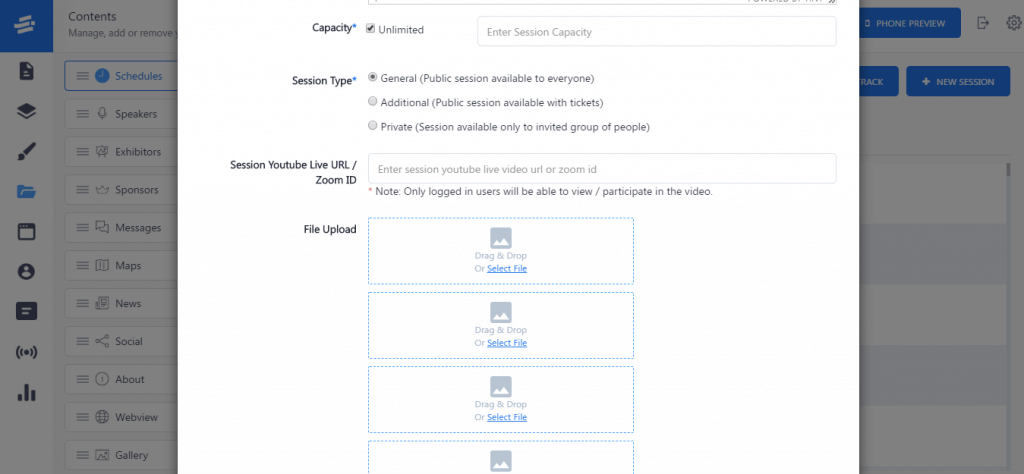
i) Session Capacity: If everyone can attend a particular session, click on the ‘Unlimited’ If you want to set a capacity limit (e.g., 100 attendees), keep it unchecked, and enter the limit in the designated text box.ii) Session Type: You get 3 options here. If a session is open to everyone, mark it as ‘General’. If people only with a certain category of tickets can attend it, mark it as ‘Additional’ (and provide the ticket details). Finally, if it’s an invitation-only session, mark it as ‘Private’.iii) Session YouTube Live URL/Zoom ID: We will explain this in detail later.iv) File Upload: Upload PDF fils, powerpoint presentations, zip files and other documents corresponding to each section. This feature is also available in the Speaker, Exhibitor and Sponsor sections.v) Allowing Speakers, Sponsors, Exhibitors to edit their own profiles: Custom ticketing URLs are generated, which can be accessed by Speakers to edit their own profiles and upload documents (organiser has to provide ‘User Permissions’ to a concerned user for that). Profile edits can be done on the web as well as on the app.
Step IV → Adding Videoconferencing Features On Eventify
Okay, detour’s over. Now it’s time to set Eventify up as a state-of-the-art virtual events platform. The process is easy:i) Log on to your Zoom account.ii) Host a meeting and schedule it during the timings of a particular session.iii) The meeting link/meeting ID will be generated. Copy it.iv) Log on to your Eventify account. Navigate to the ‘Schedules’ tab and click on the edit icon of that particular session.v) In the ‘Session YouTube Live URL/Zoom ID’ box, paste the meeting link URL.Note: If you want to work with YouTube Live instead of Zoom, just follow the same steps - and paste the YouTube URL in the box.If you want to add static videos in addition to the live video presentation, simply put the link of the static video(s) in the Session Description section.
Step V → Live Q&A During Webinar Sessions
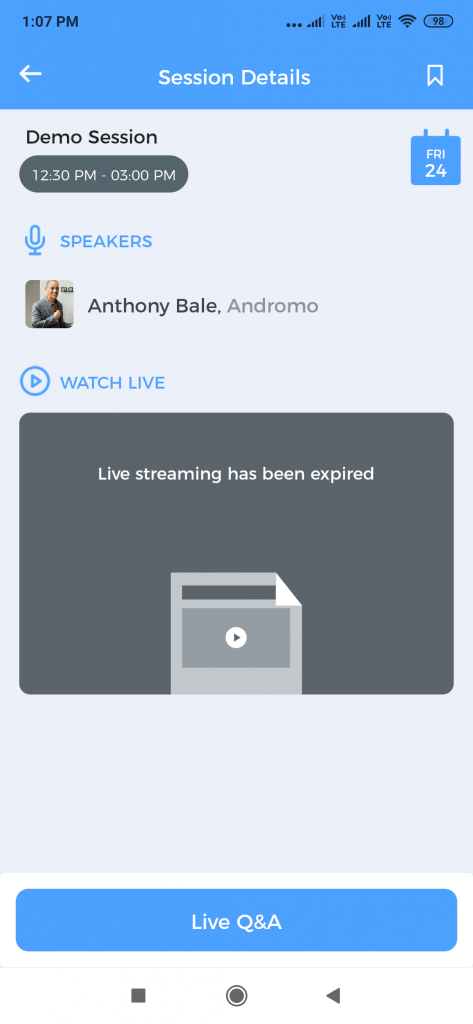
There is a dedicated Live Q&A button right below the video presentation section on the session screen. After tapping it, attendees can proceed to post questions while the session is on - either anonymously, or with their names.

Note: Organisers can screen questions before the latter are published on the app - right from the admin panel. Toggle the ‘Autopublish Q&A’ button to OFF - and manually review each question before it gets published.
Step VI (optional) → Adding Moderators In Your Event.
While using Eventify as an online webinar platform, you might want to have an entirely separate group of users called ‘Moderators’ (or, ‘Reviewers’). If that is the case, we will add a custom user category (apart from the 5 categories of users already present). The extent of platform access for ‘Moderators’ can also be adjusted.Note: Eventify package prices DO NOT include Zoom subscription charges. Organisers are expected to have their own Zoom accounts - the links from which will be integrated on our virtual event management platform.

Eventify is the best webinar tool out there. With a host of customisable features, real-time content syncing, seamless integration capabilities with Zoom and YouTube Live, highly engaging components, and effective networking opportunities (tag-based networking and QR code networking) - the platform is primed to take your upcoming virtual conference to the next level. Want to see Eventify in action? Drop an email to hello@eventify.io to schedule a FREE LIVE DEMO!


.png)


