Eventify is a cutting-edge digital platform for creating information-rich, engaging and user-friendly event applications. This app builder tool is fully scalable, and can be used to create mobile applications for all types of B2B events, conferences, exhibitions, meetings, trade shows, and the like. Eventify works on the principle of paperless event promotions.Over here, we will give you a detailed, step-by-step guide for getting started on the Eventify platform. Let’s go:
- Type https://eventify.io/ on your browser (we recommend Google Chrome or Mozilla Firefox). The homepage of the Eventify portal loads.
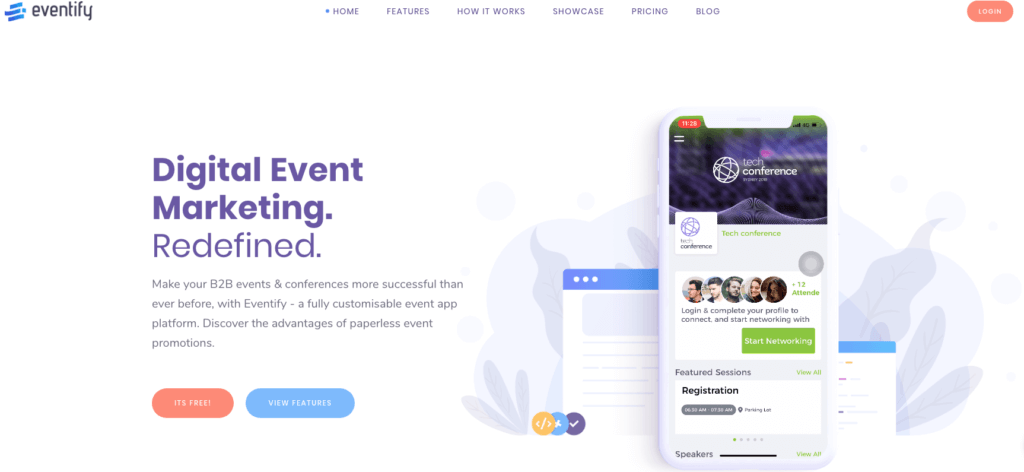
- Click on the ‘ITS FREE’ button. You will be redirected to the Eventify Admin Panel, in preview mode. Here’s where the magic starts!
- Select any of the 2 templates you see here. For first-time users, we advise choosing the ‘Pre-filled Demo Event’ option (all fields will be filled with dummy content, and you only have to replace that with your content). Alternatively, you can also start building from scratch.
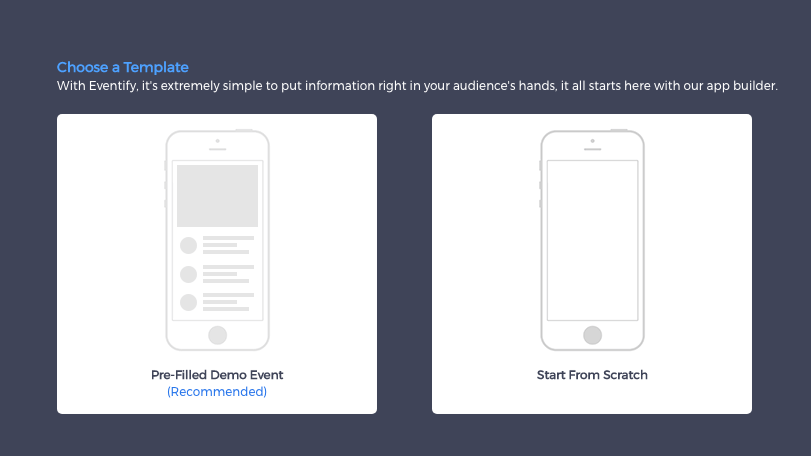
- Clicking on any of the templates opens up the Eventify dashboard. By default, you are on the ‘General’ tab.
.png)
- Fill up your Event Name and provide a brief Event Description. Select the country where your event/conference will take place.
- Choose the dates of your event. Please note that the maximum number of days you can choose for an event is 7 days. You can disable one or more days in between (say, weekends).
- Set up your event as ‘Public’ or ‘Private’. A ‘Public Event’ will be searchable on the Eventify app - and can be viewed by any other user. On the other hand, a ‘Private Event’ is an invitation-only affair, and random users will not be able to view it on the app. Choose as per your requirements.
- On the left side panel, click on the next icon. This will open the ‘Branding’ page.
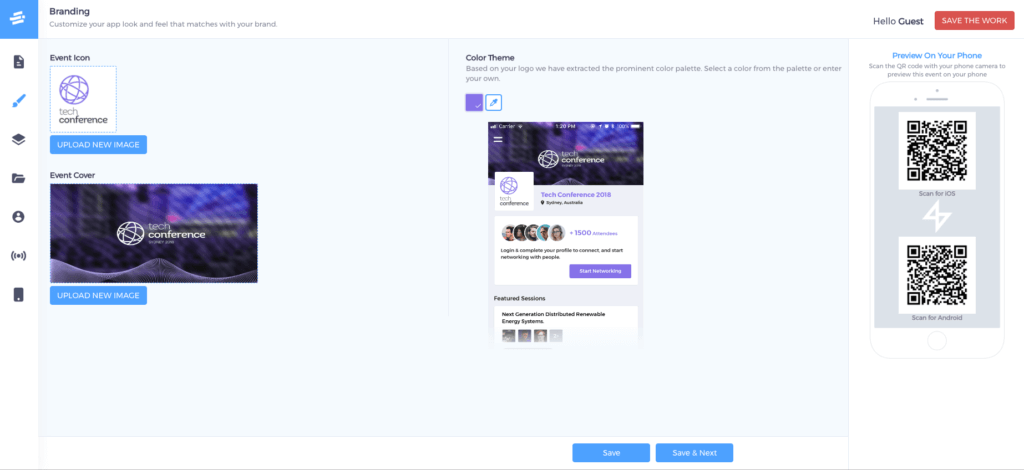
- Upload your ‘Event Icon’. Choose a .png file (minimum 256px x 256px).
- Next up is the Cover Image of your event. Upload a 840px x 480px image. While uploading, you can adjust the position of this cover image.
- On the basis of the Event Icon you choose, you will be shown suggested theme colours for your app. Select from these suggestions, or simply click on the ‘Colour Picker’ and choose your own.
- Hit ‘Save & Next’. You can also click ‘Save’ and then click on the next item on the left panel.
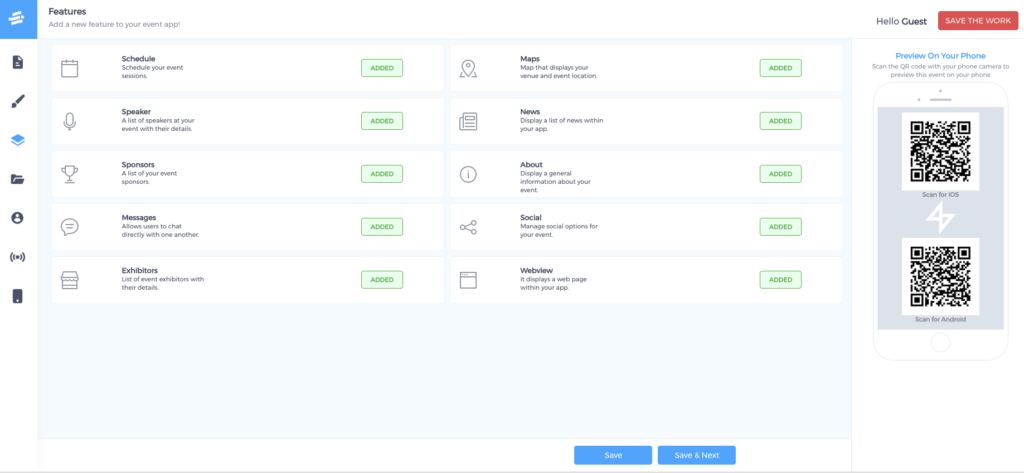
- You should now be on the ‘Features’ page. You will find 10 features (Schedule, Speaker, Sponsors, Messages, Exhibitors, Maps, News, About, Social, Webview) displayed here. By default, all of these features are activated (‘ADDED’). If you do not want your event app to have any particular section (say, News), simply click the button next to it. That section will be deactivated, and you will now see the text ‘ADD’ on the button.
- Once you are done with adding the features you need in your app, click on the next item on the left panel. Here’s where you will fill up the content for the features/sections you have chosen.
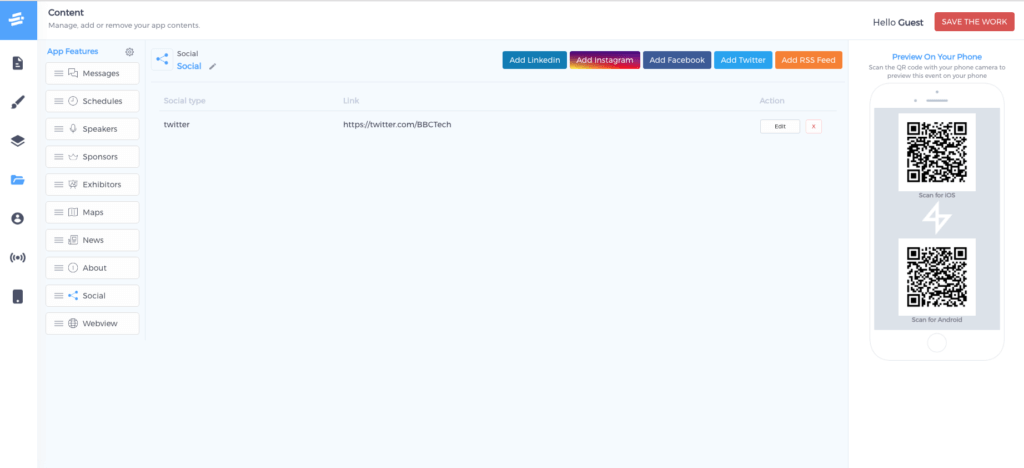
- Okay, now you are on the ‘Content’ page. You’ll see all the features you chose in the previous step over here. You can reorder the features as per your preferences by dragging the tabs. Check that out!
- Eventify allows smooth tag-based networking for users. For every user, a set of tags - things that they are interested in (for example, automation or entrepreneurship or startups or software) - have to be provided (a maximum of 20 tags can be provided). On the basis of tags, connection suggestions are generated on the app.
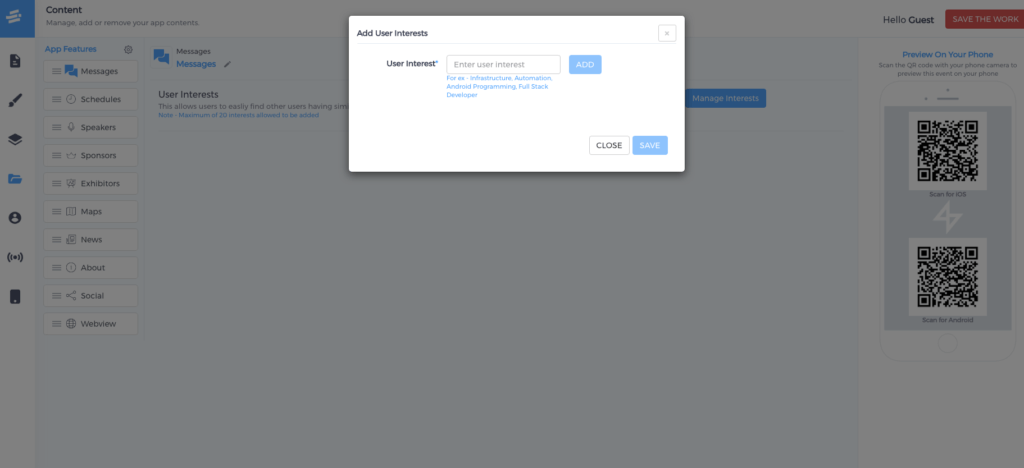
Note: A user can also search for another person with the latter’s email id, and connect.
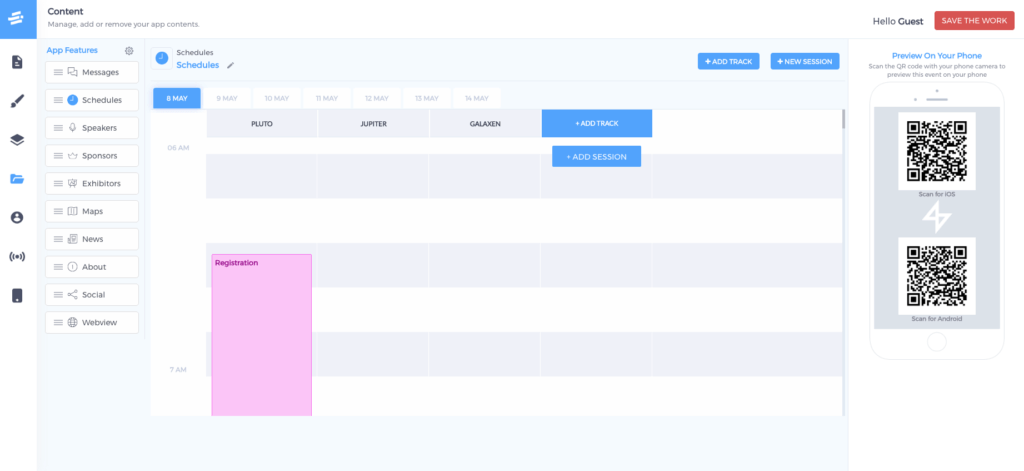
- Click on ‘Schedules’. Over here, click on ‘Add Track’. You will be requested to provide a valid ‘Track Name’. Once you do that, you can proceed to ‘+ New Session’. You can provide the track (category) to which a particular session belongs, the session title, the location (room, booth, etc.), the timing, the speaker(s) who’ll be conducting it, and a brief description. After you’ve added everything, click ‘Save Changes’. Keep adding as many tracks and sessions as you need (datewise).
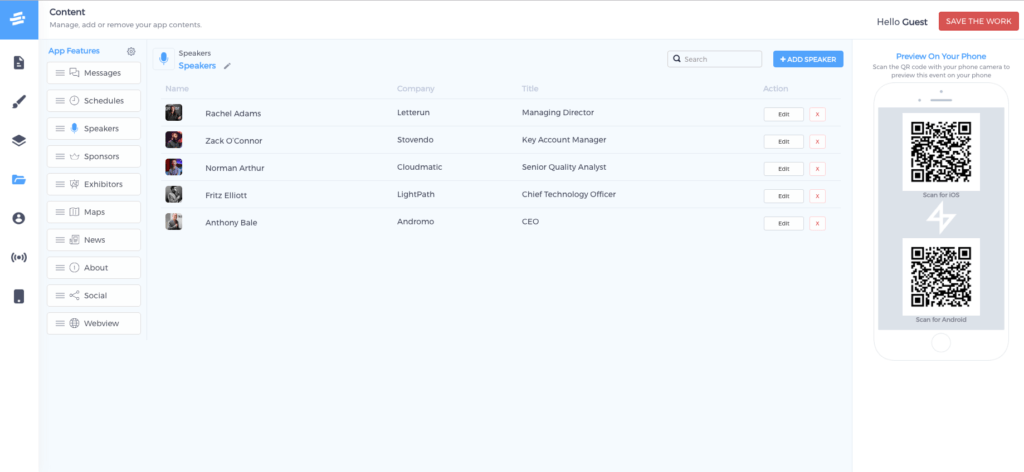
- Moving on, next is the step of adding ‘Speakers’. Click the ‘+ SPEAKER’ button. A pop-up will appear, prompting you to enter the speaker’s name, a profile photo (go for a 320px x 480px image), the company and designation, and a brief bio. On the ‘Contact Details’ tab, you can also add the speaker’s email, phone number, and social media profile links. Hit ‘Save Changes’ when you are done.
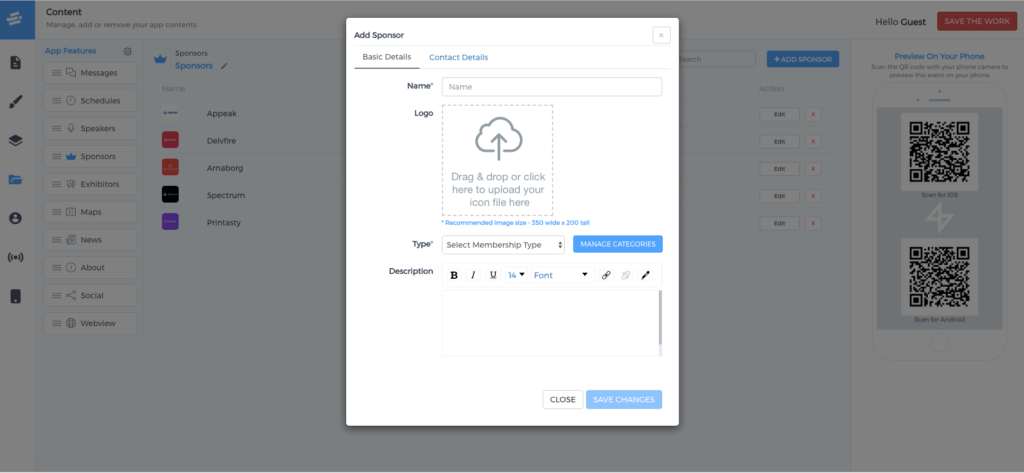
- Click on the ‘Sponsors’ tab next. The process is similar - click ‘+SPONSOR’, and add the sponsor’s name, select a membership type (you can also rename the categories; by default, they are named ‘Platinum’, ‘Gold’, ‘Silver’ and ‘Bronze’), and give a small description. Click on ‘Contact Details’ to add the sponsor’s website and social media links. Once done, click ‘Save Changes’.
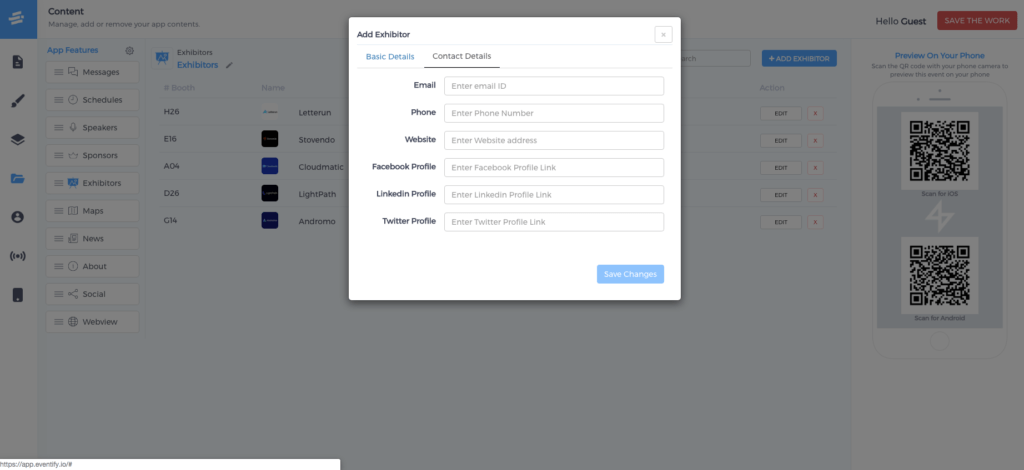
- It’s now time to proceed to the ‘Exhibitors’ tab. Once again, the flow is the same - you click on ‘+EXHIBITOR’, which pulls up a pop-up form. On it, provide the exhibitor’s name, the booth number/ID where it will be exhibiting, the company logo, and a brief description of the company. All done? Click ‘Save Changes’.
- Let’s now come to the ‘Maps’ page. Over here, you need to click on ‘+ADD NEW’ - and then select ‘Location Map’. Give the full address of the venue on the pop-up, and the map view will be automatically generated. Hit ‘Save Changes’.
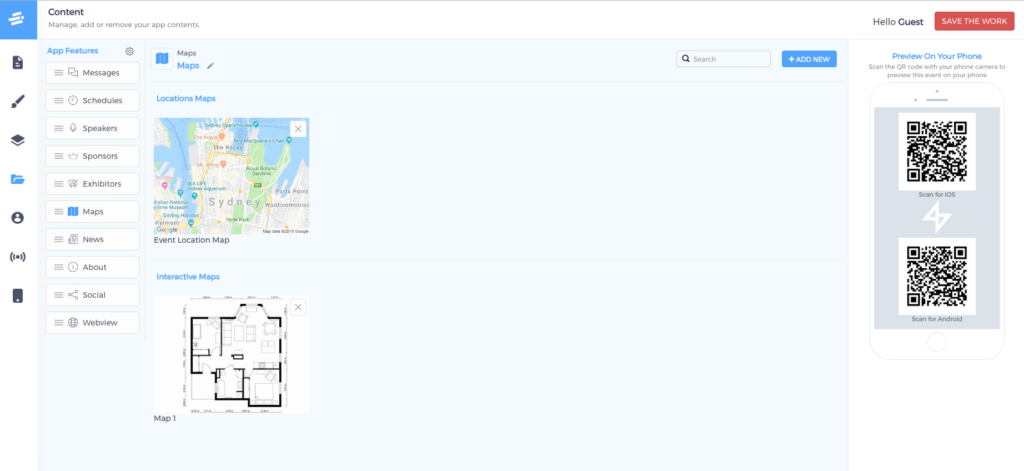
- On the same page, click on ‘+ADD NEW’ once again. This time, choose ‘Interactive Map’ (i.e., the floor plan of your event). Upload a 400 x 400 (minimum) floor plan image. After uploading, you can click ‘+ADD BOOTH’ to add/position exhibition booths and link them to respective exhibitors. Uploaded the wrong map by mistake? Simply click ‘CHANGE MAP’.
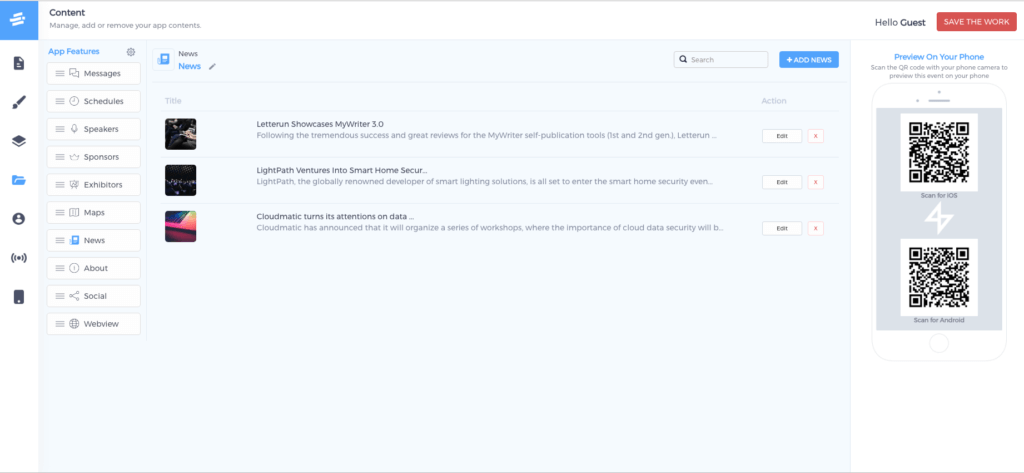
- Moving on to the ‘News’ section next - here’s where you add the latest news about your event. Click ‘+ADD NEWS’, provide a headline, an image (recommended size: 320px by 480 px), and the actual news content. Click ‘Save Changes’ when you are done.
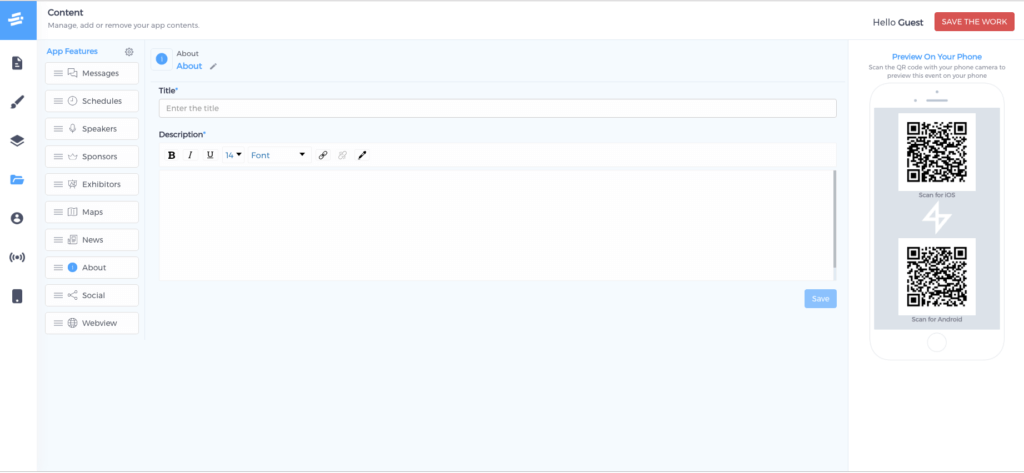
- The next section is ‘About’. Here’s where you can give a small intro or background about the event and the organizing team. After adding the content, click ‘Save’.
- The next item on the list is ‘Social’. Over here, you can add LinkedIn, Instagram, Facebook and Twitter feeds - to be directly shown in the event app. If you have a blog, add the RSS Feed too.
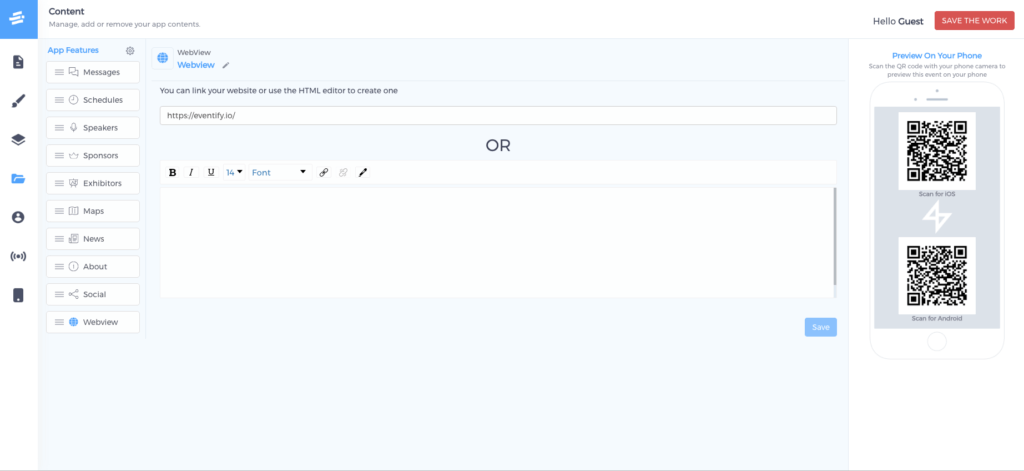
- The final thing on this particular list is ‘Webview’. If you have a website or an online ticketing partner, put its address in the given box. Alternatively, you can provide some text about your event, and it will be displayed as a web page.
Note: That brings us to the end of the ‘Content’ section. Moving on…
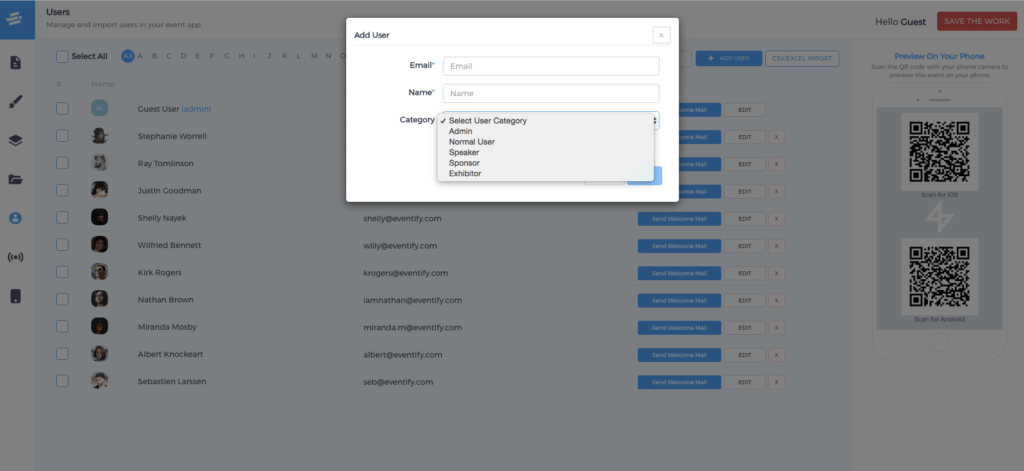
- The next item on the left panel (after ‘Content’) is ‘Users’. Click on ‘+ADD USER’ to start adding attendees to your event (with their email). You can categorise users as ‘Admin’, ‘Sponsor’, ‘Normal User’, ‘Speaker’ and ‘Exhibitor’. Alternatively, you have the option of downloading sample contact list (in .xls or .csv format), filling it up, and importing it as well.
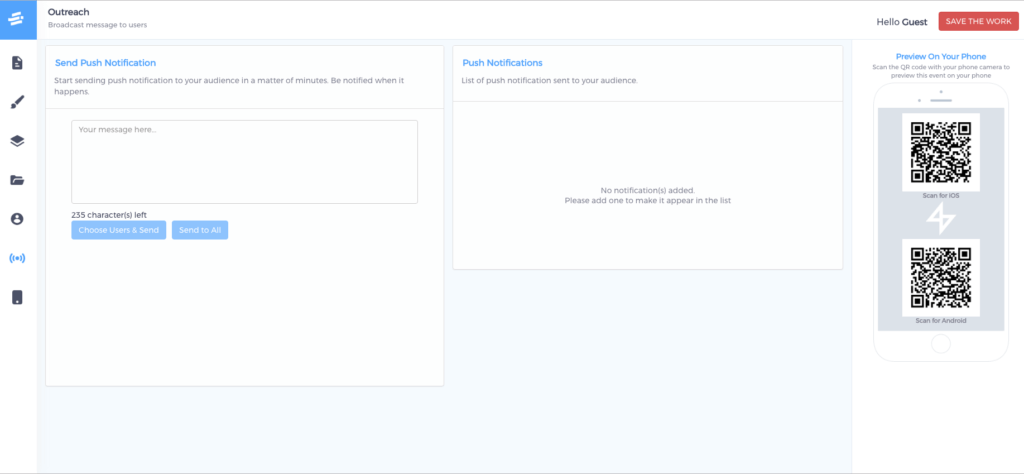
- We come next to the ‘Outreach’ tab. On this page, you can compose and send global push notifications to users. You can either send the notifications to everyone, or select the users to whom you wish to send the message (the status of the push notifications sent is viewable on the side panel).
- Finally, you move on to the ‘Publish’ tab. When you click on ‘Publish Now’, you will be prompted to provide your email. A magic link will be sent to your email, and you need to log in with it, and then publish your app.
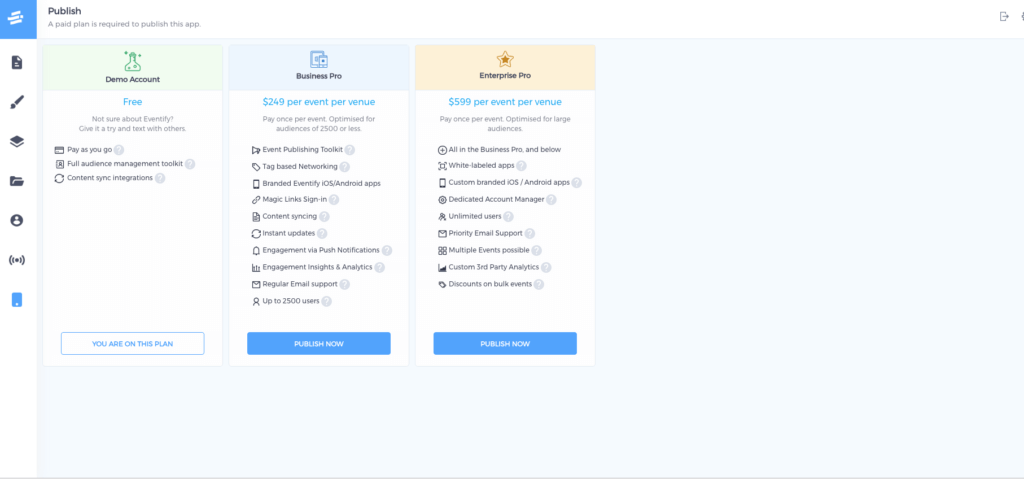
Note: For a limited time-frame, the $249 Business Pro plan of Eventify is available for free. There’s a ‘SAVE THE WORK’ tab on the top right. On clicking that, you’ll be prompted to share your email - where the magic link for logging in will be sent.That’s it. Once you hit ‘Publish’, your event should be visible on the Eventify app.Here’s a few screenshots of how a listed event looks on the Eventify app:[caption id="attachment_9109" align="aligncenter" width="576"]
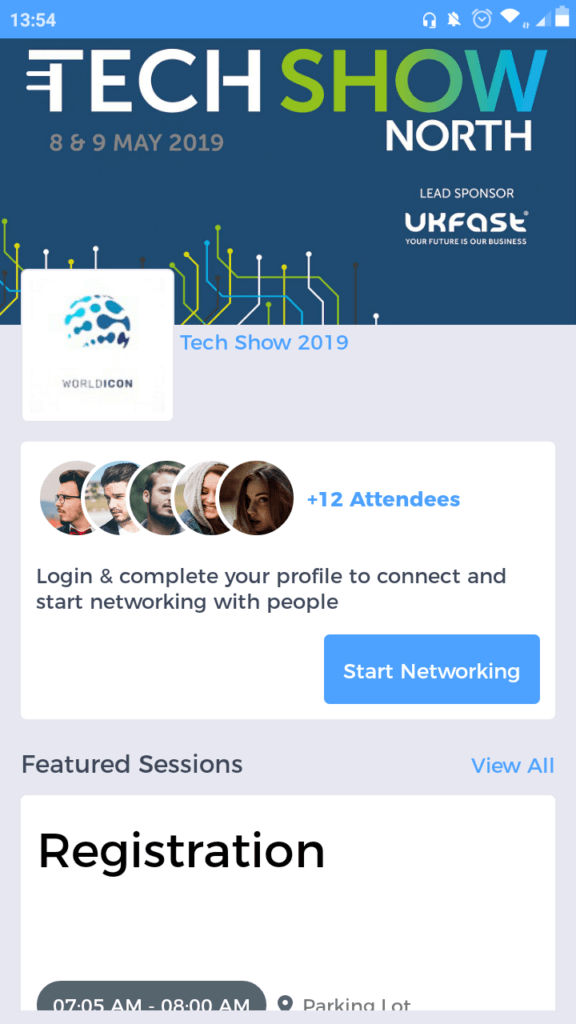
Event listed on Eventify app[/caption][caption id="attachment_9111" align="aligncenter" width="576"]
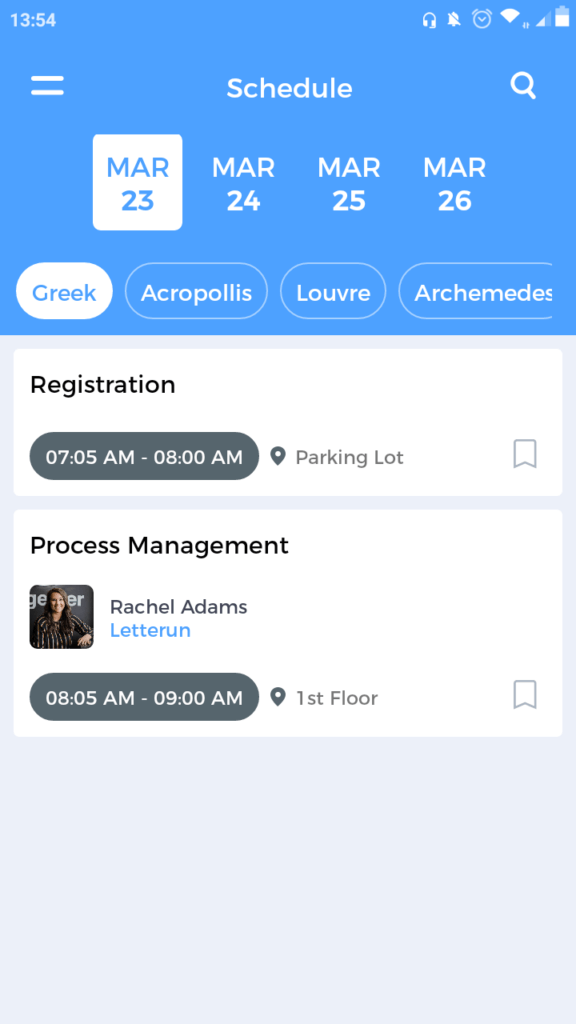
Event tracks and sessions[/caption][caption id="attachment_9110" align="aligncenter" width="576"]
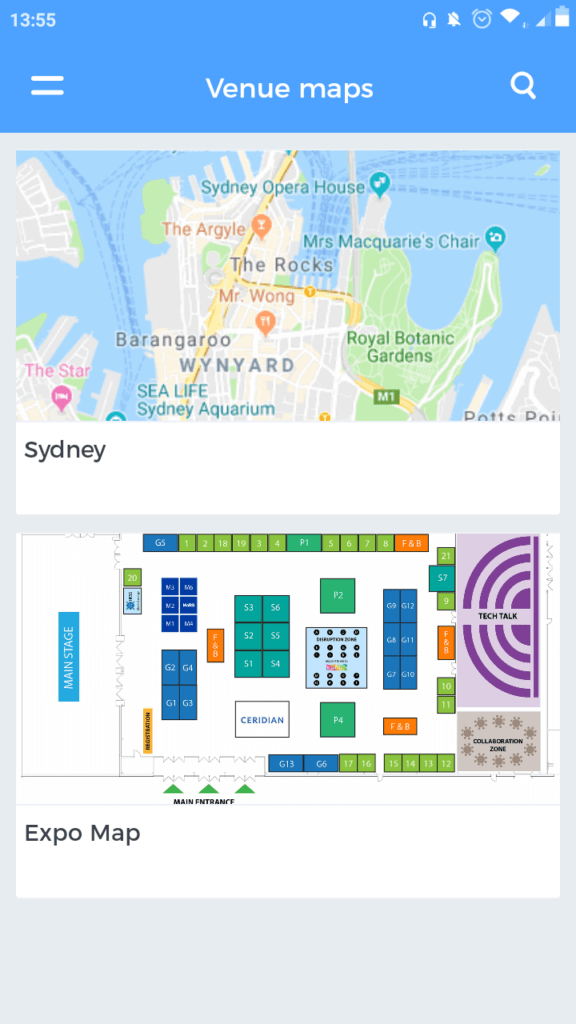
Location map and interactive booth map[/caption][caption id="attachment_9112" align="aligncenter" width="576"]
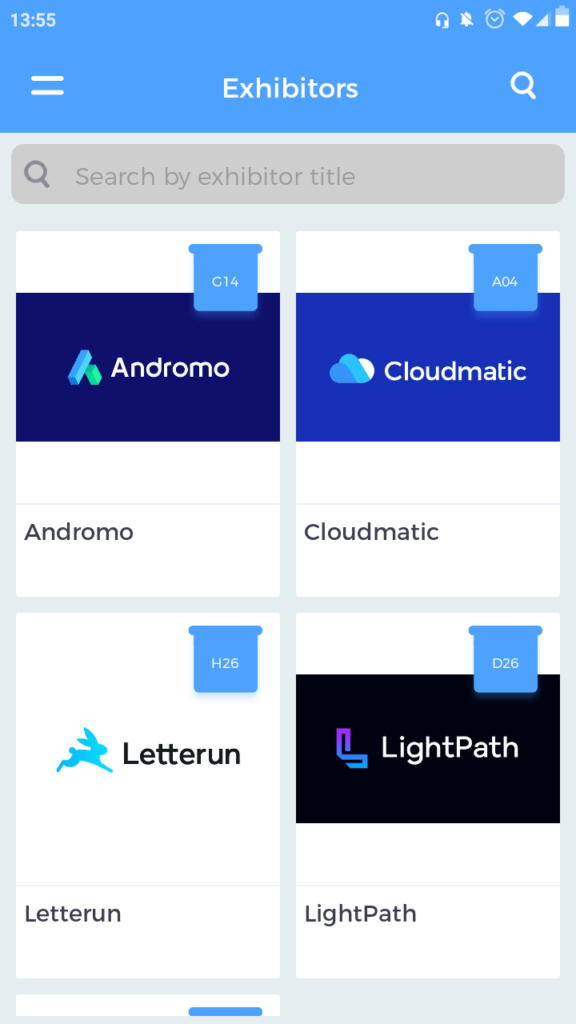
List of exhibitors at the event[/caption]Your Events on Eventify vs White-Labeled Event AppsThat’s the main point of difference between our BUSINESS PRO plan (now available for FREE) and the $599 ENTERPRISE PRO plan. In the former, your event/conference - with all the details you provide - will be listed and visible on the Eventify mobile app (iOS and Android). On the other hand, if you upgrade to ENTERPRISE PRO, you get a fully white labeled event app (the name of your event will be the name of the app, with no mention of Eventify anywhere). Please choose as per your requirements and the promotional needs of your event.Eventify takes digital event-tech and event networking to the next level. If you are not yet onboard, you are missing out!
.png)
.png)