Eventify - End-to-End B2B Event Management Platform
Eventify is a cutting-edge digital platform that makes the task of organising and managing all types of business events, conferences, trade shows, exhibitions, meetings and others easier than ever before. With Eventify, event planners can create dynamic, information-rich mobile event apps, responsive event websites, initiate tag-based networking, provide lead scanning to exhibitors, and do a lot more. QR codes play a very important role in enabling the core capabilities of Eventify. Let’s take a look:
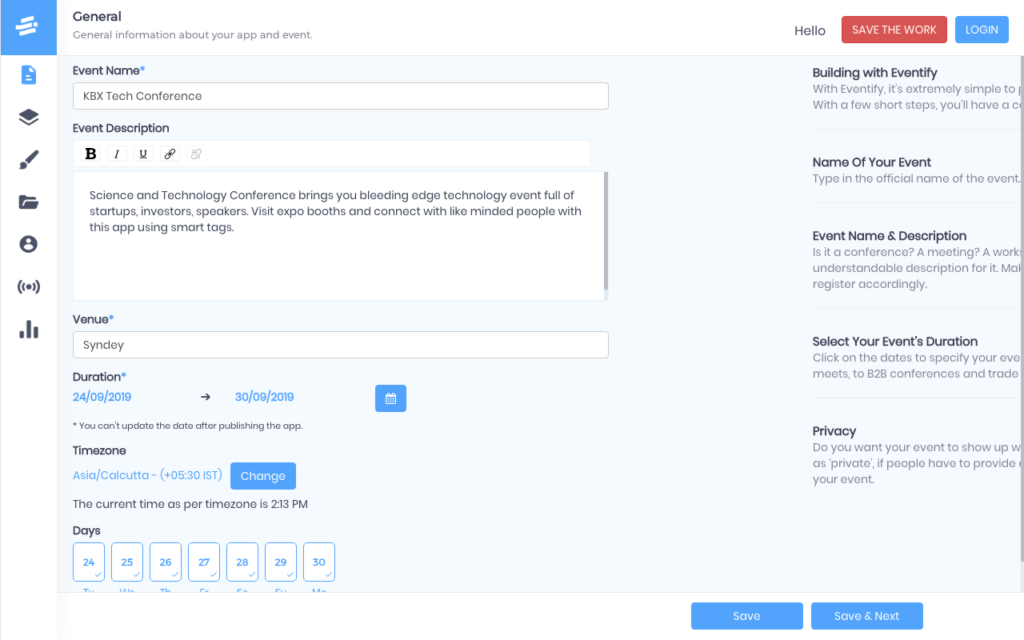
Organiser Login
While filling up event information on the Eventify dashboard, the organiser has to click on the ‘SAVE THE WORK’ button on the top.
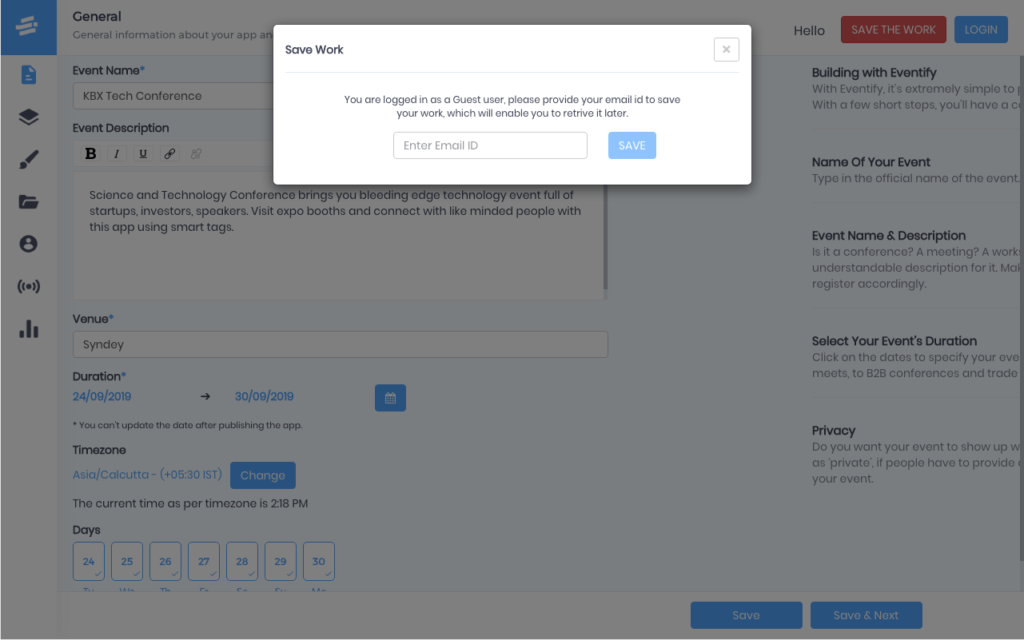
Then, the organiser (or host) has to enter his/her email id and hit ‘Enter’. (S)he will receive a welcome email in his/her inbox, with a secure, system-generated password.
The organiser can now use the email id and password to login to the Eventify dashboard.Recommended: Organisers should change the system-generated password, for security purposes.
QR Code for User Login
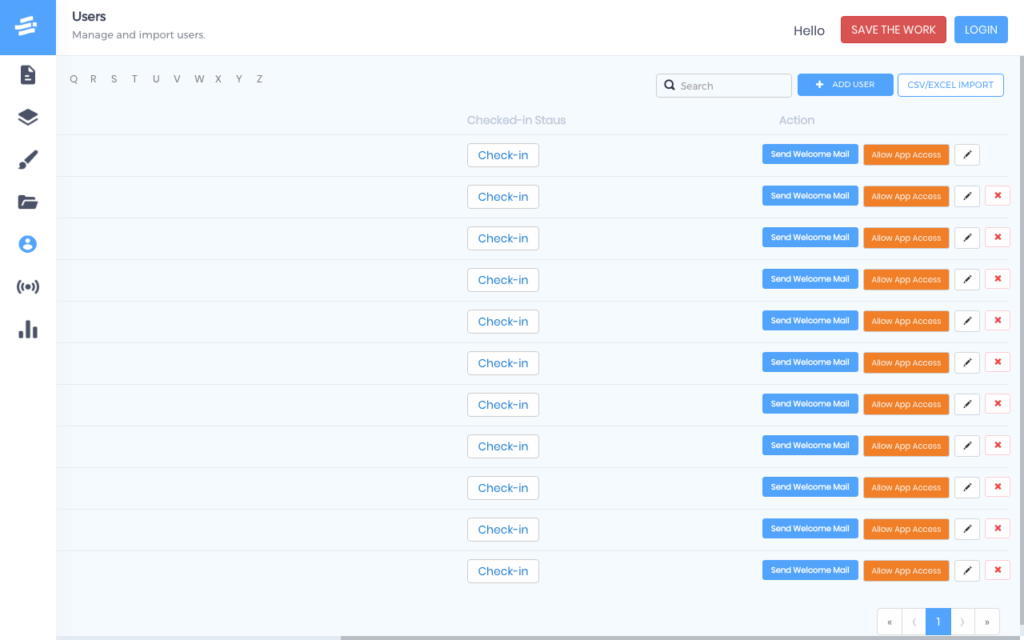
Enabling login through Welcome EmailStep 1: Log on to the Eventify platform with your email and password.Step 2: Navigate to the ‘Users’ screen.
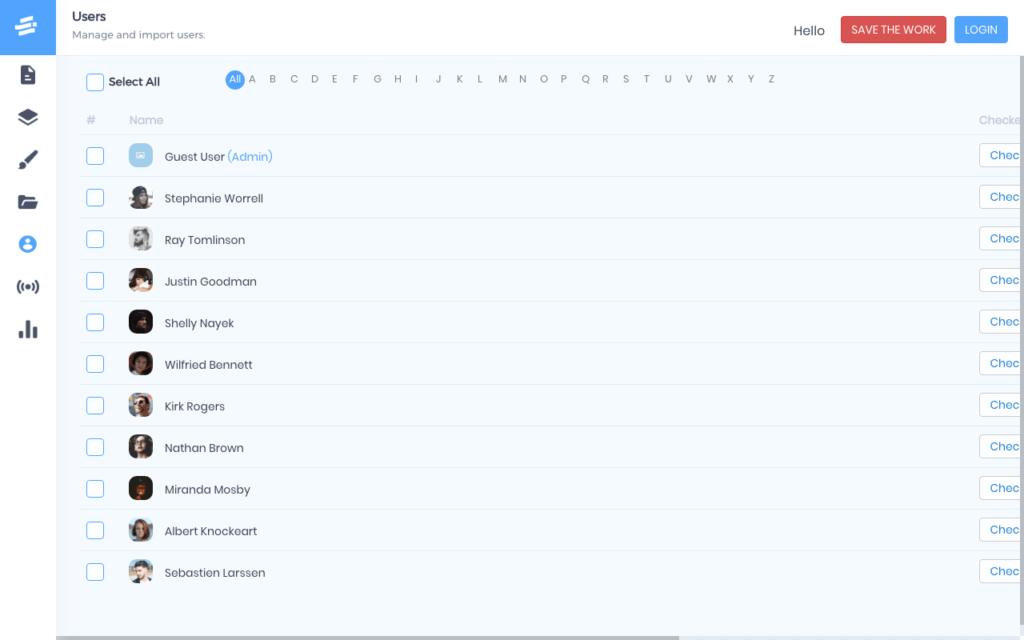
Step 3: Add a user. Pick the user-role from the drop-down list (Admin, Normal User (delegate), Speaker, Sponsor, Exhibitor).
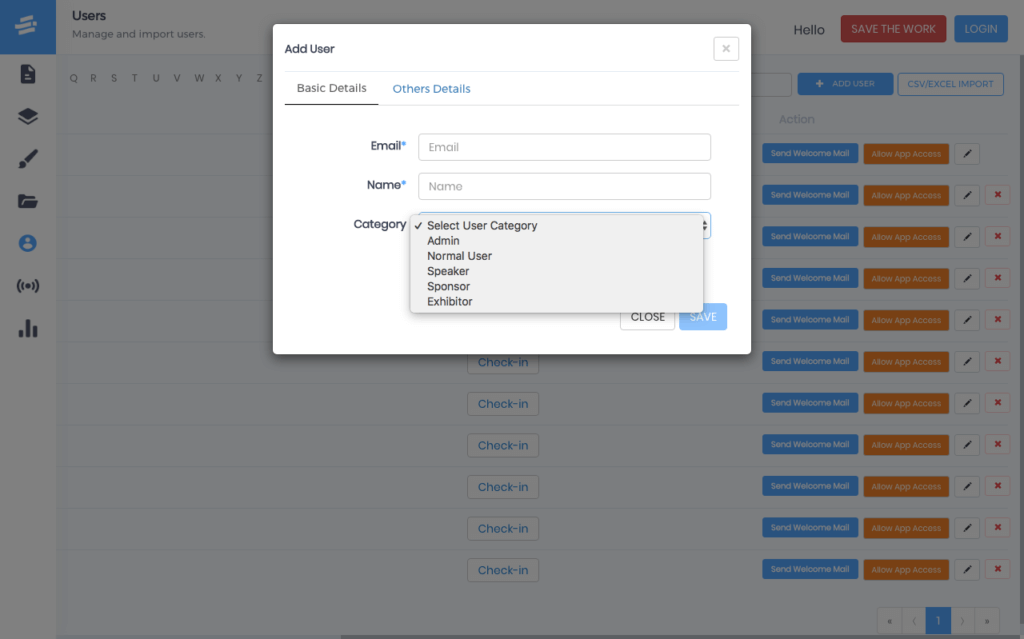
Step 4: Click on the ‘Send Welcome Email’ button beside the user’s name.
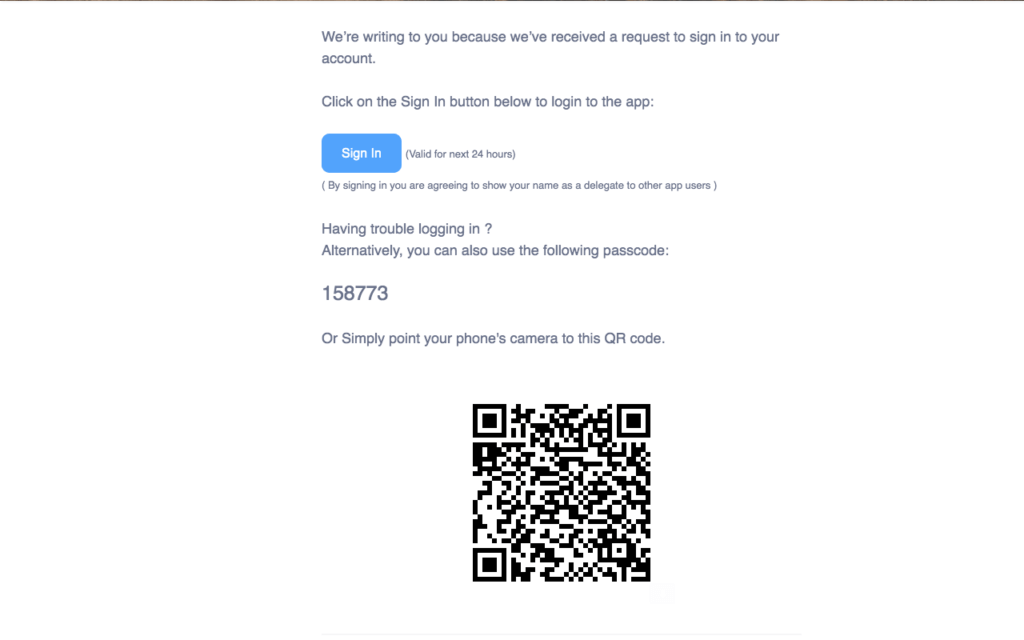
A welcome email with a unique QR code and a secure passcode will be sent to that user’s inbox.Step 5: User opens the mail and scans the QR code. There can be two alternative scenarios:Scenario I: If the user already has the Eventify app installed on his/her device, (s)he will be redirected to the ‘Edit Profile’ screen on the app.Scenario II: If the user does not have the Eventify app installed on his/her device, (s)he will be redirected to the app store download pages (App Store or Play Store, depending on the device being used).Once the user is logged in, (s)he can access all the features of the event app and start networking with fellow attendees (if opted for).Note: If a user’s email has not been added in the Eventify dashboard, and (s)he tries to scan the QR code in a welcome email, an error message will be generated. A user HAS to be added to the event by the admin, before the welcome email is scanned.
Enabling login through ‘Allow App Access’
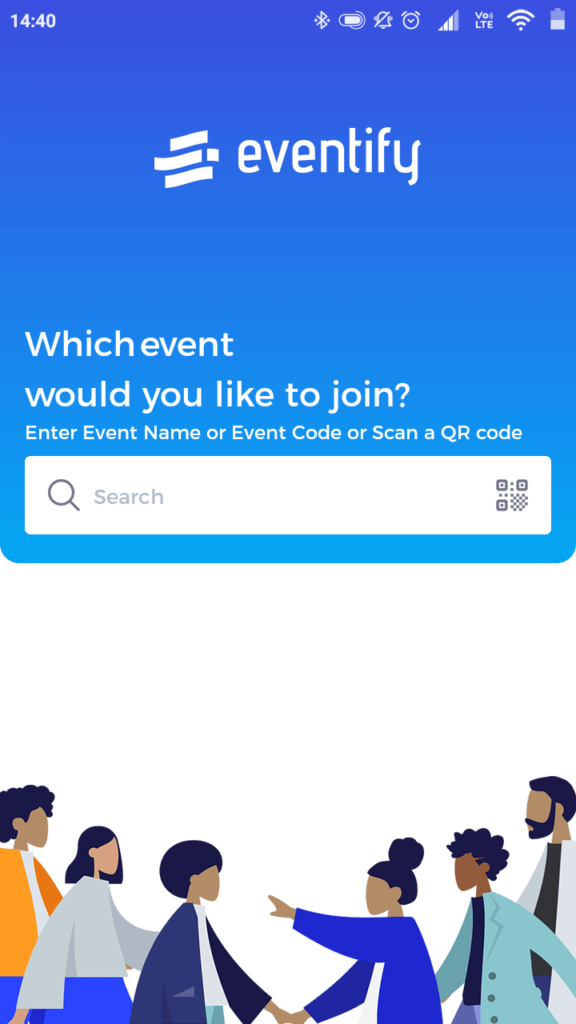
Mistakes happen, technical failures occur, and things - at times - might not function in the precise way they are meant to. In case there is a problem with the QR code in the welcome email, users can use another option to log in on the event app.Step 1: User needs to download the Eventify app from the App Store/Play Store.Step 2: (S)he searches for the event on the Eventify app.
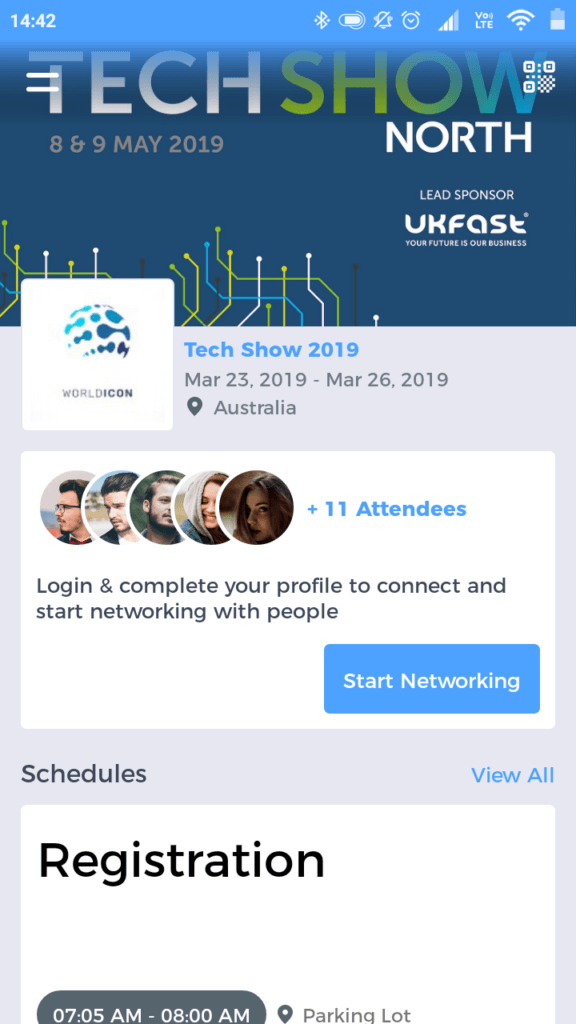
Step 3: (S)he clicks on the ‘Start Networking’ tab on the home screen of the event.
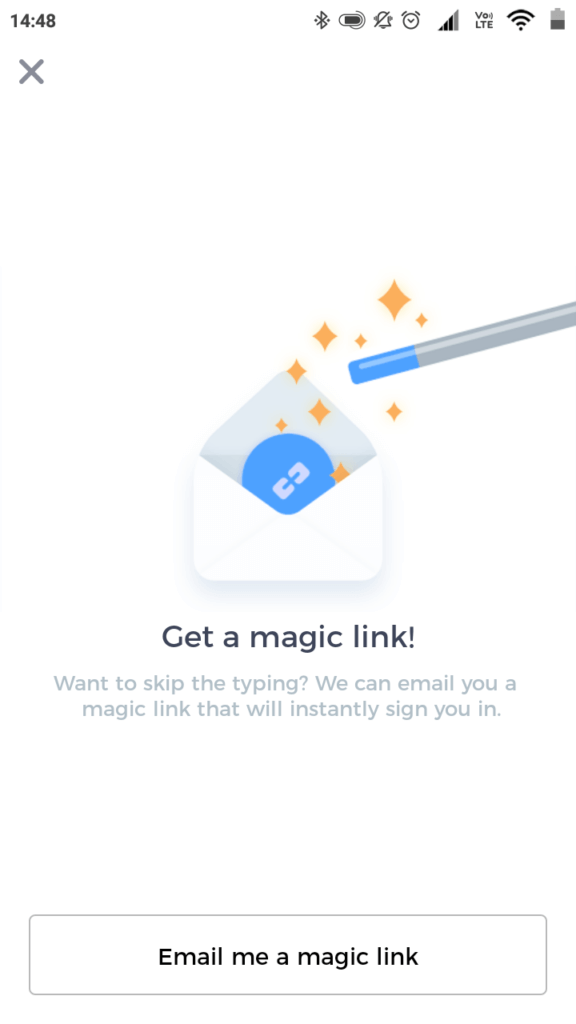
Step 4: On the next screen, user clicks on the ‘Email me a magic link’ button.
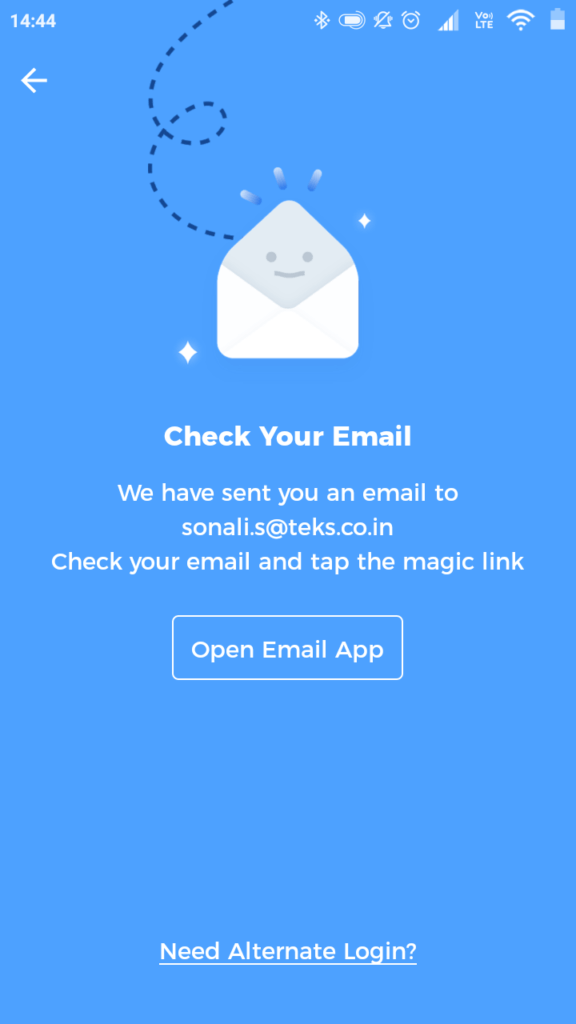
Step 5: (S)he clicks on the ‘Need Alternate Login?’ link at the bottom of the Email screen.
Step 6: (S)he clicks on the ‘Contact Admin’ tab from the available options (the other options are ‘Enter Passcode’ (sent in welcome email) and ‘Scan QR’).
Step 7: At the same time, the admin/organiser has to click on the ‘Allow App Access’ tab - beside the name of that particular user on the Eventify dashboard.
Step 8: The user will then be automatically logged in the event app.Note: All the above steps will work for both ‘Public’ and ‘Private’ events. For custom branded events, a user will have to download that event app instead of the Eventify app.
QR Code For Networking
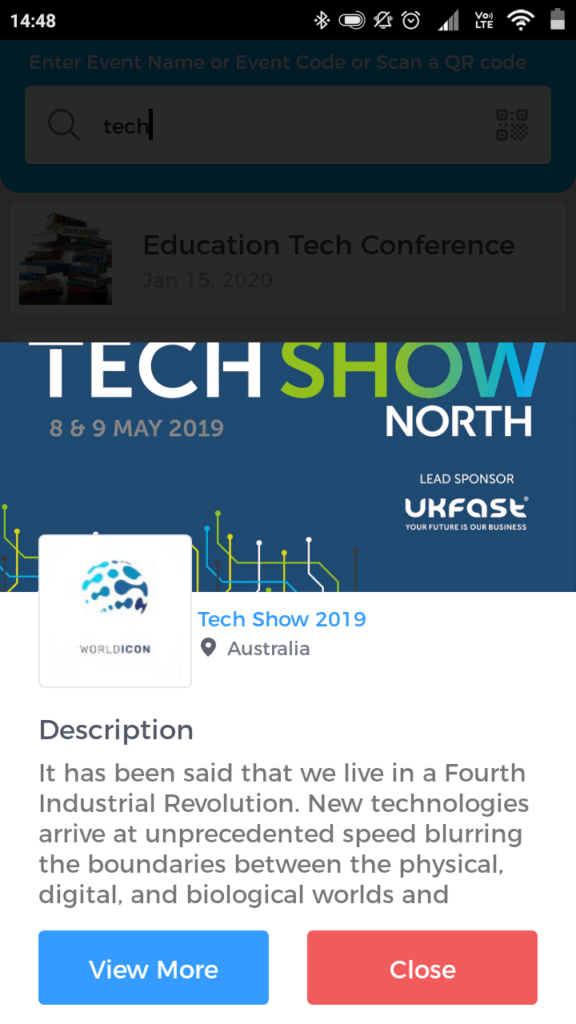
One of the biggest reasons for attending any business conference or trade show is the opportunity to meet and interact with like-minded professionals. On Eventify, event networking is easier than ever.Scenario I: User has not logged in to the event.Step 1: User downloads and launches the Eventify app. (S)he searches the event name and clicks on the ‘View More’ tab.
Step 2: On the event app’s home screen, user clicks on the ‘Start Networking’ tab.
Step 3: On the next screen, user clicks on the ‘Email me a magic link’ button.
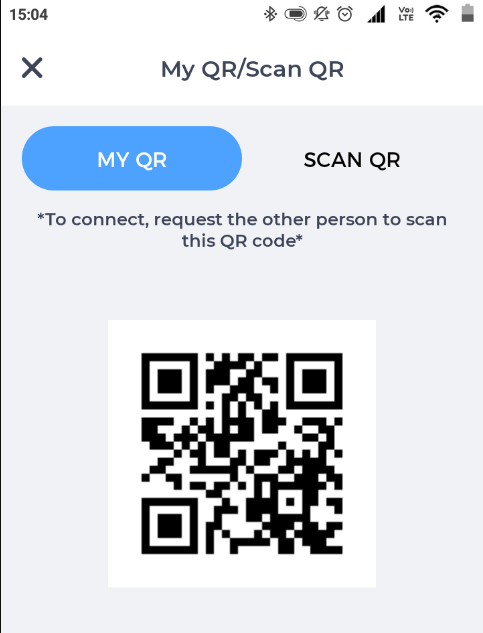
Step 4: On the next screen, user provides his/her email id (the same id as the one being used for login).Step 5: A system-generated email is sent to the user’s inbox. The mail contains a unique QR code, which has to be scanned to initiate networking.
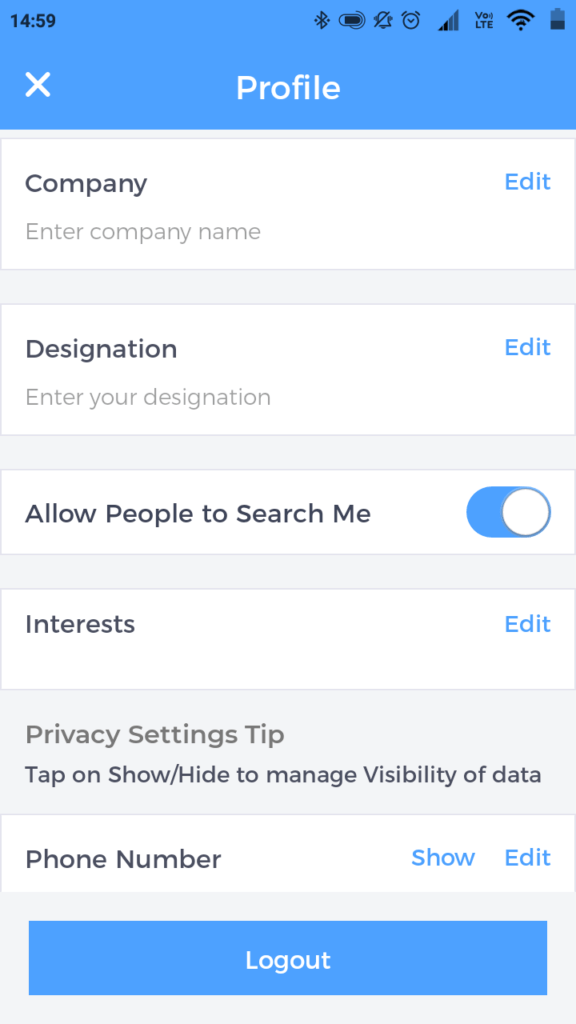
Note: The user will be automatically logged in to the event. (S)he can browse through the list of suggested contacts and send chat invitations.Scenario II: User is already logged in to the event.Step 1: User downloads and launches the Eventify app. (S)he searches the event name and clicks on the ‘View More’ tab.Step 2: On the event app’s home screen, user can see the list of suggested contacts (auto-curated on the basis of the tags/interests chosen).Step 3: User can now start sending chat requests to fellow attendees.Note: To use the networking feature on Eventify, a user has to activate the ‘Allow People To Search Me’.
QR Code for Lead Scanning
Exhibitors spend big money to participate in a corporate event. In order to recover these hefty investments, they need to connect with as many good-quality leads at the event. With Eventify, exhibitors can connect with attendees, collect their information, store them as leads, and send marketing materials to them either during or after the email.Scenario I:
Pre-event Lead Scanning
Step 1: Exhibitor signs on the Eventify app (any user added with the ‘Exhibitor’ user category).Step 2: Exhibitor creates his/her profile on the app.Step 3: Exhibitor searches for attendees with common interests (tag-based search).Step 4: Exhibitor selects an attendee with common interest, scans that person’s unique QR code, and stores the information for future communications.
Scenario II:
Lead Scanning during the event
Step 1: Attendee steps into a particular exhibitor’s booth.Step 2: Exhibitor scans the QR code from the attendee’s device.Step 3: Attendee information is collected.Step 4: The information is used for sending marketing materials either during or after the email.Note: By default, the QR contains the full name and the email of the attendee. It can be customised to include other information - like phone number(s) - as well.In addition to these, Eventify can be used to attendee badge scanning (printed QR) and/or onsite check-in (printed QR).QR codes lie at the core of both the login as well as the networking feature that Eventify offers. Use the platform to maximise the exposure and engagement of your upcoming conferences.


.png)
.jpg)